
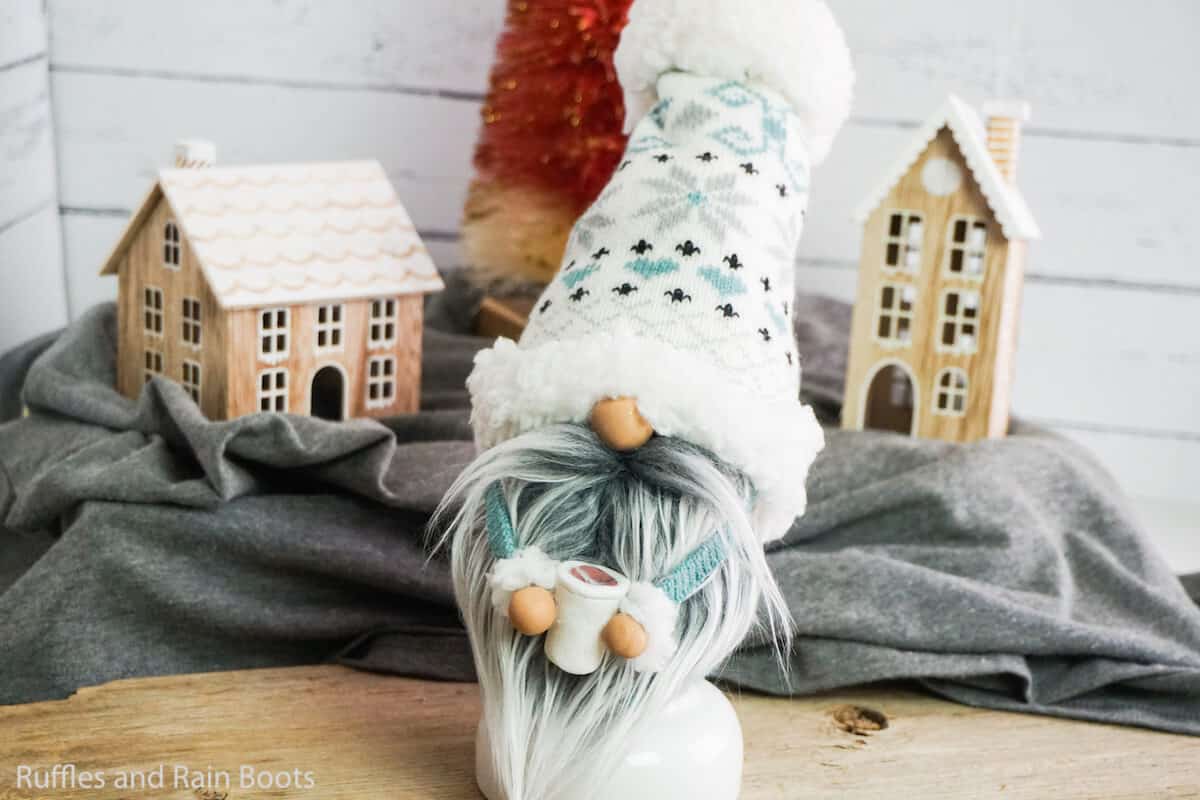
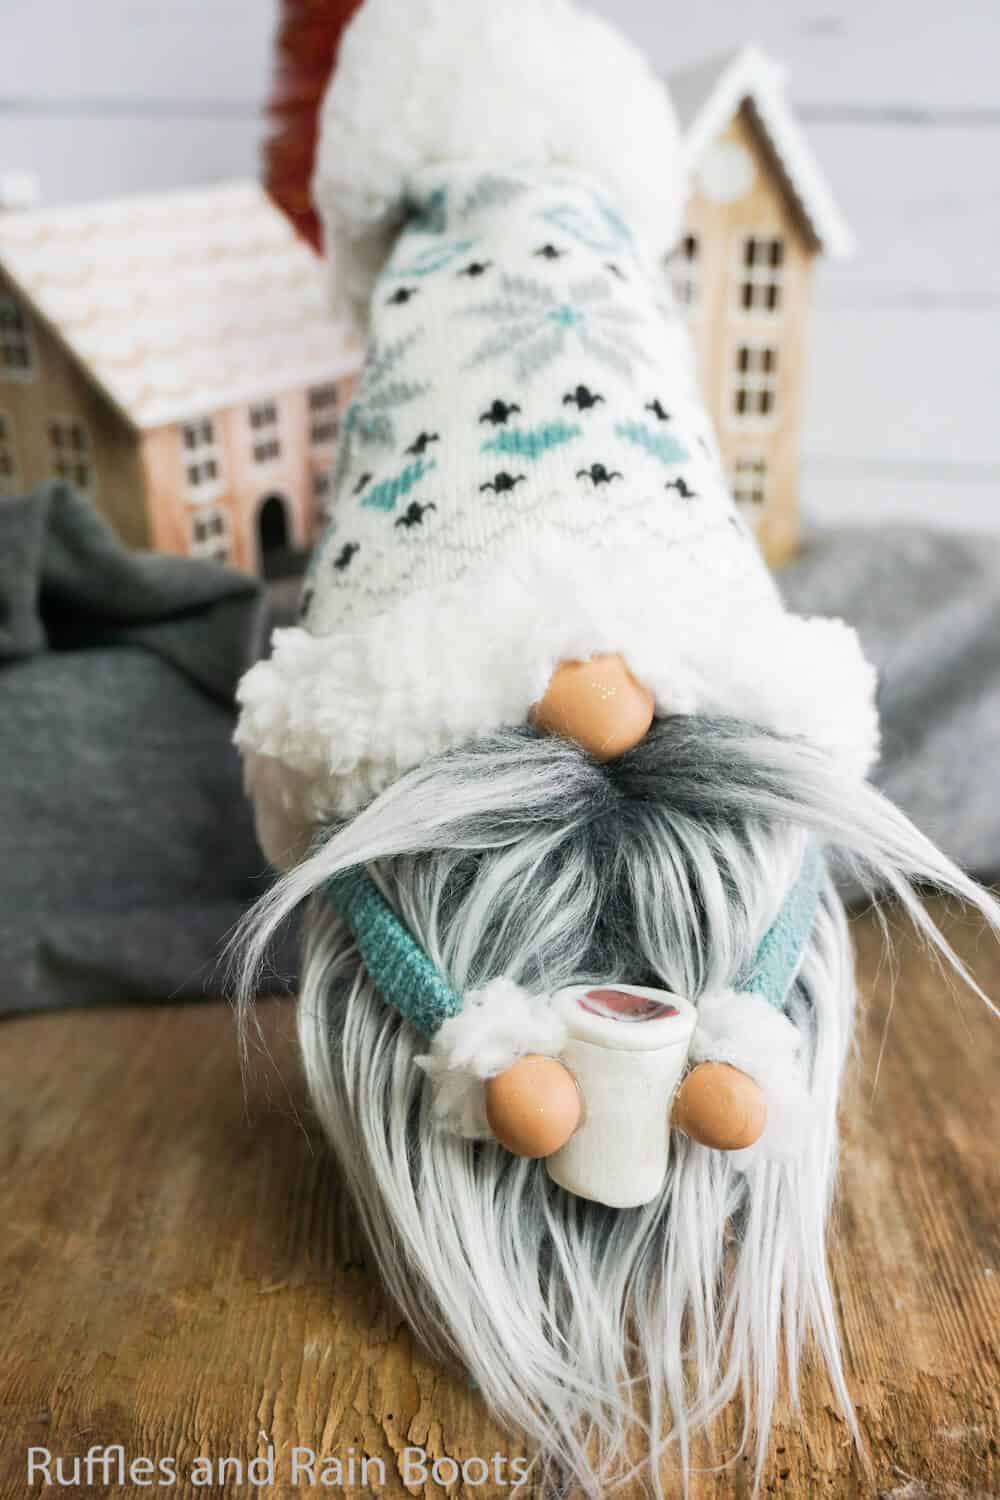
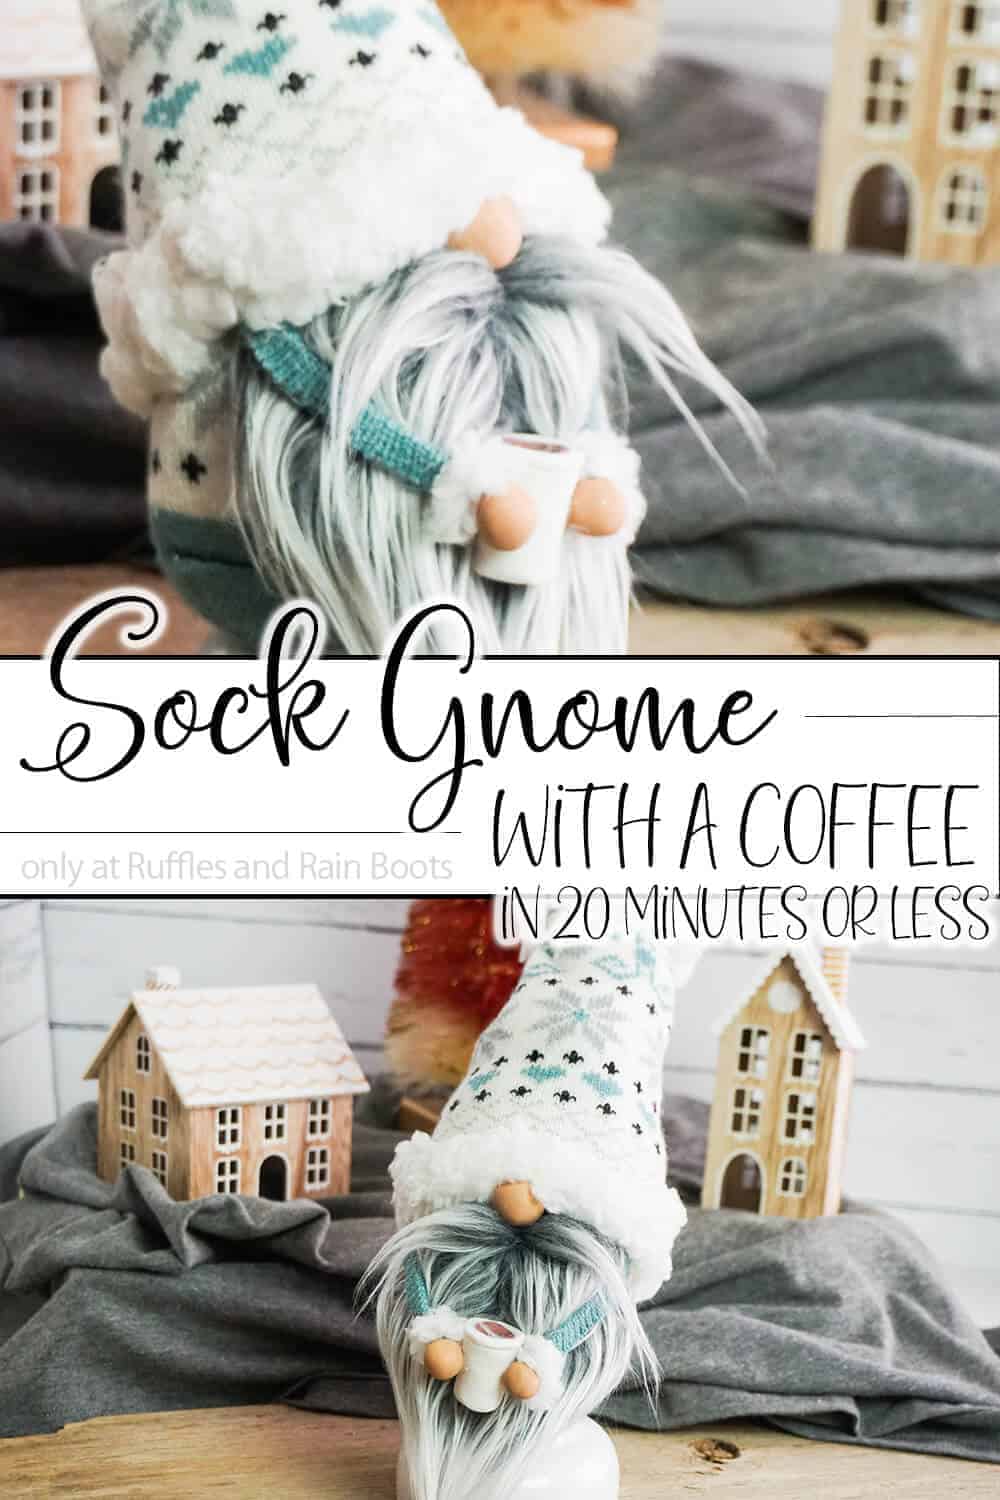
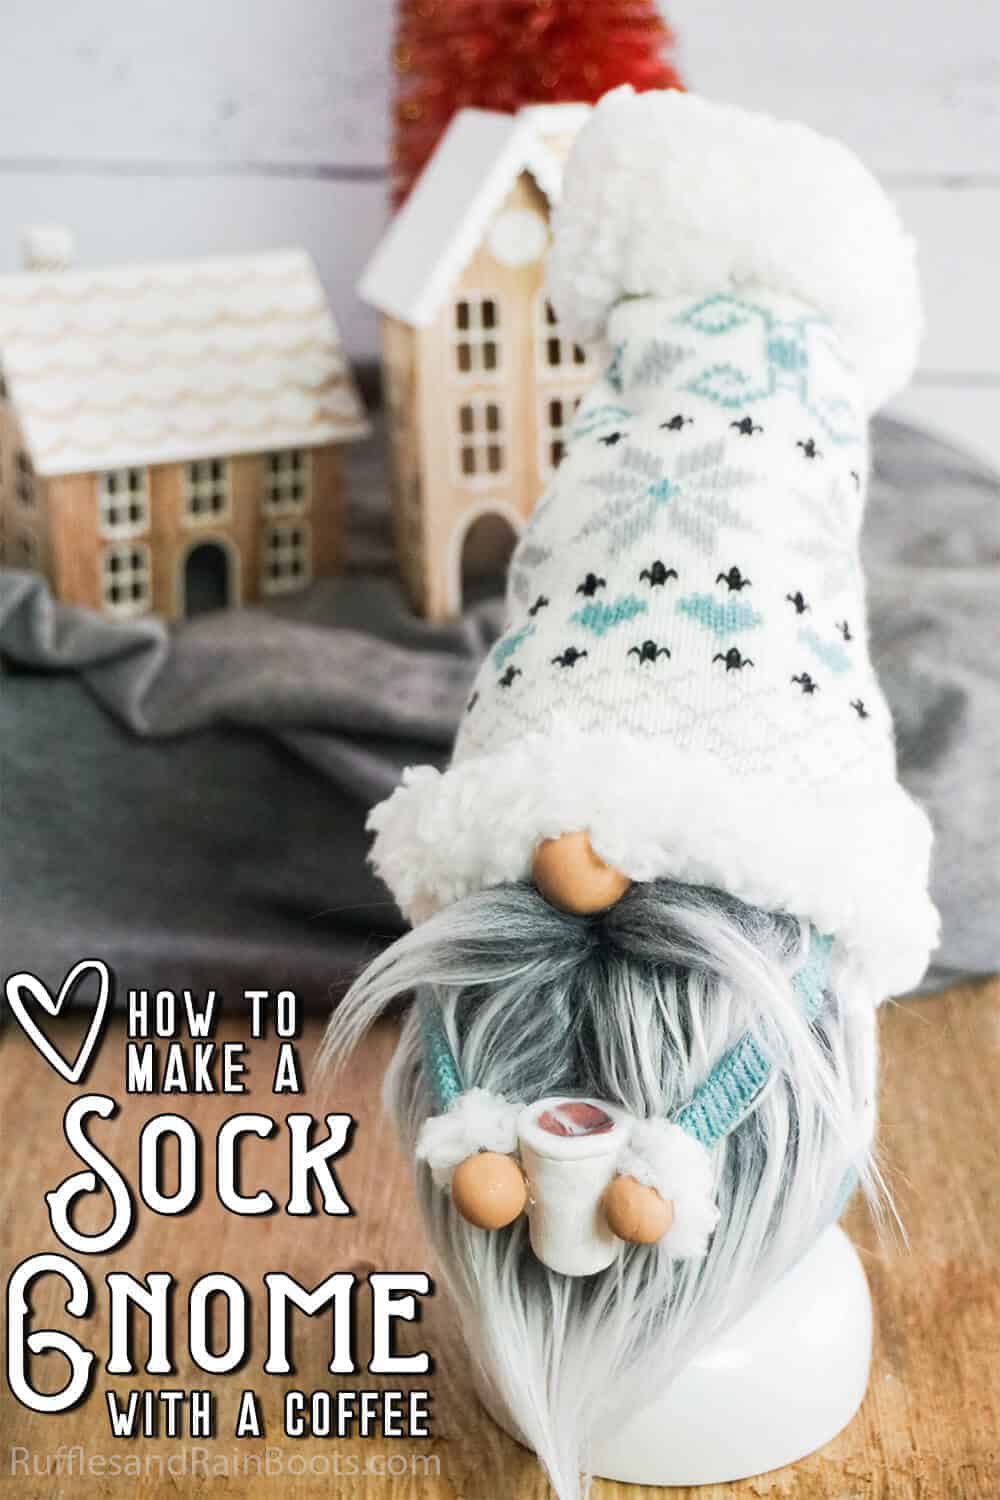
How to Make a Gnome – Sock Gnome Holding a Coffee Cup
I am all about coming up with simple tutorials for how to make a gnome, but this sock gnome holding a coffee cup is just the BEES KNEES! He’s so cute and ready to sip some fun!
RELATED READING: DIY GNOME TUTORIALS FOR EVERY SEASON
What You'll Find On This Page
How to Make a Gnome
Here at Ruffles and Rain Boots, I am in love with this little gnome. Not only is he speaking my “love language” with his little coffee, but he was SUPER fast to make.
If you’re ready to learn how to make a gnome, this is a great tutorial to start with. I would advise you to read through this short set of frequently asked questions when making sock gnomes (it will open in a new window so you won’t lose this tutorial). ;)
If you’re a gnome-pro, this is an easy gnome tutorial and you’ll learn how to make a coffee cup for your gnome. With that said, grab your hot glue gun and let’s get started.
NOTE: I used to use rice but have made the switch to only using poly pellets. Please use what you feel comfortable using.
Make your gnome nose and hands by combining a portion of light brown and white polymer clay until you have the color you want.
Roll a quarter-sized portion of this clay into a neat ball. This is the nose. Set aside.
Roll two nickel-sized portions of this clay into two neat balls. These are the hands. Set aside.
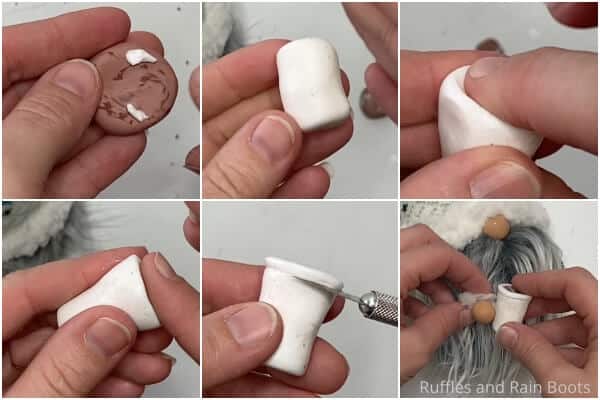
Make the coffee by poorly combining dark brown, light brown and white clay together into a cylinder about 3/4-inch thick. Set aside.
Make the coffee cup by rolling a 1-inch by 1/2-inch section of white clay into a cylinder and, press a small depression into the top of the cylinder, making it slightly wider at the top with a depression.
Press a 1/8-inch slice of the coffee into the depression in the cup.
Using your exacto knife (the back side of the blade), make a lip on the top edge of the cup.
Smooth the coffee cup and coffee to your heart’s content.
Bake the coffee cup, nose, and hands per the clay package’s directions. Allow them to cool fully.
Cut the sock in half, just below the heel.
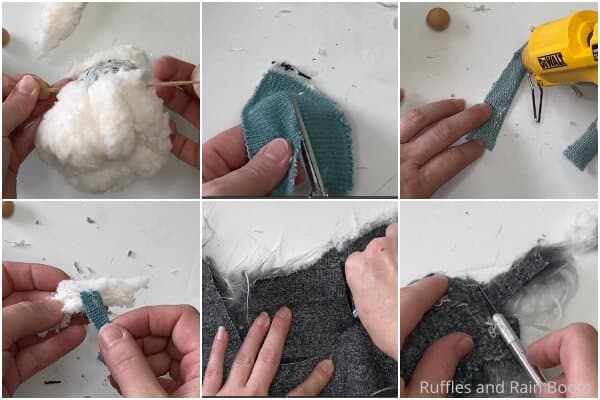
Fill the bottom part of the sock with the rice or polyfill.
Close the top of the sock with the rubber band.
Cut out your beard from your Mongolian fur in a rough “v” or “u” shape that will wrap about 1/2 way around your gnome and about 2/3 of the length of his body.
Cut out a rectangle of fur about 1 inch long by 1/2 inch wide. Split the fur in your fingers and pull it apart, making a mustache.
Hot glue the beard to the body, about 2 inches below the edge of the gnome body.
Attach the mustache about 1 1/4 inches below the edge of the beard with a line of hot glue.
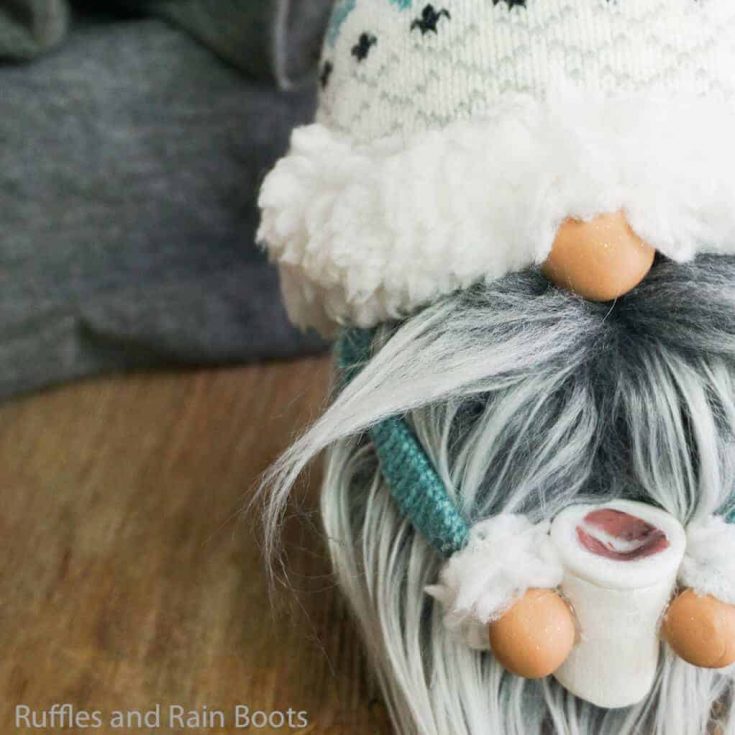
Hot glue the nose in place about 1 inch below the top of the beard.
Cut the heel off of the top part of the sock. Set aside (you’ll need both the lining and the fabric portion later).
Trim a 1/2-inch section of the outer cloth only off the sock-top’s bottom edge.
Pull the sherpa lining down over the edge of the hat, pulling it up onto the outside and hot gluing it in place along the edge like a brim or cuff.
Place the hat on top of the gnome’s head, tucking it down over the top of the nose.
Hot glue the hat in place in the back and sides, leaving plenty of space to tuck the arms up in the hat just behind the beard edges, then one little dot on the nose.
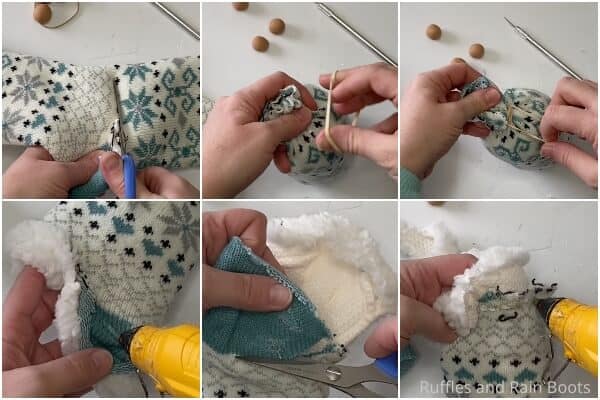
Use the twine to tie the top of the hat together, creating a pouf.
Make the arms by taking the heel fabric (solid) and cutting two 1-inch by 3-inch sections.
Place a line of hot glue down one long side of the arm shapes and then fold the fabric over onto itself to make a thin arm.
Slip each arm up into the hat on the side and hot glue it in place.
Hot glue a hand onto each arm.
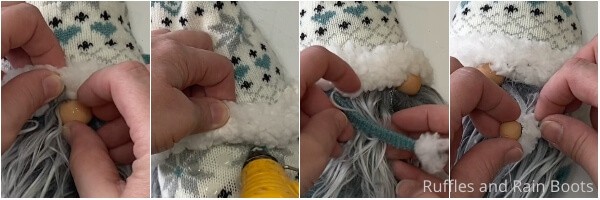
Cut two 1/4-inch wide sections of the leftover lining fabric just long enough to wrap around the gnome’s wrists.
Hot glue these sections of lining fabric around each of the gnome’s wrists to create cuffs.
Bring the hands together and hot glue one on each side of the coffee cup.
Enjoy!
DIY Christmas Gnome Tutorials
If you’re looking for the best DIY Christmas gnome tutorials, you have come to the right place. Check out all of my favorite tomte tutorials for the holidays!
No Time to Make This Now? Pin it for Later
You’re busy, I get it. Pin this to your favorite easy DIY crafts board on Pinterest and it’ll be here for when you’re ready.
As an Amazon Associate, I can earn from qualifying purchases.
Tips When Learning How to Make Gnomes
- Start with an insanely fluffy sock. Regular socks are fine and you can use them, but you know those crazy socks that are insanely fluffy and have a sherpa-style lining? Those are the best for this gnome. Click here to grab some like mine.
- I like to make my gnome beards from the nicer faux fabric furs that come on the big rolls at the craft store, as opposed to the sheets of felt you can pick up the crafting section. My favorite is the Mongolian fur that I used on this gnome (and a lot of others). So, click here to get a little Mongolian fur, if you want to get that same “greying” look that really adds a quality touch.
- If you’ve never cut faux fur or craft fur before, be sure to check out my video on how to cut faux fur the right way. It’s short, to the point, and frankly, it’s perfect for anytime you want to cut faux fur (not just for gnomes). While you’re there, be sure to subscribe to my channel.

RELATED READING: Love Farmhouse? Make DIY Highland Cows with Faux Fur
How Do I Make this Sock Gnome Holding a Coffee Cup?
I’m so glad you asked. Below is our written tutorial. If you’re making him and are a visual learner, be sure to check out the coffee gnome video tutorial here.
If you’re making this guy as a gift, consider making a gift tag or card. Use these Gnome Sayings and Gnome Puns for Any Occasion to make it easy.
How to Make a Gnome - Sock Gnome Holding a Coffee Cup
Every sock gnome ever made is the same--except this one. This tutorial for how to make a sock gnome is insanely easy and you'll be comparing this little nisse to all others you ever see. He's the sock gnome holding a coffee cup of your dreams. Or mine. Because, yeah, I dream of gnomes. LOL!
Materials
- 1 Sherpa-Lined Sock
- 1-2 cups Rice, Polyfill Beads or other filler
- Mongolian Fur
- Polymer Clay in dark brown, light brown and white
- Strip of Twine
- 1 Rubber Band
Tools
- Hot Glue Gun and Glue
- Oven
- Exacto Knife
Instructions
- NOTE: I used to use rice but have made the switch to only using poly pellets. Please use what you feel comfortable using.
- Make your gnome nose and hands by combining a portion of light brown and white polymer clay until you have the color you want.
- Roll a quarter-sized portion of this clay into a neat ball. This is the nose. Set aside.
- Roll two nickel-sized portions of this clay into two neat balls. These are the hands. Set aside.
- Make the coffee by poorly combining dark brown, light brown and white clay together into a cylinder about 3/4-inch thick. Set aside.
- Make the coffee cup by rolling a 1-inch by 1/2-inch section of white clay into a cylinder and, press a small depression into the top of the cylinder, making it slightly wider at the top with a depression.
- Press a 1/8-inch slice of the coffee into the depression in the cup.
- Using your exacto knife (the back side of the blade), make a lip on the top edge of the cup.
- Smooth the coffee cup and coffee to your heart's content.
- Bake the coffee cup, nose and hands per the clay package's directions. Allow them to cool fully.
- Cut the sock in half, just below the heel.
- Fill the bottom part of the sock with the rice or polyfill.
- Close the top of the sock with the rubber band.
- Cut out your beard from your Mongolian fur in a rough "v" or "u" shape that will wrap about 1/2 way around your gnome and about 2/3 of the length of his body.
- Cut out a rectangle of fur about 1-inch long by 1/2 inch wide.
- Split the fur in your fingers and pull it apart, making a mustache.
- Hot glue the beard to the body, about 2 inches below the edge of the gnome body.
- Attach the mustache about 1 1/4 inches below the edge of the beard with a line of hot glue.
- Hot glue the nose in place about 1-inch below the top of the beard.
- Cut the heel off of the top part of the sock. Set aside (you'll need both the lining and the fabric portion later).
- Trim a 1/2-inch section of the outer cloth only off the sock-top's bottom edge.
- Pull the sherpa lining down over the edge of the hat, pulling it up onto the outside and hot gluing it in place along the edge like a brim or cuff.
- Place the hat on top of the gnome's head, tucking it down over the top of the nose.
- Hot glue the hat in place in the back and sides, leaving plenty of space to tuck the arms up in the hat just behind the beard edges, then one little dot on the nose.
- Use the twine to tie the top of the hat together, creating a pouf.
- Make the arms by taking the heel fabric (solid) and cutting two 1-inch by 3-inch sections.
- Place a line of hot glue down one long side of the arm shapes and then fold the fabric over onto itself to make a thin arm.
- Slip each arm up into the hat on the side and hot glue it in place.
- Hot glue a hand onto each arm.
- Cut two 1/4-inch wide sections of the leftover lining fabric just long enough to wrap around the gnome's wrists.
- Hot glue these sections of lining fabric around each of the gnome's wrists to create cuffs.
- Bring the hands together and hot glue one on each side of the coffee cup.
- Enjoy!
Notes
For more fun sock gnome tutorials, visit Ruffles and Rain Boots.
Recommended Products
As an Amazon Associate and member of other affiliate programs, I earn from qualifying purchases.


More Tutorials for How to Make a Gnome You Might Like
- DIY Farmhouse Gnome – Literally the most popular farmhouse gnome tutorial on the internet (mine anyway, that is), this gnome is so adorable, it’s been shared and shared and SHARED! You have to check it out.
- 5-Minute Upcycled Sweater Hat Gnome – This is the quickest gnome ever. Seriously, you just dump the filler, glue on a nose and beard–then you’re done!
- “Home” Interchangeable Seasonal Sign with Gnomes – Oh, how I love this easy seasonal interchangeable sign. Simple, fun and sooooo cool!
- How to Paint a Christmas Gnome – The cute feet and Christmas lights make this easy DIY a perfect craft to brighten up a rainy afternoon.
Please Save This to Pinterest
Your shares are how this site grows and I am sincerely grateful. Know a friend who’d like this? Please share it on Facebook or save it to your favorite DIY ideas board on Pinterest.

I noticed the Sherpa socks you recommended have the silicone dots on the bottom. This was not mentioned in your tutorial how did you deal with those
Oh no, mine did not have those dots. They might have replaced what I purchased. :(
I did see some at Target in the adult socks section the last time I was there. They had no dots.
Love your gnomes and jumped in and made 6 for Christmas gifts. The cost of the fur is a bit beyond me so I used unraveled mop fibres and ended up with very chubby gnomes and majorly burnt fingers!! Loved them (the gnomes that is) and so did the recipients. I think this is one is lovely and would make a perfect gift for my sister, however I do have one question. Is the mustache a separate piece or just divided below the top of the beard? Thank you so much
I’VE MAKE A FEW FOR MY TREE I LOVE THEM.
Beautiful
I enjoy you on YouTube on the gnomes but how long do you cut the material for the arms to start with? I know it will depend on if the gnome will hold something.
Thank you
Deb Hiltz
[email protected]
So you’re exactly right, Deb. It will depend on whether the gnome will hold something and how tall you make the body. Sometimes I place that hat quite a bit lower on these sock gnomes than I do the pattern gnomes, so mine vary from 3 inches to 8 inches (the newest sewing pattern). I would say that if you’re not following a pattern, go ahead and wait to cut those last.