
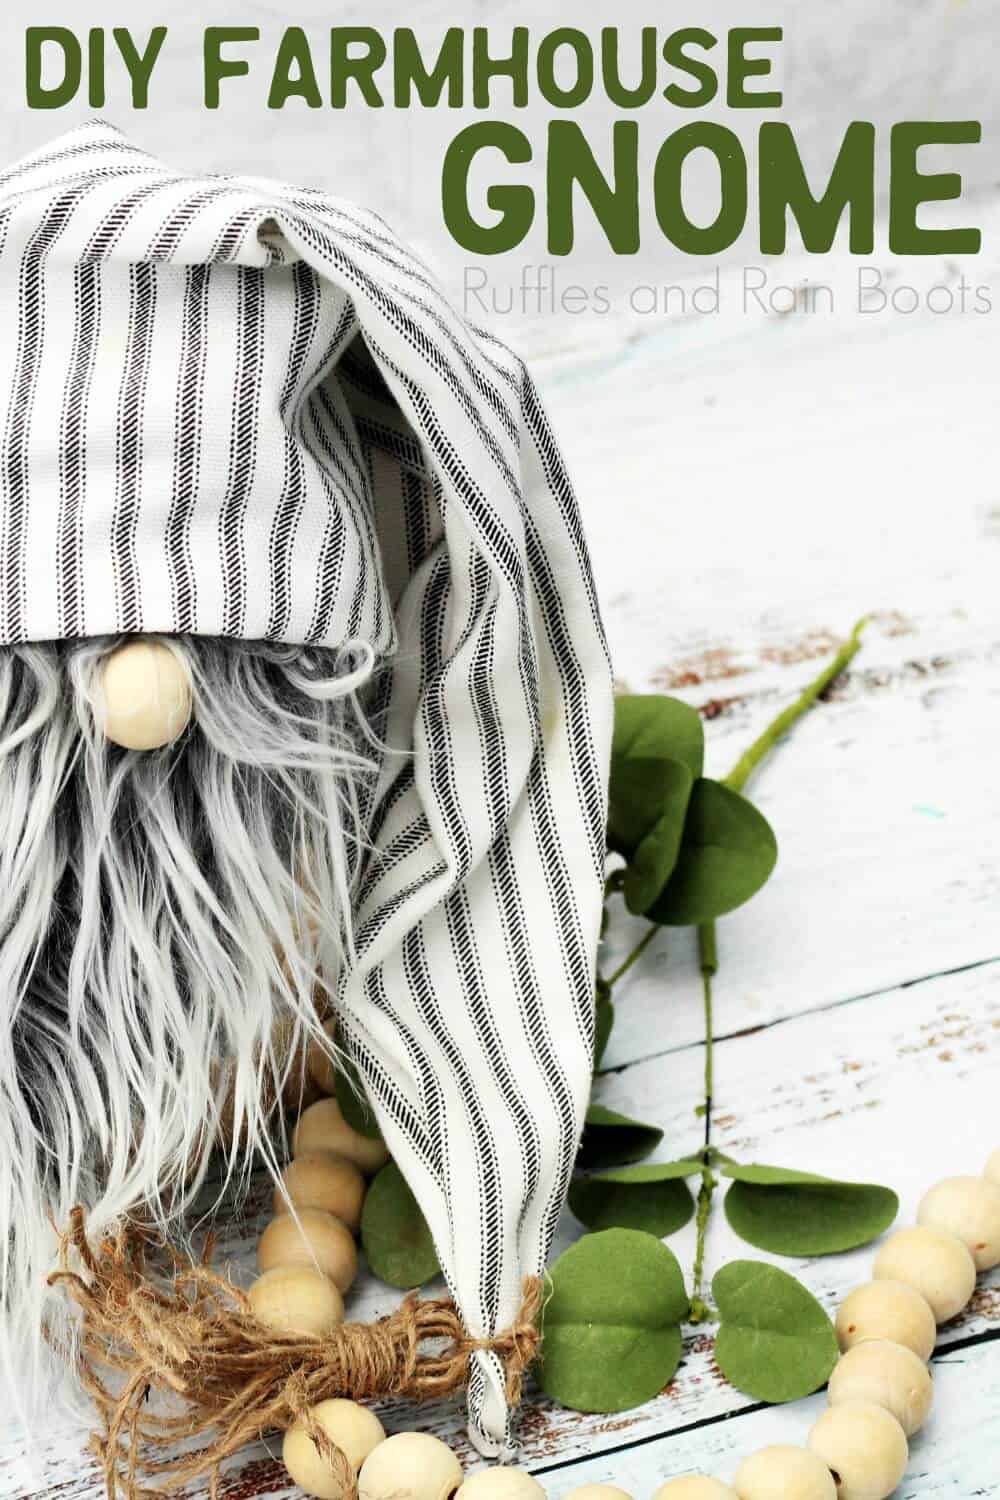
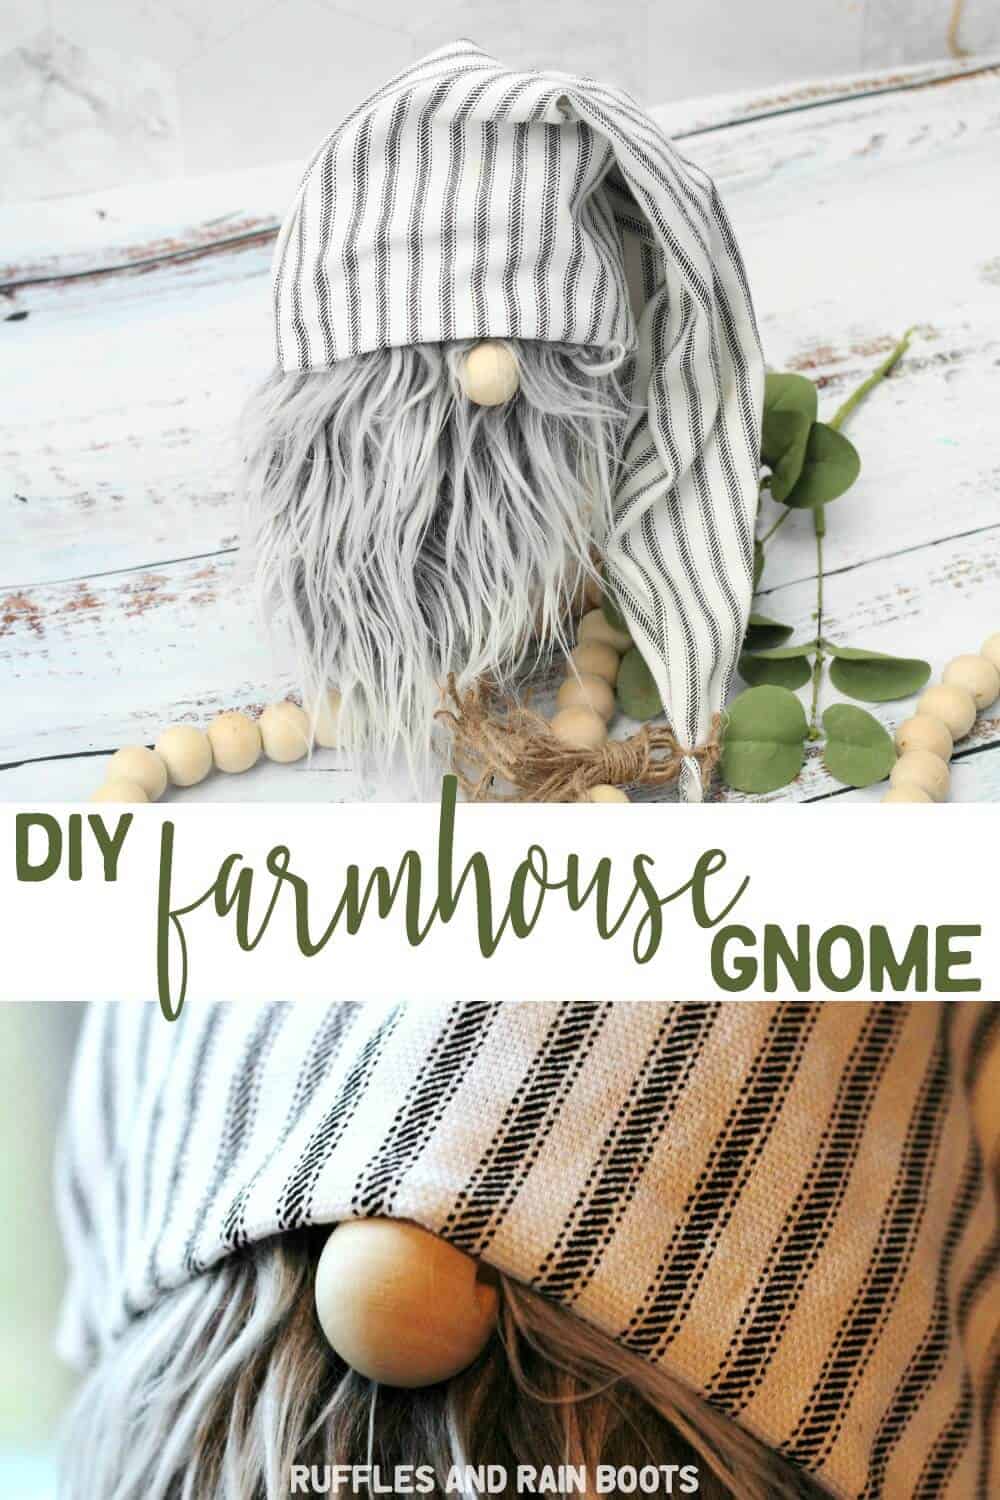
This Farmhouse Gnome is No-Sew and Absolutely Adorable!
This DIY farmhouse gnome is ready in 20-minutes and requires no sewing! We’re sharing our tips for making these cuties a unique year-round decor staple. Let’s get started!

What You'll Find On This Page
Farmhouse Gnome Tutorial
Here at Ruffles and Rain Boots, I love to make gnomes. Seriously – I love them as you can see by the fact that I not only have a DIY Christmas gnomes collection but also have a year-round set of DIY gnome tutorials.
Is there a gnome support group?
But seriously, I do love to share our fun gnome tutorials with you so that you can bring them into your home. My latest one – this no-sew farmhouse gnome – combines popular farmhouse elements with a slouchy hat style. Let’s make one together.
Psst: click here to learn the basics on how to make sock gnomes after reading this short sock gnome frequently asked questions list.
DIY Christmas Gnome Tutorials
If you’re looking for the best DIY Christmas gnome tutorials, you have come to the right place. Check out all of my favorite tomte tutorials for the holidays!

No Time to Make Him Now? Pin it for Later
I know how it is – you’re scrolling on your phone and found these awesome little gnomes. Go ahead and pin this to your favorite Crafts or Gnomes board on Pinterest.
Partner links in this article mean, at no additional cost to you, we could receive compensation for our recommendations. You can read our full disclosure policy.
Tips for Making Sock Method Swedish Gnomes
I’ve shared A LOT of gnomes here on Ruffles and Rain Boots and the sock gnomes are some of my favorites. This farmhouse gnome is just the perfect look for this easy method, isn’t it? It’s simple and functional, just like the popular design style.
If you’re giving this adorable guy as a gift, make a gift tag or card that goes with him. Here is a list of Gnome Sayings and Gnome Puns for Any Occasion.
Here are a few tips for making and styling these DIY gnomes:
- A gnome needs a home. Consider making your own DIY farmhouse tiered tray and styling it with galvanized pieces (so many great ideas here).
- Don’t fill up the socks too much with beans or other filler. In order for the body to mold under the hat, stick with about a 1/2 cup of heavy filler and the rest with polyfill.
- Secure the knot with a little hot glue. Your little ones might start playing with them and I want them to be safe for everyone.
- If you want to use the same hat material, I found some here that’s very similar that I haven’t used yet, but the print is almost identical, so I’m excited to try it. But don’t feel stuck with just the one look. Experiment with different hat styles and fabrics. This slouchy hat is perfect for the farmhouse gnome but if you’d like to make a holiday gnome, try some buffalo check in the same slouchy style or try one of our felt cone hats from our other holiday gnome tutorials.
Creativity, Delivered
In case this is your first time here and it isn’t glaringly obvious, I love to make gnomes – holiday gnomes, Christmas gnomes, Scandinavian… well, you get the picture.
Click here to join the more than 50,000 crafters who get the once-weekly Ruffles and Rain Boots newsletter so I can keep you up to date on all things gnomes and beyond. You’ll gain access to free graphics, amazing printables, and a hand lettering library full of free resources. It’ll knock your socks off.
How Do I Make a Farmhouse Gnome Without Sewing?
I’m so glad you asked! I love these no-sew gnomes made with the sock method. They’re quick and cute which are two of my top gnome-making requirements.
Read below for our step-by-step process or click here to see the full farmhouse gnome video tutorial full of tips and tricks.
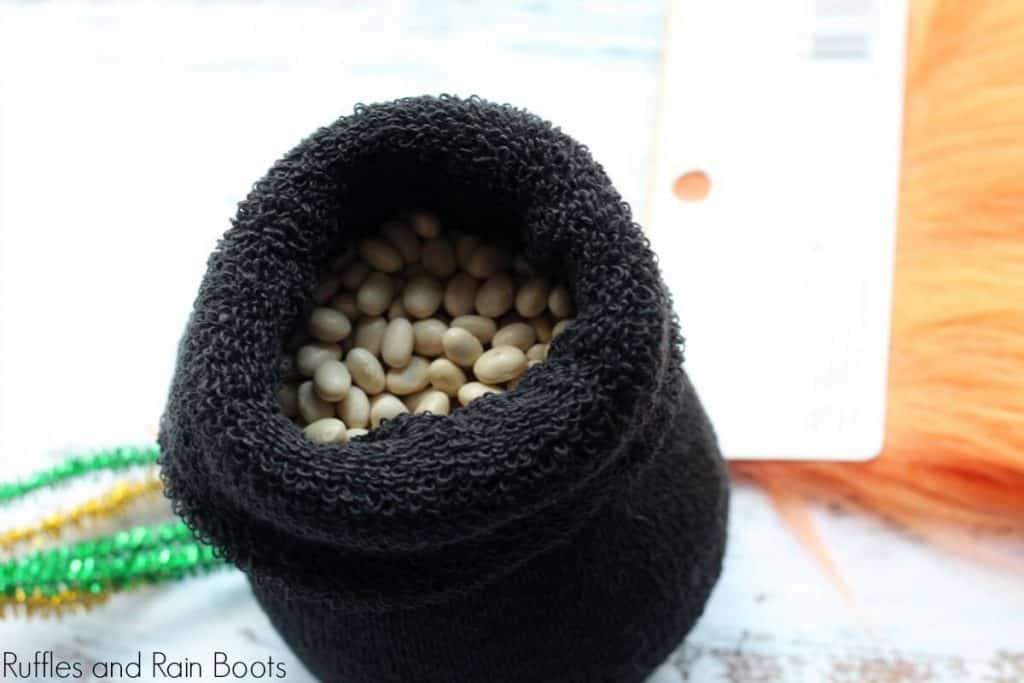
Pour the beans into the sock. Stuff the sock with polyfill about three-quarters of the way. Tie the sock in a knot. Secure with a little hot glue for extra security. This image is from our Leprechaun gnome.
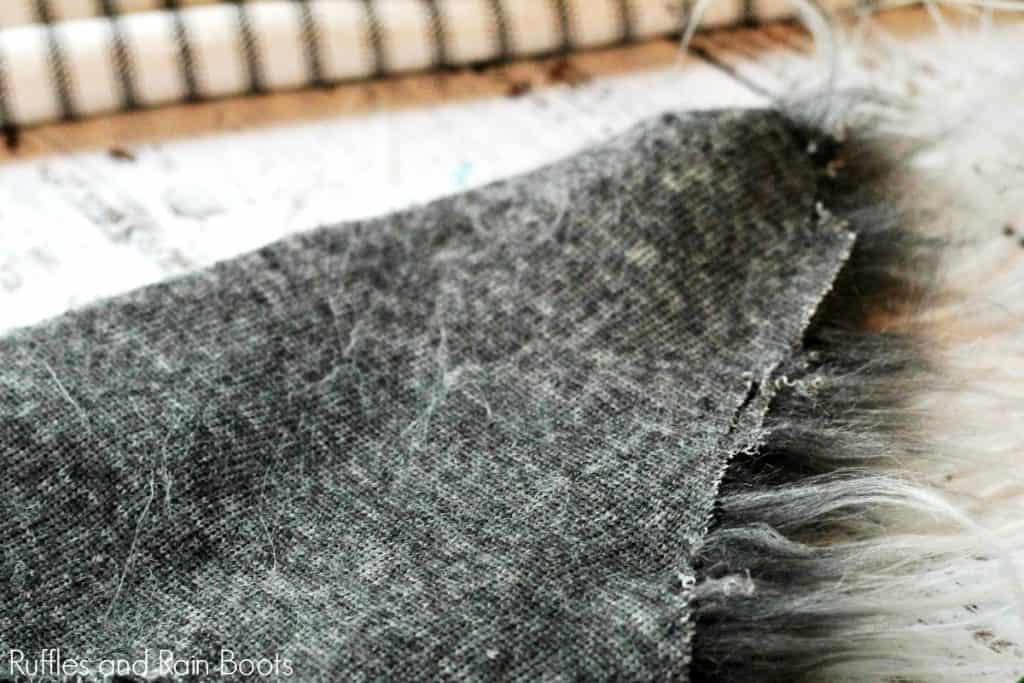
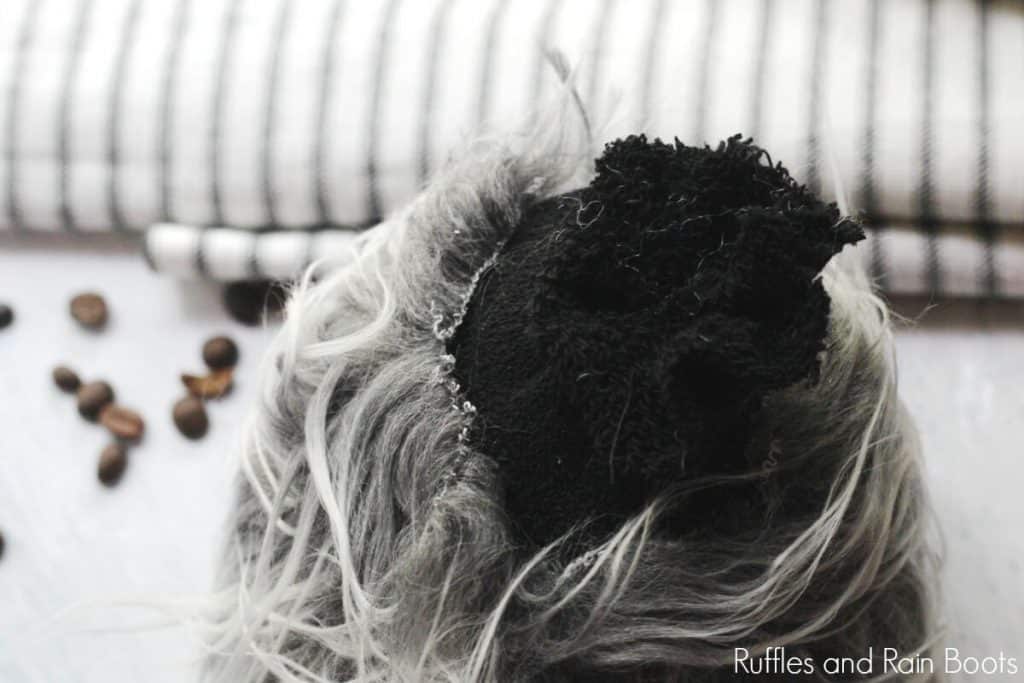
Flip the faux fur over so that you’re working on the back with the pile brushed downward. Using a straight edge (not scissors), cut a 9 inch wide triangle (9 inches at the top edge). Be careful to only cut the backing, not the faux fur if you want a nice, natural beard.
Wrap the fur around the gnome body just under the tied knot and secure with hot glue. Only glue around the top so the bottom is left open and flowing (like a gnome in the wild). :)
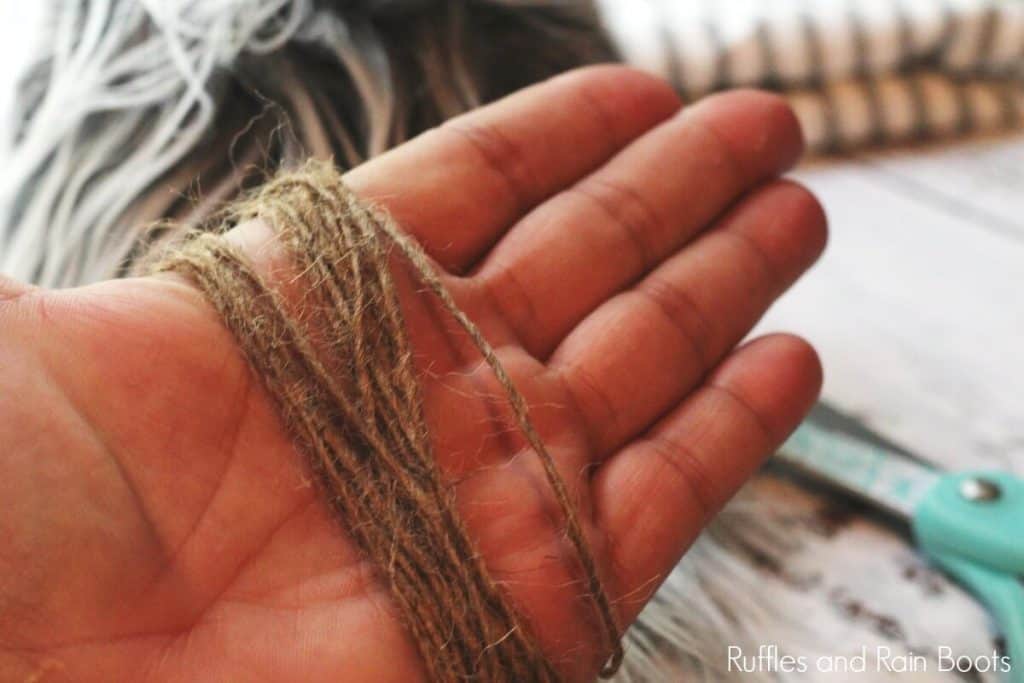
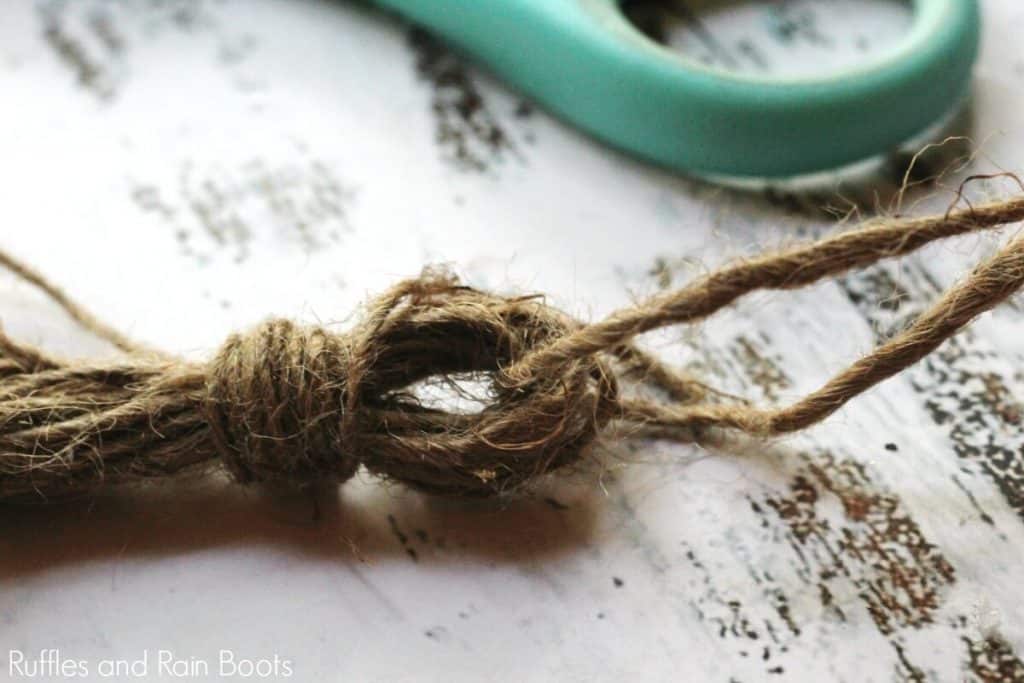
In order to add a bit of rustic charm, we’re going to create a farmhouse tassel for the gnome hat. Wrap twine around your hand a few times.
Secure the top about 3/4 of an inch down with a small piece of twine.
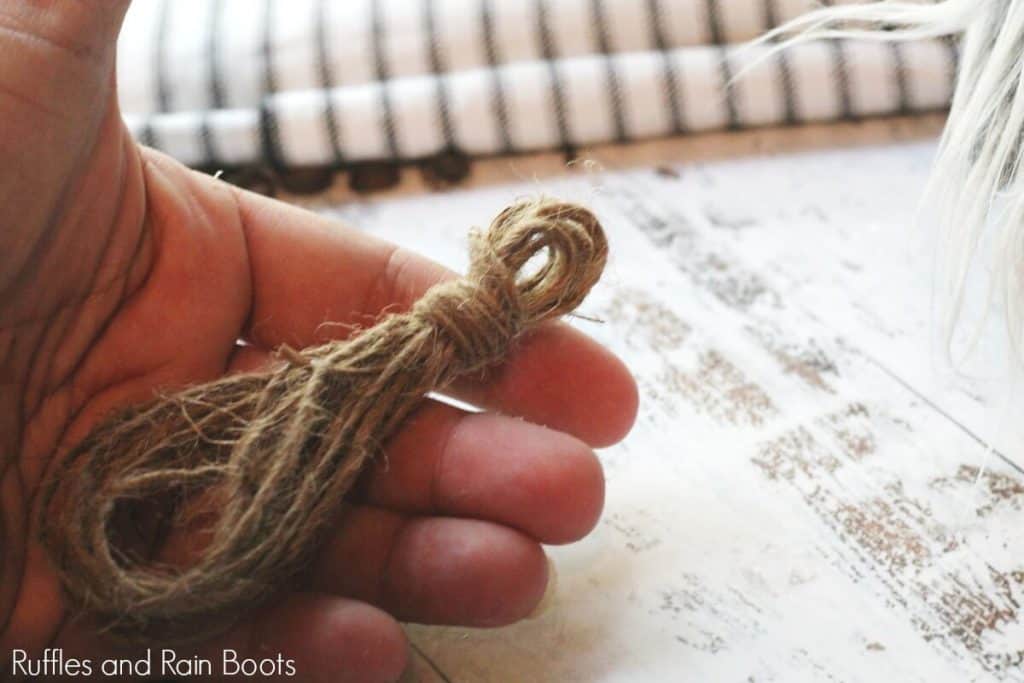
Cut the bottom loops to create a tassel and set aside. You’ll need a small piece of twine to tie it onto the hat.

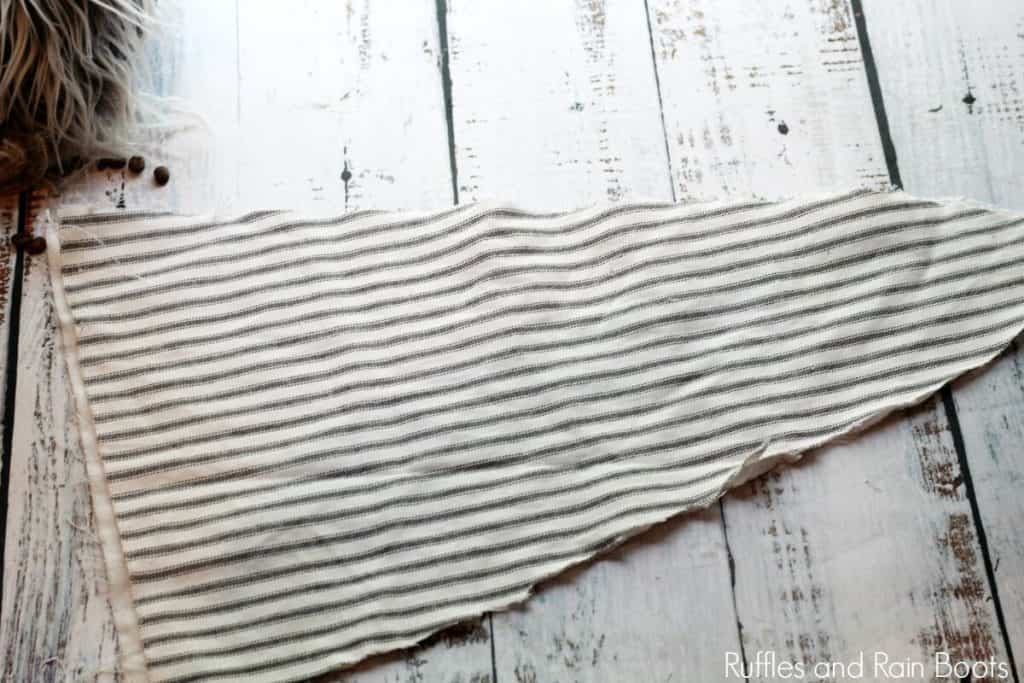
To create a long, slouchy hat, cut out two pieces of fabric in a triangle shape which are 17 inches tall (brim to point) and about 7 inches wide.
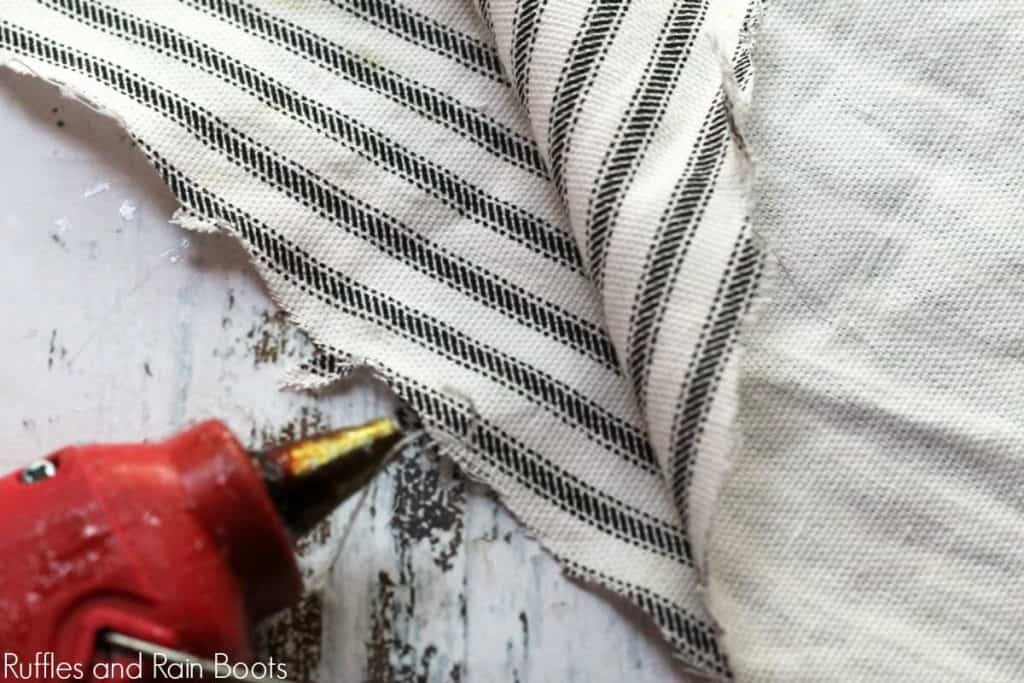
Flip them right sides together, turn up the brim edge, and secure with hot glue.
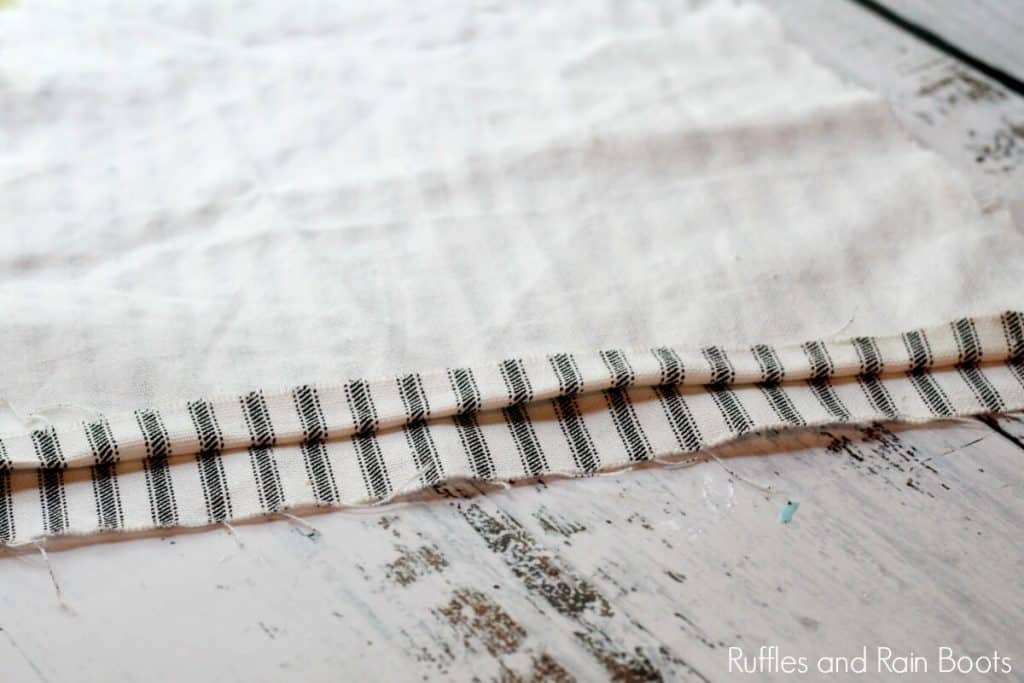
Keeping the fabric right sides together, use a small line of hot glue around the edges of the triangle. Press it down and let it set completely.
Turn the hat inside right (you might need to use a pencil gently on the tip of the hat). Tie on the tassel to the gnome hat.
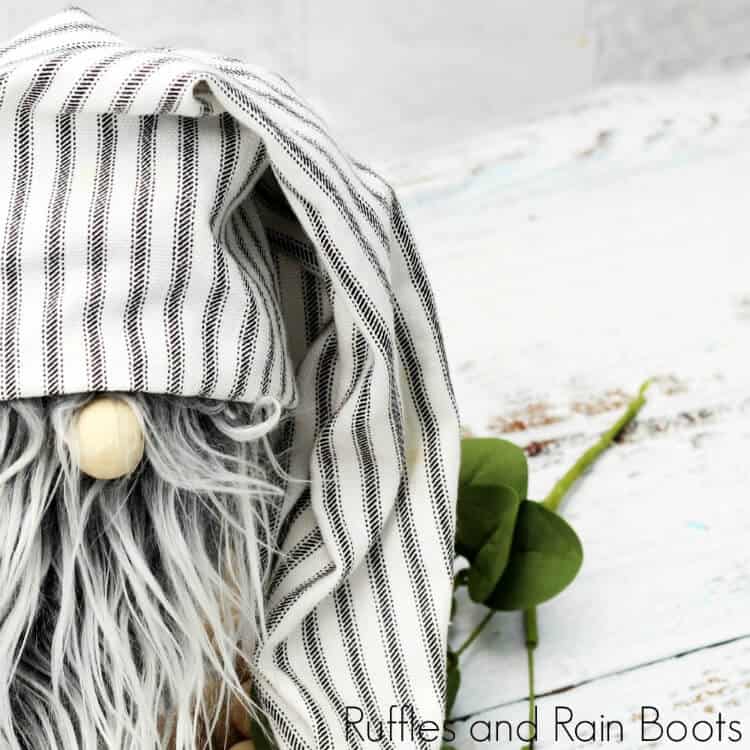
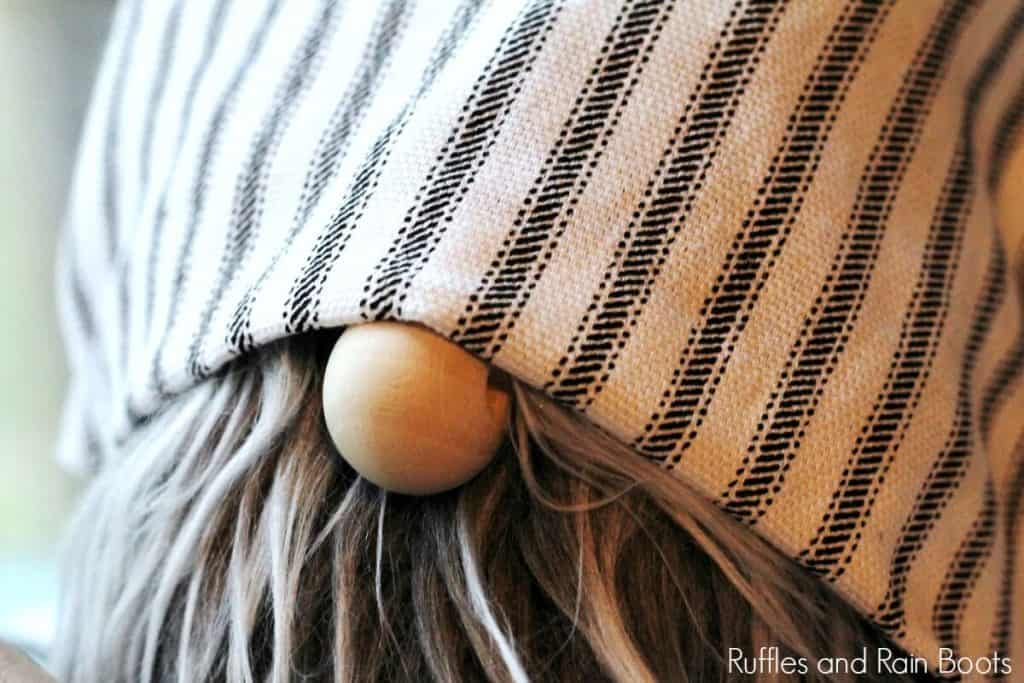
Slip the hat onto the farmhouse gnome and secure it with hot glue. Lift up the front of the hat and glue on a wooden bead for the nose.
Step back and admire your adorable farmhouse gnome!
How to Make a DIY Christmas Gnome
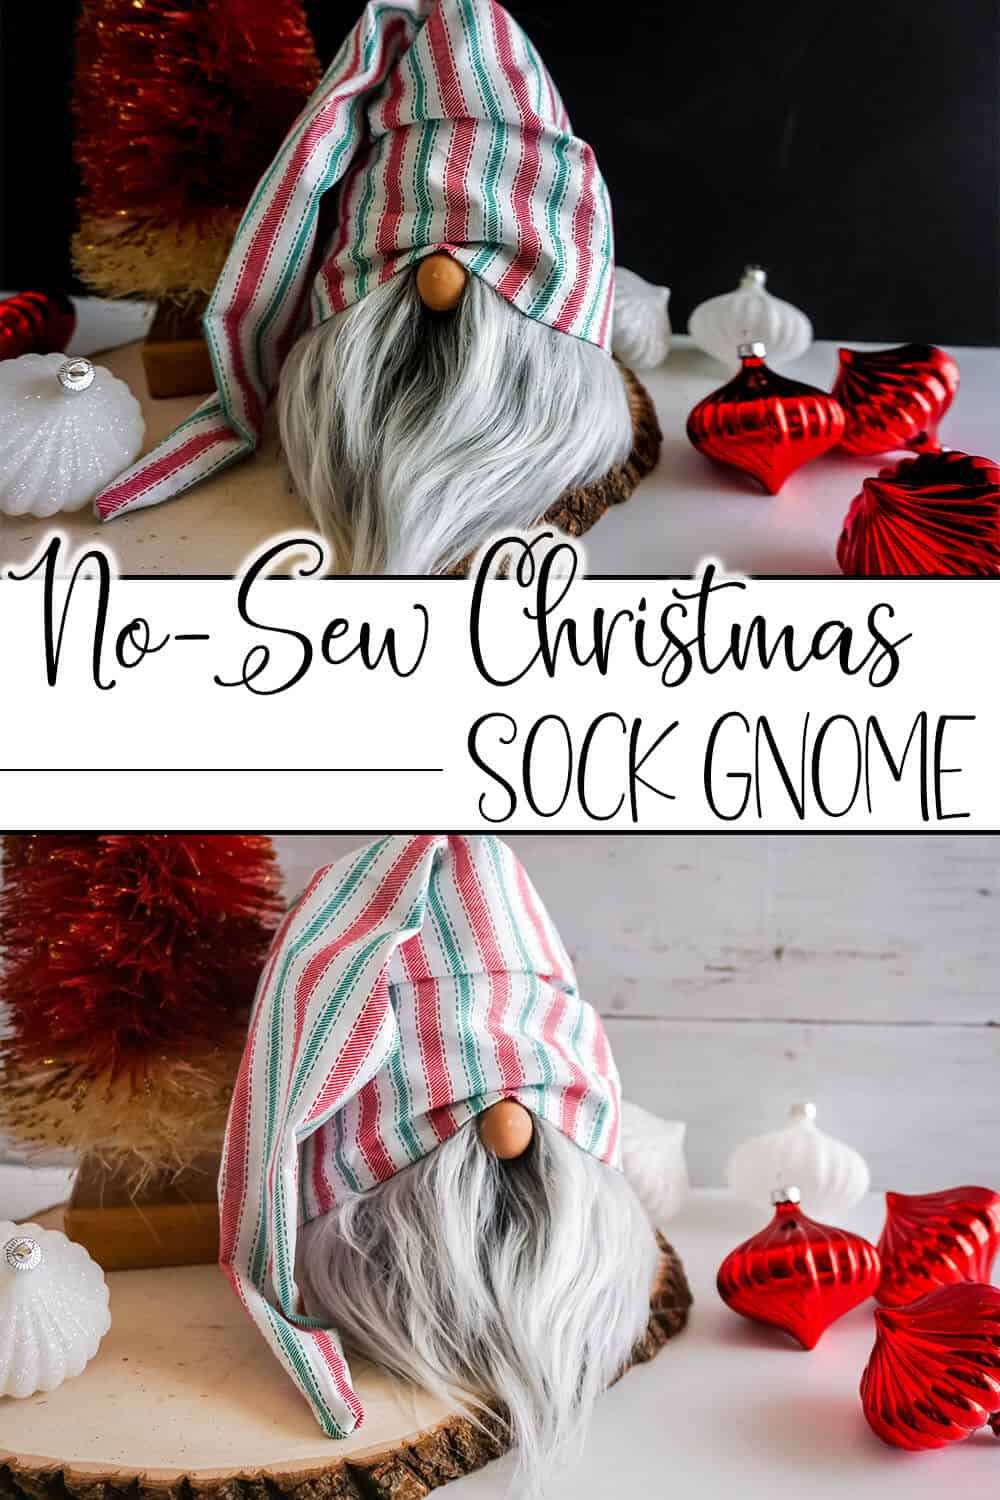
One of the questions I get quite often is how to turn this easy farmhouse gnome into a DIY Christmas gnome. Let me tell you, it’s easier than you might think!
- Pick a Christmas fabric that also incorporates the farmhouse feel. I found my fabric at my local craft store. I love farmhouse ticking and I pick up a bit of it every time I see it in any store. Just having some around means I can make a gnome with it!
- Decide if you want a fluffy beard or a straight and clean one. I personally wanted to try out a brushed beard for that cleaner look on my farmhouse Christmas gnome. All I did was brush the fur before putting it on my little DIY Christmas gnome!
And that’s it! You just make a gnome like I detailed above, but using a different fabric. Easy, right?!
RELATED READING: Love Farmhouse? Make DIY Highland Cows with Faux Fur
What About Making it a Farmhouse Holiday Gnome?
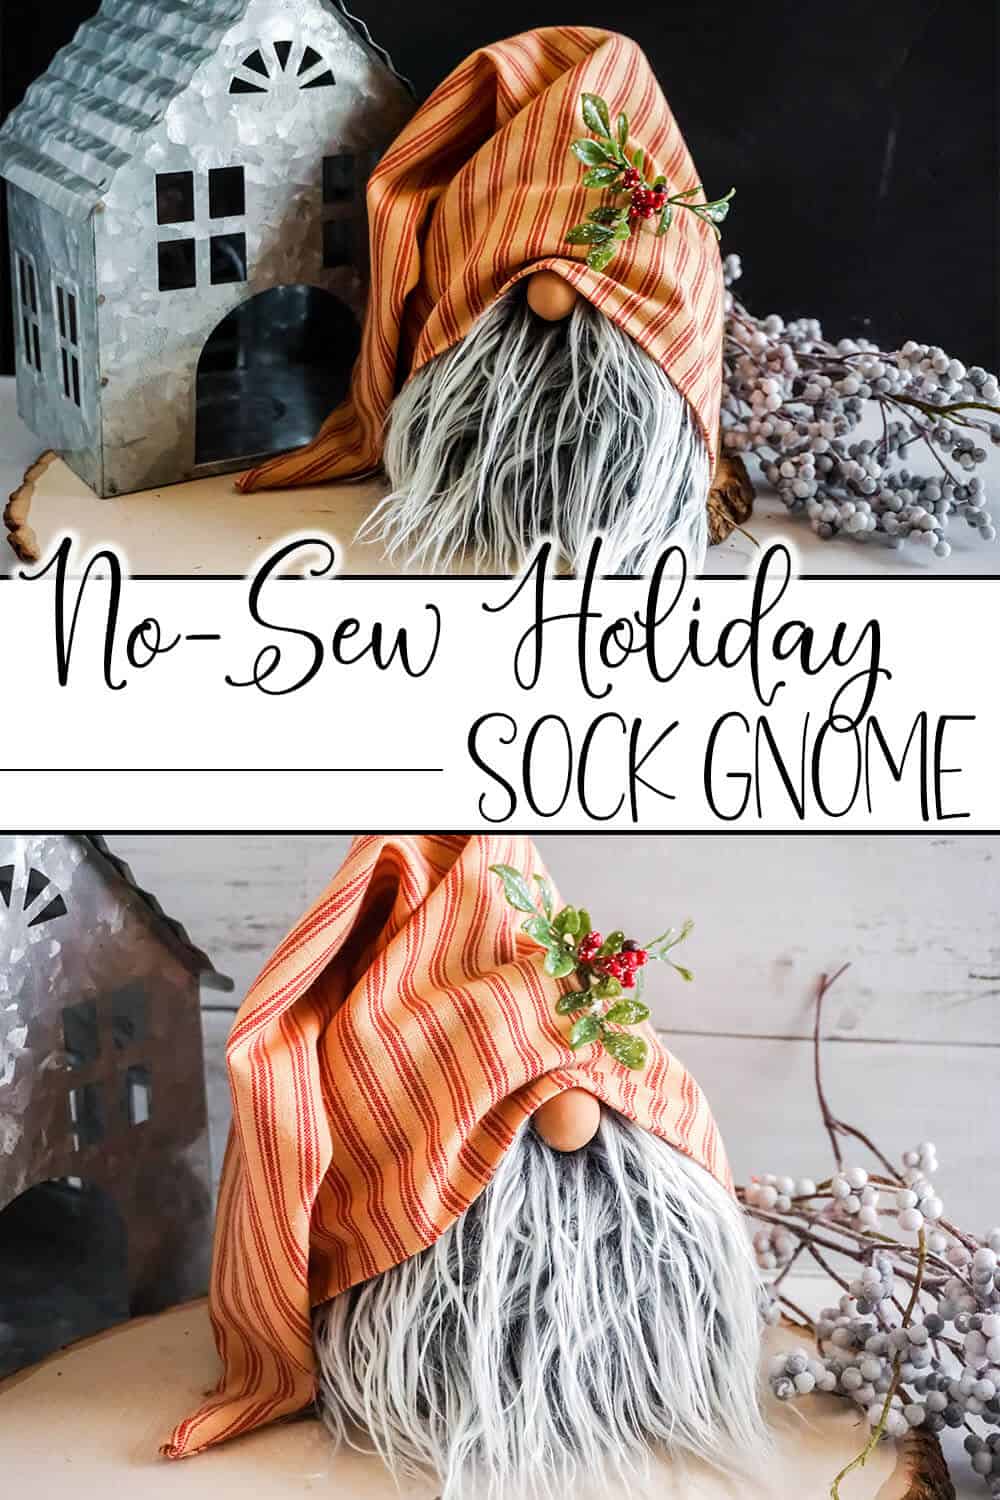
Well, now you think you’re throwing me for a loop, right?! No. This is easy too. You don’t have to go over the top to make a farmhouse holiday gnome. The steps to turn your simple sock gnome into a holiday gnome is so similar, it’s almost not worth mentioning, but I will note what I did differently.
- First, I chose a farmhouse ticking fabric that has an antique cast to the coloration. Just that little off-white shading really takes the brightness down and turns it into a more deep and rich tomte.
- Adding a tiny sprig of holiday floral makes this less of a “oh, it’s just a red gnome” into a clearly holiday category. Simple enough and does not have to overpower the little nisse, this sprig makes a different statement altogether.
More Gnomes – So Many Gnomes for You…
If you’re like me and are obsessed love making gnomes with which to decorate and gift with, you might love these other DIY gnome tutorials:
- Christmas Gnome Ornaments – These take just 15-minutes and are made with scrap!
- Easter Gnome – Who knew you could make a sketch turn out like this adorable bunny gnome?
- Leprechaun Gnome – This lucky little fella looks perfect in an entryway.
Please Save This to Pinterest
Friends, your shares are how this site grows and I am sincerely grateful. A quick share to Facebook or save to Pinterest allows us to bring more gnomes to more gnome lovers. ;)
DIY Farmhouse Gnome

This farmhouse gnome has a slouchy hat and a lot of rustic style. He's perfect for a quick craft for the home.
Materials
- Mongolian fur (we got ours here on Amazon)
- fabric for hat (I got mine here and LOVE the quality)
- ankle sock (short adult sock)
- polyfill or fabric scraps to stuff the gnome body
- 1/2 cup coffee beans (or other dried beans)
- wooden bead for the nose (we used these)
- twine
Tools
- scissors
- glue gun and glue sticks
- razor or other straight-edged blade
Instructions
- Pour the beans into the sock. Stuff the sock with poly fill about three-quarters of the way. Tie the sock in a knot. Secure with a little hot glue for extra security. This image is from our Leprechaun gnome.
- Flip the faux fur over so that you're working on the back with the pile brushed downward. Using a straight edge (not scissors), cut a 9 inch wide triangle (9 inches at the top edge). Be careful to only cut the backing, not the faux fur if you want a nice, natural beard.
- Wrap the fur around the gnome body just under the tied knot and secure with hot glue. Only glue around the top so the bottom is left open and flowing (like a gnome in the wild). :)
- In order to add a bit of rustic charm, we're going to create a farmhouse tassel for the gnome hat. Wrap twine around your hand a few times.
- Secure the top about 3/4 of an inch down with a small piece of twine.
- Cut the bottom loops to create a tassel and set aside. You'll need a small piece of twine to tie it onto the hat.
- To create a long, slouchy hat, cut out two pieces of fabric in a triangle shape which are 17 inches tall (brim to point) and about 7 inches wide.
- Flip them right sides together, turn up the brim edge, and secure with hot glue.
- Keeping the fabric right sides together, use a small line of hot glue around the edges of the triangle. Press it down and let it set completely.
- Turn the hat inside right (you might need to use a pencil gently on the tip of the hat). Tie on the tassel to the gnome hat.
- Slip the hat onto the farmhouse gnome and secure it with hot glue. Lift up the front of the hat and glue on a wooden bead for the nose. Step back and admire your adorable farmhouse gnome!
Notes
For so many more adorable gnome tutorials, visit Ruffles and Rain Boots .com

Can you share more about the size of the triangle for the beard? I get that the dimension across the top is 9″, but how far is it from there to the bottom point of the triangle? Also, what are the rough dimensions of the body once it’s filled (diameter/height)? I am trying to use up some fabric scraps and sew a body instead of using the sock. Thanks so much for this tutorial. Super cute!
As big as you want it, Sherri – the beard style is usually decided by those making and/or by the material itself. Some people like to stop well before the bottom of the body (which is dependent upon the size you are making).
Thank you so much for sharing these tutorials! They are fun to make, and so cute!!
Sarah thank you! This is the best gnome tutorial I’ve read so far, and I’ve read a lot!
Everyone in my life will be getting a gnome for Christmas.
“You get a gnome! You get a gnome!” It’s like Oprah giving everyone a gnome – love it!
What size wooden bead did you use for the farmhouse gnome? Please
They are about 3/4 inch beads – I picked them up on Amazon but I have seen them at the craft stores, too.
Is the hat glued all the way around the gnomes head? Thank you.
Yes, the hat should be attached securely. I do have a few I made with velcro so I could use the same body with different hats – just an idea if you didn’t want to secure it permanently.
Thank´s for sharing this! Something I will do, love swedish gnomes. Maybee because I live in Sweden? =)
I need to join your gnome support group….just tell me when and where lol! I love this little guy and the farmhouse ticking fabric is perfect!!!
We should start one!
where did you get the material for the Farm House Gnome…..
Hobby Lobby, JoAnns’s, or any fabric store. This one is called farmhouse ticking.