
xTool S1 Review, Video, and Projects
I fell out of my chair (literally) when I learned about the first 40W fully-enclosed diode laser on the market. Today, I’ll share my takeaways, usage notes, and whether or not I think it’s “worth it” to bring into a crafting studio.
There is no doubt the xTool S1 is powerful but is it good for crafters? If you hate when someone just types out the specs, you’re in luck because I hate that, too. Here, you’ll get my review after using this for nearly 2 months.

Makeblock sent me the xTool S1 laser, air assist, and the honeycomb but the review and opinions of this machine are my own. There could be affiliate links within this article.
RELATED READING: The xTool M1 – Is the M1 the Best Crafter’s Laser?
What You'll Find On This Page
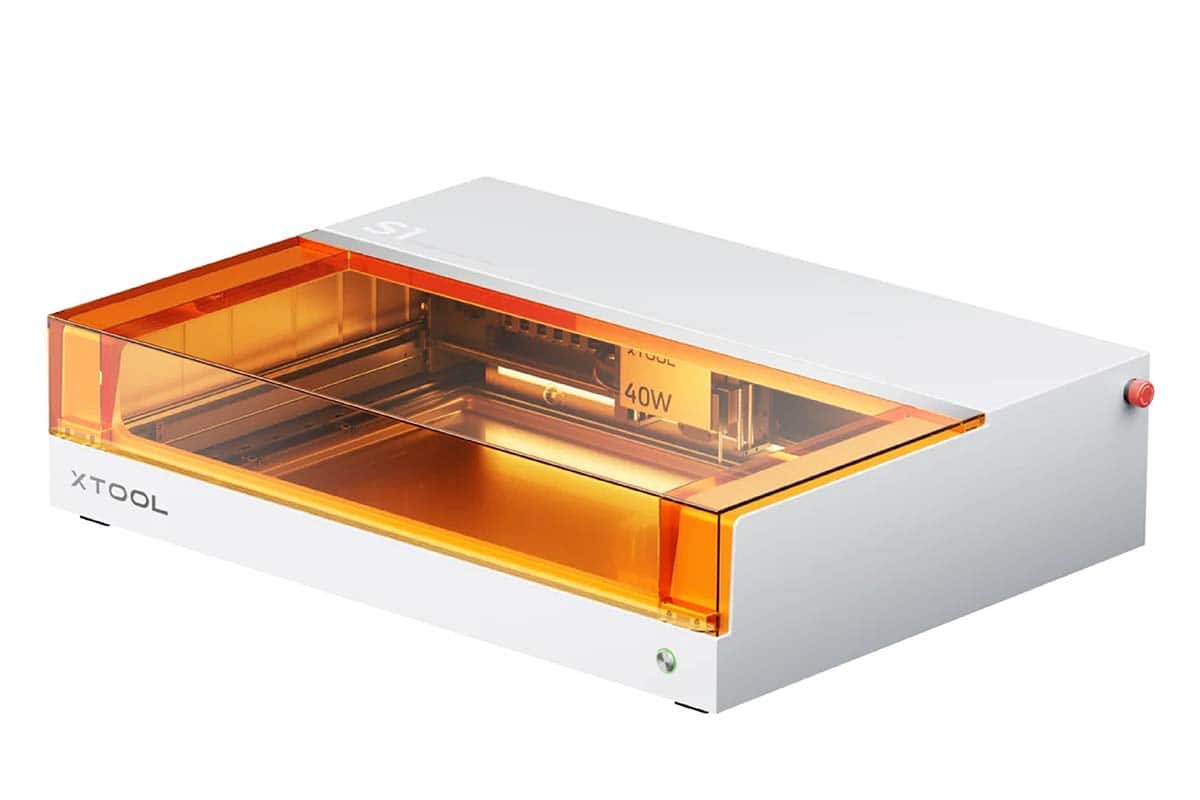
Innovative and Powerful: xTool S1 40 Watt Laser
Here at Ruffles and Rain Boots, I’m not one to fall out of chairs and yet, it happened the day Makeblock contacted me about the xTool S1. And I thought I was in WAY over my head with this thing and was very nervous I’d be learning it pre-launch without any instruction.
But, that’s exactly what I did.
xTool Laser Coupons, Deals and a NEW STYLE
Friends, if you love an aesthetically pleasing craft room with all white tables, equipment, etc, you are going to want to check out the all new white series! And dont’ forget: try the code SN10 for additional discounts on the 20 and 40 watt lasers.
Launched during the Valentine’s Day promotion, the exclusive pearl series is so pretty. I have the xTool P2 CO2 laser coming in white soon but they launched the S1 in it, as well.
Just launched is the new xTool S1 10 watt. This laser combines the power of positioning and safety of the S1 in a lower wattage unit. This will have unmatched detail when engraving.
In the new white series, you can pick up the xTool S1 40 watt (the one I have) or the xTool S1 20 watt in Pearl. Either of these lasers is a good choice, though I do recommend the 40W if you can add it because it’s unmatched in the market.
RELATED READING: Make a Laser Cut Sun Catcher with Your xTool S1
Key Points You Should Know: Nutshell Review
If you’re a “just the facts, ma’am” sort of person, here is my review in a nutshell. I do recommend the S1 laser and actually, I recommend it over the M1 or the M1 Ultra laser if you have another cutting machine (Cricut, Silhouette, etc.) already in your set up (or don’t need one).
First, let’s start with why I’m keeping this machine:
- the safety features are plentiful and reassuring
- this machine is powerful with swappable laser head modules and 600 mm/s (that’s fast)
- it’s nearly plug and play; I set it up myself in about 20 minutes
- the dynamic positioning is precise (even on oddly shaped items)
- this is a good crafter’s laser because it can get big jobs done fairly quickly
- it has interchangeable modules, allowing expansion capabilities
- the working area is robust (40w is 19.6″ x 12.5″)
- UPDATE: I recommend adding an inline duct fan (I got the Safety Pro Series IF2) because we need something more powerful than the built-in fan. If you have no place to vent out, please instead get the Air Purifier – I have it and it is amazing.
You can see both of these xTool air purification and venting systems items in this video.
Anything I’d change? Sure. For those who like to know what you’re getting into, here’s what I would change:
- it would be very helpful to get an AUTO-SNAP to the center of the cut boundary; UPDATE November 2023: xTool added this to the software!
- there should be a GRID on the base plate – it would help ease anxiety
- the length of the computer attachment cord needs to be longer (I ended up purchasing a longer data cable but now use it exclusively wirelessly)
This is a detailed read: you can save or share this for yourself or others. Whether it’s a quick share to Facebook or a save to a laser pin board, I’m very grateful.
RELATED READING: Make Layered Ornaments with the xTool S1
RELATED READING: Is it Worth the Hype? Read My xTool M1 Ultra Review
Still Deciding on a Laser?
I own three types of lasers right now: CO2, diode, and fiber (infrared). Below are summaries of each and suggestions on materials. If you have questions, please ask! Not all lasers are right for those looking to start a business or side hustle. If that’s you, choose the P2 or the S1.
- xTool P Series – A fully-enclosed CO2 laser, perfect for cutting acrylic and wood. This is an unrestricted laser when it comes to acrylic, wood, slate, etc. and it’s my top choice.
- xTool S1 – The option I have is a 40 watt diode laser which cuts some acrylic, wood and does amazing engravings. This laser has some acrylic restrictions (no clear, mirror, translucent; primarily opaque) but powers through wood.
- xTool M1 ULTRA – The updated version of the ground-breaking xTool M1 shows up to the party with a printer (can print on wood), a laser, a set of blades, foil, and embossing, as well as a pen tool. Great for crafters!
- xTool F2 – This dual laser is portable! It’s the best-selling, landmark setting laser that contains a diode and an infrared laser. It’s perfect to take to shows, markets, and events.
- WeCreat Vista – This is a fun tool to have if you’d like to work primarily with tumblers or wood. The patented FlipLaser design turns the laser head 90 degrees, allowing you a great tumbler engraving experience.
xTool S1 Unboxing Video: A First Look and How It Works
If you want to see this innovative laser in action, watch my xTool S1 unboxing video. I share how it’s packaged, a few assembly notes, some projects, and a quick look at both the automatic distance measuring and the dynamic positioning system in the xTool S1 video.
Be sure to subscribe while you’re there. We have a lot of fun!

RELATED READING: Learn to Cut White Acrylic with the xTool S1
Is the xTool S1 a Crafter’s Laser?
If you’re new here, I am a big fan of the xTool M1 laser and blade cutter machine (10 watt). I started with the M1 because it seemed like I didn’t have to have a specialty or even any knowledge before jumping in and the focus on on SAFETY.
For those without a cutting machine, the blade addition elevated the laser functionality. The combination created a multi-use machine at an amazing price point.
The xTool S1 is like the M1 / M1 Ultra in that it can be elevated on the riser base and run the rotary tool. And the nearly “ready-out-of-the-box” set up for the S1 makes it easy for us “non-laser” folk to assemble.
Again, the focus is on SAFETY, as this is a fully-enclosed laser. There is no need to don those absolutely fashion-forward safety glasses when working with this machine.
If you’re interested in starting a small business, this is a very capable machine. The speed and power combination, along with the bed size and rotary capability are going to be a great piece for the safety-conscious crafter.
The xTool S1 is a good option for adventurous crafters, even over the M1 (if you don’t need a cutting machine). The S1 works fast with an array of materials while prioritizing safety.
xTool S1: Safety Is the Priority
If you’re a crafter new to lasers or you want to make sure you have a focus on safety, I will recommend the S1. Shared previously, safety is my first priority with my studio in my home. Here are a few of my favorite safety features:
- the S1 is fully enclosed and can be used without safety goggles
- inside the machine is a 5-point flame detection system (comes standard)
- automatic stop features: tilt detection, opening the lid, emergency stop button
- the shell is fire-resistant
- optional fire suppression kit available
RELATED READING: xTool Screen Printer – This Add-On Is FUN!
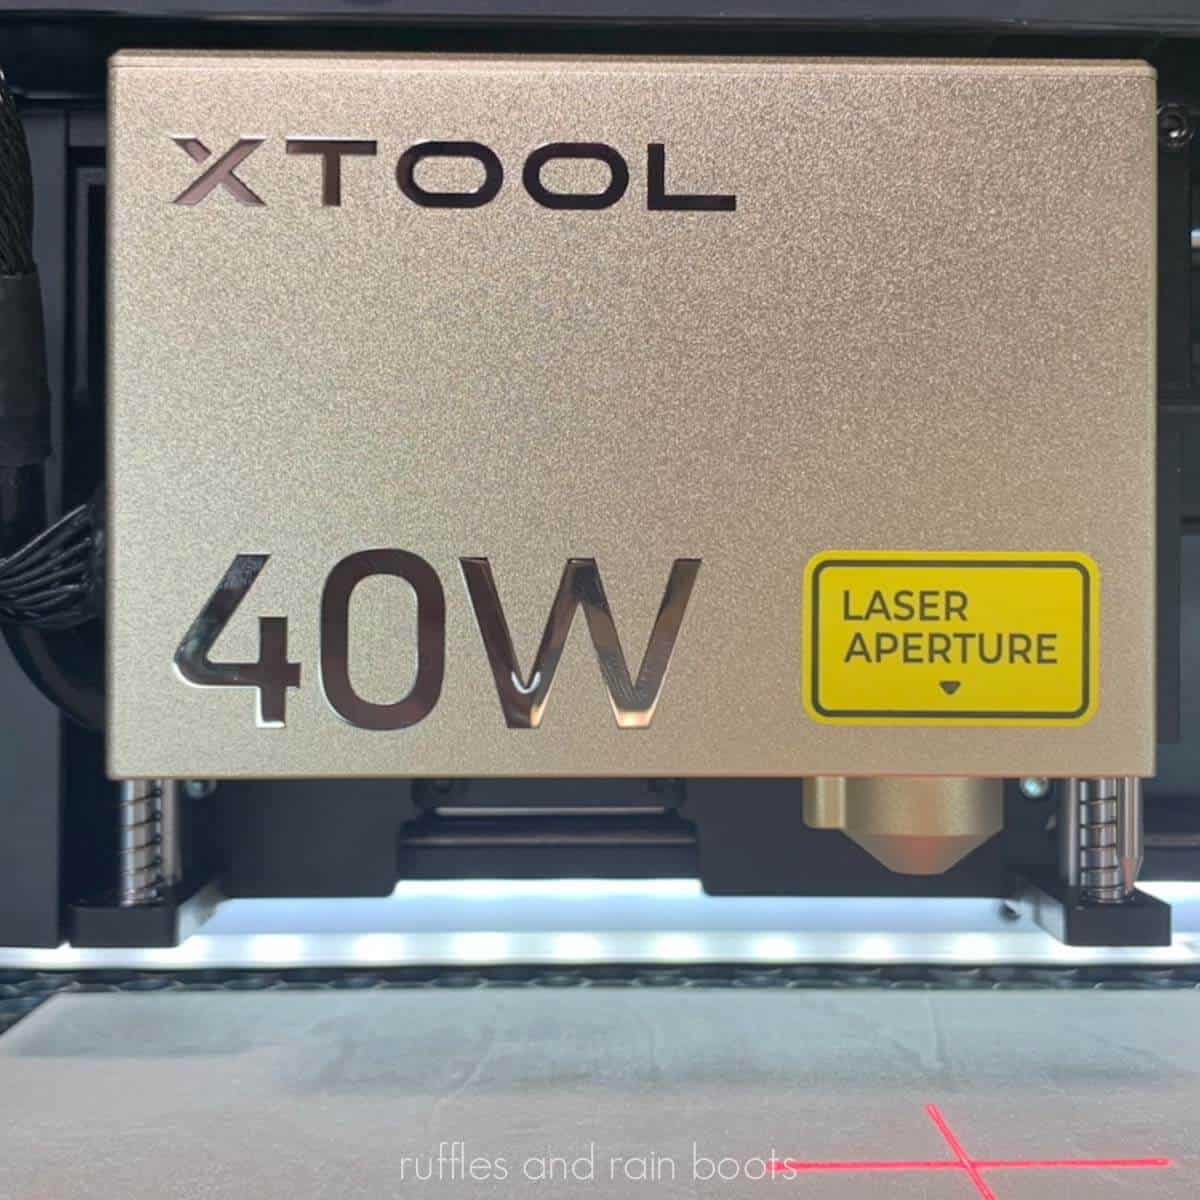
Power of Score, Engraving, and Laser Cuts with the 40W S1
As I mentioned, xTool sent me the 40W diode laser. It can cut wood, acrylic, paper, card stock – just a ton of stuff. The 40W module can also engrave everything above and stainless steel.
I was able to cut clear flex (something diode lasers aren’t great with) very, very well. The edges don’t look as clean as a CO2 laser, however, the diode laser has less maintenance and a longer life, so that’s a win for me.
Even though it’s a 40W, it’s still a diode and has those limitations. The biggest limitation of a diode laser is that it cannot cut clear acrylic (it can only engrave it). Additionally, it cannot cut acrylic in blues (and some colors with blue neighbors). If you need this functionality, invest in the xTool P2 (it’s also enclosed).

RELATED READING: xTool S1 Wooden Stocking Tag Beginner Tutorial
The S1 is Easy to Maintain: How to Clean the xTool S1
I have gotten this question on the xTool M1 about 3,003 times so I’m going to get ahead of this… It is EASY to clean this lens, lens cover, and enclosure (easier than the M1 to clean).
xTool created the S1 with interchangeable modules connected with two screws. You’ll unscrew those, lift the module out of the gantry, and turn it upside down.
Lift off both the laser cover (the pointed thing) and the housing next to it (the rectangle thing); these are both magnetic, so just pull. Unscrew the cover (if needed) and clean everything with a cotton swab and alcohol.

My xTool S1 Unboxing Notes
My husband and I both audibly gasped at the packaging on the S1. All of the items are stored inside the machine, thoroughly protected. For a list of what comes inside, view the xTool S1 specs here (be sure to check for any free gifts or discounts with me).
We opened up the hook and loop straps, removed the foam, and closed up the straps again. This allowed us to easily and safely move the S1 all the way through the house into my craft room.
Use the packaging straps to move the machine safely.
Speaking of the craft room: I put the S1 on a 55 inch elevating table, right next to my xTool M1. I use the air purifier for both machines only for the M1 now, so sharing a table seemed a good idea. Update: I purchased the inline duct fan for the S1, as I felt it needed something a bit more powerful than the built-in or purifier.

After reading through the manual and unpacking everything, set up took only about 20 minutes. I attached the laser module, added the distance sensor, removed the limiters, added venting, plugged in the air assist, and popped in the key.
Set Up Time: 20 Minutes (without riser)
Was it easy to set up? YES. I didn’t have any videos to follow and used only the user manual to complete it. You’ll have to download the XCS software compatible with your device, but after that you’re ready to start working!
My xTool S1 Set Up and Accessories
One of the questions I have received in the past is what accessories to get. It can be quite a bit more added to the price tag for this hobby, so here’s what I have and recommend.
First, let’s see what comes with any machine, no matter the package you choose:
- S1 machine with laser module (choose 40W diode, 20W diode)
- user manual
- mini materials kit (I recommend getting this plywood bundle)
- triangular prisms for elevating materials off the base plate
- laptop connection (USB) and the power cord and adapter
- mini tool and spare parts kit (screwdriver, lens covers, keys to operate, screws)
- rail lubricant
Air Assist
Get an air assist module. It will remove frustration exponentially when cutting and also help to keep the laser clean. I have a manual (set the power) and an automatic air assist and both work well, but I’m loving the Smart air assist with the S1.
The air assist should come with all lasers – it makes a drastic difference with wood, so please invest in this addition.
Honeycomb Panel and Magnetic Pins
When I got my first laser, I didn’t understand the power of the honeycomb panel but now recommend it to EVERYONE. The honeycomb increases air flow and makes cuts turn out better. It’s also great for holding down material to keep it from shifting.
As I mentioned in the summary above, I don’t like that it isn’t the same size as the laser bed. That said, I have been able to work with it cleanly and even when creating a jig.
Smoke Purifier
The xTool smoke purifier (Safety Pro Series AP2) has become a necessity for me crafting inside. I vent the laser into the purifier and then vent the purifier out of the window. The S1 has a more powerful exhaust than my previous laser and I can’t smell a thing until I open that lid!
Note: I also have this room air purifier in my craft room to clean the air from particulates long after the machines have stopped running.
If crafting inside, a smoke purifier is a must-have. You can skip it and directly vent out a window.
Rotary Pro and Riser Base
If you want to engrave tumblers or other cylindrical items OR get a bit larger in your projects, you’ll need the riser base. It’s easy to assemble and is METAL. I got an S1 compatible cord to “convert” the rotary pro from xTool I had with the M1.
If you have the xTool rotary pro already and need a conversion cord, contact xTool directly.
Other Options: Conveyor
I don’t have this but check out YouTube if you need a passthrough with an automatic conveyor feeder system. Some of the big laser gurus might be testing and sharing this soon!
xTool S1 Must Have Accessories: air assist and honeycomb panel
Like to Have Optional Add-Ons: rotary tool and riser base
How to Measure Distance in the S1
This is one of the most talked about features in the Facebook groups! To put it mildly, you barely have a part in it. The S1 uses a distance sensor to tap the material for auto-measuring – just position the crosshair over the material, and it will start its procedure to auto-measure.
Additionally, with the new dynamic distance measuring system, we can engrave convex or concave items as if they were flat. This was a big selling point of the xTool P2 CO2 laser and is now available for diodes.
Have you joined the Laser Group on Facebook yet? It’s a welcoming, friendly, and open space to get ideas, ask questions, and learn from our peers.
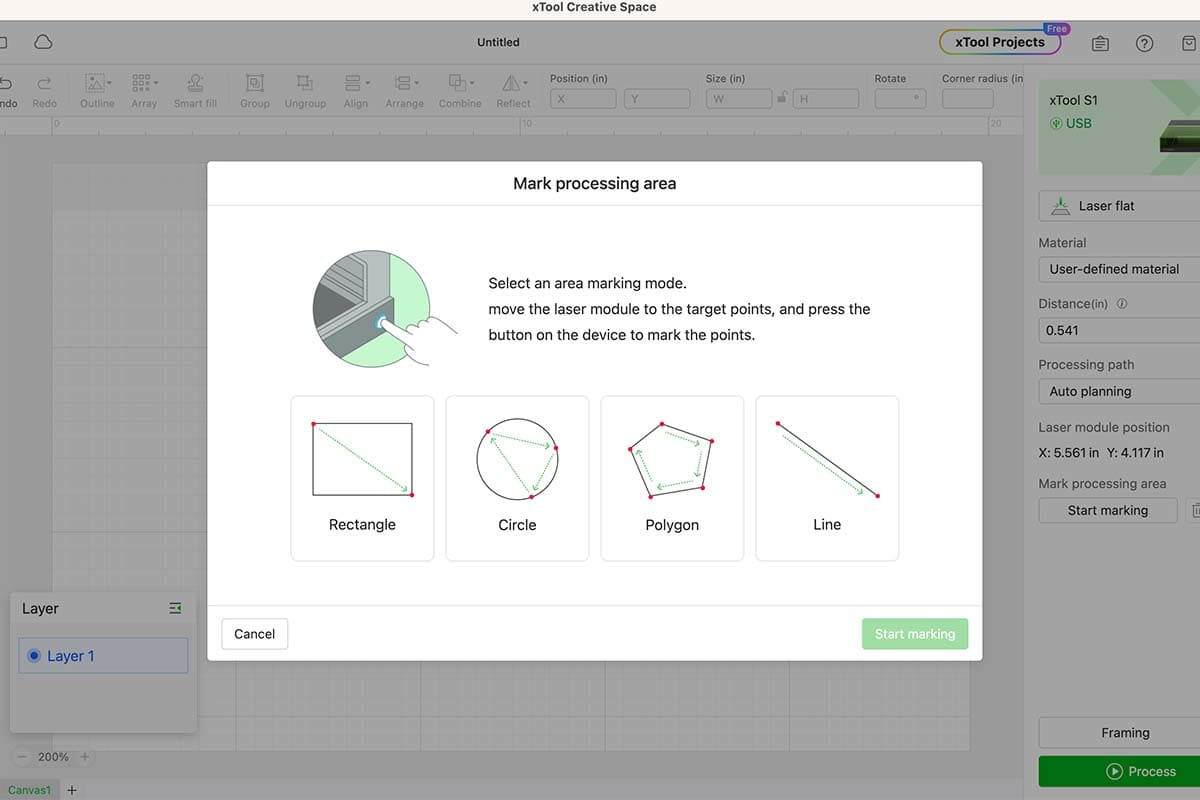
How to Position in the S1 Without a Camera (UPDATE!)
Another of the most-asked questions has been, “How do you know where to tell the S1 to process if there is no camera?!” Honestly, I had the same question when I learned the laser was without a camera – it was a huge piece of my anxiety after unboxing the machine.
In fact, I was a little nervous because there was no training on how it worked. But I read the instructions that pop up on the screen, tested it, and was able to create a holiday ornament in just a couple of minutes.
If you want a detailed look at this process, check out the video linked above. Update December 2023: we got an AMAZING update with the new XCS software release. We now have the ability to create our processing areas a variety of ways. Here are the new options and I cannot wait to share the new projects and scrap busting uses with these!
Using the xTool S1 is very easy – even for those of us who aren’t “laser people.”
Materials the xTool S1 Can Cut, Engrave, and Process
The powerful diode laser module gives us a range of materials with which to work inside the S1. Some of my favorites are
- wood (cut, score, and engrave; up to 20 mm!)
- acrylic (cut, score, and engrave; most colors)
- paper, card stock, and cardboard (cut, score, and engrave)
- leather, felt and fabric (cut, score, and engrave)
- glass and ceramic (engrave)
- slate and natural stone or rock (engrave)
- stainless steel (engrave)
What File Types Work in the S1?
Though XCS (the software which runs all xTool lasers) has images and even an AI module to work with, you can upload any of the following file types to use: SVG, PNG, DXF, JPG, BMP and a few others. The cool thing is that you can even edit images inside the software!
That said, if you’re a laser guru already, the S1 works with Lightburn however, it has limited functionality. Some features are only available inside XCS, such as the real-time laser positioning, rotary controls, and the curved surface measuring.
xTool S1 Project Ideas: Sneak Peek
This is a very long read already, so I’m going to share some initial findings and frustrations while creating my first few projects with the S1.
Wood Engraving – The 40W Engraves Wood Spectacularly
If I’m honest, this day was the most frustrating in my entire laser-ing journey. It downright sucked to have no reference or starting points, but I learned so much from engraving this AI generated image eight separate times.

xTool S1 Engraving Settings Used
– Power: 23
– Speed: 88
– Pass: 1
– LPC: 100
Wood Cuts and Quick Projects
I created a variety of basswood plywood projects to learn this laser and test my settings. As I mentioned above, when learning stick with the inexpensive materials – you WILL MESS THINGS UP.
Layered Wood Christmas Ornament
I used a purchased ornament file, made a couple of changes, and even learned to cut the clear flex with the S1 with this project. If you’re looking for items to sell, non-customized layered ornaments will keep your costs down.

RELATED READING: How to Batch Process in xTool S1 (Slate Coaster Project)
Mandala Standing Christmas Tree
There were many parts to this project: wood cut front, wood cut back, two wood base pieces and my added element of the clear flex.
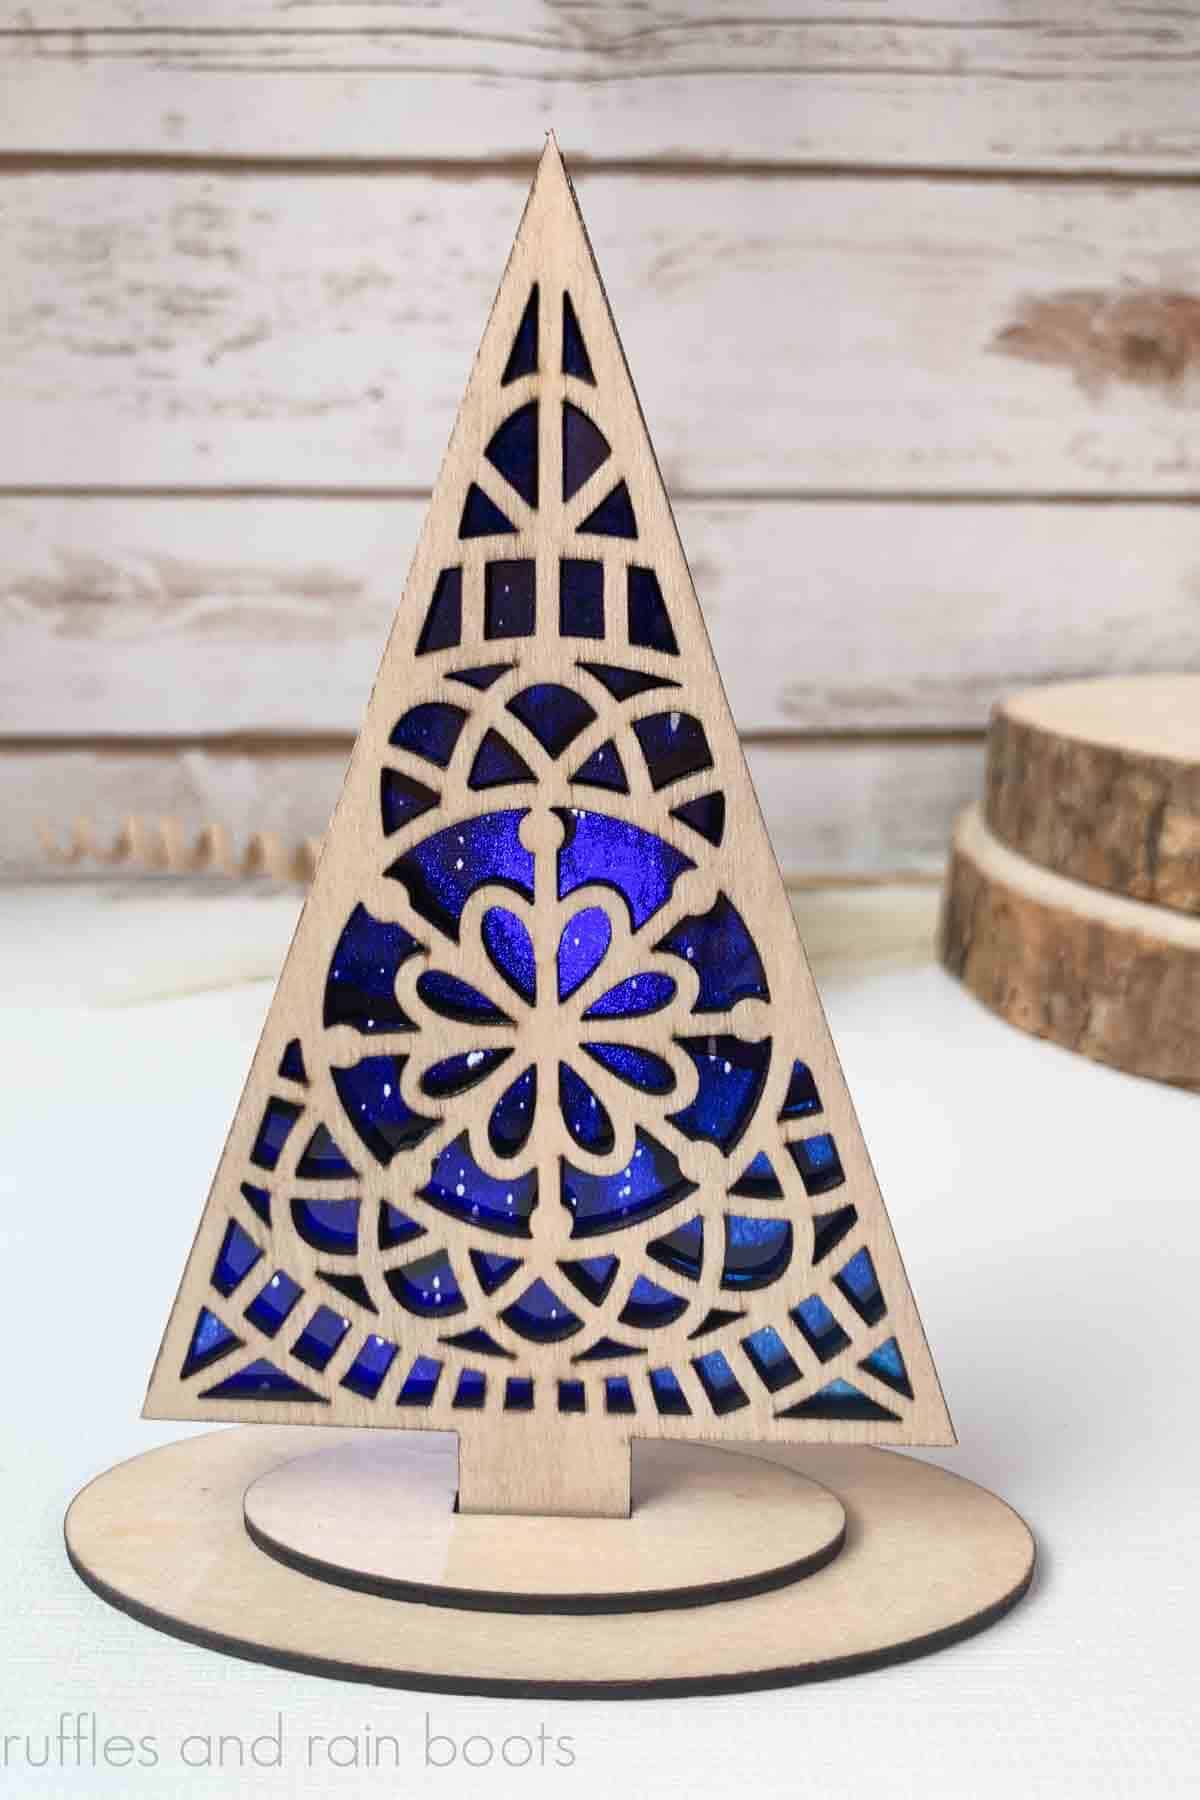
xTool S1 Basswood Plywood Cut Settings Used
– Power: 100
– Speed: 5
– Pass: 1
– LPC: 100
Dollar Tree Bamboo Cutting Boards
I conducted a fun experiment pitting the xTool S1 (40 watt) against the xTool M1 (10 watt). For some reason, I expected the processing time and results to be different – they weren’t. The S1 handles engraving very well – the dot size even allows for great details.

Layered Acrylic Keychain
Okay, this machine BLEW ME AWAY when I first cut the test run for 1/ inch acrylics. I thought it would need much more power and many more passes (I was so wrong that I burned the test grid into the bed of my laser).

xTool S1 Acrylic Cut Settings Used
– Power: 100
– Speed: 4-5
– Pass: 1 (2 for the white core light pink)
– LPC: 100
What I Would Change About the xTool S1
First, this laser blew me away and there is a lot to love about it. But as I mentioned above, I have a few pet peeves. Most are only worthy of the summary above, but if you’re considering this machine (or have it), here’s one thing you should know.
Auto-Snap to Boundary Box for Processing
Any software updates are top of my list because that affects the processing of materials. An automatic snap to center (or upper left, bottom right) of the processing area would vastly improve the functionality of the software. NOTE: in November 2023, xTool added this feature.
My workarounds until this feature is added:
- Create a shape that is the same size as the processing area after positioning (calling it the boundary box). Center the design into that rectangle, set the rectangle to ignore, and process. Ex: cutting board is 9×6, rectangle is made 9×6, positioned over the boundary box, set to ignore, and then the image is processed.
- For odd-shaped items, I put the item into the bed of the laser, take a picture of the item, and upload and ensure the correct size in the software. I turn that layer to “ignore,” position my design, and process the score, engrave, or cut functions.

What Do You Think?
Now that you’ve read my take on the xTool S1 and know that I recommend it for crafters, I’d love to hear your thoughts. If I can answer any question, please leave a comment, send me an email, or touch base on social.
Be sure to follow along as I detail each of the projects I’ve made with the S1. I’ll share settings, tips, tricks, and even my suppliers of some amazing materials.
And as always, your shares are how this site grows and I am sincerely grateful. Please consider saving this to a laser crafts pin board or share it on Facebook.
Want a Quick Read? Here are Christmas Laser Crafts to Make and Sell (in case you want to earn some extra cash with your new xTool S1 laser).

Meet the Creator
Hi there, I’m Sarah Nenni-Daher. I’m a crafty gal and always have at least 14 projects going at once. I am a crafter, designer, DIYer, and pattern maker. I share my creations here and in the Ruffles and Rain Boots® Shop.
Here at Ruffles and Rain Boots®, you’ll find DIY gnomes, crafts, gifts, cupcakes, laser crafts, and so much more. I love sharing video tutorials over on YouTube and chatting with other crafters in my Facebook groups. We’d love to have you!