
Laser Cut White Acrylic Ornament
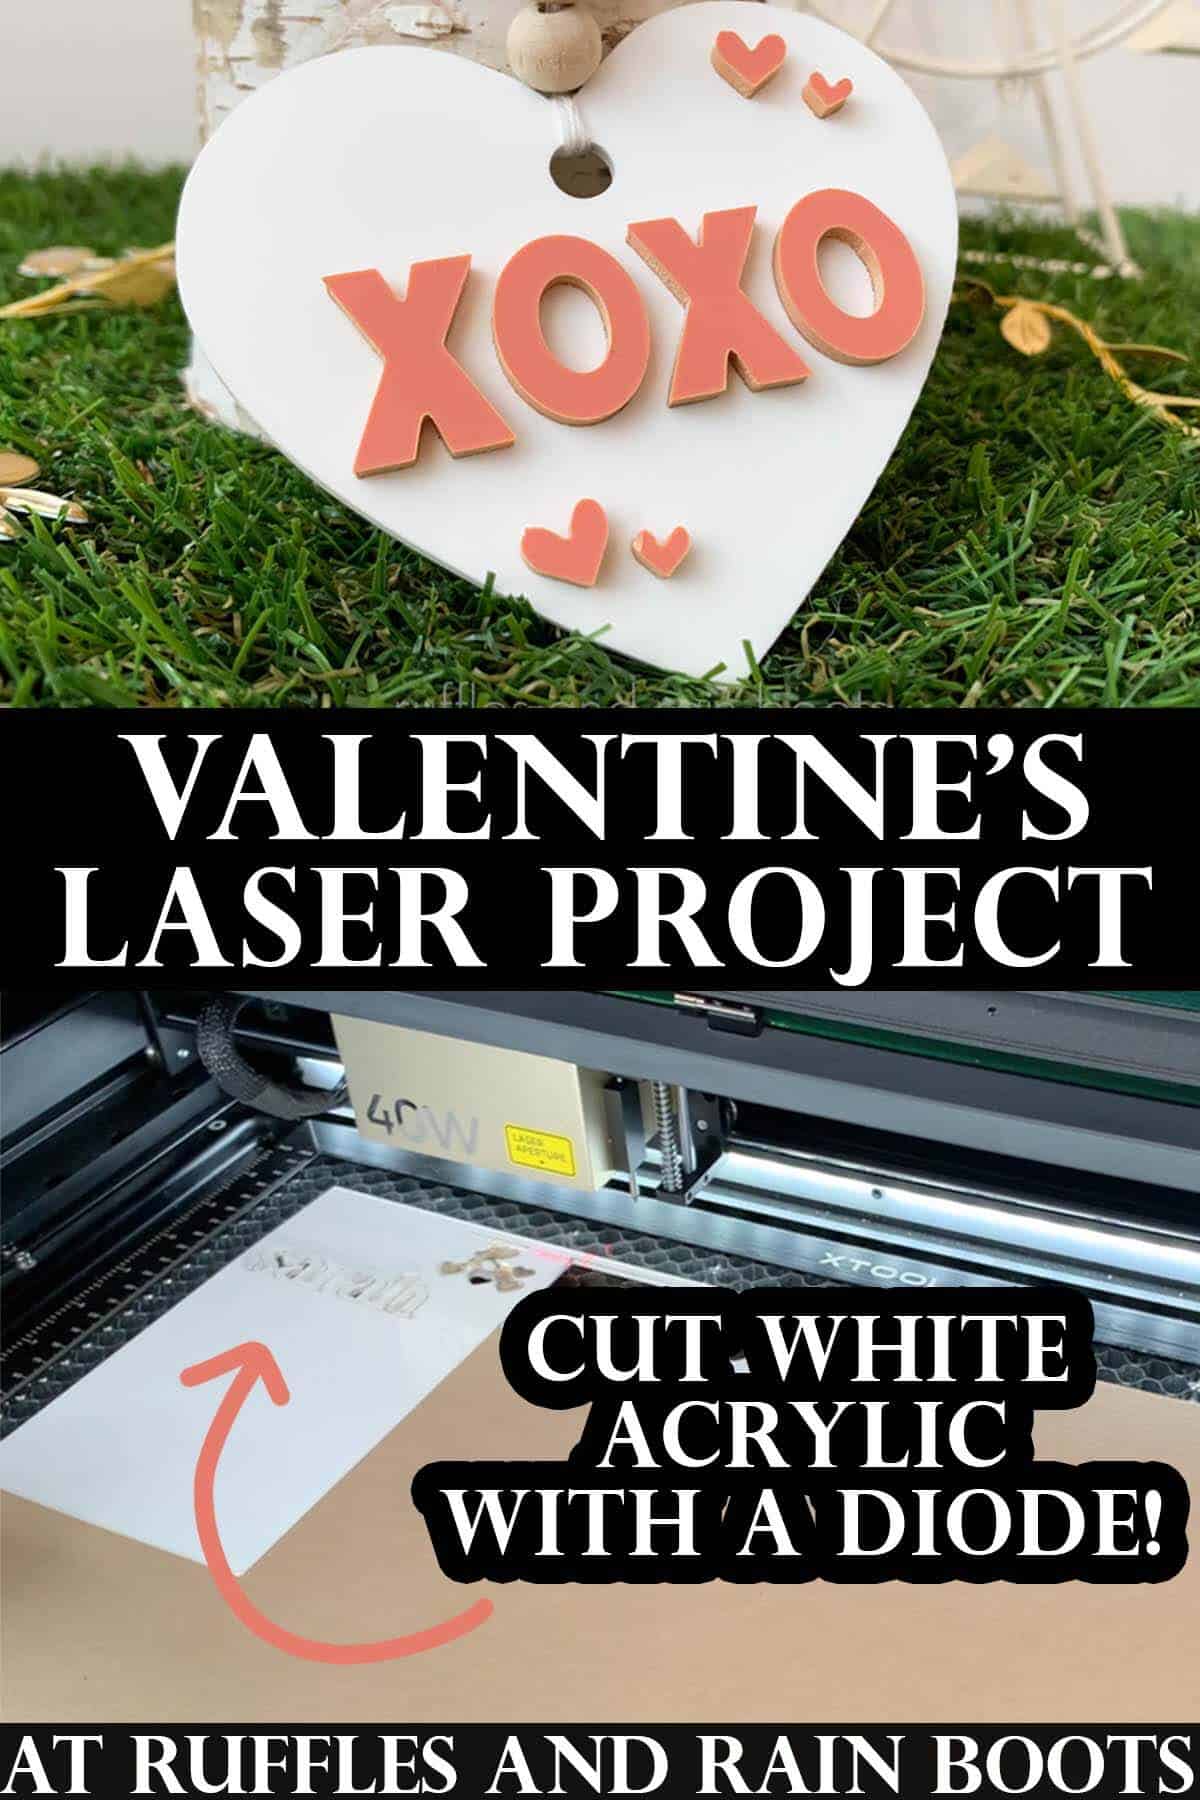
If you want to learn how to laser cut white acrylic, this ornament is perfect for Valentine’s Day. The entire project can be done in about 20 minutes using a diode laser.
Making this easy acrylic heart ornament is a great beginner diode laser project because you will learn how different materials need different handling. Make this for any holiday, any theme, and any color – just don’t shy away from white!

As an Amazon Associate, I could earn from qualifying purchases. There could be affiliate links within this article.
RELATED READING: Is the xTool S1 the Best Diode Laser? Yep, Yes, and You Bet.
What You'll Find On This Page
How to Cut White Acrylic with a Diode Laser
Here at Ruffles and Rain Boots, I am LOVING my xTool S1 40W laser. It’s a blue light laser (diode), it’s a powerful machine, and I have been pushing it to its limits.
Many people have trouble with white acrylic and I thought I’d work on testing a few suppliers AND techniques. And friends, I’m going to work to find the method with the LEAST clean up because I do enough cleaning around here.

RELATED READING: Clear Acrylic Ornament Using a Diode Laser
Still Deciding on a Laser?
I own three types of lasers right now: CO2, diode, and fiber (infrared). Below are summaries of each and suggestions on materials. If you have questions, please ask! Not all lasers are right for those looking to start a business or side hustle. If that’s you, choose the P2 or the S1.
- xTool P Series – A fully-enclosed CO2 laser, perfect for cutting acrylic and wood. This is an unrestricted laser when it comes to acrylic, wood, slate, etc. and it’s my top choice.
- xTool S1 – The option I have is a 40 watt diode laser which cuts some acrylic, wood and does amazing engravings. This laser has some acrylic restrictions (no clear, mirror, translucent; primarily opaque) but powers through wood.
- xTool M1 ULTRA – The updated version of the ground-breaking xTool M1 shows up to the party with a printer (can print on wood), a laser, a set of blades, foil, and embossing, as well as a pen tool. Great for crafters!
- xTool F2 – This dual laser is portable! It’s the best-selling, landmark setting laser that contains a diode and an infrared laser. It’s perfect to take to shows, markets, and events.
- WeCreat Vista – This is a fun tool to have if you’d like to work primarily with tumblers or wood. The patented FlipLaser design turns the laser head 90 degrees, allowing you a great tumbler engraving experience.
Should Masking Be Left On When Cutting Acrylic?
This is a question that is often asked by beginners and those new to learning how to cut acrylic with a diode laser. I tend to only leave it on with darker colors or darker cores (the inside portion of the acrylic) and remove it for all lighter acrylic colors or lighter cores. Many people remove it for everything and some never remove it.
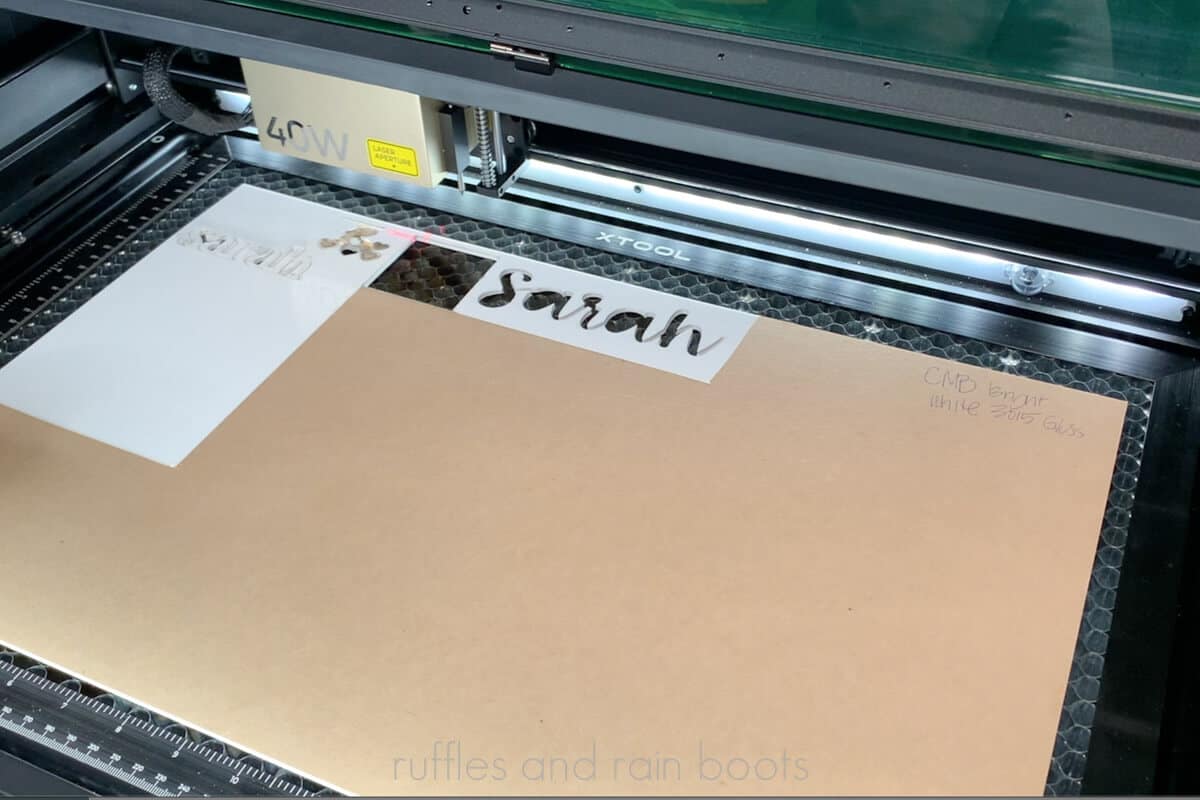
So, I decided to test the coral (a lighter core) both ways for this project – there are two sides to this heart ornament, after all. My test is to determine whether or not it makes a difference in removing the masking. Spoiler alert: here is the difference in the finished project.
Takeaway: Should you remove the masking on white or light colored acrylic before laser cutting with the xTool S1? Yes.

Materials and Tools Needed for This Project
Below are the materials I used for this fun Valentine’s Day laser project idea. I’m a HUGE fan of not having to glue small pieces, so I added the 3M adhesive backing to the coral acrylic prior to cutting – it’s one of my favorite finds.
- 1/8th White Acrylic (Glossy) (10% off coupon)
- 1/8th Matte Coral Acrylic
- 3M Adhesive Backing (LOVE this stuff)
- Twine, String, or Ribbon
- XOXO Y’all SVG (or Use Your Own)
- xTool S1 40W
- Honeycomb Panel and Pins (optional)
- Auto Air Assist (lowered to 2 on CUT function)
- File or Sand Paper
- Scissors
- Optional: Dawn Powerwash or Acrylic Cleaner and Soft Cloth for cleaning
- Optional: Sticky Mat (to help position pieces easily)
Please run a test grid with your laser on any new material. It will save you so much time, money, and frustration. :)
Valentine Laser Cut Ornament Video Tutorial
The full tutorial for this is written out below but it’s a lot of text. If you’re a visual learner, however, you’re in luck! I filmed the entire process and created this Valentine Laser Cut Ornament video.
I love sharing how well this laser works with video. If you prefer a printed, step by step tutorial without images, scroll to the bottom of this article.
RELATED READING: The xTool S1 Pin-Point Positioning™ is Unmatched!
How to Prepare Acrylic for Laser Cutting
Prepare a small section of the BACK of the coral acrylic by removing the masking and replacing it with 3M adhesive – just use scissors to cut what you need. Remove the masking on the front of the coral acrylic for the same section and set this piece aside.
Remove the front and back masking of the area you’re working with on the white acrylic. Load the acrylic onto the honeycomb, elevating slightly off the honeycomb to avoid flashback and pin down.
How to Design in XCS Software for xTool Lasers
Insert a heart at 3.25 inches wide. Create a circle at 0.25 inches, center align it about 0.2 inches away from the top peak of the heart, and use the COMBINE > Subtract function with the heart and circle selected. This creates the hole for stringing twine or ribbon.
Use the Import Image function on the top menu to insert the XOXO Y’all SVG. Remove the black layer and group, then unite the XOXO portion onto a differently colored layer than the heart – this just helps to keep things straight.

Position the hearts, unite them, and duplicate before horizontally flipping one set (mirror). Group the hearts and put them onto the layer you created for the XOXO. Group the hearts and XOXO together – do not UNITE as you cannot undo it.
NOTE: At this point, I would recommend duplicating the hearts and XOXO and run a score function on the heart. In my tests, however, the score lines were so hard to see (even at 50 power), so I skipped the score and placed them manually. Tips below.
How to Cut White Acrylic in xTool S1 40W
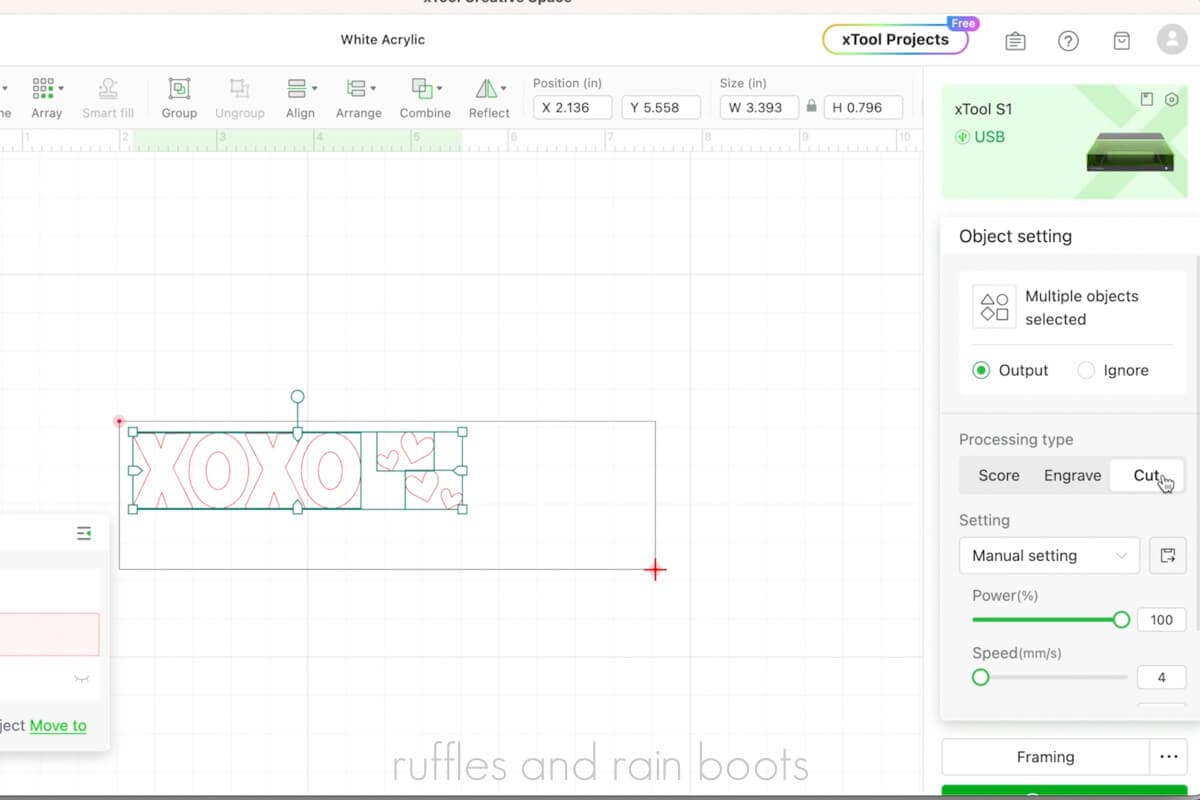
Set all layers to cut. Set the XOXO and hearts layer to IGNORE in the selected objects menu and only the heart layer to OUTPUT. You can use my settings below as a starting point, but please test your laser and this material to avoid wasting materials.
Select only the heart and input the settings into the manual function of a laser flat, user-defined material. Move the laser head / crosshairs over the white acrylic, select auto-distance measure. I absolutely LOVE the distance measuring feature of this machine.
Select Start Marking to define the process area. Choose rectangle, position the laser module to the top left-most starting point, and press the start button on the machine to lock the position. Move the laser module to the bottom right-most of the processing area and press the start button on the machine again to lock it. Select end marking.

Move the heart into the processing area you identified in the previous step. Select frame and ensure the heart is within your processing area. If using the automatic air assist, reduce to 2 for the cut function to avoid char being sent across the acrylic.
Turn on any air purifiers or inline fans (be sure to open the blast gate). Select Process, select Start in the XCS software, and then press the Start button on the S1. Let the xTool S1 cut the white acrylic into a beautiful heart.
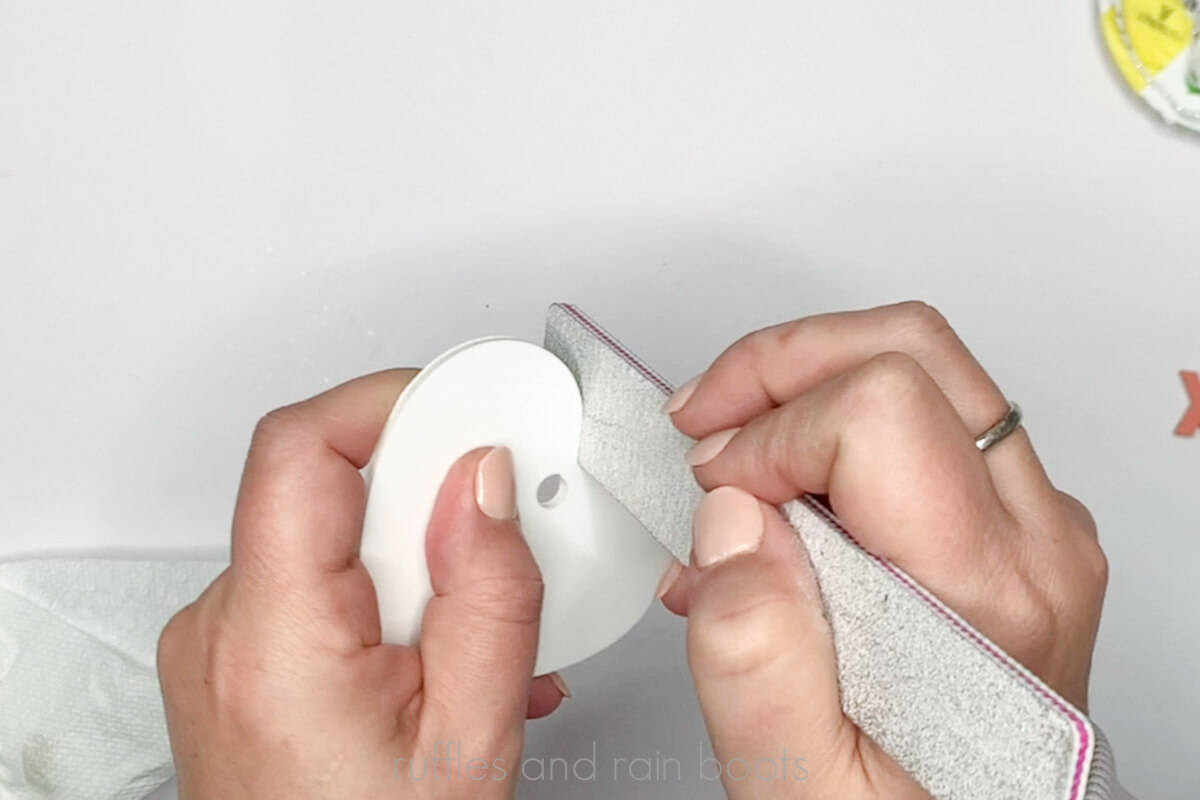
Remove the heart and white acrylic board. Note: be careful not to scratch the acrylic when removing. Clean and sand the edges, if necessary. I had a sharp point at the start / stop point of the laser and used a nail file for acrylic nails to smooth it out in just a couple of passes.
RELATED READING: The xTool M1 is the Best Laser for Crafters
How to Cut Acrylic Laser Projects in xTool S1 40W
Replace with the coral acrylic (make sure you followed the preparation step to remove the front masking and add 3M adhesive to the back of the area with which you’re working). Elevate and pin down the acrylic.
Set the heart layer to IGNORE in the selected objects menu. Set the XOXO and hearts layer to OUTPUT. Ungroup the two (hearts and XOXO) you performed earlier to allow us to position these to take up as little space as possible.
With all of the mini hearts and XOXO letters selected, set the cut settings. Repeat the distance, marking, and framing before processing the acrylic by selecting Process, Start in the XCS software, and then the Start button on the machine. Remove the coral acrylic hearts and XOXO.
How to Assemble the Valentine’s Day Ornament
First, clean up the white acrylic, if it’s needed with a bit of dish soap and a soft cloth. Make sure it is fully dry before moving on.
If you have a double-sided sticky mat, remove the protective covers and secure it to the table. If you don’t have one, just use some painters tape to create a loop and secure the white heart to the table.
Place the heart right-sides up onto the sticky mat so that the placement of the letters is on a measurement line to make things easier to line up. Without the 3M adhesive backing removed, place all pieces onto the heart.
Once satisfied with the location of the pieces, remove the backing of a single letter or heart, and place onto the white acrylic heart. Note: you do have some wiggle room with the 3M adhesive, but go slow and position all pieces onto the heart.

Cut a ribbon or string and use a lark’s head knot to create a hanger. Optional: add beads before knotting the hanger.
RELATED READING: Should You Get the xTool Screen Printer? My Review Here
XCS Material Settings for xTool S1 40W
White Acrylic, 3015 Glossy, 1/8th: Cut – 90/3/3 (very slight raised bubble edge on front; barely noticeable; very lightly sanded the start/stop point and around the outside of the heart)
Coral Acrylic, 1/8: Cut – 100/4/1 (no sanding); note: my tests had 100/4/2 as cleaner but with small pieces like this, the problem is that it will cut after one and potentially burn when it drops

Notes on the White, 3015 Glossy, 1/8th Settings Attempted
- 85/2/2 – check for a raised bubble edge on the front that went about 1/16th in from the edge; I had one so can’t use this)
- 85/1/2 – less bubble edge but SO SLOW
- 90/2/2 – again, had a bit of that bubble edge so this wasn’t ideal for me
- 90/3/2 – if your laser runs hot (hotter than mine), try this; I had to pop it out and one of the edges was very jagged
RELATED READING: Glowforge Aura vs xTool M1 Laser
Please Save or Share This Beginner Laser Project Idea
Your shares are how this site grows and I am sincerely grateful. Please save this Valentine’s Day laser idea to a laser crafts pin board or share it with a crafty group on Facebook.
How to Cut White Acrylic for a Valentine Ornament

Learn how to cut white acrylic with a diode laser to make a beautiful beginner laser Valentine ornament. This quick beginner laser tutorial is a good way to learn your diode laser can cut white acrylic and why you should take the masking off some acrylic and leave it on others.
Materials
- White Acrylic Glossy (link above)
- Matte Coral Acrylic 1/8th
- 3M Adhesive Backing
- Twine, String, or Ribbon
- XOXO Y’all SVG (or Use Your Own)
Tools
- xTool S1 40W
- Honeycomb
- Auto Air Assist (lowered to 2 on CUT function)
- File or Sand Paper
- Scissors
- Optional: Dawn Powerwash or Acrylic Cleaner and Soft Cloth for cleaning
- Optional: Sticky Mat (to help position pieces easily)
Instructions
Preparation
- Prepare a small section of the BACK of the coral acrylic by removing the masking and replacing it with 3M adhesive. Remove the masking on the front if the core of the coral acrylic is light.
- Remove the front and back masking of the AREA you’re working with on the 3015. Load the acrylic onto the honeycomb, elevating slightly off the honeycomb to avoid flashback and pin down.
How to Design in XCS Software for xTool Lasers
- Insert a heart at 3.25 inches wide. Create a circle at .25 inches, center align it about .25 inches away from the top peak of the heart, and use the COMBINE > Subtract function with the heart and circle selected. This creates the hole for stringing twine or ribbon.
- Use the Import Image function on the top menu to insert the XOXO y’all SVG. Remove the black layer and group, then unite the XOXO portion onto a differently colored layer than the heart - this just helps to keep things straight.
- Position the hearts and duplicate, if desired. Group, then unite the hearts and put them onto the layer you created for the XOXO or another. Again, this is just to keep things straight while you’re learning to design in the XCS software. Group the hearts and XOXO together.
How to Cut White Acrylic in xTool S1 40W
- Set all layers to cut. Set the XOXO and hearts layer to IGNORE selected objects menu and the heart to cut. You can use my settings below as a starting point, but do test your laser and this material prior in order to avoid wasting materials.
- Select only the heart and input the settings into the manual function of a laser flat, user-defined material. Move the laser head / crosshairs over the white acrylic, select auto-distance measure.
- Select Start Marking to define the process area. Choose rectangle, position the laser module to the top left-most starting point, and press the start button on the machine to lock the position. Move the laser module to the bottom right-most of the processing area and press the start button on the machine again to lock it. Select end marking.
- Move the heart into the processing area you identified in the previous step. Select frame and ensure the heart is within your processing area. Select Process, select Start in the XCS software, and then press the Start button on the S1. Remove the heart and white acrylic board.
- How to Cut Coral Acrylic in xTool S1 40W
- Replace with the coral acrylic (Make sure to remove the front masking and that 3M adhesive is on the back of the area with which you’re workingp). Elevate and pin down the acrylic.
- Set the heart layer to IGNORE in the selected objects menu. Set the XOXO and hearts layer to OUTPUT. Ungroup the two (hearts and XOXO) you performed earlier to allow us to position these to take up as little space as possible.
- With all of the mini hearts and letters selected, set the cut settings to 100/4/1. Repeat the distance, marking, and framing before processing the acrylic by selecting Process, Start in the XCS software, and then the Start button on the machine. Remove the coral acrylic hearts and XOXO.
- How to Assemble the Valentine’s Day Ornament
- First, clean up the white acrylic, if needed. Make sure it is fully dry before moving on. If you have a double-sided sticky mat, remove the protective covers and secure it to the table. If you don’t have one, just use some painters tape to create a loop and secure it to the table.
- Place the heart right-sides up onto the sticky mat so that the placement of the letters is on a measurement line to make things easier to line up. Without the 3M adhesive backing removed, place all pieces onto the heart.
- Once satisfied with the location of the pieces, remove the backing of a single letter or heart, and place onto the white acrylic heart. Note: you do have some wiggle room with the 3M adhesive, but go slow and position all pieces onto the heart.
- Cut a ribbon or string and use a lark’s head knot to create a hanger.
Notes
White Acrylic, 3015 Glossy, 1/8: Cut - 90/3/3 (very slight raised bubble edge on front; barely noticeable; very lightly sanded the start/stop point and around the outside)
Coral Acrylic, 1/8: Cut - 100/4/1 (no sanding, ready to go after masking removed); note: my tests had 100/4/2 as cleaner but with small pieces like this, the problem is that it will cut after one and potentially burn when it drops
Meet the Creator
Hi there, I’m Sarah Nenni-Daher. I’m a crafty gal and always have at least 14 projects going at once. I am a crafter, designer, DIYer, and pattern maker. I share my creations here and in the Ruffles and Rain Boots® Shop.
Here at Ruffles and Rain Boots®, you’ll find DIY gnomes, crafts, gifts, cupcakes, laser crafts, and so much more. I love sharing video tutorials over on YouTube and chatting with other crafters in my Facebook groups. We’d love to have you!