
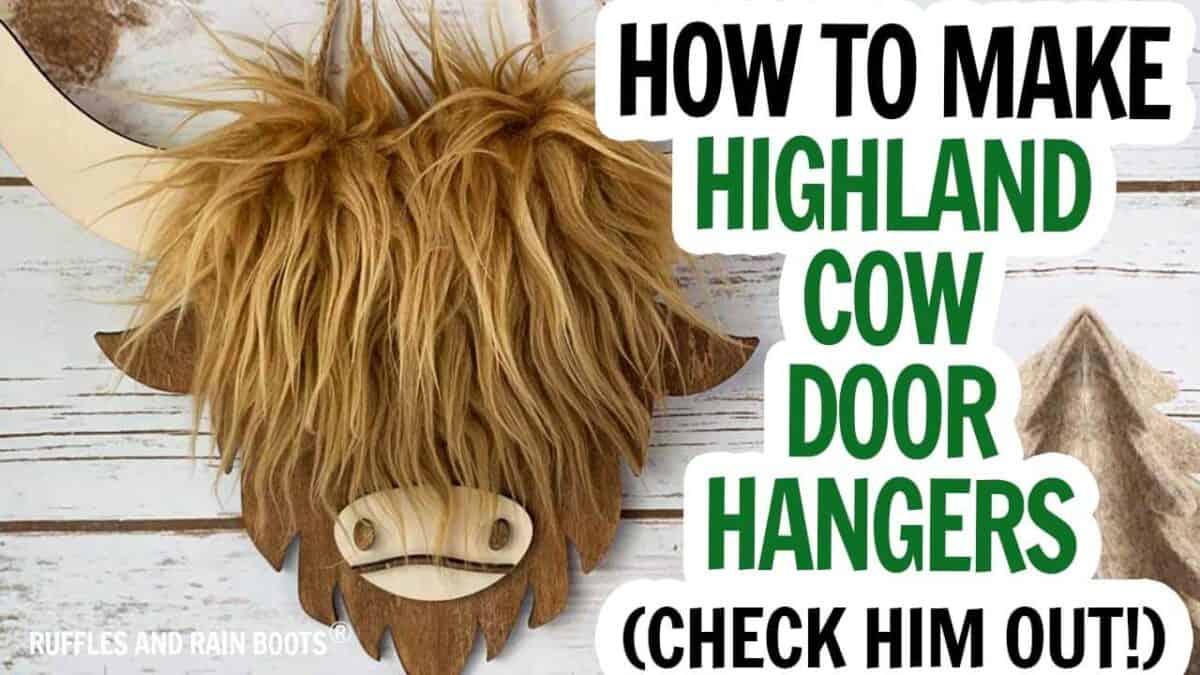
DIY Highland Cow Door Sign
Today I created a highland cow door hanger with a bit of plywood, faux fur, and a twine hanger. The highland cow SVG can be used for this project, ornaments, or any number of fun cutting machine or laser crafts.
You can make this with a laser, Cricut or other cutting machine, or even by hand if you’ve got the power tools handy. This project is so quick to come together and can be made with a ton of materials you might have on hand.

RELATED READING: xTool M1 – The Best Craft Room Laser
What You'll Find On This Page
Highland Cow Door Hanger
Here at Ruffles and Rain Boots, I have been thinking on something for a good year now. While house hunting, every.single.house we went into here in Texas had some of kind of cow art.
Cow painting? Yes. Photographs of cows? Yes. Highland cows? Yep. Baby highland cows? Yeah, those are my favorite.
But back to my thinking… Now that we’ve been here in Texas a year, I figured it was time for some cow art of our own. So today I made this adorable highland cow SVG and the cutest door hanger!
RELATED READING: Highland Cow SVG Ornament with Santa Hat
If you love this project but can’t get started on it now, save this to a DIY crafts pin board or share it on Facebook. Either way will make it easy to find when you’re ready to begin.

As an Amazon Associate, I could earn from qualifying purchases. There could be affiliate links within this article.
RELATED READING: Glowforge Aura vs xTool M1 – Which is Better?
Deciding on a Laser or Wanting to Start a Laser Business?
I own three types of lasers right now: CO2, diode, and fiber (infrared). Below are summaries of each and suggestions on materials. If you have questions, please ask! Not all lasers are right for those looking to start a business or side hustle. If that’s you, choose the P2 or the S1.
- xTool P Series – A fully-enclosed CO2 laser, perfect for cutting acrylic and wood. This is an unrestricted laser when it comes to acrylic, wood, slate, etc. and it’s my top choice.
- xTool S1 – The option I have is a 40 watt diode laser which cuts some acrylic, wood and does amazing engravings. This laser has some acrylic restrictions (no clear, mirror, translucent; primarily opaque) but powers through wood.
- xTool M1 ULTRA – The updated version of the ground-breaking xTool M1 shows up to the party with a printer (can print on wood), a laser, a set of blades, foil, and embossing, as well as a pen tool. Great for crafters!
- xTool F2 – This dual laser is portable! It’s the best-selling, landmark setting laser that contains a diode and an infrared laser. It’s perfect to take to shows, markets, and events.
- WeCreat Vista – This is a fun tool to have if you’d like to work primarily with tumblers or wood. The patented FlipLaser design turns the laser head 90 degrees, allowing you a great tumbler engraving experience.
Supplies for This Beginner Laser Project
Because I was making this with my xTool M1 laser cutter, engraver, and blade cutting machine, I used plywood. If you’re working with a cutting machine (like a Cricut or Silhouette), you’ll need to use a thinner balsa wood or veneer and layer it.
For this project, I used:
- xTool M1 / M1 Ultra (the best crafter’s laser)
- 3mm Basswood Plywood
- Faux Fur (link below)
- Antique Wax in Brown and White
- Wood Glue and Gorilla Glue
- Staple Gun and 8mm Staples (for the hanger)
- Twine

Highland Cow Door Hanger Video Tutorial
Over the years, I’ve embraced visual learning. If you are creating a playlist of projects or learn best visually, watch the step by step highland cow door hanger tutorial.
RELATED READING: Easy Summer Door Hanger with Free Flamingo SVG
How to Make a Door Hanger of a Highland Cow
Below are the step by step instructions for this fun beginner laser craft project. Keep this page open and follow along, using the comments section for questions.
If you prefer a printable tutorial without images, scroll down. Select the print button and save as a PDF or send to a printer.
Step 1: Size and Cut the Highland Cow Pieces
Upload the design into the software of your choice, size, and cut. You can also print off the PNG files and cut this by hand. See “Note 2” below.

Step 2: Size and Cut the Faux Fur Topper
On the back of the faux fur, trace the top edge of the highland cow head. Drop the bottom down to just above snout (keep in mind the faux fur pile will hang down).

Step 3: Prepare the Faux Fur
Glue down the top edge of the faux fur piece and set aside. This makes the back look as finished as the front.

Step 4: Paint or Stain Each Piece of the Door Hanger
Clean up the edges (I dry wipe mine) and paint or stain the horns, snout and face pieces, along with the base. Add a second coat, if desired, and then let dry and seal.

Step 5: Glue Components Together
Use a combination of super glue and wood glue to adhere the horns to the base piece. Use the same combination to combine the nostrils, smirk, and snout pieces together and then adhere the snout onto the base.

Step 6: Staple on the Hanger
Tie a piece of twine into knots at either end for the hanger. Turn the piece over and use the staple gun just above the knot to adhere the hanger to the back of the base piece.

Step 7: Add the Faux Fur Topper to the Highland Cow Sign
Flip the base back over and adhere the faux fur topper to the front of the base piece, taking care to pull it up and over the edge so it looks seamless. Pull the twine hanger to either side of the fur topper for a clean look.

More Projects You Might Like
- Highland Cow Plush / Highland Cow Gnome Tutorial – You can learn to make a highland cow three ways using this free pattern and highland cow tutorial.
- xTool Screen Printer Review and Project Ideas – If you want to have a lot of fun in your craft room or small business, check out this fun find.
- DIY Wine Charms – Use wood, acrylic, or vinyl to create these fun wine glass charms.
- Laser Cut Wooden Bookmarks for Christmas – Use the SVG bundle to create three different wooden Christmas bookmarks.
Please Save or Share This xTool M1 Project Idea
Have you joined the Laser Group on Facebook yet? It’s a welcoming, friendly, and open space to get ideas, ask questions, and learn from our peers.
Your shares are how this site grows and I’m so very grateful. Save this to a DIY Cricut craft ideas pin board or share it to Facebook.

How to Download the Highland Cow SVG for Cricut, Lasers, +
Add this highland cow SVG set here your cart and use the coupon moocow23. Once you add the digital download to your cart, add some more items (free or premium SVGs), and checkout – it’s as simple as that. The commercial use license will be provided for your records in the download.
Highland Cow Door Hanger

Use this adorable highland cow SVG set to create the cutest, fuzziest highland cow door hanger with a fur accent and twine hanger. Built to last, this fun beginner laser project walks you through the step by step process and even includes a laser door hanger video tutorial. Download the cute highland cow cut file set, upload and size to your laser bed or door size, and you're halfway done.
Materials
- Highland Cow SVG free with coupon moocow23
- Basswood Plywood (2, 12x12 inch Sheets)
- Faux Fur (I used this light brown)
- White and Brown Stain
- Sealant (I use this in matte)
- Twine
- Wood Glue
- Super Glue (I use this - LOVE it)
- 5/16" Staples (2)
- Baby Wipe and Microfiber Cloth
Tools
- xTool M1 / M1 Ultra Laser
- Pen
- X-Acto Knife
- Hot Glue Gun (optional)
- Scissors
- Staple Gun
Instructions
- Upload the design into the software of your choice, size, and cut. You can also print off the PNG files and cut this by hand. See "Note 2" below.
- On the back of the faux fur, use the pen to trace the top edge of the highland cow head. Drop the bottom down to just above snout (keep in mind the faux fur pile will hang down). Cut it out.
- Glue down the top edge of the faux fur piece with hot glue (or other) and set aside.
- Using the dry cloth, clean up the edges and paint or stain the horns, snout and face pieces, along with the base. Let dry and seal.
- Use a combination of super glue and wood glue to adhere the horns to the base piece. Use the same combination to combine the nostrils, smirk, and snout pieces together and then onto the base.
- Tie a piece of twine into knots at either end of the hanger. Turn the piece over and use the staple gun just above the knot to adhere the hanger to the back of the base piece.
- Flip the base back over and adhere the faux fur topper to the base piece, taking care to pull it up and over the edge so it looks seamless.
Notes
- If using a laser, run a test cut on your material to find your laser's optimal settings for the desired material.
- Using the xTool M1 10 watt, I cut the basswood plywood at power 100, speed 5, and 1 pass.

Hi, the design mentioned en shown in the video is different than the one you receive when you purchase it. Where can I find the right design?
The design is the exact same as linked in the video – there is a cow with a Santa hat for a different project, but this design is linked here and in the video.