
Gnome with a Face 3 Ways
This gnome with a face can be made 3 ways–and it’s SO CUTE! A perfect little Christmas gnome, you CAN have a gnome with a face and a fluffy beard, too!

What You'll Find On This Page
Gnome with a Face
Here at Ruffles and Rain Boots, we have built-up quite the DIY gnome collection. To be honest, I think that my gnome-making days are just starting, though. They’re so fun to make, gnomes make perfect little gifts and they’re cheap. Seriously, Scandinavian Christmas gnomes are just an all-around great craft.
RELATED READING: BEST CHRISTMAS GNOME TUTORIALS FOR TOMTE MAKING
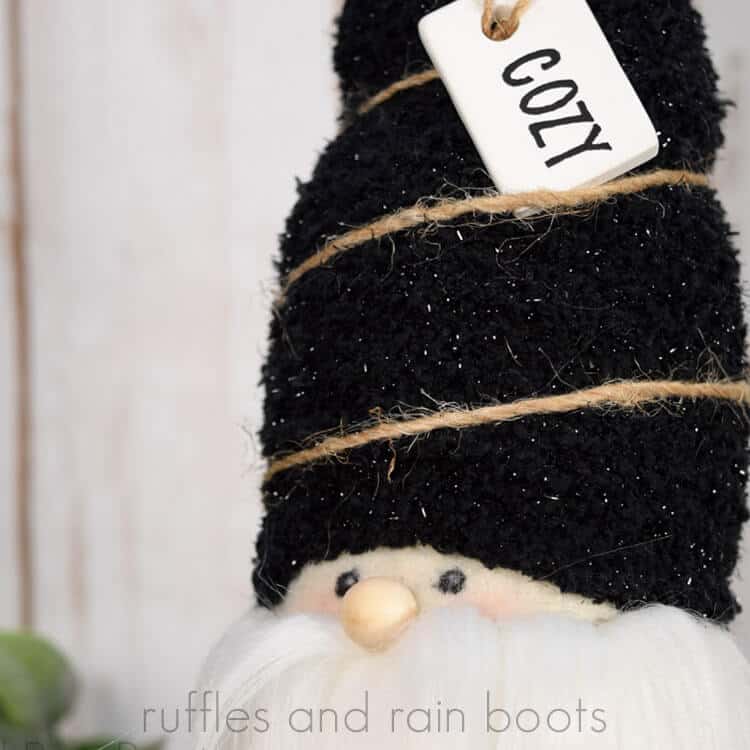
Let’s take this Swedish gnome, for example. He took about 20 minutes for me to make, he’s a gnome with a face (which is SO AWESOME–and also my first one with a face, by the way) and he’s going to find a new home with my friend as a Christmas decoration in a few days as a housewarming gift. How fun!
And did I mention that it only took me 20 minutes?! If you’re ready to make a farmhouse gnome you’ll love, let’s get started.
DIY Christmas Gnome Tutorials
If you’re looking for the best DIY Christmas gnome tutorials, you have come to the right place. Check out all of my favorite tomte tutorials for the holidays!
No Time to Make This Now? Pin it for Later
You’re busy, I get it. Pin this to your favorite Christmas DIY ideas board on Pinterest and it’ll be here for when you’re ready.

As an Amazon Associate, I can earn from qualifying purchases.
Tips to Make a Farmhouse Christmas Gnome
- If you’re cutting faux fur for the first time–or the hundredth, but you’ve always hated how it cuts and you’re not happy with it…well, I have a trick for you. Flip the fur over and, with a razor blade or exacto knife, cut through only the fabric. When you pull it away, the fur will be intact, long and luxurious!
- I have a little secret: I got most of the supplies for this gnome from the dollar store. Don’t feel like you have to spend a ton on your gnome projects. There’s no reason for it to be expensive.
- Gnome noses are often the best part of a gnome. I mean, they’re just cute and all, well, cute. So, I take a lot of care in–eh, really, I rely on making gnome noses by just grabbing what I have on hand. Today, for this gnome, it was a wooden bead. In the past, I’ve also used polymer clay, a ball of fabric, some beads. Whatever I have on hand usually works.
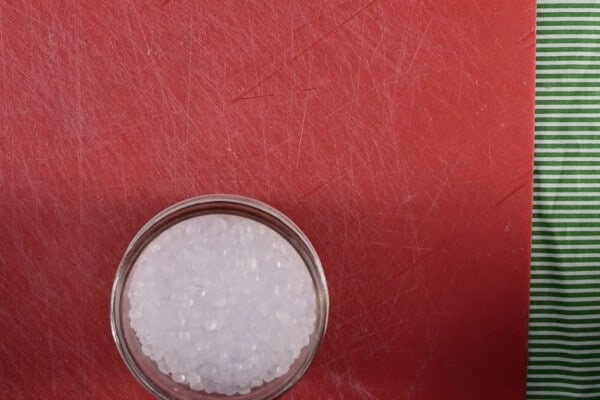
- I used polyfill beads for weighing my gnome’s bottom down for this particular gnome. But you can use rice, beans, sand, rocks, whatever. Just something weighty so your gnome doesn’t keep falling over–that’s annoying.
How Do I Make this Gnome with a Face?
I’m so glad you asked. Below is our written tutorial. If you’re making a DIY Christmas crafts playlist on YouTube, here is our gnome with a face video tutorial.
First, fill the bottom of the sock with poly beads (between 1/4 and 1/2 cup). Be sure to check the notes below and the full video for tips.
Determine your desired height and generously stuff the sock with polyfill. Squeeze the body to make sure the fill is distributed and solid.

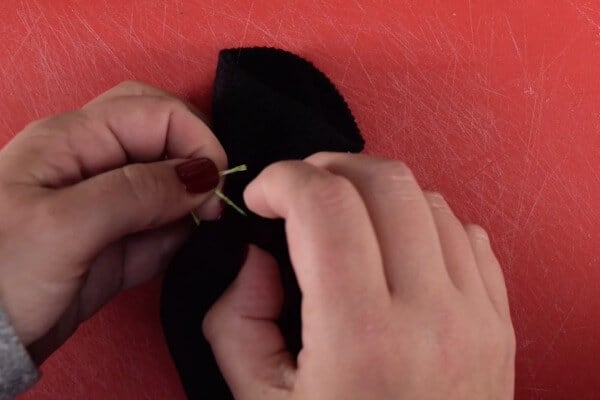
Tie off the top with twine or string and set the body aside. The body of my gnome with the tied section is 9 inches high.
Determine the length of arms (if you are adding arms) and cut the coordinating fabric to that length. Note: there will be a portion of the arms tucked under the hat because they are placed higher on the body, so add 2 inches to accommodate. My fabric arms are 5 inches (though only 3 inches show on the complete gnome. I used a previously cut piece of fabric and “hot glue hemmed” one side (this is the side for the bead hand).
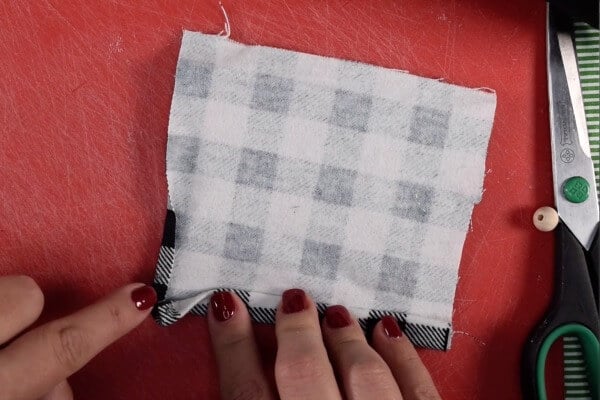
Turn the fabric and fold over twice (gluing in between for stability) the desired width of arm, leaving a small amount of the hemmed section UNGLUED to accommodate the wood bead hand. Glue in the wood bead hand. Repeat for the second arm. Please see the full video if this is unclear.

Position the hands how you want them (I chose to make them long enough that they could join together if needed) and glue them the top inch onto the sock gnome body.
Cut the faux fur after measuring where you would like it to start and fall on your gnome. I cut a triangle at 3 inches high (in the center point) and about 6 inches (at the widest point). See the video if you’re new to cutting faux fur, as how you measure and cut does matter for the final product.

If you want a puffy mustache and a face that looks “set back” as I’ve done here, fold back the top of the fur (the widest section) and glue down about 1/4 of an inch. This will allow you to create this look and still part a mustache. Do not glue the fur to the gnome yet.
Position your fur (below the arms) and measure the face portion – you will need to cover from arm to arm in felt. I cut a rounded off shape, however, this was unnecessary and you can just use a rectangle. See the video tutorial for clarification. Glue the face onto the body. Glue the fur onto the body with the top of the fur just covering the bottom of the felt.

Slide on the decorative sock for the gnome hat over the tied portion of the body. Tug and pull until you have it covering the arms and the beard, leaving a portion of felt open for the face. Glue it down on either side above the arms (but near the beard as we want it to cover the top edge). Glue the sock down just over the top of the felt so it does not move around and cover the face.

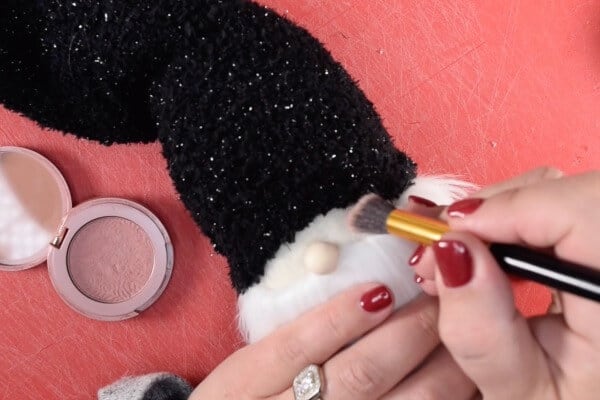
Create the gnome face by parting the fur in the center of the gnome and gluing on a bead for the nose. Using a small brush and blush, add cheeks to either side of the nose. Use the paint pen to create black dots for eyes. Once dry, add a small white dot in the upper right section of the black dot to create a reflection.
Flip the gnome over and glue down the back of the hat, making sure the full face is still showing. Finish the hat however you would like – I cut off the excess, made a “hem” from hot glue, and tied the end with a piece of twine.
Use the bottom of the sock you cut off (or a different color one) and position it over the bottom of the gnome, covering the less-decorative ankle sock. Glue it in place.
Drop the gnome on the table and let it settle. Use a small pair of scissors to remove any sock drop-over from the face area. This will make your gnome look polished and finished.
Decorate the hat. I’ve shown three ways in the video (with twine and clay message tag, with a wintry look, and with the garland and berries).

Notes:
- The easiest way I’ve found to fill a sock with no mess is to place a small jar or cup with the weighted items (we use poly beads) on the table. Place the sock around. the jar and flip the entire thing over to fill.
- Make a trio of gnomes different sizes (varying the poly fill amount) and the hat details for a fun mantle decoration.
- Use beads for eyes to vary the look – tiny black balls look adorable.
Creativity, Delivered
Would you like inspiration delivered right to you each week? Sign up for the once-weekly Ruffles and Rain Boots newsletter and you’ll get that and more! Get access to the exclusive libraries full of free SVGs, hand lettering practice, and so much more.
More Easy Gnome Tutorials You Might Like
- How to Make a Sock Gnome – If you’re looking for the easiest kind of sock to make, you have to check out this quick tutorial–breaks it down in digestible bites!
- Dollar Store Gnome Tutorial – Making gnomes has never been cheaper–and quicker than this gnome tutorial.
- DIY Farmhouse Gnome – One of the most epic gnomes you’ll ever see–it’s simple, fun and VERY easy.
Please Save This to Pinterest
Your shares are how this site grows and I am sincerely grateful. Know a friend who’d like this? Please share it on Facebook or save it to your favorite Christmas crafts board on Pinterest.

Gnome with a Face

This adorable gnome with a face is a perfect addition to any Christmas decor. We use a no-sew method to create this gnome and three ways to decorate this cutie!
Materials
- 1 ankle sock (or tall sock)
- 1 fuzzy sock (can use multiple)
- faux fur for the gnome beard
- felt for the face (I used a light cream to offset the white fur)
- bead for the nose
- poly fill
- poly beads (or something to help weigh down the gnome)
- string or twine
- Optional, if making arms: fabric and small beads for hands
- decorations (garland, tags, twine, fur accents, etc.)
Tools
- blush and small applicator or brush
- paint pen in black and white (for eyes); can also use a small black bead
- scissors and a razor blade (or other straight blade)
- hot glue gun and sticks
- optional (brush to style fur)
Instructions
- Fill the bottom of the sock with poly beads (between 1/4 and 1/2 cup). Be sure to check the notes below and the full video for tips.
- Determine your desired height and generously stuff the sock with polyfill. Squeeze the body to make sure the fill is distributed and solid.
- Tie off the top with twine or string and set the body aside. The body of my gnome with the tied section is 9 inches high.
- Determine the length of arms (if you are adding arms) and cut the coordinating fabric to that length. Note: there will be a portion of the arms tucked under the hat because they are placed higher on the body, so add 2 inches to accommodate. My fabric arms are 5 inches (though only 3 inches show on the complete gnome. I used a previously cut piece of fabric and “hot glue hemmed” one side (this is the side for the bead hand).
- Turn the fabric and fold over twice (gluing in between for stability) the desired width of the arm, leaving a small amount of the hemmed section UNGLUED to accommodate the wood bead hand. Glue in the wood bead hand. Repeat for the second arm. Please see the full video if this is unclear.
- Position the hands how you want them (I chose to make them long enough that they could join together if needed) and glue them the top inch onto the sock gnome body.
- Cut the faux fur after measuring where you would like it to start and fall on your gnome. I cut a triangle at 3 inches high (in the center point) and about 6 inches (at the widest point). See the video if you’re new to cutting faux fur, as how you measure and cut does matter for the final product.
- If you want a puffy mustache and a face that looks “set back” as I’ve done here, fold back the top of the fur (the widest section) and glue down about 1/4 of an inch. This will allow you to create this look and still part a mustache. Do not glue the fur to the gnome yet.
- Position your fur (below the arms) and measure the face portion - you will need to cover from arm to arm in felt. I cut a rounded off shape, however, this was unnecessary and you can just use a rectangle. See the video tutorial for clarification. Glue the face onto the body. Glue the fur onto the body with the top of the fur just covering the bottom of the felt.
- Slide on the decorative sock for the gnome hat over the tied portion of the body. Tug and pull until you have it covering the arms and the beard, leaving a portion of felt open for the face. Glue it down on either side above the arms (but near the beard as we want it to cover the top edge). Glue the sock down just over the top of the felt so it does not move around and cover the face.
- Create the gnome face by parting the fur in the center of the gnome and gluing on a bead for the nose. Using a small brush and blush, add cheeks to either side of the nose. Use the paint pen to create black dots for eyes. Once dry, add a small white dot in the upper right section of the black dot to create a reflection.
- Flip the gnome over and glue down the back of the hat, making sure the full face is still showing. Finish the hat however you would like - I cut off the excess, made a “hem” from hot glue, and tied the end with a piece of twine.
- Use the bottom of the sock you cut off (or a different color one) and position it over the bottom of the gnome, covering the less-decorative ankle sock. Glue it in place.
- Drop the gnome on the table and let it settle. Use a small pair of scissors to remove any sock drop-over from the face area. This will make your gnome look polished and finished.
- Decorate the hat. I’ve shown three ways in the video (with twine and clay message tag, with a wintry look, and with the garland and berries).
Notes
For more gnome tutorials visit Ruffles and Rain Boots.
- The easiest way I’ve found to fill a sock with no mess is to place a small jar or cup with the weighted items (we use poly beads) on the table. Place the sock around. the jar and flip the entire thing over to fill.
- Make a trio of gnomes different sizes (varying the poly fill amount) and the hat details for a fun mantle decoration.
- Use beads for eyes to vary the look - tiny black balls look adorable.
Recommended Products
As an Amazon Associate and member of other affiliate programs, I earn from qualifying purchases.


I’m looking for a gnome pattern is that short and round and the fur goes all around the gnome. I’ve seen some on Etsy and they are cute. Tired to add a picture but could not. Thank you for responding with instructions.
Many of my styles are offered by Etsy sellers, however, I’m unsure of what you’re looking for. Most of my patterns can have gnomes with wrap-around beards. You can email me the image ([email protected]), however, if I don’t have a tutorial for it, I’d urge you to support the artist.
– No Sew Sachet Gnome https://rufflesandrainboots.com/sachet-mini-gnome-tutorial/
– Sock Gnome with Large, Slouchy Hat: https://rufflesandrainboots.com/buffalo-check-fall-sock-gnome/
– Wrap Around Shelf Sitter: https://rufflesandrainboots.com/fall-shelf-sitter-gnome-pattern/