
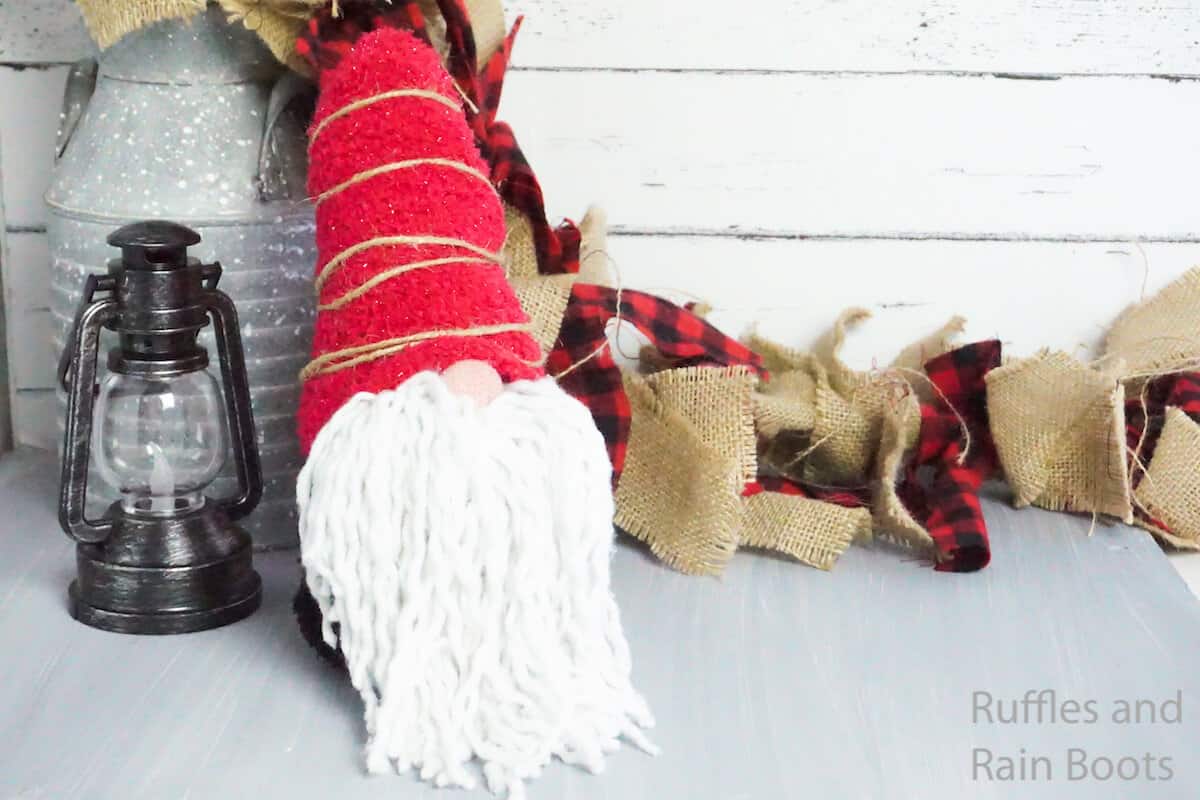
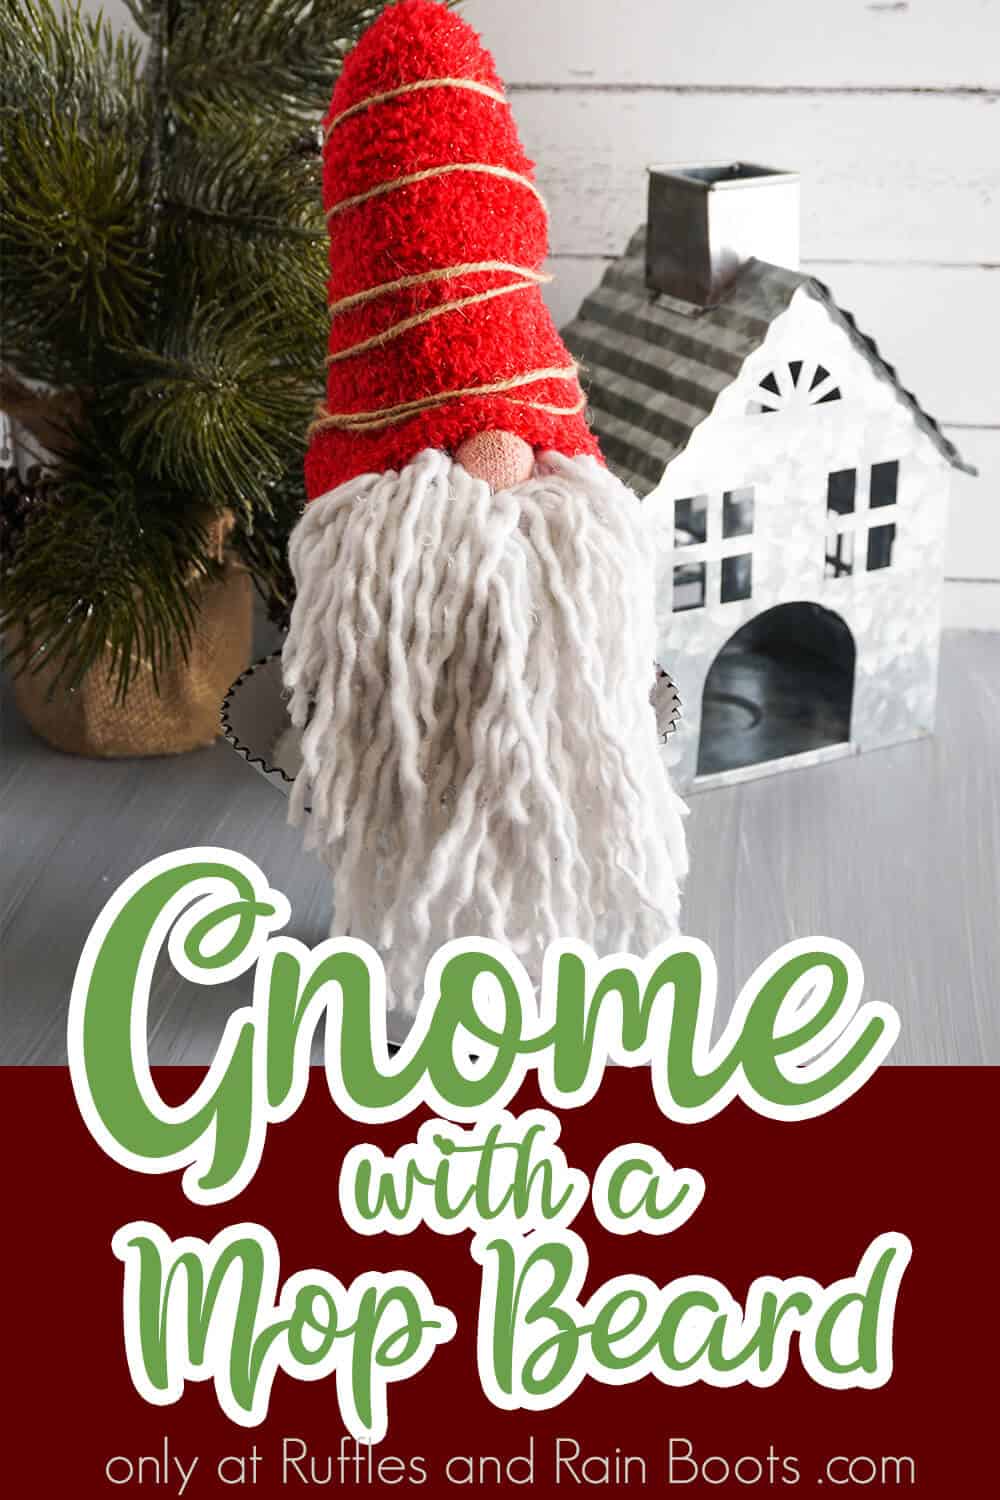
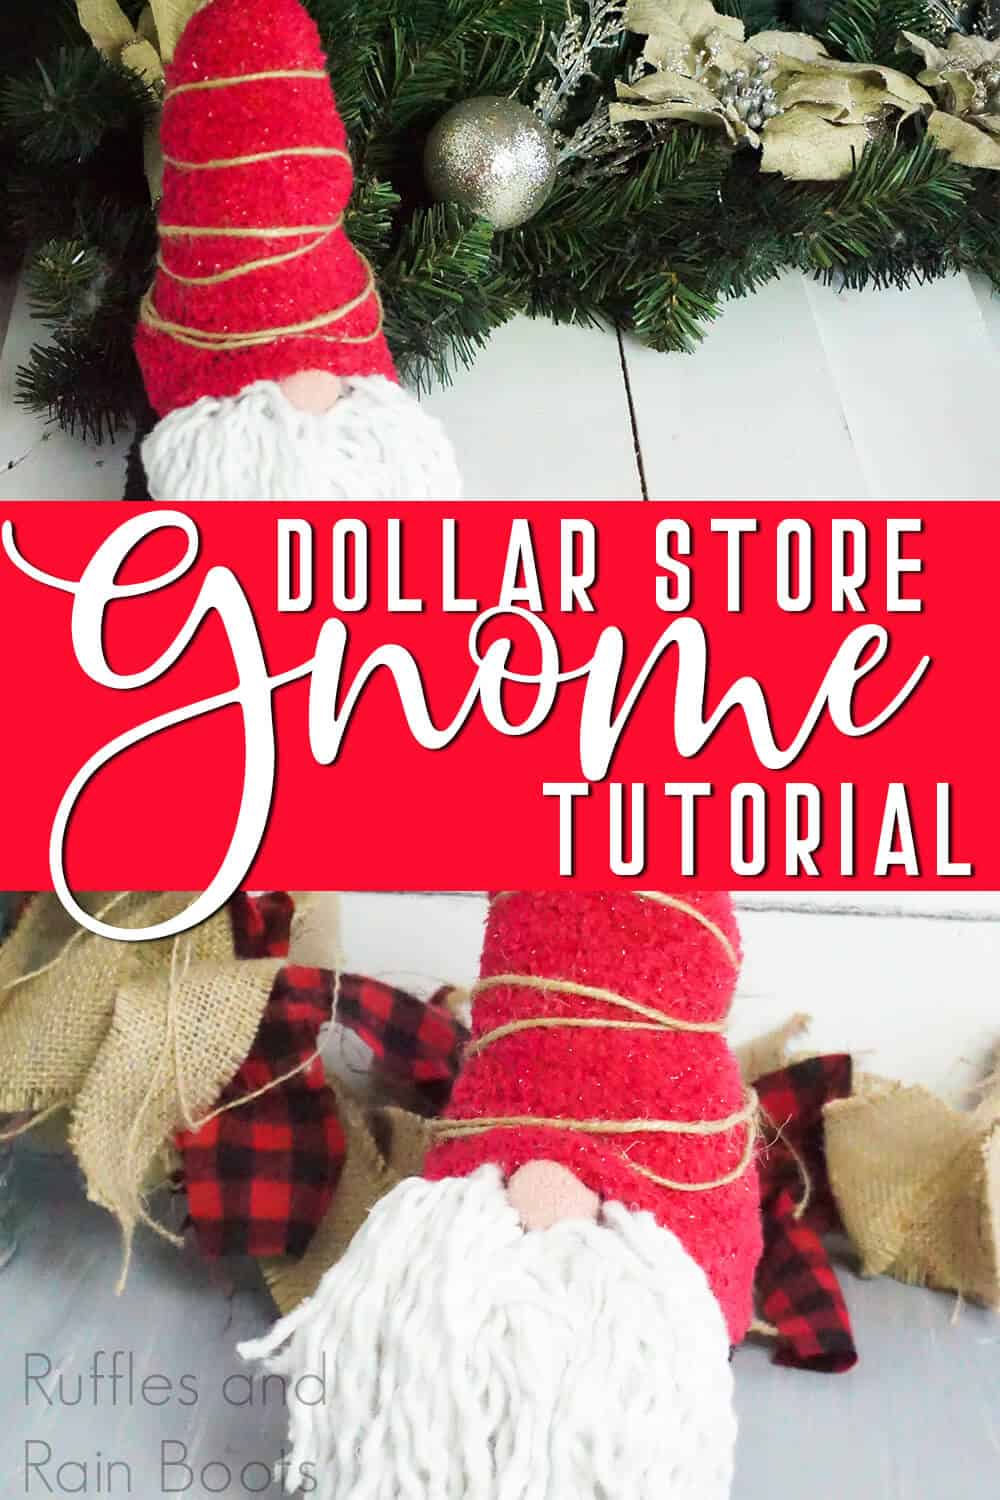
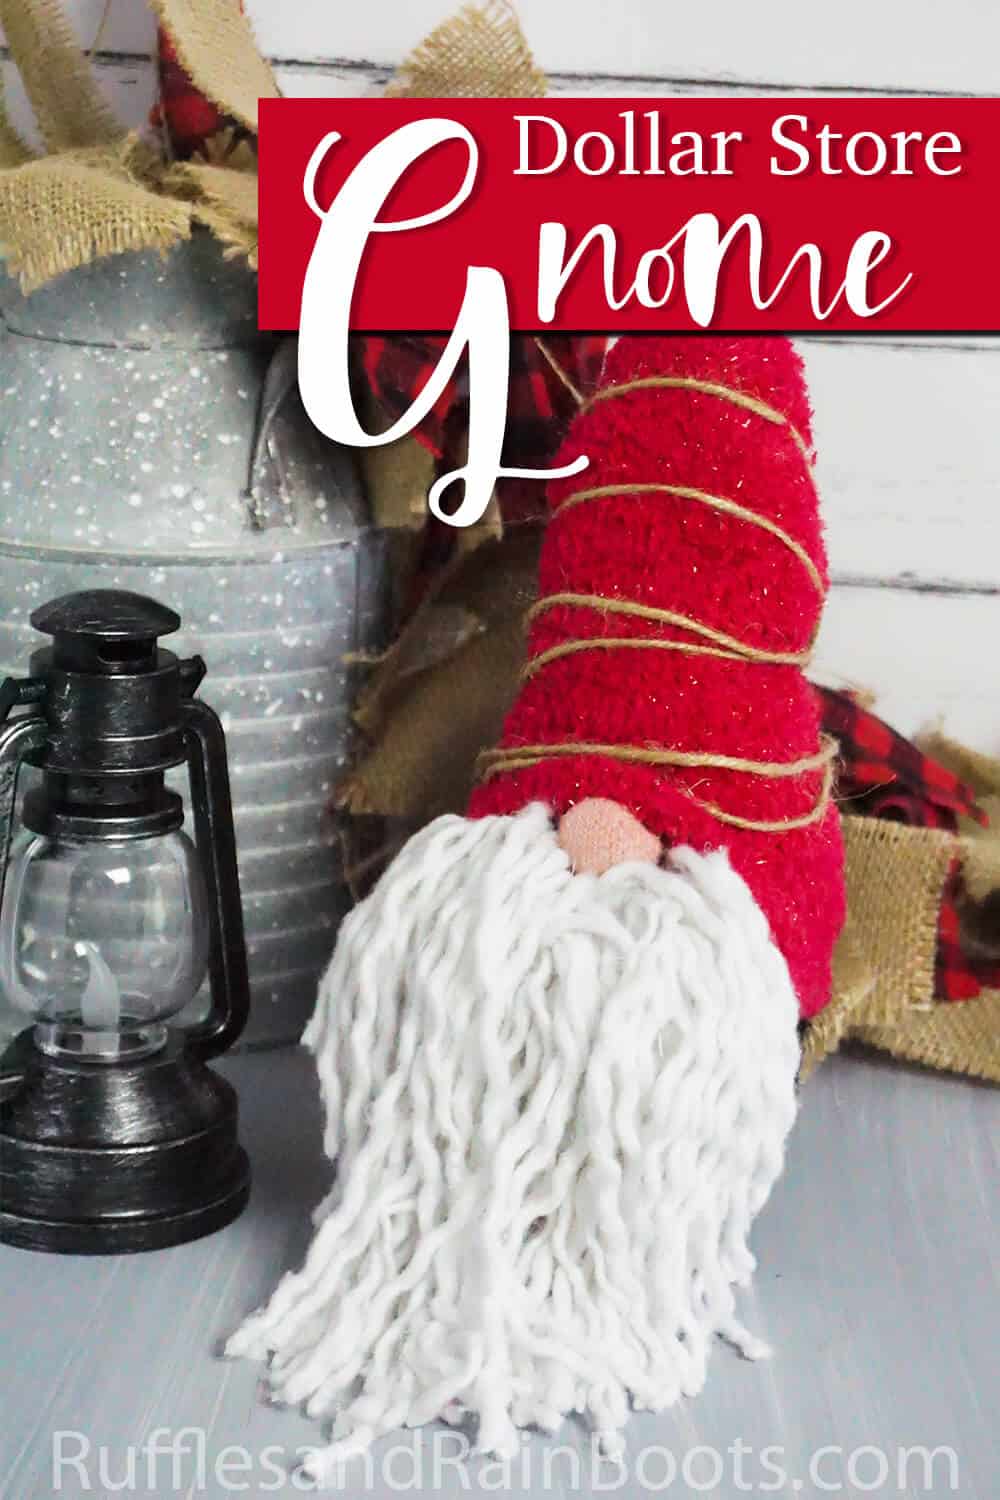
Make a Dollar Tree Gnome with a Mop Beard
Check out how easy and inexpensive it is to make an adorable Dollar tree gnome with a mop beard! In less than 20 minutes, you will add a whimsical Scandinavian gnome to your Christmas decor.
Head on over to the dollar store for your supplies and grab your glue gun for this cute Christmas gnome. This is a great Christmas craft idea to make with friends, so invite some over and let’s get started.
What You'll Find On This Page
Dollar Store Gnome
Here at Ruffles and Rain Boots, I love making Christmas gnomes. Perusing the Dollar Tree with the little one earlier today, I knew I could make a fun holiday gnome DIY using only materials from the Dollar Tree. In just a few minutes, I had all the items added to my cart and it was SO fun to put this cutie together.
RELATED READING: DIY GNOME TUTORIALS
And I know that there’s some kind of Scandinavian folklore involving Christmas porridge and farm animals that goes along with all these gnomes, but at the end of the day, you do not have to have read Viktor Rydberg to just straight-up enjoy making tomten.
Before you get your supplies ready, be sure to read this “sock gnome questions and answers list.” It will help you decide what you want your gnome to look like – there are just so many possibilities.
If you have yarn or faux fur on hand, you won’t even need everything on this list. You can substitute the fur or yarn for the mop from a dollar store (yes, a mop!). Let’s get started making our fun Nordic Dollar Store gnome.
DIY Christmas Gnome Tutorials
If you’re looking for the best DIY Christmas gnome tutorials, you have come to the right place. Check out all of my favorite tomte tutorials for the holidays!
No Time to Make This Now? Save or Share This for Later
Need to head to the dollar store to gather supplies? Save this to your favorite DIY Christmas decorations pin board or share it on Facebook. It will be easy to find when you’re ready to begin.
As an Amazon Associate, I could earn from qualifying purchases. There could be affiliate links in this article.
Tips to Make a Dollar Tree Mop Head Beard Gnome
- I decided to make this Scandinavian gnome from the Dollar Tree as inexpensively as possible. I bought the mop, socks, filler, twine, AND the blush to color the nose at the dollar store. The socks were only $0.50 (watch for those two-for deals), so I was able to make a $5 gnome for a Christmas decoration!
- When you glue the beard on, use quite a bit of hot glue. The sock is stretchy and the mop is floppy so the hot glue is more likely to release if you don’t use enough along the edge.
- If your dollar store doesn’t have twine, you can grab a rubber band for the nose and just skip the twine around the red cap. Other ideas for gnome noses are: pompoms, wood balls or beads, or ping pong balls.
- The dollar stores have great embellishments, so keep your eye out for mini signs, micro holiday lights, or even package tags!

How to Make this Dollar Store Mop Beard Gnome
Below is the written tutorial for this easy holiday gnome. If you learn best with video or would like to save it to a gnomes playlist, our dollar store gnome with a mop beard video tutorial is here. And if you have any questions, please let me know in the comments.
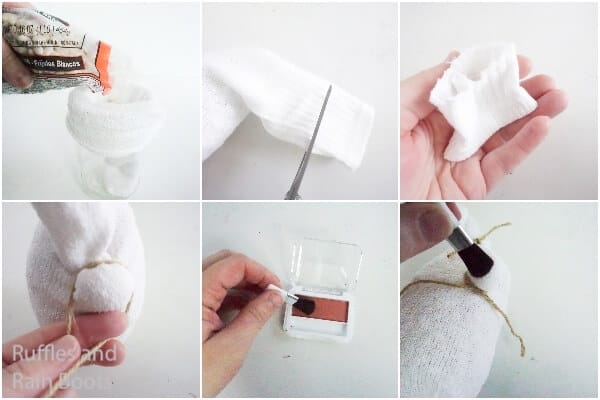
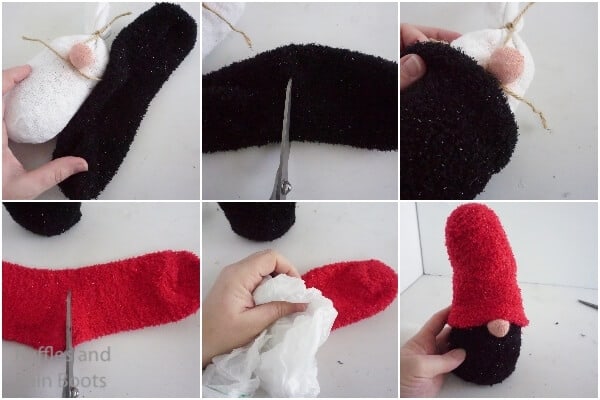
First, fill the white sock with beans. You will need 2 cups of beans but only fill it about 1/2 way. Do not close the sock yet. Cut off a 6-inch long section of twine.
Cut off the top quarter of the white sock. Ball up this small portion of the sock off and stuff it inside the gnome, where you’d like the nose to be.
With the 6-inch length of twine, tie this small ball of sock in place. This will leave the twine showing, but we’re going to cover it.
Fill the white sock so that the nose stands out proudly and there’s a little stuffing left over the top of the nose for a head. If you run out of beans that’s ok, just use a bag from the dollar store. Keep in mind you will need at least one bag for the hat.
Tie off the top of the white sock and add a little hot glue to the knot to keep it tied.
With the blush, color the nose pink.
Cut the top 1/4 off the black sock (set aside and keep). Work the gnome inside the black sock. This sock is the gnome’s clothes. Hot glue the black sock in place.
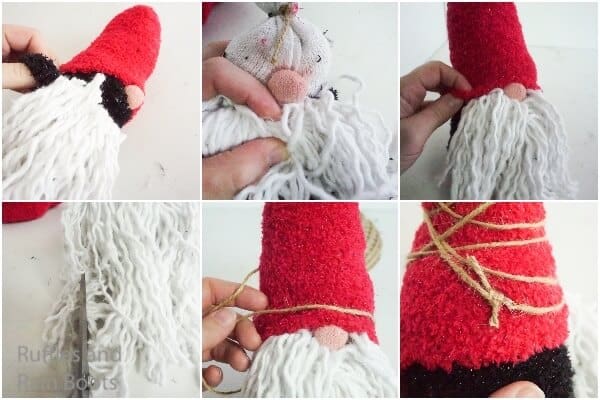
Cut about half of the mop head threads off the mop head. Hot glue them in place on the 1/4 section of the black sock you cut off. Un-wind the threads of the mop head yarn and make the beard more fluffy.
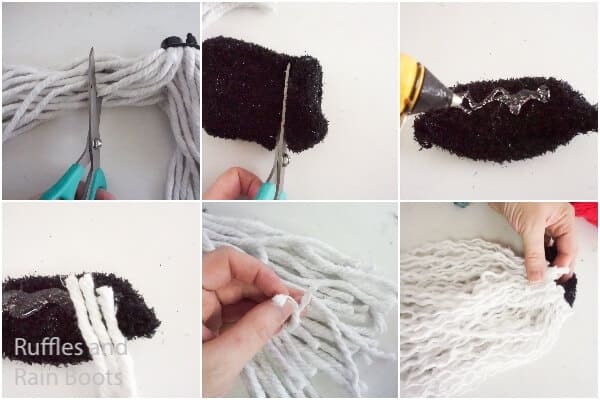
Work the small section of black sock up onto the gnome, glue additional beard pieces onto it, getting the beard as snug around the bottom of the nose as possible. Hot glue it all in place.
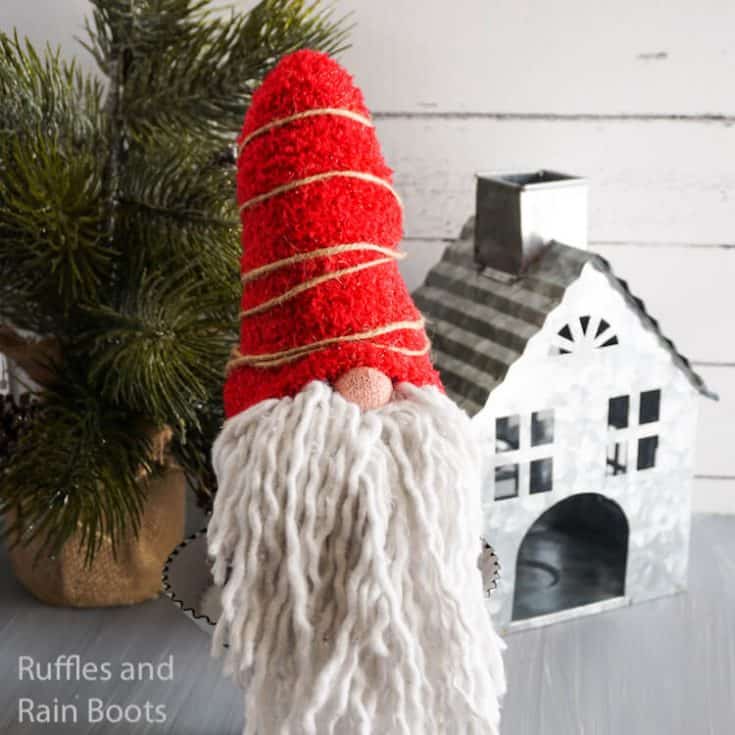
Cut the top 1/4 of the red sock off. Stuff a plastic bag into the red sock. Put the red sock onto the top of the gnome, tucking it around the back of the gnome, hot gluing it in place.
Wrap the twine around the top of the red hat, tying it in place.
Proudly display this fun Dollar Store gnome!
Mop Beard Gnome Tips
I have answered a lot of questions from readers and YouTube viewers, so I thought I’d add some notes here.
- unwrapping the mop’s ropes makes for a fuller, curlier beard but you can leave it as-is
- if you cannot find any mops at your dollar stores, try discount stores and ask for mop heads
- you can use any amount of the mop for the gnome’s beard
- mop beard gnomes are made with or without the mop’s plastic nub – you can tuck it down into the body of the gnome or cut the mop strands off and discard it
- you will likely have mop material leftover – make gnome ornaments like these or an entire gnome family (the mop heads also make great braids for girl gnomes)
More Christmas Gnome Tutorials You Might Like
- Christmas Cowboy Gnome – If you want to learn how to make a gnome for Christmas, this Nordic Christmas cowboy nisse is one long, tall drink of water that’s down for the holidays–and you can find everything you need to make him at the craft store!
- 75+ Christmas Gnome Tutorials – All of the BEST gnome tutorials for the holidays that you’ll find anywhere. And I mean ANYWHERE. There’s so many free sewing patterns for gnomes, you’ll never run out of ideas.
- Christmas Gnome Ornaments – Our most popular Scandinavian Christmas gnome tutorial by far, these little tomten are perfect for any Christmas tree!
Please Save or Share This Dollar Tree Mop Gnome
Your shares are how this site grows and I am sincerely grateful. Know a friend who’d like this? Please share it on Facebook or save it to your favorite easy Christmas crafts pin board.
Dollar Store Gnome
Check out how easy and inexpensive it is to make an adorable Dollar Store gnome! In less than 20 minutes, you will add a whimsical Scandinavian gnome to your Christmas decor.
Materials
- 1 White Sock
- 1 Fuzzy Black Sock
- 1 Fuzzy Red Sock
- Twine
- Dollar Store Plastic Bag
- 1 Bag Beans
- Blush
- Mop Head
Tools
- Hot Glue Gun & Glue
- Scissors
Instructions
- Fill the white sock with beans. You will need 2 cups of beans but only fill it about 1/2 way. Do not close the sock yet. Cut off a 6-inch long section of twine.
- Cut off the top quarter of the white sock. Ball up this small portion of the sock off and stuff it inside the gnome, where you'd like the nose to be.
- With the 6-inch length of twine, tie this small ball of sock in place. This will leave the twine showing, but we're going to cover it.
- Fill the white sock so that the nose stands out proudly and there's a little stuffing left over the top of the nose for a head. If you run out of beans that's ok, just use a bag from the dollar store. Keep in mind you will need at least one bag for the hat.
- Tie off the top of the white sock and add a little hot glue to the knot to keep it tied.
- With the blush, color the nose pink.
- Cut the top 1/4 off the black sock (set aside and keep). Work the gnome inside the black sock. This sock is the gnome's clothes. Hot glue the black sock in place.
- Cut about half of the mop head threads off the mop head. Hot glue them in place on the 1/4 section of the black sock you cut off. Un-wind the threads of the mop head yarn and make the beard more fluffy.
- Work the small section of black sock up onto the gnome, glue additional beard pieces onto it, getting the beard as snug around the bottom of the nose as possible. Hot glue it all in place.
- Cut the top 1/4 of the red sock off. Stuff a plastic bag into the red sock. Put the red sock onto the top of the gnome, tucking it around the back of the gnome, hot gluing it in place.
- Wrap the twine around the top of the red hat, tying it in place.
- Proudly display this fun Dollar Store gnome!
Notes
For more easy gnome tutorials, visit Ruffles and Rain Boots.
Meet the Creator
Hi there, I’m Sarah Nenni-Daher. I’m a crafty gal and always have at least 14 projects going at once. I am a crafter, designer, DIYer, and pattern maker. I share my creations here and in the Ruffles and Rain Boots® Shop.
Here at Ruffles and Rain Boots®, you’ll find DIY gnomes, crafts, gifts, cupcakes, laser crafts, and so much more. I love sharing video tutorials over on YouTube and chatting with other crafters in my Facebook groups. We’d love to have you!