
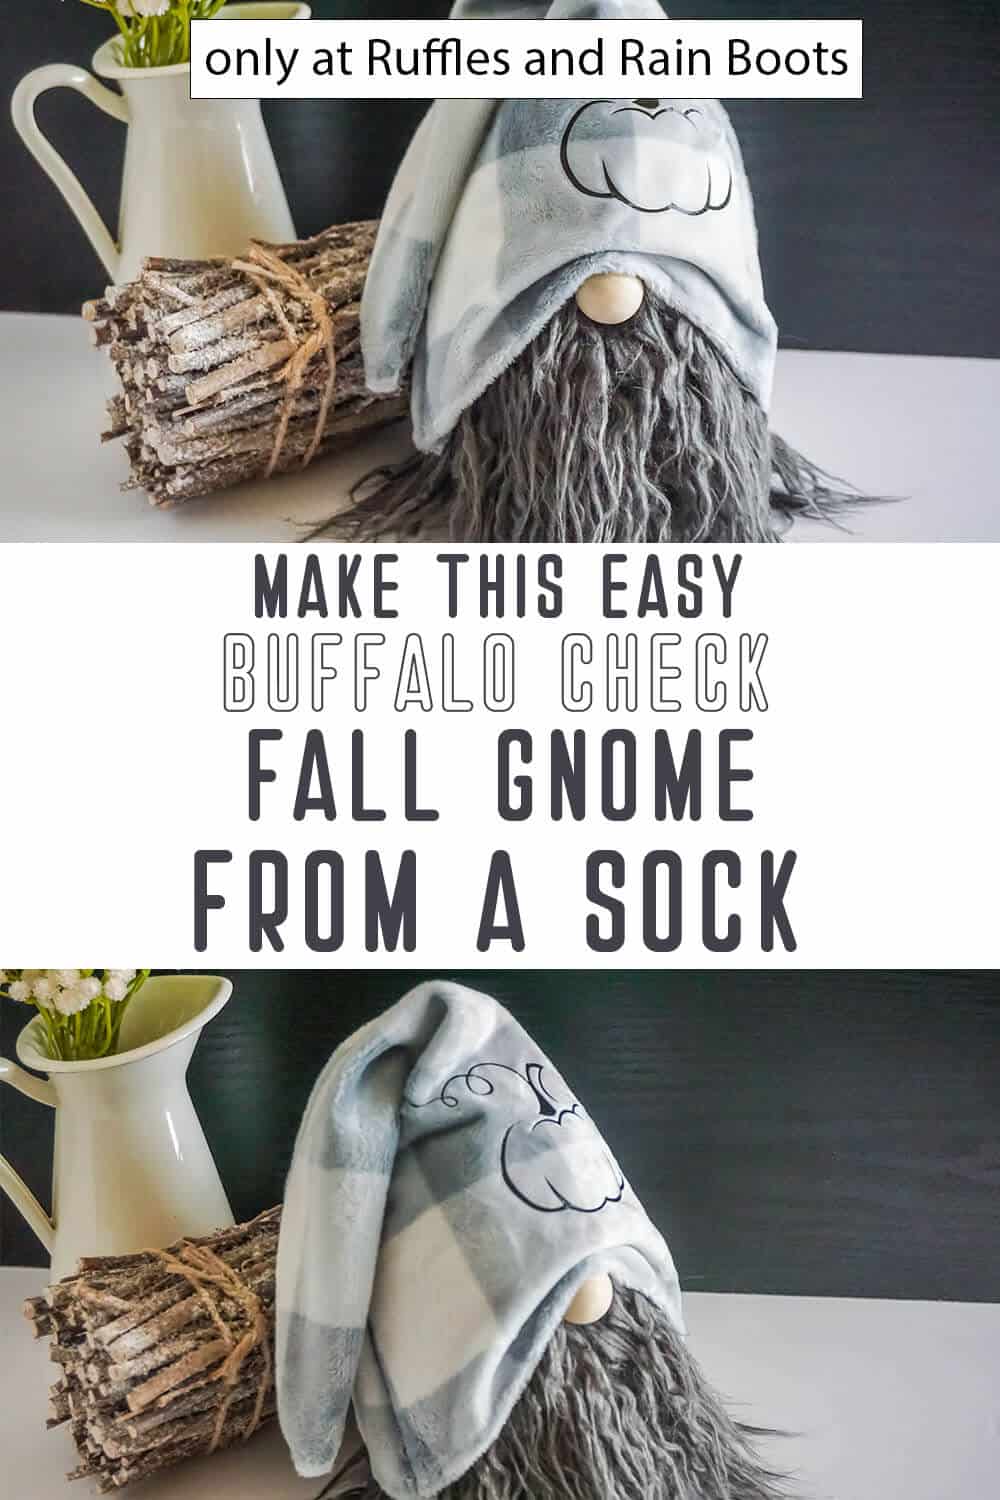
DIY Fall Sock Gnome (No Sewing)
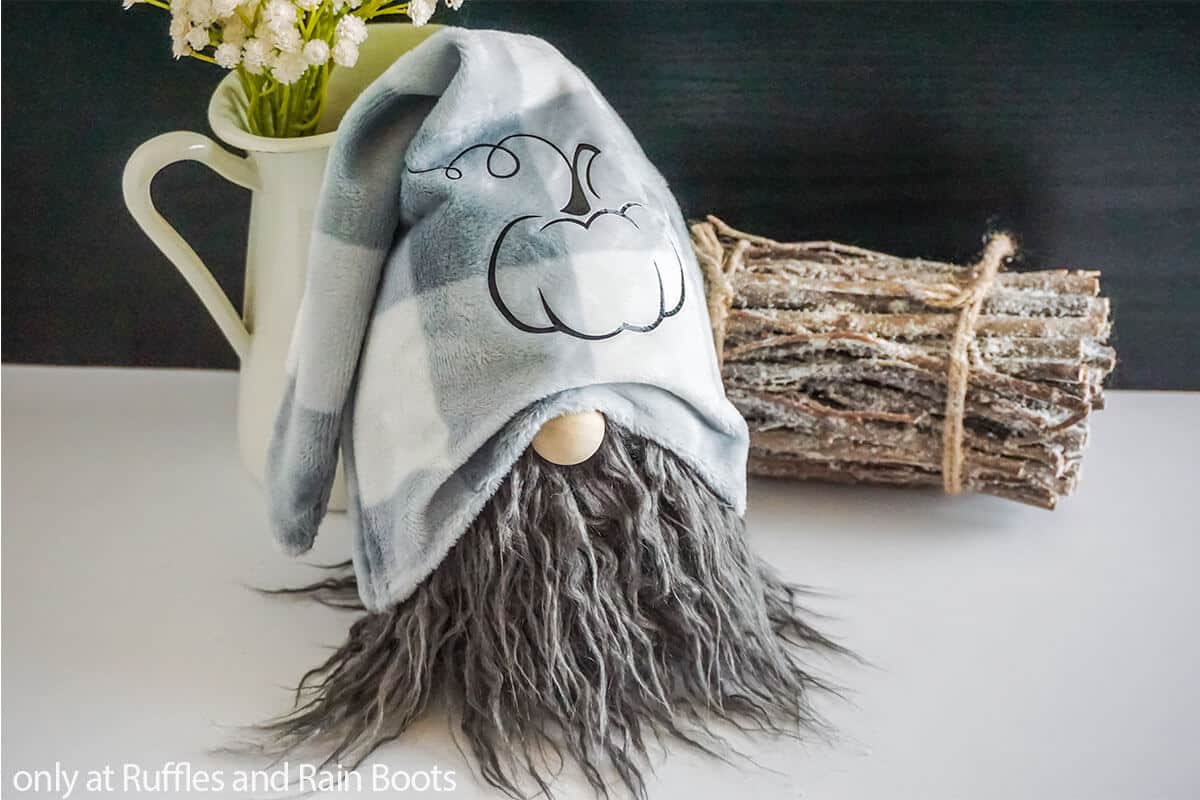
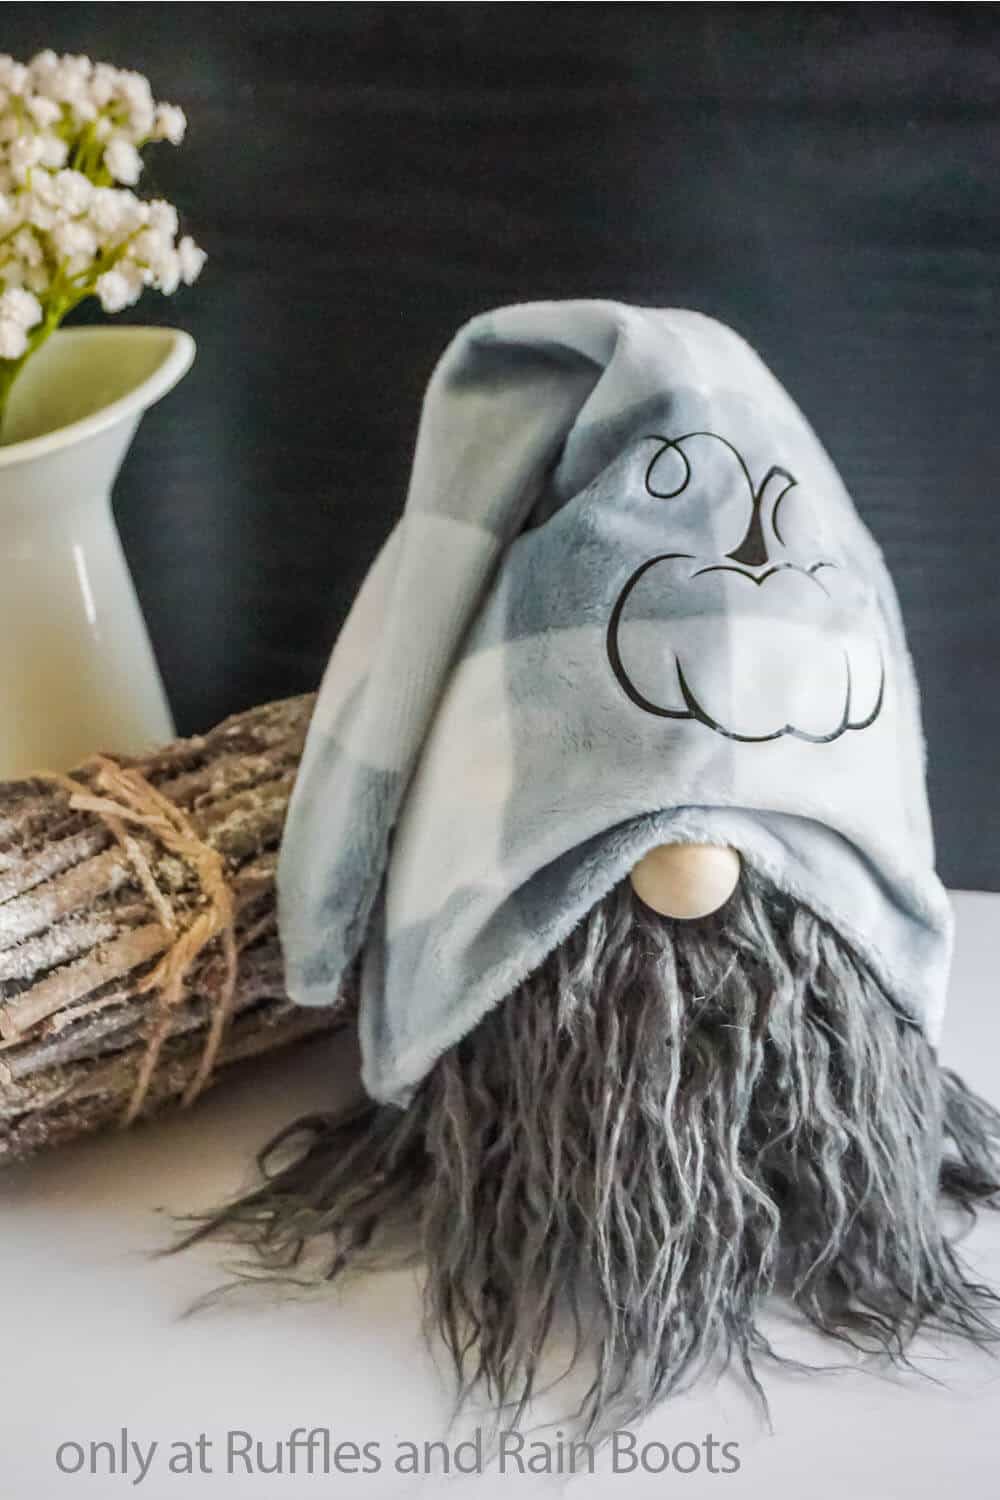
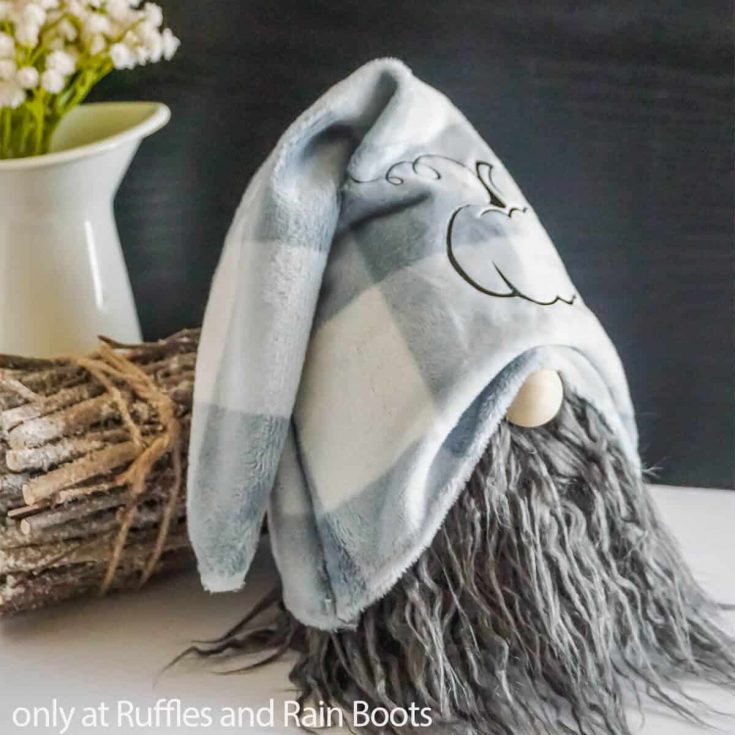
This no sew Buffalo Check DIY fall sock gnome has elegant details that will work for any decor. Use fleece to create the free gnome hat pattern and the free pumpkin SVG is optional for those who want to craft with heat transfer vinyl.
In this easy gnome tutorial, you will use a sock, fleece, faux fur, and something for a nose to create this fall decor. Watch the sock gnome video tutorial or use the step by step written instructions.
RELATED READING: How to Make a Sock Gnome 3 Minutes
What You'll Find On This Page
Buffalo Check Fall Sock Gnome
Here at Ruffles and Rain Boots, I decided to make a quick sock gnome to go with my farmhouse decor. I had this fun Buffalo check minky fleece in the prettiest gray (I got it at the craft store, but check online).
The rough faux fur gnome beard is a balanced look with the clean lines of the slouchy gnome hat. Use this free tutorial to create a beautiful fall gnome for your home or make this gnome to sell.
RELATED READING: Elegant Fall Shelf Sitter Gnome Pattern
No Time to Make This Fall DIY Now? Save or Share for Later
If you love this cute gnome idea but can’t get started right away, save this to a fun fall crafts pin board or share it on Facebook. Either way will make it easy to find when you’re ready to begin.
As an Amazon Associate, I can earn from qualifying purchases. There could be affiliate links within this article.
RELATED READING: One Sock Gnome – Easy and Adorable Sock Gnome Idea
Tips to Make a Fall Farmhouse Gnome
- First things first, you see that perfect little hand-drawn pumpkin design? That’s this minimalist pumpkin SVG that I applied to my little fall farmhouse gnome hat using some heat transfer vinyl. Sneaky way to bring a pop of pumpkin into my gnome, huh?! LOL!
- Is this your first sock gnome? Cool – but be warned, they’re addictive! So, get ready to make a TON by checking out my quick and easy how to make a sock gnome FAQ page. Everything you need to know about making a quick and fast sock gnome for every occasion!
- One of my biggest “things” with gnomes is how the faux fur gets cut for the beard. Every time I see a chopped-off, squarish beard, I feel like I got a bad haircut. Avoid making me cringe by putting down the scissors and picking up a craft knife. Flip that fur over, fur-side-down onto the cutting surface and use the craft knife to very gently cut through just the fabric backing of the fur, then just pull the two parts away from each other and watch that fur part neatly. Check out this quick tutorial video I made for how to cut faux fur and while you’re there, be sure to subscribe, if you would like more awesome gnome tutorials and tips.

Fall Sock Gnome Video Tutorial
If you’re a visual learner, watch the buffalo check fall sock gnome video tutorial on YouTube. Be sure to subscribe – we have a lot of fun over there.

More Fall Gnome Crafts You Might Like
- Scarecrow Gnome Pattern – So adorable and absolutely one of the funnest no-sew gnome patterns you can make in minutes.
- Fall Gnome Garland – Add a touch of all the best fall colors to your mantle with this quick Cricut gnome craft.
- Dollar Tree Pumpkin Gnome with Feet – Super cheap, easy, and ridiculously adorable, this little guy’s twinkle toes have me giggling!
Please Save or Share This Fall Gnome Idea
Your shares are how this site grows and I am sincerely grateful. Please share this on Facebook or save it to a fall crafting pin board. on Pinterest.

How to Make a Buffalo Check Fall Sock Gnome
Keep this page open and follow along with the step by step tutorial below. If you like, you can also print this gnome tutorial.
Buffalo Check Fall Sock Gnome
So simple to make, you can have this fun buffalo check fall sock gnome made in just 20 minutes. Plus, that adorable farmhouse gnome look is just so perfect for a tiered tray!
Materials
Pumpkin
- Heat Transfer Vinyl (I used scraps)
- Elegant Pumpkin Cut File Set
Gnome
- 1/8 yd Minky Grey/White Buffalo Check Fabric
- 1 1-inch Wood Ball
- 1 Grey Men's Sock
- Grey Crinkle Mongolian Faux Fur
- Poly-Fill
- 1-2 cups Poly Beads
Tools
- Hot Glue Gun and Glue
- Scissors
- Craft Knife or Razor Blade
- Cricut Cutting Machine
- Light Grip Mat
- Fine Tip Cutting Blade
- Cricut EasyPress Mini
- Funnel, optional
Instructions
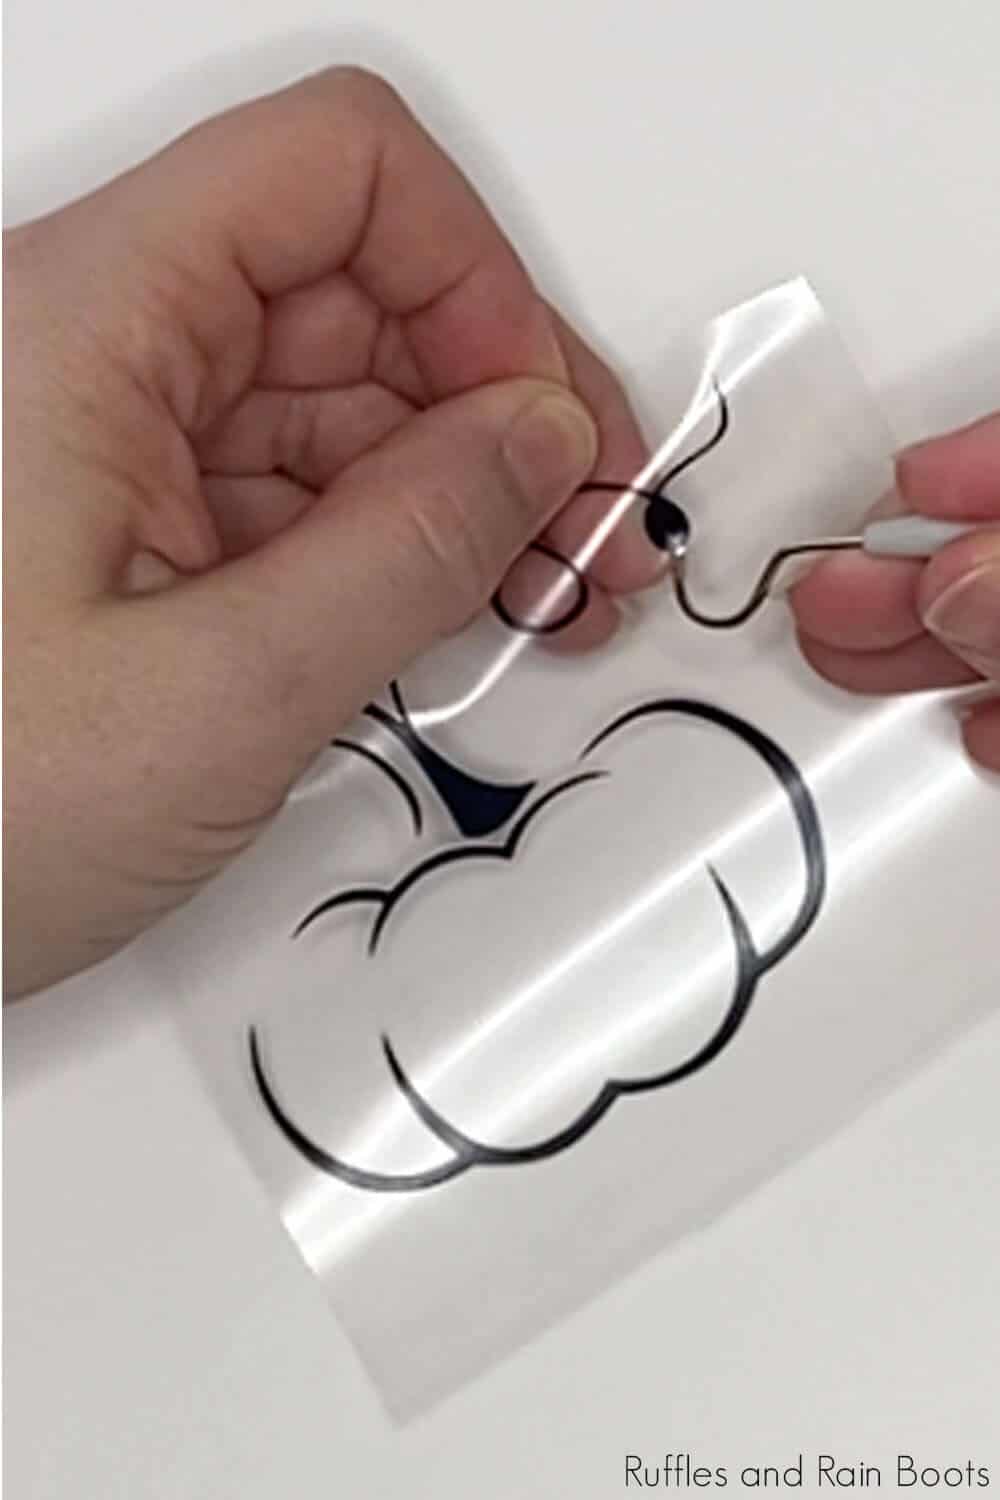
- Make the pumpkin detail: Download the cut file and upload it to Cricut Design Space. Follow the prompts to resize the design to about 3 inches wide. Follow the prompts to cut the file from the vinyl and load the vinyl into the machine as directed. Remove the vinyl from the machine and weed the elements that you do not need leaving the pumpkin shape only on the transfer paper. Set aside.

- Fill the gnome body: Fill the toe of your sock with Poly Beads by pouring them into the sock. Stuff about 2 cups of Poly-Fill into the sock on top of the Poly Beads and tie tight knot to close the sock. Hot glue it in place to secure.
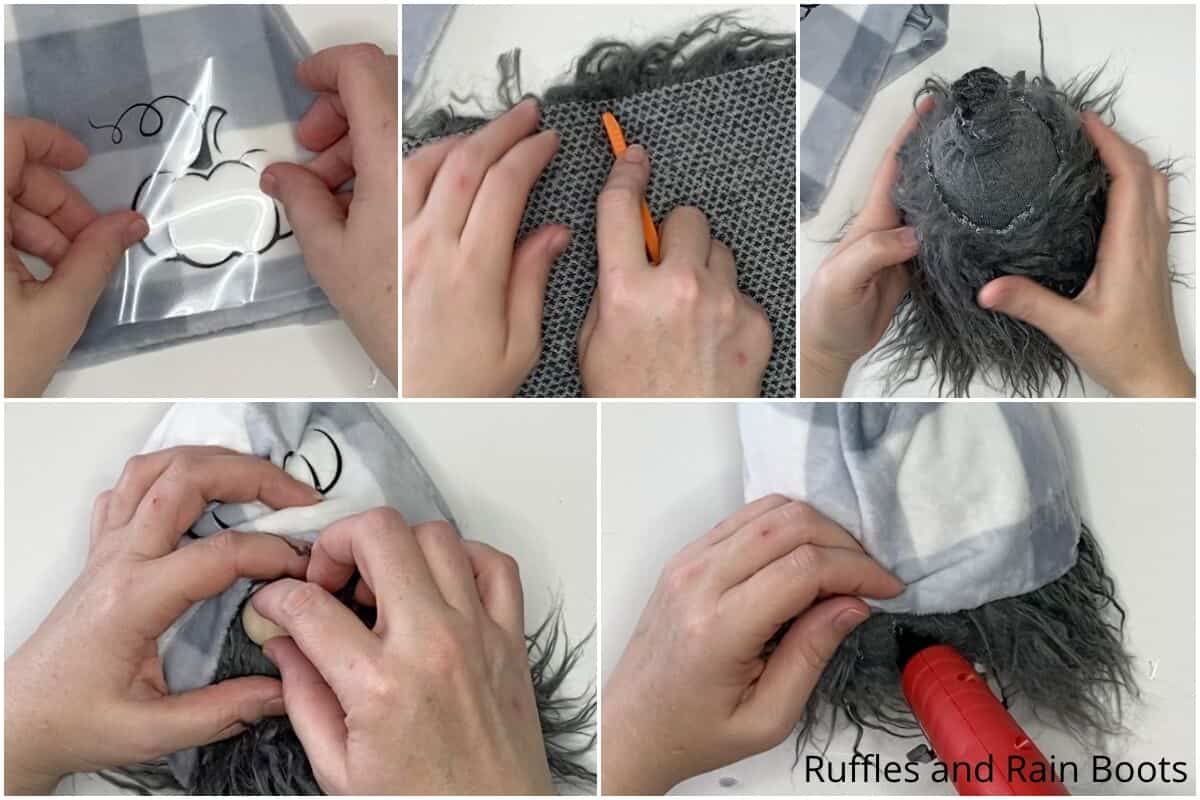
- Make a hat: Cut two triangles of the minky/fleece fabric about 8 1/2 -inches wide by 14 1/2 -inches tall. If you have a pattered piece of fabric, make sure to align them and cut them with the pattern in mind. Place the two triangle pieces right-side to right-side, then hot glue hem the two long sides of the triangles together. Allow the hot glue to cool completely then hot glue hem the brim. Allow the hot glue to cool completely then turn the hat right side out.

- Add the pumpkin detail: Preheat your EasyPress Mini to high. Place the weeded heat transfer vinyl pumpkin onto the hat with the transfer tape up. Position the pumpkin away from the hem of the hat, and the brim - the hot glue will be affected by the heat press if they come in contact and it may cause problems, so make sure the design is far enough away from the edges to stay clear of the hot glue. Place the EasyPress Mini on top of the pumpkin shape and hold it in place for 30 seconds. Then remove the EasyPress Mini and gently peel the transfer paper away from the design and discard.
- Give the gnome a beard: Cut a beard shape from the faux fur by flipping it over and cutting a large rectangle shape long enough to wrap around the filled sock and cover the sock all the way from about 1 inch from the knot all the way to about 1 inch from the toe of the sock. Hot glue this onto the sock.
- Finish the gnome: Pull the hat down over the top of the sock, pulling the hat down low over the nose. Hot glue this in place, with a cute wrinkle (because that's the best part). Allow the hot glue to cool completely, then turn the gnome over and pull the hat down low in the back, opening up the face of the gnome, then hot glue the back of the hat in place, where the sock is exposed just between the two sides of the beard. Then it's time to display your gnome because he's complete!


Notes
For more fun sock gnome tutorials, visit Ruffles and Rain Boots.
Recommended Products
As an Amazon Associate and member of other affiliate programs, I earn from qualifying purchases.


Meet the Creator
Hi there, I’m Sarah Nenni-Daher. I’m a crafty gal and always have at least 14 projects going at once. I am a crafter, designer, DIYer, and pattern maker. I share my creations here and in the Ruffles and Rain Boots® Shop.
Here at Ruffles and Rain Boots®, you’ll find DIY gnomes, crafts, gifts, cupcakes, laser crafts, and so much more. I love sharing video tutorials over on YouTube and chatting with other crafters in my Facebook groups. We’d love to have you!