
Easter Gnome – The Perfect Easter Bunny Gnome DIY!
This no-sew Easter gnome tutorial is going to make everyone say, “Aww!” It’s a quick DIY with basic craft supplies, so let’s get started with our bunny gnome!

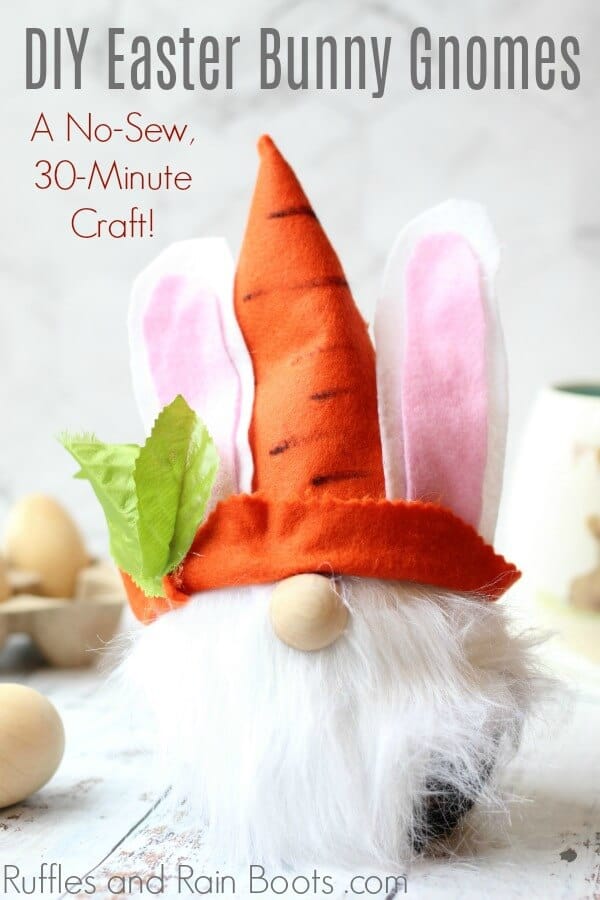
DIY Easter Gnome
Do you ever get an idea in your head that will not let you sleep until it’s made? As with all of my DIY felt gnomes, that was the case with this adorable Easter gnome, friends. I made sketch after sketch to get the plan just right and here he is. A Scandinavian gnome dressed up for Easter!
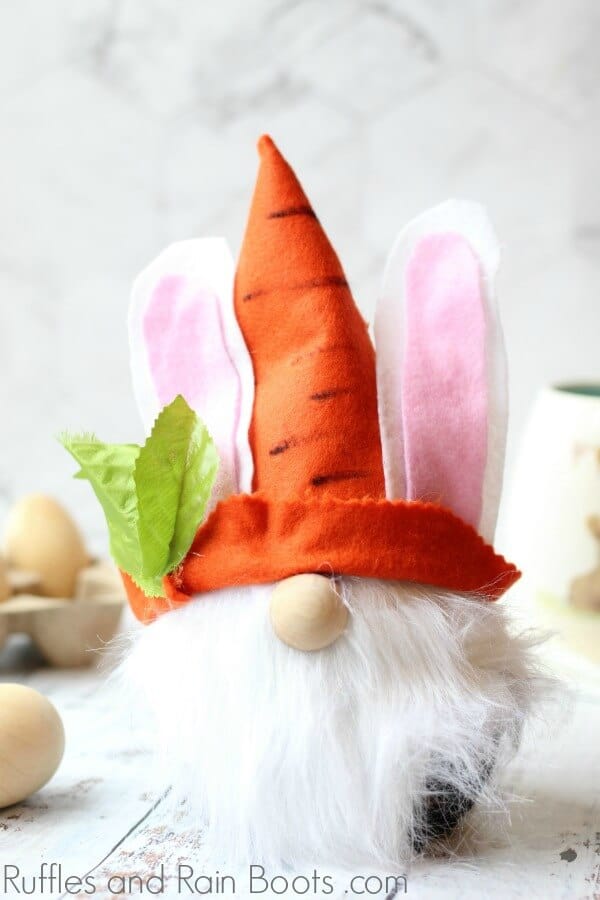
This Easter bunny gnome got all dressed up for the holiday and is decked out in a carrot-inspired gnome hat and has the most endearing little bunny ears. If you gave him a little egg basket, wouldn’t he just look the part?! Let’s get started on our newest Ruffles and Rain Boots gnome tutorial.
Psst: click here to learn the basics on how to make sock gnomes.
No Time to Make This Now? Pin it for Later
How Do I Make an Easter Gnome?
I’m so glad you asked! If you’re making a video playlist on YouTube of gnome tutorials, you can find our Easter Gnome video tutorial here. Otherwise, keep on reading.
Easter Gnome - A Cute Easter Bunny Gnome
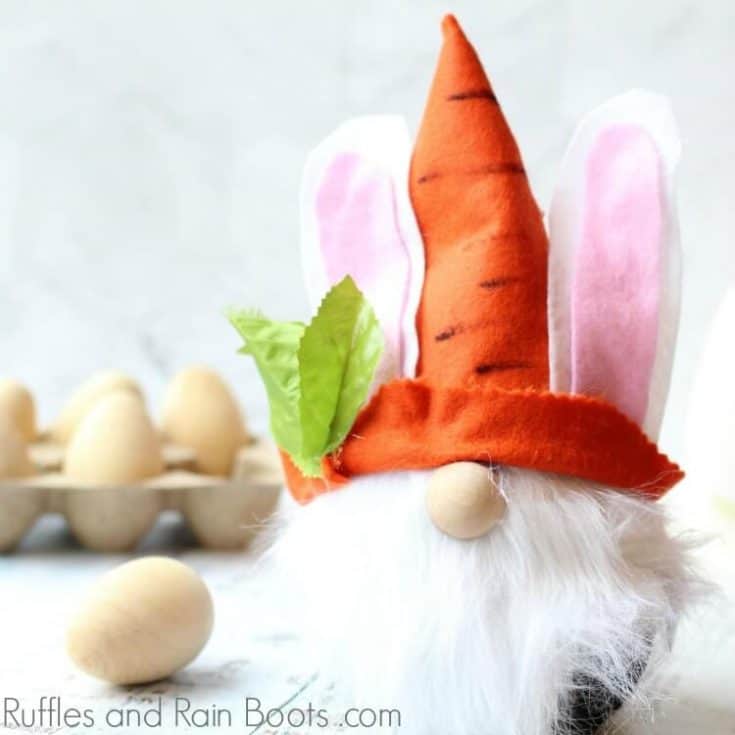
This adorable no-sew Easter gnome makes a cute addition to any decor. From the carrot hat to those floppy ears, this Easter bunny gnome will hop into your heart.
Materials
- ankle socks
- rice
- rubber band
- craft fur (we like these)
- nose (we love using these for a natural look)
- orange, brown, and pink craft felt (get it here on Amazon)
- leaves, eggs, or bird embellishments for hat
Tools
- jar
- scissors (we used regular and pinking shears)
- glue gun and sticks
- black marker
- razor blade or craft knife
Instructions
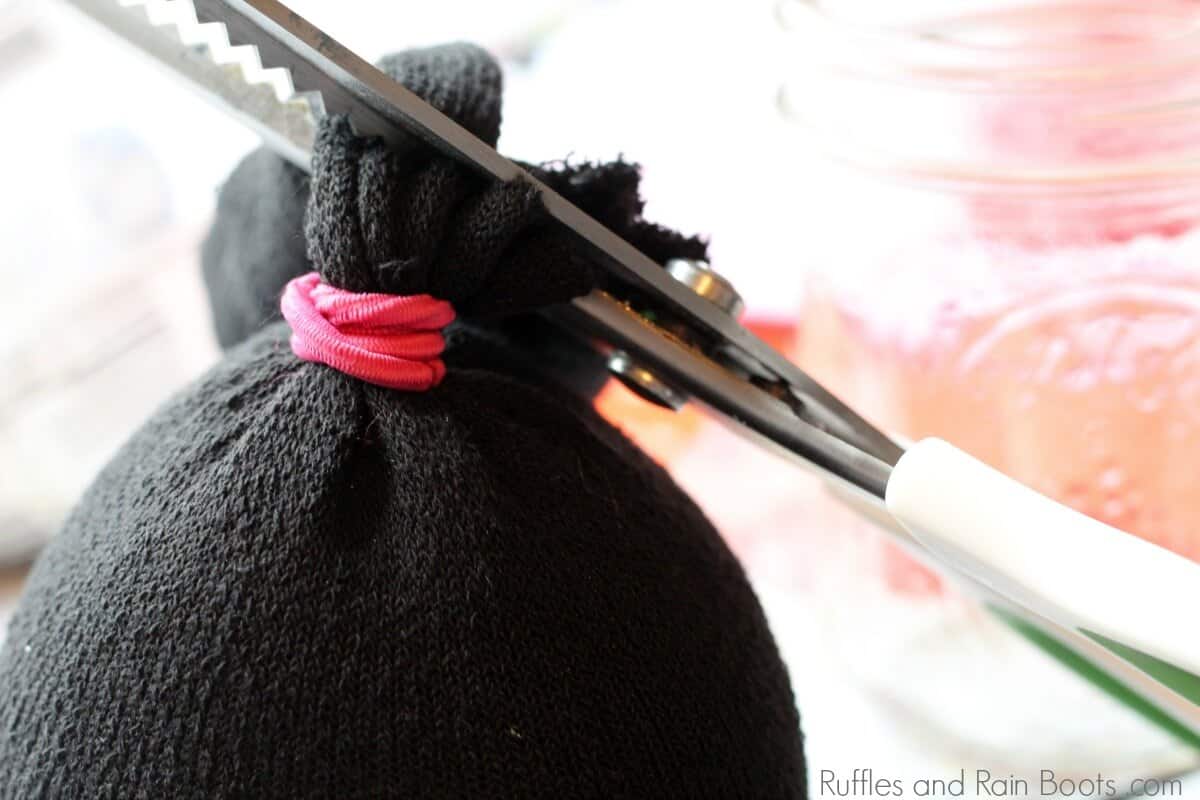
- Place rice in a jar and put the sock opening over the top.

- Flip the jar to easily fill the sock with rice. Make sure the sock is full but leave enough room to secure the top with a rubber band. Trim excess fabric.
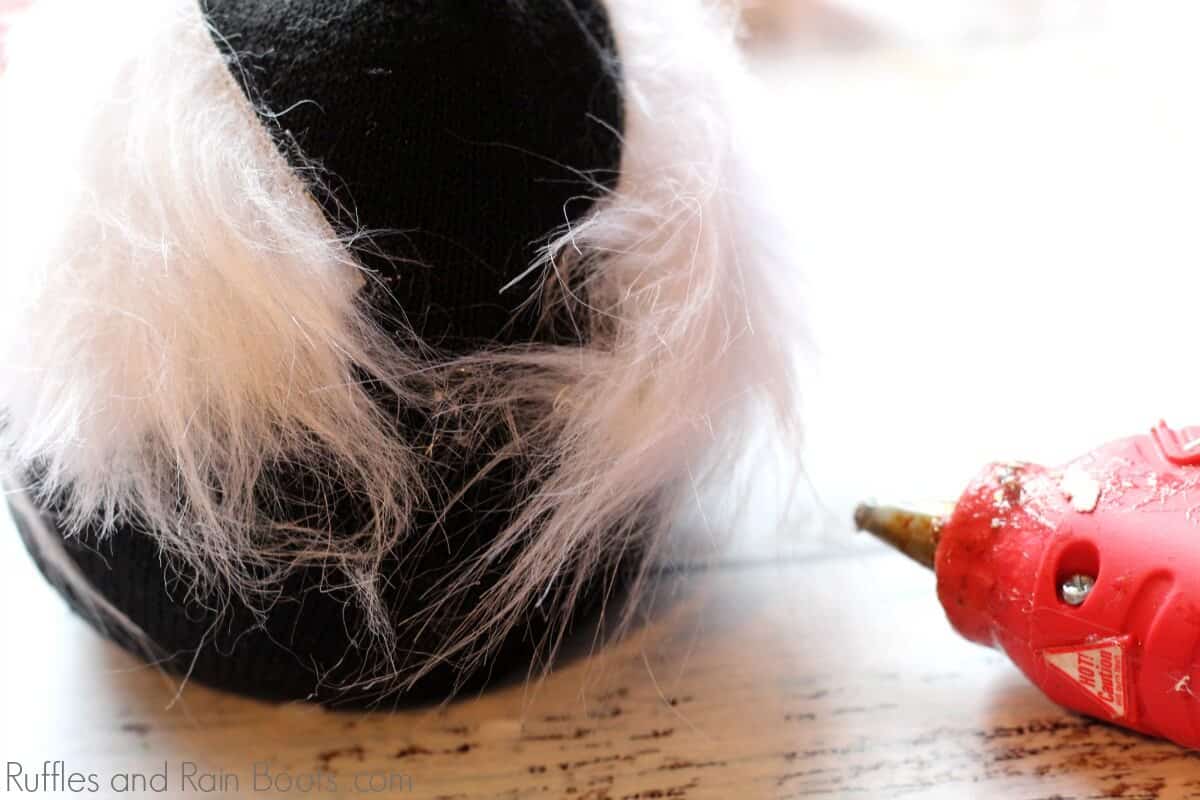
- Use a razor blade to cut the craft fur (the backing only) into a triangle that is about 9 inches at its widest point and as long to touch the bottom of rice-filled sock body. Your goal is to cut it long enough to wrap it around most of the body. Secure it to the sock with hot glue.
- Roll orange craft felt into a cone shape and glue down the side. Trim the bottom so that it is even(ish). We used pinking shears to give the gnome hat some character.
- Fold the bottom up to make a cuff but do not secure. Set aside.
- From the white felt, cut two ear shapes about 5 inches tall with a rounded top edge. Repeat with the pink felt, cutting them slightly smaller. Glue the pink felt into the middle of the white felt to make bunny ears.
- Unfold the cuff of the hat, making a note where the fold was. Secure the bottom edges of the bunny ears to that fold, flip up the cuff again, and secure the cuff down with glue.
- Add horizontal lines on the orange felt to mimic a carrot.
- Place the hat onto the gnome and secure with hot glue. Place the gnome nose under the brim of the hat and glue on any extras (like the leaves we used).


Notes
For more gnome crafts than you'd ever think could be in one place, visit Ruffles and Rain Boots .com (your source for fun gnome DIY projects).
More Gnomes on Ruffles and Rain Boots
Let me just be the first to admit that I have had a gnome invasion. For a few years, tomte, nisser, gnomes – whatever you want to call them – have taken over as the go-to decor pieces. From our popular 15-minute Christmas gnome ornaments to our first little 30-minute Scandinavian gnome tutorial, I love coming up with new designs.
Right now, I’m making no less than 5 more gnome tutorials! I absolutely love the little guys and gals. If you do as well, check out more of our gnome projects:
- Easter Gnomes to Make – These popular gnomes for Easter will get you creating with inspiration, techniques, and gnome patterns.
- Easter Gnome Bottle Topper – This adorable Easter bunny gnome is done in just 10 minutes and uses up some scraps from your craft room.
- Scandinavian Christmas Gnome Tutorials – Festive and Whimsical
- DIY Felt Gnome Tutorials – Gnome Crafts for Kids AND Adults
Please Save This to Pinterest
Your shares are how this site grows and I am sincerely grateful for them.

I can’t figure out the hat. Could you please give me more details, please. Size of the felt piece? How to form the brim? Thank you so much.. love the pattern
Hi, Joan – I am so glad you love this little Easter gnome. The trick about sock gnomes is that none is ever exactly the same as another. For this reason, a pattern for the felt hat isn’t the best I can do for my readers and viewers. But I can definitely give you options…
In the tutorial, it details rolling the felt into a cone to ensure a fit around the body of your gnome (with the fur in place). You would secure the cone by gluing it along the inside and cutting off any remainder from the bottom (to make it flat). The bottom is then flipped up to make the brim.
An additional way to make the hat is to measure HALF the width of your completed gnome body (with the fur in place) and add a small seam allowance (a half-inch should be fine). You would then cut a triangle with the widest part at the bottom (the brim). Repeat the same cut and stack the two triangles on top of one another. Glue the long sides together and flip right-sides out. Fold up the brim.
After making so many gnomes, I find that all hats are best measured after the faux fur beard and the gnome nose are in place. That way, you have the option of tucking the nose under the brim of the hat and even non-stretchy fabrics will work.