
Easy Dollar Tree Beehives DIY
These DIY Dollar Tree beehives are such a fun afternoon craft and use inexpensive supplies you might already have on hand. Create a rope skep with a planter pot, rope, and a bit of hot glue.
Bee crafts have taken the DIY and decor world by storm and they’ve been going strong for years. If you want to add this rope beehive to a tiered tray or other display, read through the easy, step by step bee hive tutorial below.

What You'll Find On This Page
DIY Beehives – A Dollar Tree Bee Centerpiece Idea
Here at Ruffles and Rain Boots, I am refreshing a bit of my decor for the season and bees are everywhere! While walking through the dollar store, I saw an upside down yellow planter pot and well, this craft had to come to life. I’ve made other bee crafts here (and will put a few below), but this one takes the cake as the absolute easiest.
RELATED READING: Farmhouse Tiered Tray Moss Accents
These beehives can be made as small or as large as you need. I chose a small pot from the Dollar Tree’s garden section, but if you have a larger one similarly shaped, it would make for a great addition to a Spring or Summer porch.

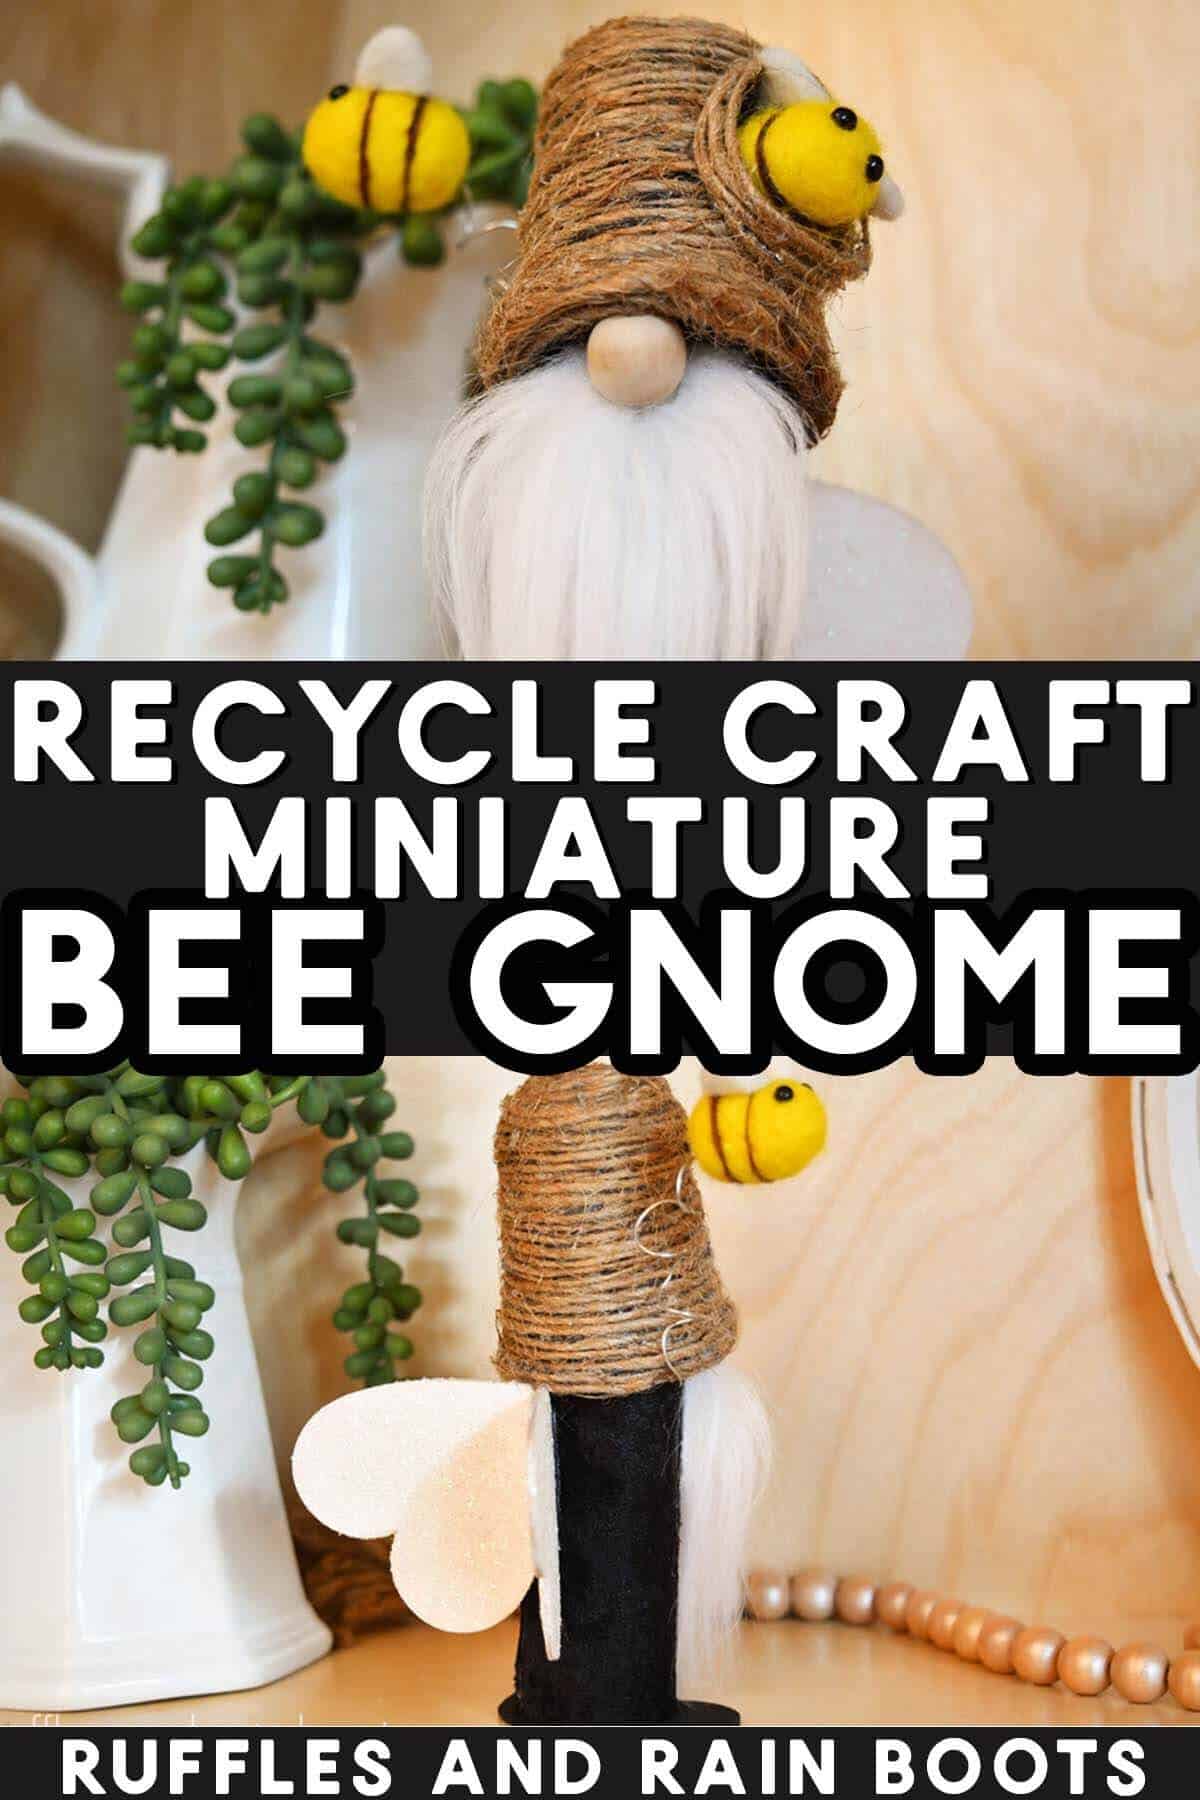
Tiered Tray Bee Gnome Using Recycled Crafts
If you are building out a seasonal tray or display, consider using what you have on hand to make this adorable DIY mini bee gnome. He’s perfect for any shelf on small to medium sized tiered trays or the very top of the larger ones.
No Time to Make This Now? Save or Share This for Later
Need to head over to the dollar store or gather supplies from the craft room? Save this to a DIY pin board or share it to a crafty group on Facebook. Saving will make this spring or summer craft idea easy to find when you’re ready to begin.

As an Amazon Associate, I can earn from qualifying purchases. There could be affiliate links within this article.
RELATED READING: Make a Beehive Candle Holder Using THIS from the Dollar Store
Tips to Make a Your Own Rope Bee Skep Using Dollar Tree Finds
- Work slowly. Take time to press the rope together and hold it in place until the glue cools. This will help close any gaps between each layer of the bee hive to prevent the flower pot from showing through.
- I strongly recommend a set of little finger guards like these to protect against the hot glue. In my craft room, I also have the face mask spatulas to protect my fingers!
- The best part of this fun DIY beehive craft is the ridiculously cute little bees I found. I am told by a friend that her Dollar Tree didn’t have them. If yours doesn’t, this set of itty bitty bees AND ladybugs here are too cute (I am a little jealous).
- One thing I wish I had done but did not think of at the time, was to make a little honey dribbling out of the bee hive’s entry. I ran out and didn’t want to wait for the delivery, but I plan to do this. I like to use this yellow hot glue as I did with this no sew bee gnome. It makes the nicest little dribble and adds a touch of whimsy.
How to Make DIY Beehives for Bee Centerpieces
Below is the written and printable tutorial for this rope bee hive craft. It’s a an easy craft for a rainy afternoon, so put on a show or an audio book and let me know if you have any questions.
DIY Bee Hives

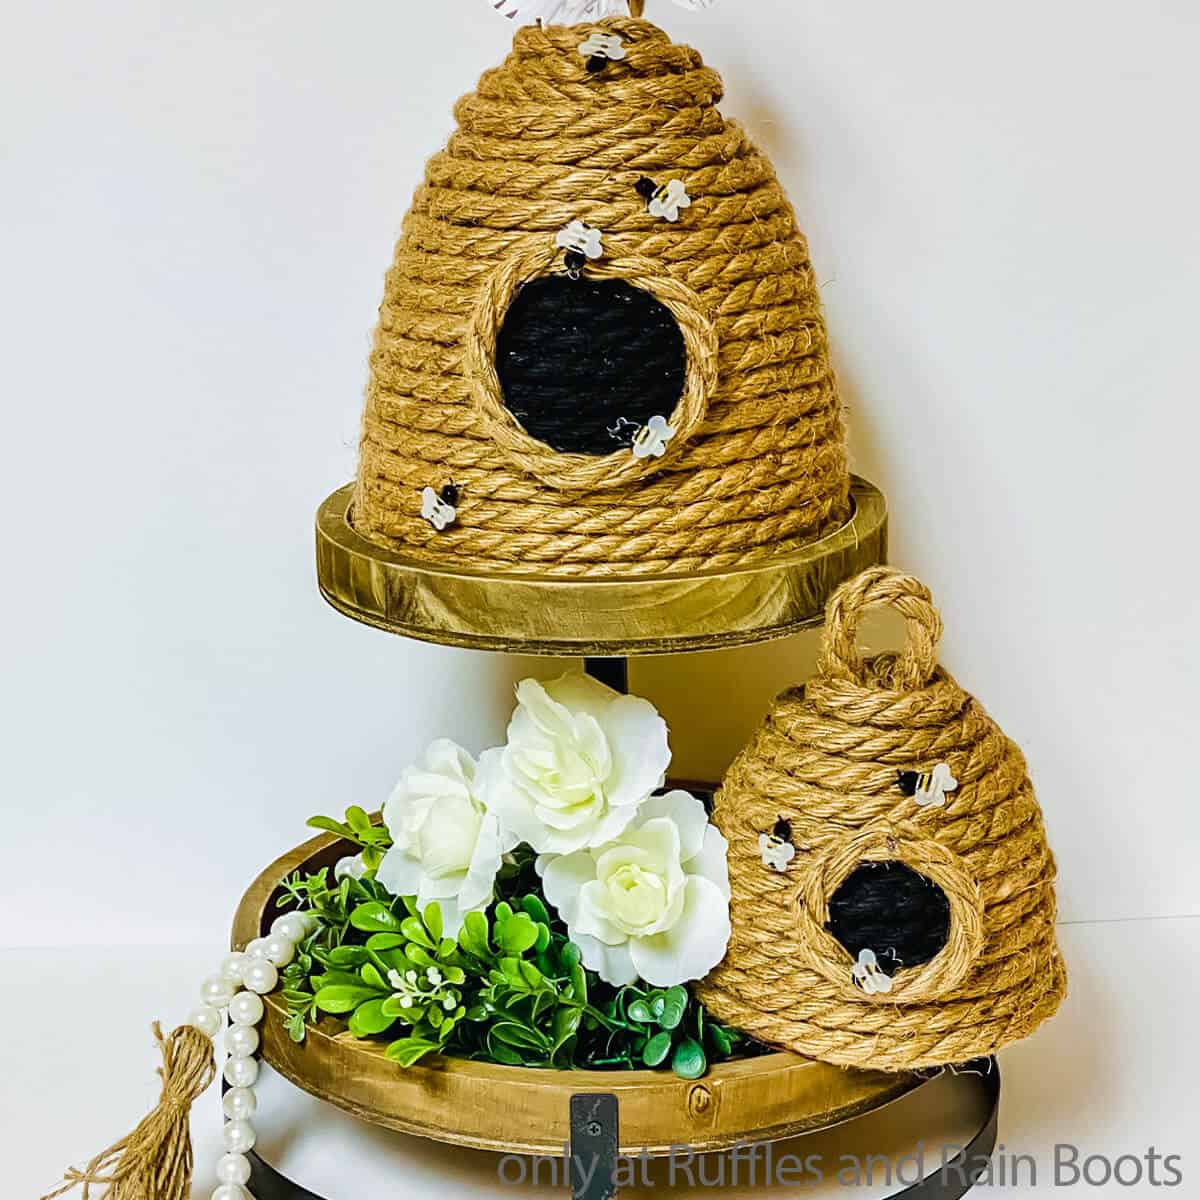
This DIY beehive from Dollar Tree materials is perfect for a farmhouse tiered tray, a Spring display, or even a porch decoration.
Materials
- Medium or Small Flower Pot (plastic)
- 3-4 feet Rope or Thick Twine
- Black Acrylic Paint or Felt
- Bee Stickers, optional
Tools
- Paintbrush
- Scissors
- Hot Glue Gun and Glue Sticks
Instructions
- Turn the flower pot open-side down. Place a bit of hot glue in a small 3-4 inch line around the bottom of the flower pot and affix the beginning of a rope. Continue working around the pot, gluing the rope onto the side of it, stacking the rope tightly and neatly. Hold the rope in place until the hot glue cools to eliminate gaps between the layers. Wrap the rope around the flower pot, gluing it place, until you reach the top.
- To create the loop on top, cut a 4-6 inch section of rope and fold it in half, placing a small amount of hot glue between the two ends to keep them together. Add a large dollop of glue to the top center of the pot and place both ends of the folded rope section onto the pot. Allow the hot glue to cool completely before removing pressure.
- Continue wrapping the rope around the top of the pot, working to cover any plastic. Trim the end and secure behind the loop.
- Cut a 4-6 inch section of rope, gluing the two ends together to make a circle. Apply a thin line of glue to the back of the circle of rope then press this into the center front of the beehive to create the opening. Hold the circle in place until the glue cools completely so that it does not slip.
- Paint the inside of the circle with the black paint, allowing it to dry completely. I had to apply two coats to make it look neat enough to my liking. Optional: cut a circle of black felt, glue to the rope, and add the circle of rope on top.
- Hot glue the bee stickers in place around the bee hive randomly and display.


Notes
If you love bees, search DIY bee on Ruffles and Rain Boots for beehive crafts, gnomes, and more.
More DIY Bee Crafts You Might Like
- DIY Bee Gnome – You don’t have to sew a thing to make an adorable little spring gnome. This trend can be done in under an hour and uses hot glue to bring it all together.
- The Best Bee Cut Files for Digital Crafting – Once I made that first bee craft, I got a, well, a bee up my bonnet and made a ton of cut files to make some of the most fun digital crafts with!
- Winnie the Pooh Hot Cocoa Bombs – Honey, bears, and bees make the cutest and most fun little hot cocoa bombs you’ll ever enjoy!
- Just Bee-Cause Vase – Turn a mason jar into an adorable bee-themed vase with this free tutorial from art skills (includes a printable).
Please Share or Save This Fun Bee Centerpiece Craft Idea
Your shares are how this site grows and I am sincerely grateful. Know a friend who’d like this bee craft? Please share it with a crafty group on Facebook or save it to your favorite easy dollar store DIY pin board.


Made a couple of these and just love them 💕