
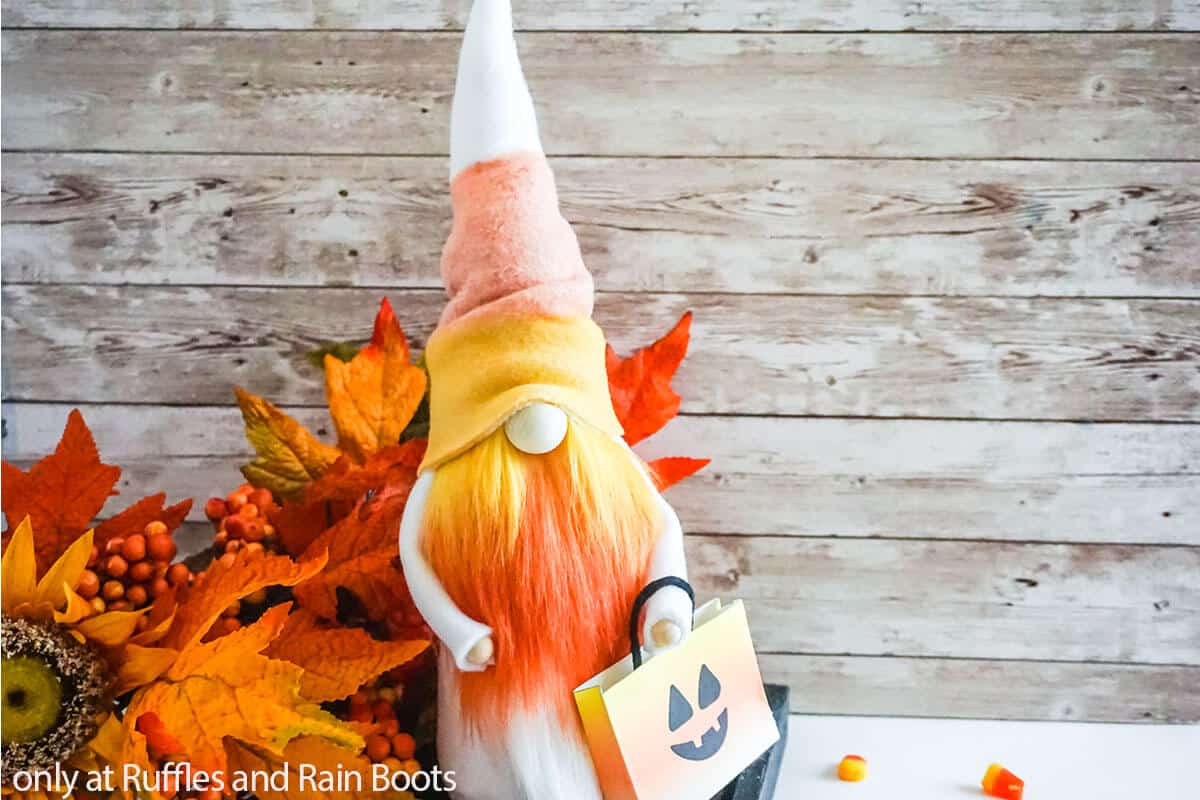
DIY Candy Corn Gnome for Halloween
I wanted a fancy Halloween gnome and when this candy corn gnome came to mind, I was inspired and got to sewing. You can create this easy Halloween gnome DIY project, too, with a bit of fleece, some fur, and alcohol inks.
Learn how to color fur with alcohol inks to create any color combination and expand your creative options. This comes with a step by step printed tutorial and a candy corn gnome video tutorial, as well.
RELATED READING: DIY Devil Gnome Pattern and Tutorial (No Sewing)
Candy Corn Gnome Pattern
Here at Ruffles and Rain Boots, I have a serious crush on all things Halloween. For some reason, I’m so ready for spooky-season that I started making Halloween gnomes before the end of August – I just couldn’t wait.
Part of why I’m so excited about this candy corn gnome is that it’s 100% unique and easy to customize. Let’s get started.
RELATED READING: THE BEST DIY GNOME TUTORIALS

No Time to Make This Now? Save or Share It for Later
If you need to gather supplies, save this to your favorite DIY gnome pin board or share it to Facebook. It will make it easy to find when you’re ready to begin.

As an Amazon Associate, I can earn from qualifying purchases. There could be affiliate links within this article.
Tips to Make this Halloween Gnome
- Grab the easy gnome sewing pattern here. One of my most elegant gnome patterns that I come back to time and again to customize for another pretty gift idea or quick addition to my displays. If you would rather make this cute trick-or-treat gnome without having to find your pair of fabric scissors, grab the same gnome pattern with cut files here. Seriously, it’s the same pattern you’d get the other way, but also includes the SVGs for Cricut or Silhouette.
- I have made painted gnome beards on several occasions. But, frankly, I was always a little disappointed with how long it took for the beards to dry. And don’t get me started on trying to dry them with a blowdryer (burnt faux fur is no pleasant). But, I found the most AMAZING method to make this fun DIY ombre gnome beard: Alcohol Ink.
- Speaking of beards, if you’re not familiar with faux-fur cutting, you’re going to want to check out this quick and simple video of how to cut faux fur. That way you know exactly how to cut your carefully colored beard without getting any chunky, sharp edges. We’re all about natural, flowing beards here. LOL!
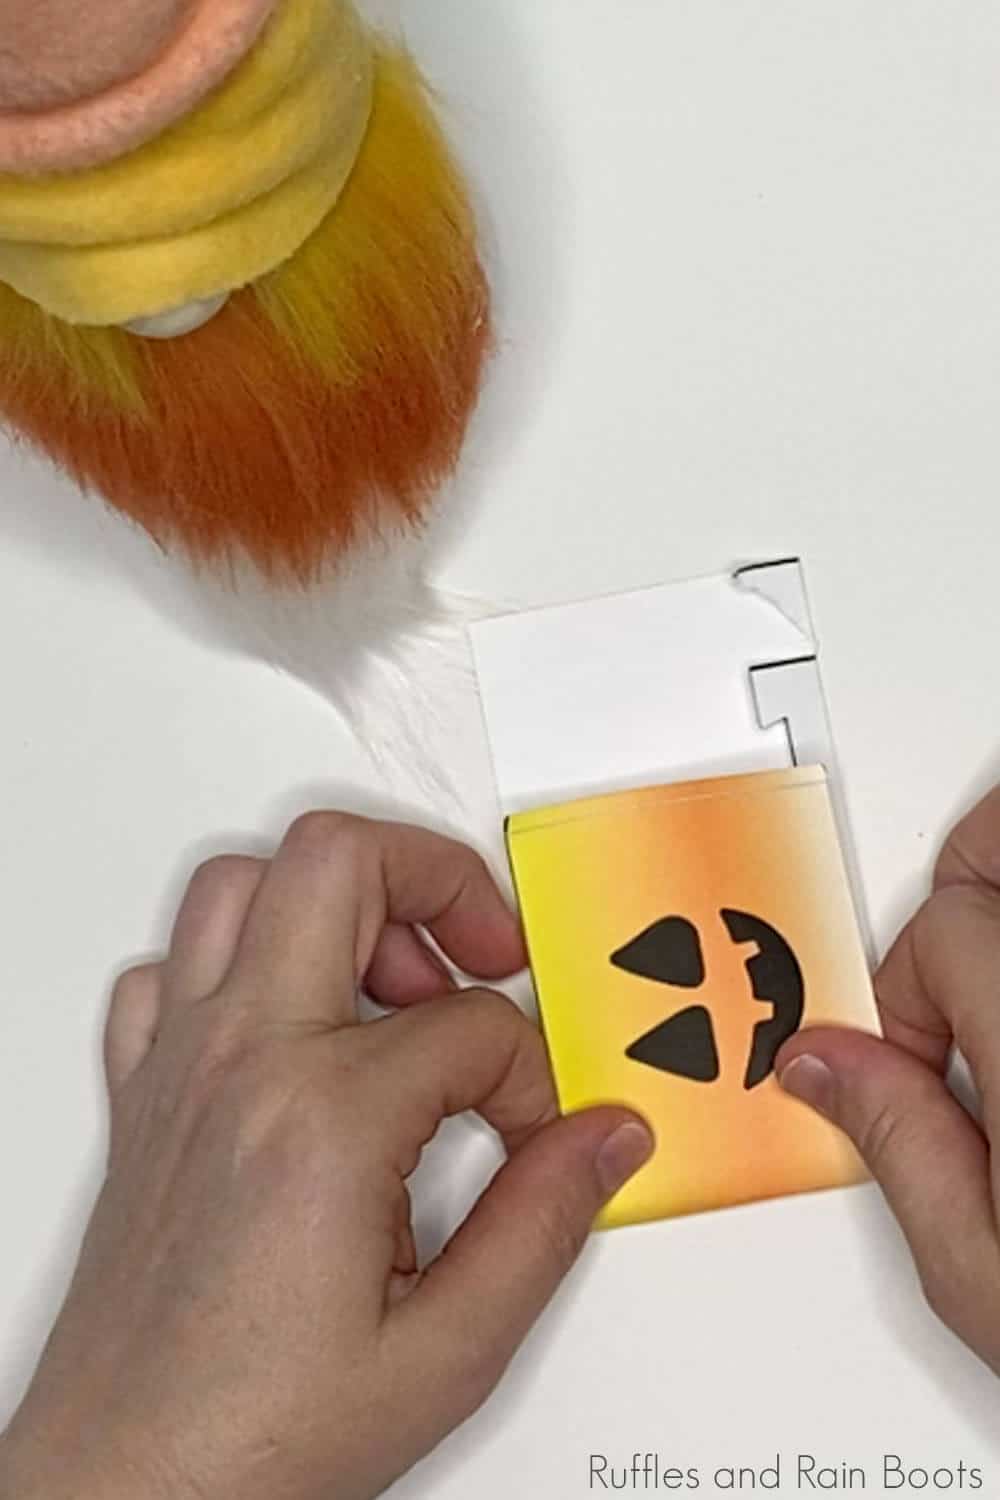
- Click here to get the trick or treat bag printable like my wee spooky gnome has. It’s a great print and cut file for Cricut or Silhouette, or you can just print it and cut it with scissors or a craft knife – it’s not overly complex. One cool thing about that particular candy bag is that it’s two-sided so you can decide how to display it!

More Halloween Gnome Patterns You Might Like
- Halloween Sock Gnome – This easy DIY is done in no time and looks so cute – boop the nose!
- No-Sew Witch Gnome – Not spooky at all and absolutely adorable in every way, you can make this witch gnome in just a few minutes!
- Easy Pirate Gnome Pattern – He’s got a hook for a hand and a peg leg that’s gloriously adorable – and the tricorn hat that just won’t stop!
- DIY Mummy Gnome – To make your halloween display more fun, make sure there’s a mummy (no curse required! LOL!).
Please Share or Save This Halloween Gnome DIY
Your shares are how this site grows and I am sincerely grateful. Know a friend who’d like this? Please share it on Facebook or save it to your favorite halloween crafts pin board.

How to Make a Candy Corn Gnome
Below is the written tutorial – just keep this page open and follow along If you’re making a DIY gnome craft playlist or you’re a visual learner like me, here is the candy corn gnome pattern tutorial.
Candy Corn Gnome Pattern

Such a fun and easy halloween gnome pattern, this candy corn gnome pattern makes a great (and fun) handmade gift idea or a spectacular way to bring a pop of color to your halloween farmhouse decor!
Materials
Gnome
- Sewn Gnome Pattern
- 1/4 yd White Fleece Fabric
- White Mongolian Faux Fur
- 1 - 1/2-inch Wood Bead
- 2 - 1/4-inch Wood Beads
- 1 - 2 cups Poly-Beads
- Small Amount of Poly-Fill
- 1 Piece of Floral Wire
- Red, White and Yellow Alcohol Ink
- 1 Sheet Card Stock Paper
- Scrap Black Felt or Black Embroidery Thread
Tools
- Sewing Machine (optional)
- Needle and Thread
- Razor Blade or Craft Knife
- Hot Glue Gun and Glue
- Paintbrushes
- Masking Tape
- Small Bowls
- Sewing Pins
- Cricut Maker Cutting Machine, optional
Instructions
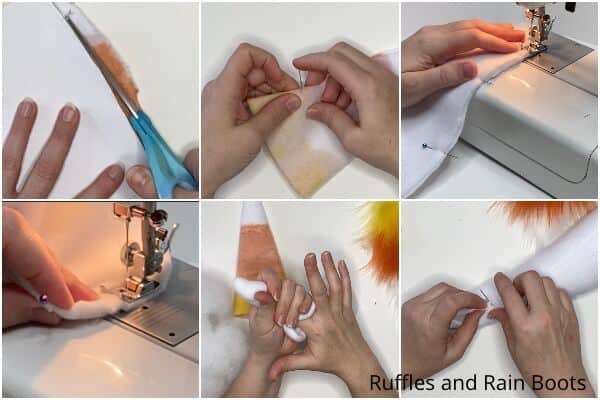
- Start by making your beard. Cut a gnome-sized triangle of faux fur more than adequate for your beard by turning the fur over and cutting only the fabric with the craft knife or razor blade. Lay out the fur on a sheet of parchment paper or poster board you don't mind getting colorful.
- Using your finger or a comb, separate the fur into 3 horizontal sections. Tape down the bottom section, covering it entirely. This section will be the white section of the beard. Take care to cover it entirely so that you don't accidentally drip or brush onto the white section.

- With the paintbrush, paint the top 1/3 of the beard with lemon yellow or a mixture of yellow and white alcohol inks (I found that the yellow by itself was far too dark). Be sure to brush the yellow fur back away from the rest of the beard material. Repeat painting the middle 1/3 of the beard with a mixture of orange and white or yellow, red, and white alcohol inks (I found that orange by itself was too dark and then I ran out of orange, so I made my own). Set the faux fur aside to dry for about 1 hour - do not rinse.
- Trace and cut out the gnome body shape, hat shape, two arm shapes, and bottom circle shape from the white fleece, per the Cozy Gnome Pattern.
- Lay out the hat piece on a sheet of parchment paper or poster board you don't mind getting colorful. With the paintbrush, paint the bottom 1/3 of the beard with lemon yellow or a mixture of yellow and white alcohol inks (I found that the yellow by itself was far too dark). Be sure to brush the yellow fur back away from the rest of the beard material. Repeat painting the middle 1/3 of the beard with a mixture of orange and white or yellow, red, and white alcohol inks (I found that orange by itself was too dark and then I ran out of orange, so I made my own). Set the hat aside to dry for about 1 hour - do not rinse.

- Fold the gnome body shape in half and run a hem along the open side with your sewing machine. Be sure to leave the small portion open on the side seam, as directed in the pattern. Attach the bottom circle shape by hemming it in place then turn the body of the gnome right side out. Fold the hat piece in half then hem along the seam, then turn the hat right side out.
- Fill the gnome body with the Poly-Beads. Tuck a small portion of Poly-Fill into the top of the gnome body to fill out the cone shape of the head, tuck the floral wire inside, curving both ends to keep them from poking through, and sew the body closed.
- Comb out your dyed faux fur beard and trim the faux fur into the perfectly-sized beard shape you like. Hot glue the beard to the body.
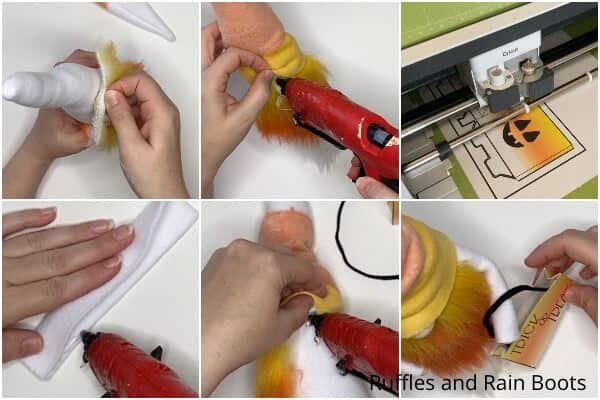
- Hot glue the nose in place about 1-inch below the top of the beard. Place the hat on top of the gnome's head, tucking it down over the top of the nose, with the seam of the hat in the back of the gnome. Hot glue the hat down on top of the nose, giving it a cute wrinkle.
- Make the trick or treat bag by either printing it and cutting it by hand or by printing it and cutting it on the Cricut or Silhouette. Once cut out, fold the bottom flaps of the bag over, then fold the sides together. Hot glue the tab on the side in place and hot glue the bottom flaps together. Cut a thin strip of scrap black felt or a length of black embroidery thread for a handle, then set aside.
- Fold the arm shapes in half and hem them in a long tube, then turn them right side out. I also slid a piece of floral wire into each arm to allow them to bend so they could hold the bag. Hot glue the hands in place on the ends of the arms. Slip each arm up into the hat on the side and hot glue it in place.
- Fit the bag onto the arm of the gnome, hot gluing the handle in place inside the bag, then get ready to display!


Notes
This gnome stands 14-15-inches (ish, depending on how twisty you make your hat, of course).
For more fun gnome patterns and tutorials, visit Ruffles and Rain Boots (we have lots...).
Recommended Products
As an Amazon Associate and member of other affiliate programs, I earn from qualifying purchases.


This gnome is adorable! I can’t wait to get started making it. Thank you so much,
Lila