
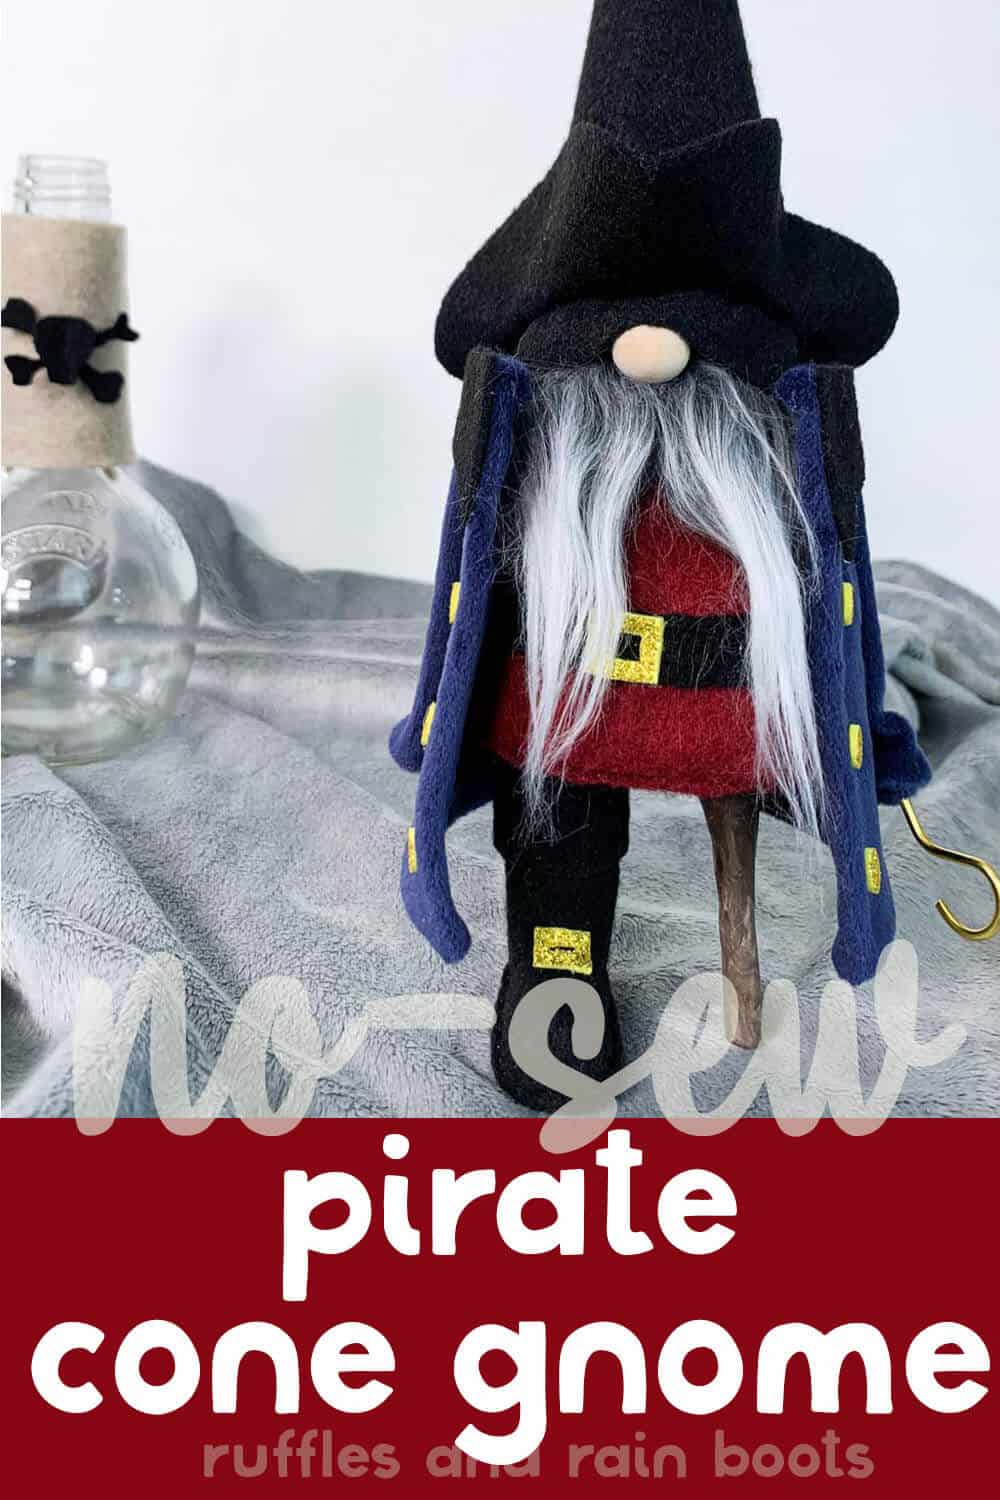
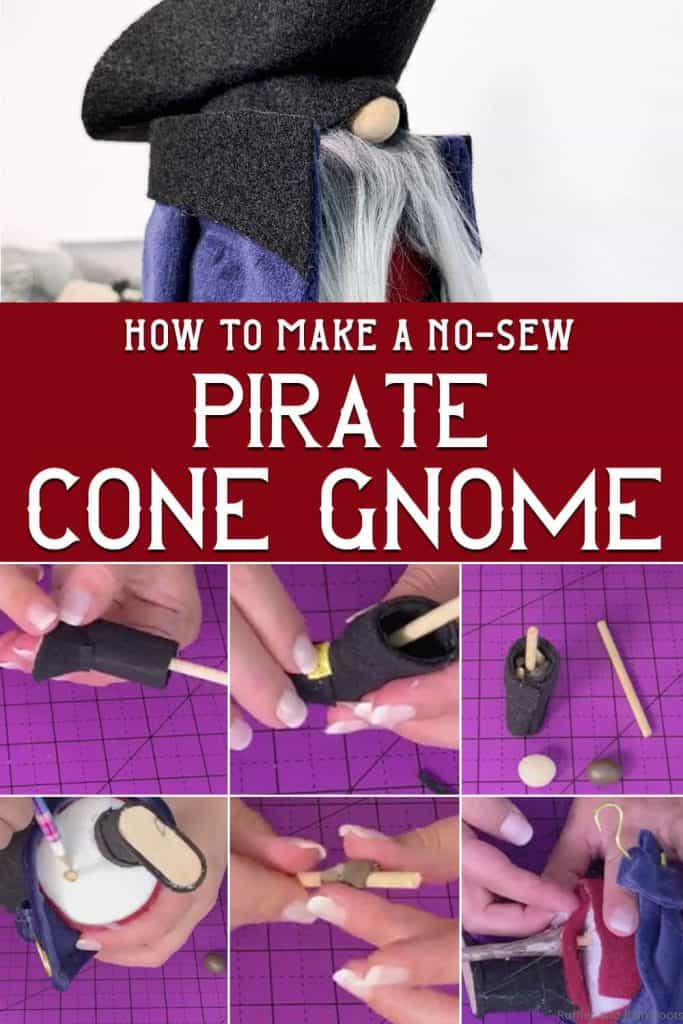
How to Make a Pirate Gnome for a Halloween Gnome or Just FUN!
I decided to start my Halloween gnomes a bit early this year with this tutorial for how to make a pirate gnome! I am sharing the tricorn hat pattern, the gnome jacket pattern, the boots, and even how to make a peg leg!
How to Make a Pirate Gnome
Here at Ruffles and Rain Boots, we are really ready for Halloween. I don’t know if it’s the heat or the just general readiness for this summer to be over, but I can’t wait for cooler weather, longer nights and some spooky tales. Also, I just love Halloween gnomes. They’re fun, silly and always a great way to stretch those creative muscles. So, when I came up with the idea for the pirate gnome, I ran to the craft room, ready to walk that plank!
RELATED READING: THE BEST DIY HALLOWEEN GNOME TUTORIALSA
He looks so much more debonaire than I imagined! Definitely one of my favorite DIY gnomes, for sure. If you are ready to shove off, me-hardies, and make a Halloween gnome pirate, let’s get started. #sorry

No Time to Make This Now? Pin it for Later
You’re busy, I get it. Pin this to your favorite easy DIY crafts board on Pinterest and it’ll be here for when you’re ready.
As an Amazon Associate, I can earn from qualifying purchases.
Tips to Make Halloween Gnome Pirate
- First, start by grabbing the no-sew pirate gnome pattern here. You’re going to love being able to make this fun pirate without any sewing.
- If you wanted to go completely overboard and make a little parrot from polymer clay, I totally encourage that. I ran out of time before I needed to get the video edited and the pattern made. But a parrot would be amazing.
- Do not be afraid of this gnome. Let me repeat: do not be afraid. It’s so much easier to make than it looks. You’re going to grab a cone like this one and then build up from there. So simple, you’re going to be surprised. Just follow the pattern and you’re going to love it.
Get the Pirate Pattern Here
Click below to add this fun pattern to your cart. So many gnomes can be made with this!
How Do I Make this Pirate Gnome?
I’m so glad you asked. Below is our written tutorial and the pirate gnome video tutorial is here.
Pirate Gnome
This is the most adorable pirate gnome tutorial that you're going to find. Ok, maybe I'm partial, but it's cute and fun. If you're in need of a fun Halloween gnome tutorial, this is al-rrrrrright, mateys!
Materials
- Pirate Gnome Pattern
- 7-inch Styrofoam Cone
- 1/8 yd Dark Blue or Purple Minky or Velvet
- Craft Felt in Red and Black
- Premium (Stiff) Felt in Black
- 2 1/8-inch Dowels (4-5 inch pieces)
- Small Amount of Brown Polymer Clay
- 1 Craft Stick
- 3 Wood Beads (or 2, if making using a hook for the second hand)
- Small Rocks
- Velcro Dots (2 Sets)
- Small Amount of Mongolian Faux Fur
- Cup Hook or 1-in Piece 12-gauge Gold Floral Wire, optional
- Gold Glitter Craft Foam, optional
Tools
- Hot Glue Gun & Glue
- Scissors
- Hole Punch
- Straight Pins
- Pencil
- Black Marker, optional
Instructions
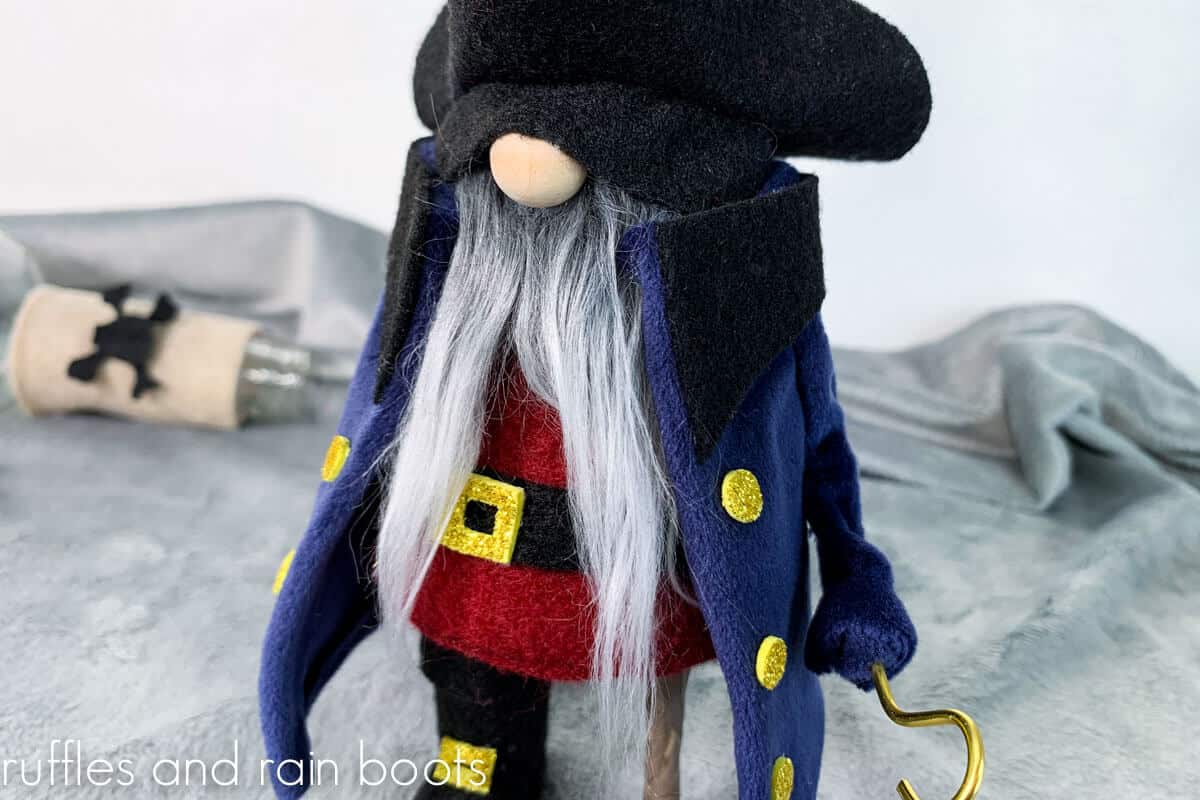
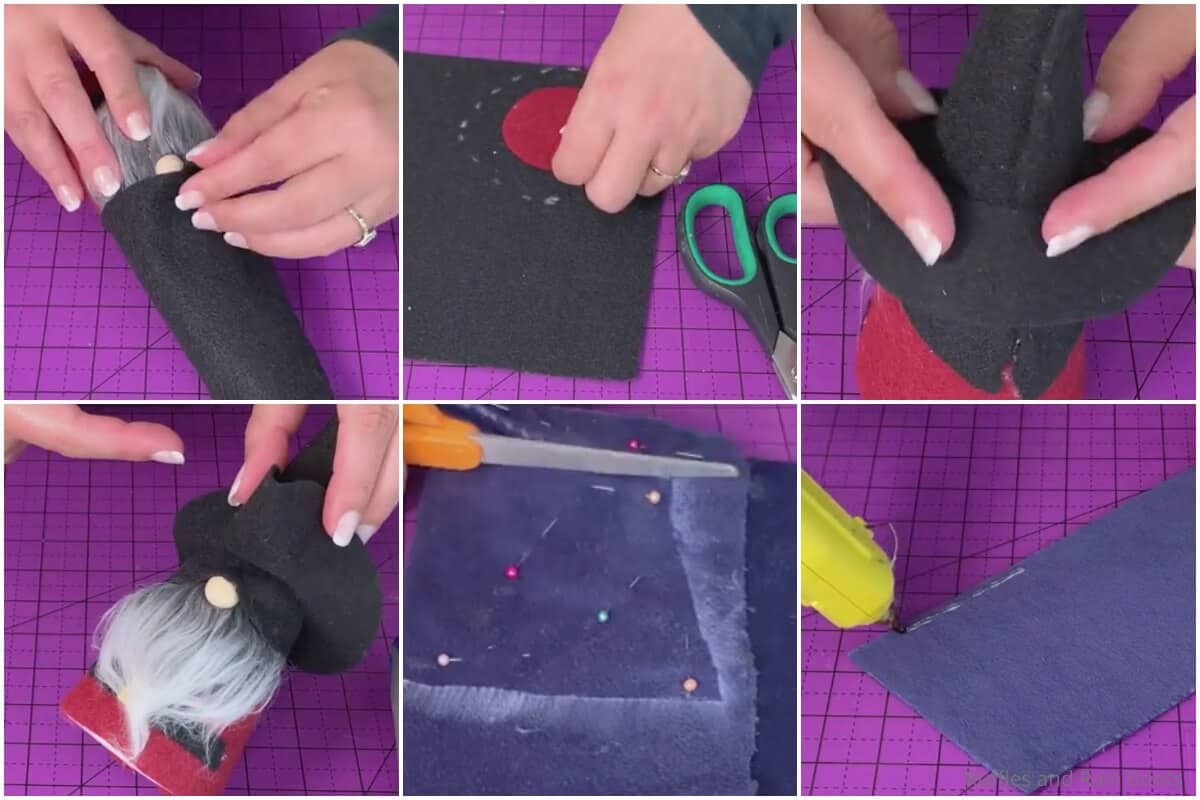
- Start by cutting the red felt to fit the bottom 1/3 of your cone for the shirt of your gnome. Leave additional room on the bottom edge for an overhang of about 1/4 inch on the bottom of the cone.
- Trace the bottom of the cone onto the red felt and cut that circle out, leaving no overhang. Set this aside for now.
- Place the shirt element onto the cone where you plan for it to sit and mark where the topmost part is where you want the bottom edge of your hat to sit. Set aside.
- Roll the cone in the black felt and cut it to size to fit the area from the mark all the way to the top of the cone. Set aside.
- Cut a small 3-inch x 2-inch rectangle of faux fur for the beard. Set aside.
- Wrap the shirt piece around the foam cone and hot glue it in place, maintaining the planned overhang on the bottom.
- Hot glue the beard in place on the front of the gnome, just above where the top of the shirt starts.
- Cut a tiny little rectangle (1/2-inch by 1/2 inch at most, with the center cut out) for a buckle from the gold glitter foam. Set aside.
- Cut the sash shape from black craft felt and hot glue in place under the beard, about halfway up the shirt from the bottom.
- Hot glue the buckle into the center of the sash.

- Place the nose onto the gnome in the center top of the beard, affixing it with hot glue.
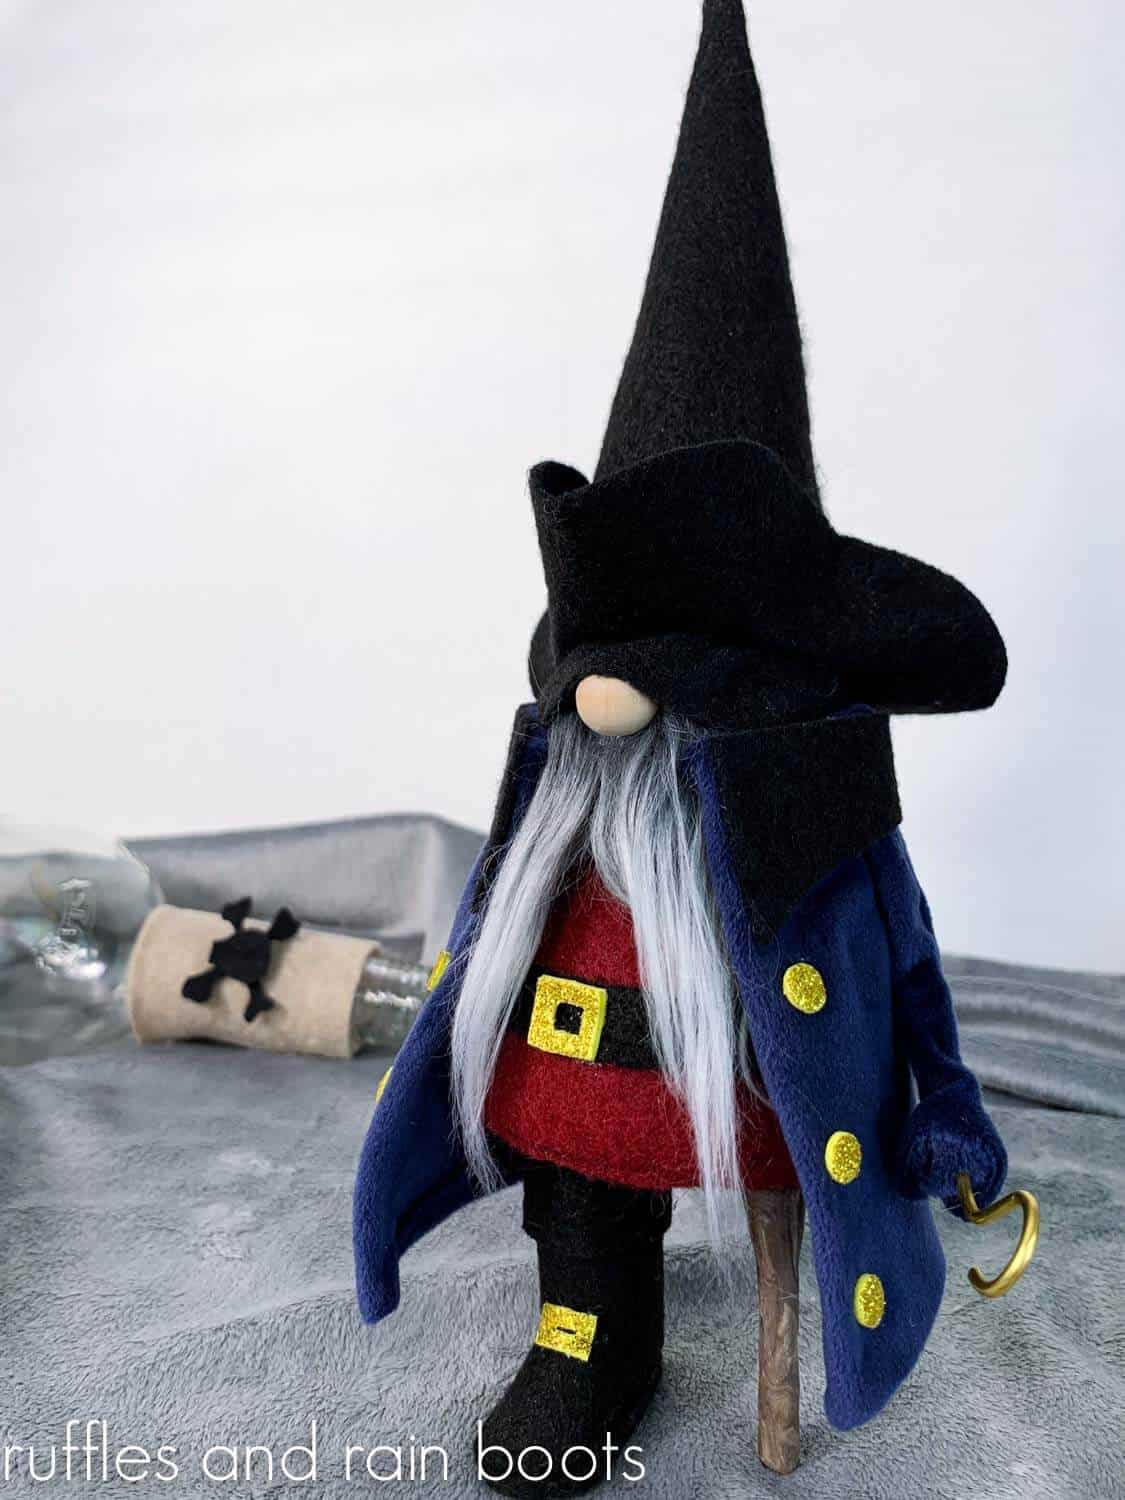
- Wrap the hat piece around the cone top and position it where you plan to have it sit. Hot glue the front piece in place on the nose first, so you know you like where it's sitting, then move to the back and hot glue the back of the hat in place, pulling it snug around the cone. Trim away any excess.
- Cut a circle of the stiff black felt about 1-inch in diameter larger than the bottom traced bottom of the cone circle you cut out in the earlier step. This does not have to be perfect. From this circle of felt, cut out the center in a rough circle leaving you with a hollow circle of no less than 1-inch wide.
- Slide the hollow circle onto the top of your gnome, working it down toward the bottom portion of the hat, creating a hat brim.
- Pinch the two sides of this hat brim toward the cone, forming a tri-cone shaped brim. Hot glue this in place, using the pins to hold the felt's shape while the glue cools. Set aside.
- Trace and cut out the jacket bodice shape from the dark blue fabric, then hem all the edges using the hot glue, to make sure it doesn't unravel.
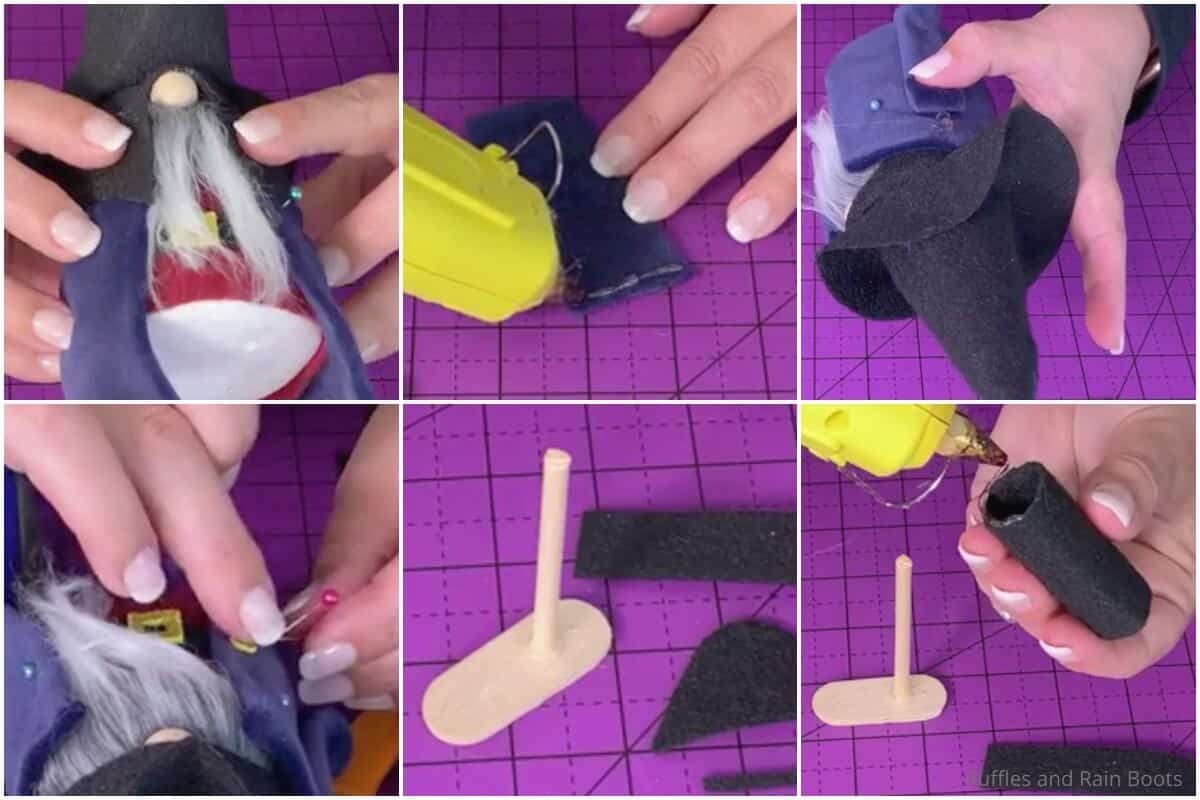
- Wrap this jacket bodice piece around the gnome with the skinny portion of the jacket tucked up under the hat brim in the back and the opening of the jacket on the front of the gnome. Pin this in place to make sure you like where it sits. If you want to, you can hot glue this in place, but I did not. I just left it pinned until the very end.
- Cut out the collar piece from the stiff black felt and wrap it around the jacket at the top to make sure it looks the way you want it to, then pin it in place, if desired, but then make sure it's off for the next few steps so it stays out of your way.
- Make the arms by cutting two of the arm shapes from the dark blue fabric then hemming one of the short sides with the hot glue. For arms without hooks, fold the arm in half wrong-side to wrong-side and hot glue in place, hot gluing the hand in place just inside the cuff. For an arm with a hook, make the hook with the wire or get your cup hook, then cut a small portion of the dark blue fabric in a circle (about 1/4 inch in diameter) and thread this onto the hook, hot gluing it in place in a cone, to finish off the look of the hook inside the jacket sleeve. Place the hook inside the sleeve on the wrong side, then hot glue it in place, folding the sleeve in half wrong-side to wrong-side to complete the sleeve with the hook.
- Line up the top of each arm with the edge of the jacket, and hot glue each arm in place onto the jacket.
- Using the hole punch, cut out 2-3 buttons from the gold glitter foam and hot glue those onto the jacket below where the collar of the jacket will end.
- Wrap the collar around the jacket and hot glue it in place.
- To make the legs, cut the craft stick in half, then make it in to a short, 1 1/2 long rounded oval by cutting down either end and rounding it. Repeat with the other half of the craft stick, then stack the two craft sticks on top of each other and hot glue them together.
- Hot glue a piece of dowel to the center toward the back of this craft stick.
- Cut the shoe elements from the pattern out of the stiff black felt.
- With the larger rectangle shoe piece, roll this into a cylinder and hot glue it in place.
- When the glue has set, slide this over the dowel and hot glue it in place on top of the craft stick, forming the cylinder into the shoe shape of the craft stick.
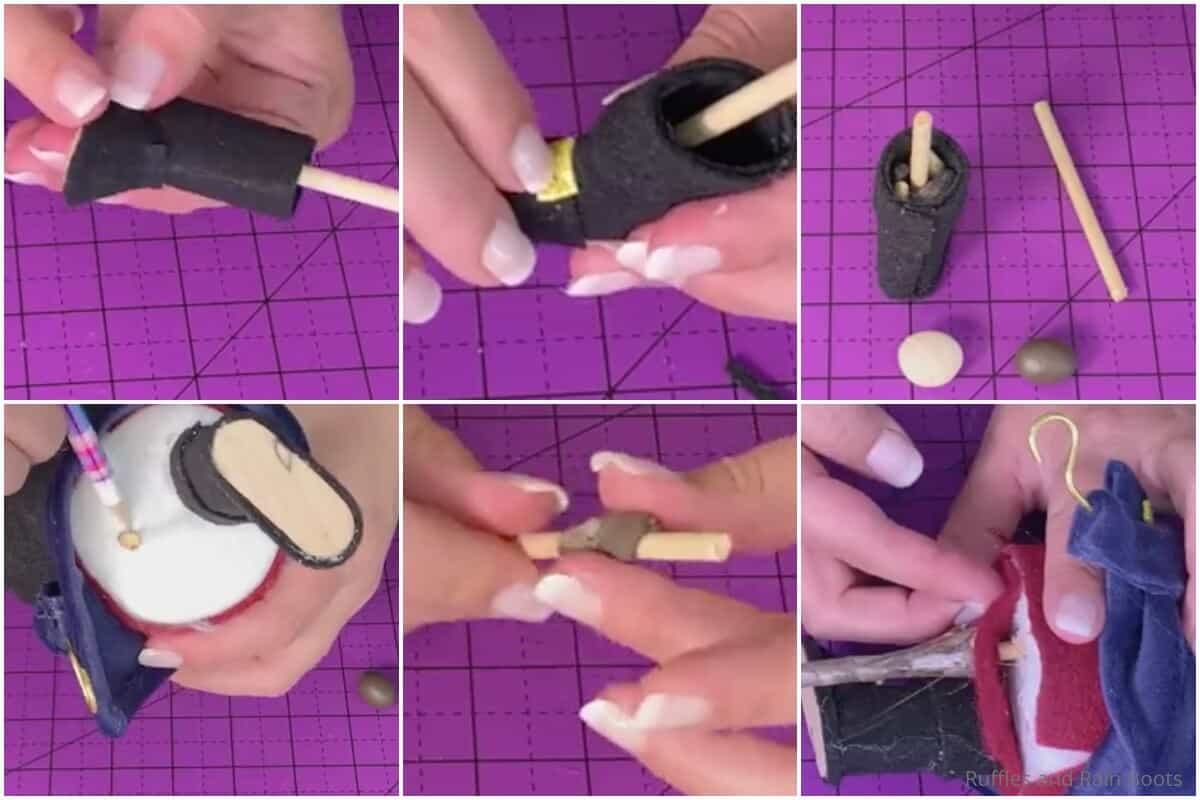
- Wrap the toe piece around the end of the craft stick with the slits allowing the toe piece to fit nicely around the cylinder of the boot. Hot glue this in place.
- Wrap the top of the boot shaft around the top of the boot and hot glue it in place.
- Cut a second tiny buckle from the gold glitter craft foam and glue this in place onto the front of the boot.
- Wrap the thin sole cover felt piece around the sole of the shoe and hot glue it in place.
- Fill the shaft of the boot with the small rocks.
- Use the dowel to poke two holes in the bottom of the gnome where you want the boot and peg leg to be, then press the peg leg and boot in place under the gnome body.
- Mark where the dowel starts being exposed beyond the cone and remove the dowel.
- Wrap the dowel in the brown polymer clay, taking care not to cover the bottom of the dowel nor the top where it will be inside the cone, and bake per the clay directions.
- Poke a hole in the felt circle for the bottom of the cone where the peg leg and boot will sit on the bottom of the cone, then hot glue the boot onto this piece of felt, sealing in the rocks into the boot as well as sealing the boot and peg leg to (what will be) the base of the gnome, adding stability.
- Place the bottom piece of felt onto the gnome's bottom, pressing the peg leg and boot into their corresponding holes. Then, working around the edge of the felt round, seal the base of the cone to the felt, closing any gaps where you can see the cone.
- Using the velcro dots inside the jacket, I placed one set on each side of the jacket to affix the jacket to the gnome. Then it was time to enjoy!

Notes
For more fun halloween gnome (ALL THE GNOMES) tutorials, visit Ruffles and Rain Boots!
More Halloween GNomes You Might Like
- Eerily Easy Halloween Sock Gnomes – So cute, so fun and REALLY easy. The basic sock gnome with a fun Cricut lettering twist that is spook-tacular.
- Nordic Viking Gnome Tutorial – Dress up as a viking for halloween? Yes, please. This cutie-patootie gnome is ready for trick-or-treating.
- Halloween Elfin Gnome – This fun gnome pattern is exactly what is awesome about making gnomes. So many options and variations, I just can’t stop!
Please Save This to Pinterest
Your shares are how this site grows and I am sincerely grateful. Know a friend who’d like this? Please share it on Facebook or save it to your favorite halloween DIY board on Pinterest.
Meet the Creator
Hi there, I’m Sarah Nenni-Daher. I’m a crafty gal and always have at least 14 projects going at once. I am a crafter, designer, DIYer, and pattern maker. I share my creations here and in the Ruffles and Rain Boots® Shop.
Here at Ruffles and Rain Boots®, you’ll find DIY gnomes, crafts, gifts, cupcakes, laser crafts, and so much more. I love sharing video tutorials over on YouTube and chatting with other crafters in my Facebook groups. We’d love to have you!