
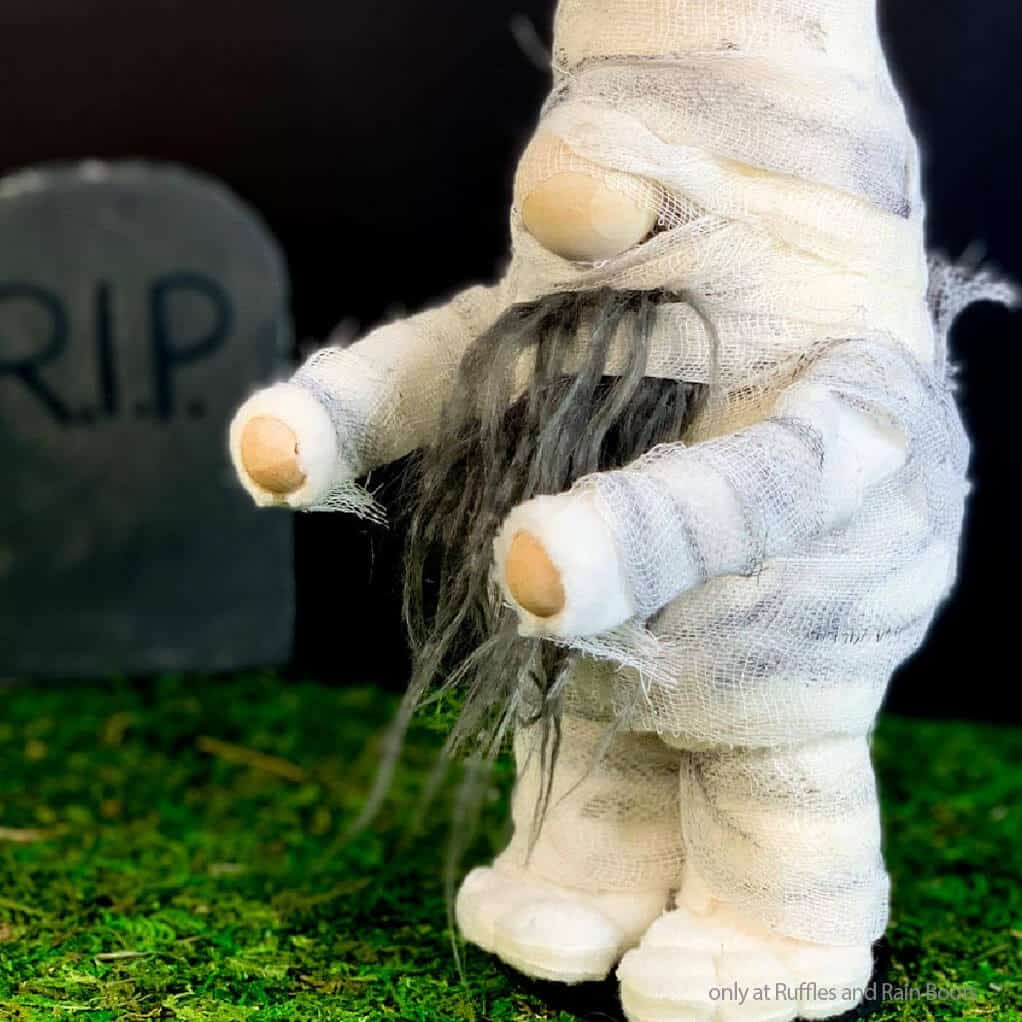
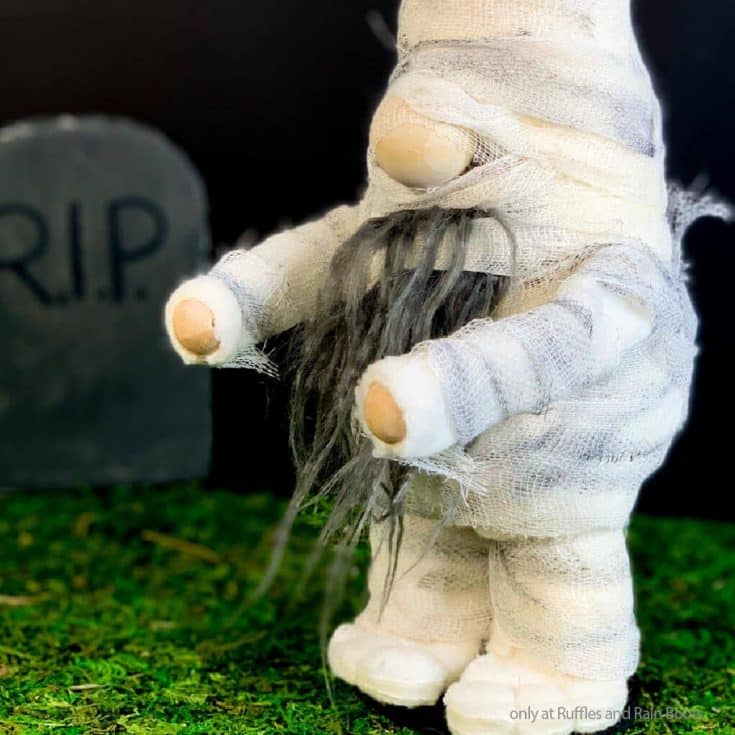
Easy DIY Halloween Mummy Gnome
This easy mummy gnome is so simple and done so fast, you’ll be able to enjoy the rest of your afternoon. Any cone will work for this body style, so you can have a standing gnome with arms and legs.
You can make this DIY Halloween gnome in no time using some fabric and gauze from the dollar store. The little scraps of faux fur sticking for the gnome beard just make me smile every time I see him.

RELATED READING: DIY Halloween Gnomes – Easy Sock Gnomes, Cone, and More
Easy Mummy Gnome
Here at Ruffles and Rain Boots, we have been decorating for Halloween this week. You might have seen this easy ghost gnome that people went crazy for recently. You asked for more (one person asked for a mummified gnome!), so I made this Halloween gnome mummy in a similar way.
I have been so pleased with how cute these gnomes have turned out and am glad they’re made in a way everyone can create. Let’s make this adorable gnome together.

Can’t Make This DIY Halloween Gnome Now? Save or Share for Later
If you’re gathering ideas or need to check your crafting stash supply, use the sharing buttons to save this. Save it to a Halloween crafts ideas pin board or share it to Facebook.

As an Amazon Associate, I can earn from qualifying purchases. There could be affiliate links within this article.
Tips to Make This Halloween Gnome Mummy
- Start by getting the no-sew mummy gnome pattern here (which happens to be bundled with the ghost gnome). The no-sew ghost gnome pattern AND cut file set here to cut with a cutting machine.
- Grab about 1/3 yard of a cream fleece fabric. We’re going to use the Dollar Tree gauze on the outside, but has holes and gaps. We don’t want to see the cone through that.
- This Halloween gnomes DIY pattern is primarily based on a 7-inch styrofoam cone. Cones make a great material to make a gnome body – just wrap and decorate!
- I used a wood round for the gnome nose and hands. That said, pompoms, wood beads, and even polymer clay gnome noses all work well.
- I made this entire gnome a no-sew pattern by using hot glue to make all my hems (with the exception of the toes, I couldn’t find a way to make the toes without sewing). It’s my recommendation that you use a fabric hot glue stick like these or my favorite brand of non-fabric glue here.
How to Make a Halloween Mummy Gnome
Below is the written tutorial for this Halloween gnome. If you are a visual learner, follow along with the DIY Mummy Gnome video tutorial here.
Easy Mummy Gnome
Create a DIY Halloween gnome everyone will love. Use a cone, some fabric, and dollar store gauze to create this mummy gnome. This standing gnome with arms and legs is easy to put together with this free gnome tutorial and you will not even need a sewing machine. Because this is a cone gnome body, you can make a tiny or a large gnome using the same techniques. Watch the full mummy gnome video tutorial and use it as a guide to create your own Halloween gnome craft.
Materials
- Mummy Gnome Pattern
- Scrap of Grey Long Pile Crinkle Fur (check out some awesome options here)
- 1 - 7-inch Styrofoam Cone
- 1/3 yard Off-White Fleece
- 2 Rolls Medical Gauze
- Off-White Embroidery Thread
- 12-Gauge Floral Wire
- 2 - 1/4 inch Balls or Beads for Hands
- 1 - 3/4 inch Ball or Bead for Nose
- 2 Foam Hair Curlers (optional)
- 1 Wood Round (I painted mine black)
- 2 - 4 1/4-inch long 1/4-inch thick Dowels
Tools
- Hot Glue Gun and Glue Sticks
- Sharp Scissors or Rotary Cutter
- Embroidery Needle
- Grey or Black Marker
Instructions
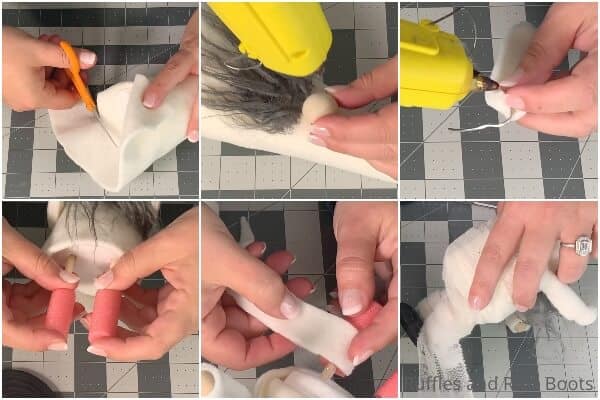
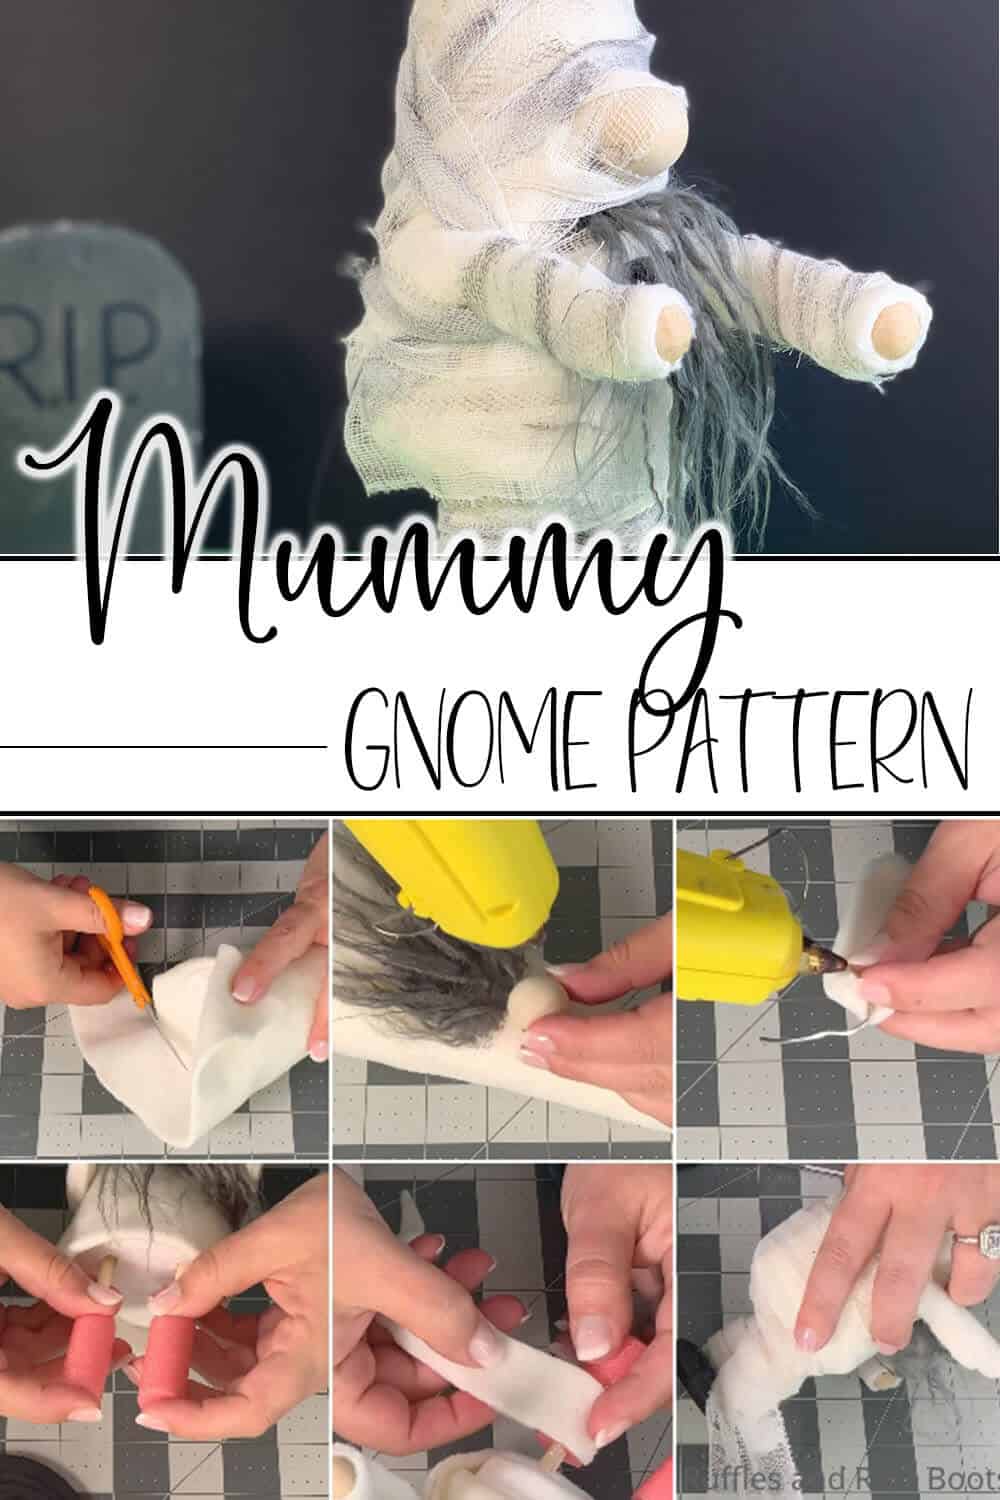
- Cut out the pattern shapes for the gnome body, two arms and four feet from the white fleece fabric. Cut out two eyes from the black felt.
- Wrap the body piece of fleece around the cone, hot gluing it in place snugly and trim off any excess. Save your scraps.
- Fold the arm shape in half and hot glue in place, then attach a bead for a hand.
- Cut the beard and glue to the front of the gnome, then hot glue the nose in place at the top of the beard.
- Mark where you want the arms to sit on the sides of the gnome.
- Slide a piece of floral wire into the arm, leaving a 2-inch long tail then bend the wire tail in a 90-degree angle at the end of the arm.
- Poke a hole in the marked spot through the fleece, then slide the wire into the hole, and hot glue in place.
- Flip two of the feet cut outs over, then match them up one on top of the other. Working with one foot at a time, hot glue between the two pieces along the toe line - do not glue the back.
- Add a stitch to separate each toe with a blanket stitch. Tie off the thread and trim end.
- Cut a foam curler into two 2 inches long pieces and remove the wire. Thread the dowels into the curler pieces then insert the dowels into the cone bottom, hot gluing them in place.
- Glue the front of the feet pieces to the wood round. Then, lift the top piece of the foot and glue the curlers onto the bottom foot fabric. Lift the back of the bottom foot’s fabric up and secure it to the curler or dowel. Then glue the back bottom foot fabric to the wood.
- Cut the scraps of the white fleece into strips and cover any curler or dowel showing by gluing the strips to the legs.
- Wrap the gauze around the gnome body, from head to legs. You can thread the gauze between the beard to get the look I made. Cut two small portions of the distressed gauze in half lengthwise and cover each arm.
- Add a second layer of distressed gauze on top and get ready for boos!

Notes
For more fun gnome patterns and tutorials, visit Ruffles and Rain Boots!
Recommended Products
As an Amazon Associate and member of other affiliate programs, I earn from qualifying purchases.


More No-Sew Halloween Gnome Patterns You Might Like
- Halloween Gnome Garland – I am so excited to have this little garland to decorate with this year because it’s like nothing you’ve ever seen.
- Easy Pirate Gnome – Argh! This be one of the best gnome patterns I’ve made. The jacket, the boots – it’s pretty awesome.
- No-Sew Witch Gnome – She’s wicked but oh so fun. This girl gnome has the cutest tennis shoes.
Please Save or Share This DIY Halloween Gnome Idea
Your shares are how this site grows and I am sincerely grateful. Know a friend who’d like this? Please share it on Facebook or save it to your favorite Halloween crafts pin board.
Meet the Creator
Hi there, I’m Sarah Nenni-Daher. I’m a crafty gal and always have at least 14 projects going at once. I am a crafter, designer, DIYer, and pattern maker. I share my creations here and in the Ruffles and Rain Boots® Shop.
Here at Ruffles and Rain Boots®, you’ll find DIY gnomes, crafts, gifts, cupcakes, laser crafts, and so much more. I love sharing video tutorials over on YouTube and chatting with other crafters in my Facebook groups. We’d love to have you!