
DIY Standing Scarecrow Gnome for Fall
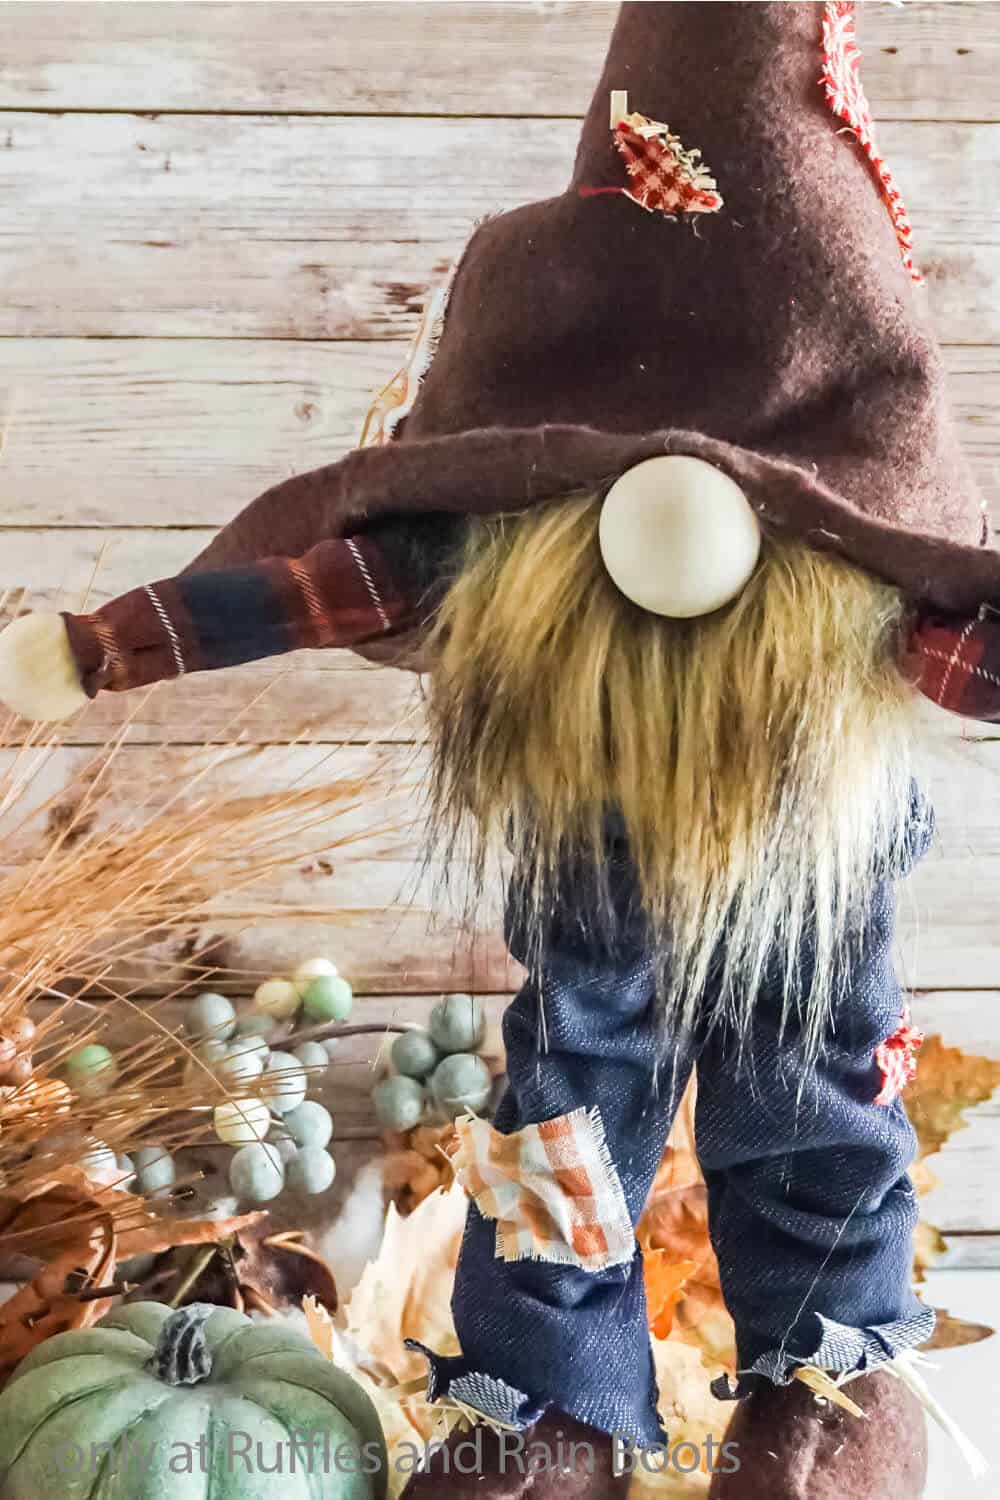
This stunning standing scarecrow gnome has a ton of features and is a fun Fall decor piece. It is a standing gnome with legs and posable arms – something everyone has been asking for.
Create this gnome using the provided pattern but change up the decorations. I added patches and raffia but would love to see how you make this fall gnome idea.

RELATED READING: DIY Witch Gnome (No Sewing)
What You'll Find On This Page
Standing Scarecrow Gnome Pattern
Here at Ruffles and Rain Boots, I have been on a fall and Halloween tangent lately. This fun standing gnome pattern has just been waiting to make his debut! I had a lot of fun creating all of the little details like the patches, his jeans, and the straw poking out.
The best part of this no-sew scarecrow gnome is that you can create his using hot glue – no sewing is required to construct this DIY fall gnome. We get to play with raggedy edges, so even if you’re a beginner crafter, yours will look great!
RELATED READING: Sitting Fall Scarecrow Gnome DIY
No Time to Make This Now? Save or Share It for Later
If you love this guy but can’t get started right now, save this to your favorite fall crafts pin board or share it on Facebook. Either way will make it easy to find when you’re ready to begin in this easy Fall gnome.

As an Amazon Associate, I can earn from qualifying purchases. There could be affiliate links within this article.
RELATED READING: Buffalo Check Fall Gnome with Pumpkin Accent
How to Make a Curved Gnome Hat
I have made a handful of different types of gnome hats, trust me. But one question I get all the time is: how do you make a curved gnome hat? And I’ll be honest, it can completely depend on the gnome that you’re making. That being said, here are my favorite tips, for anyone who still has this question.
- Use a curved hat gnome pattern. If you’re using a pattern that specifically has a curved hat, you’re already one step ahead than when you were not working from a pattern at all.
- Use a thick floral wire. If you want a gnome hat to retain it’s wrinkles, the thickness of the wire can play a big part.
- Use a stitch (or two) or glue your curve/wrinkled hat in place. I know this might seem counter-intuitive, because it can look like magic getting those hats to make that curve. A well-placed stitch IS magic – just tack your hat into the bend you want with a stich or glue those wrinkles down.
This particular scarecrow gnome pattern utilizes a curved hat, but it’s trimmed to allow the straw to poke out the top.

RELATED READING: DIY Fall Sock Gnome with Free Gnome Hat Pattern
Tips to Make this No-Sew Scarecrow Gnome
- Click here to get the no-sew gnome pattern which features both the no-sew gnome pattern and the sewn gnome pattern (both are included). If you want your cutting machine to do the work, get the pattern with cut files here.
- For this gnome, I really wanted him to have one of my favorite set of gnome boots for standing in the fields. You can grab that pattern for gnome boots here – this set of gnome shoe patterns my BEST SELLING gnome pattern, so you know it’s fantastic.
- If you’re worried about how to cut faux fur, I have this quick video tutorial for how to cut faux fur here. Watching the video is well worth it, though, particularly if you’re new to cutting faux fur.

DIY Standing Scarecrow Gnome Video Tutorial
If you’re a visual learner, watch the standing scarecrow gnome video tutorial on the YouTube channel. Be sure to subscribe – we have a lot of fun over there.

More Fall Gnome Crafts You Might Like
- Fall Gnome Garland – Such a pretty gnome garland that really sets-off my mantle and all the bright colors are just *chef’s kiss*!
- Modern Fall Shelf-Sitter Gnome – Timeless and elegant, I love this modern gnome look for fall!
- Fall Farmhouse Sock Gnome Display – Seriously one of the cutest gnome couples you can make – and just takes a few minutes!
Please Save or Share This Fall Gnome Idea
Your shares are how this site grows and I am sincerely grateful. Use the sharing buttons to save this to a DIY gnomes pin board or share it with a crafty Facebook group.

How to Make a Standing Scarecrow Gnome
Below is the step by step written tutorial. Keep this page open and follow along with the instruction or print it to take with you.
Standing Scarecrow Gnome Pattern

I fun and easy way to add some fall farmhouse flair to you decor, this standing scarecrow gnome pattern is just adorable on all levels!
Materials
- No Sew Pattern Here
- 1/4 yard Dark Brown Fabric
- 1/4 yard Jegging Fabric (I used an old pair of kids' jeggings)
- Scraps Fall Print Cotton
- 1 Large Wood Bead
- 2 Small Wood Beads for Hands
- 1 Floral Wire
- 1 Sheet Brown Kraft Paper Card Stock
- 1/4 yard Brown Mongolian Faux Fur
- Small Amount of Polyfill
- 2 cups Poly Beads
- 2 - 1/4-inch Dowels for Legs, optional
- 1 Set Winter Cutie Booties, optional
- 1 Mini Straw Bale
Tools
- Hot Glue Gun & Glue
- Scissors
- Razor Blade or Craft Knife
Instructions
- Trace and cut out one gnome body shape and 2 hat shapes out of the dark brown felt fabric. Fold the gnome body shape in half and run a hot glue hem along the open side. Cut slits in the flap about 1/2 inches long and 1 inch apart, then fold the flap of the gnome body shape over and close the bottom of the gnome with hot glue. Allow the glue to dry fully.
- Turn the body of the gnome right side out. Fill the gnome body with 1-2 cups of poly beads. Tuck a small portion of polyfill into the top of the gnome body to hold the poly beads inside.
- Cut off the top of the two hat pieces where the hat starts to curve. With your hot glue gun, run a hem along the side edges of the two hat pieces, leaving a small gap of 1 1/2 to 2 inches long on each side of the hat. Allow glue to dry completely. Roughly trim the brim edge of the hat to give it a rougher look than your clean cuts. Turn the hat right side out and fill the hat a little with a small amount of polyfill.

- Make the Winter Cutie Booties, following the pattern, adding a piece of foam core board cut to a little smaller than the sole shape to the sole for additional stability.
- Fit a dowel inside each of the shoes then hot glue them in place, adding poly beads or polyfill to help hold the dowels in place, as needed.
- Fit a piece of the kraft brown card stock around each of the legs, hot gluing it in place, in order to fill-out the space in the ankle of the bootie and give the leg a bit of body so it looks stuffed under the pants.
- Cut a piece of jegging fabric that covers the bottom 1/2 of the gnome body, including the base. Hot glue hem the rough edges. Fit this fabric piece around the gnome and hot glue it in place with the gnome's body shape covered.
- Cut two pieces of jegging fabric to loosely cover the legs. Fold the jegging fabric wrong-side to wrong-side and hot glue hem the two side together. Turn the two legs right-side out and fit them over the legs, folding the body-side hem over into the leg and hot gluing it in place.

- Hot glue the body on top of the legs, affixing the dowel, card stock and jegging material to add a little stability. Slide the floral wire through the top of the body, down through the base of the gnome and into one of the legs, if possible, to add just one more added layer of stability.
- Cut out the beard shape from the brown faux fur by turning the fur over and cutting only the fabric with the razor blade or craft knife.
- Affix the beard to the gnome by hot gluing the beard to the body, about 2 inches below the top edge of the gnome body. Hot glue the nose in place about 1-inch below the top of the beard. Place the hat on top of the gnome's head, tucking it down over the top of the nose.
- Hot glue the hat in place in the back and sides in just a couple of places--not the whole way around, then one little dot on the nose to make a wrinkle (this is the best part).
- Cut out two arm shapes from the printed cotton fabric. Fold the shape in half wrong-side to wrong-side and hot glue it in place. Turn the arm shape right-side out. Fit a piece of floral wire into each arm and add a little Poly-Fill to give it some shape. Slip each arm up into the hat on the side and hot glue it in place. Hot glue the small wood bead "hands" in place on the ends of the arms.
- Fill any of the gaps in the hat with patches cut from the printed cotton fabric and then follow by hot gluing in some straw from the straw bale. Add some straw coming out of the pant legs, sleeves and around the edge of the hat. Then get ready to display your gnome because they're done!


Notes
For more fun DIY gnome patterns, visit Ruffles and Rain Boots!
Recommended Products
As an Amazon Associate and member of other affiliate programs, I earn from qualifying purchases.


Meet the Creator
Hi there, I’m Sarah Nenni-Daher. I’m a crafty gal and always have at least 14 projects going at once. I am a crafter, designer, DIYer, and pattern maker. I share my creations here and in the Ruffles and Rain Boots® Shop.
Here at Ruffles and Rain Boots®, you’ll find DIY gnomes, crafts, gifts, cupcakes, laser crafts, and so much more. I love sharing video tutorials over on YouTube and chatting with other crafters in my Facebook groups. We’d love to have you!