
DIY Devil Gnome for Halloween
This adorable DIY devil gnome comes together with a glue gun – no sewing required! Use this step by step Halloween gnome tutorial to create the cutest little decoration.
I have created a gnome tutorial video, as well, walking you through each step to craft this guy and provide tips to make him look high-end. Read below to get started on this fun craft idea for Halloween.
RELATED READING: The Best Halloween Gnomes to Make
What You'll Find On This Page
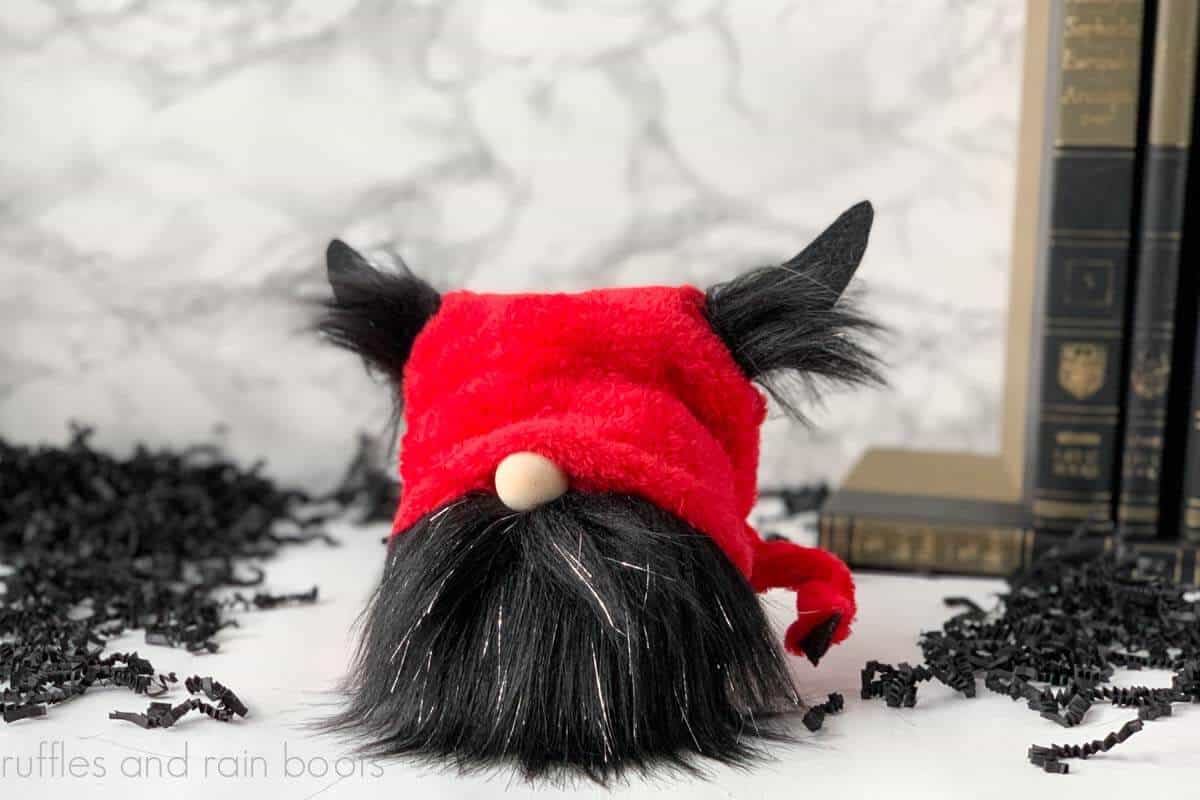
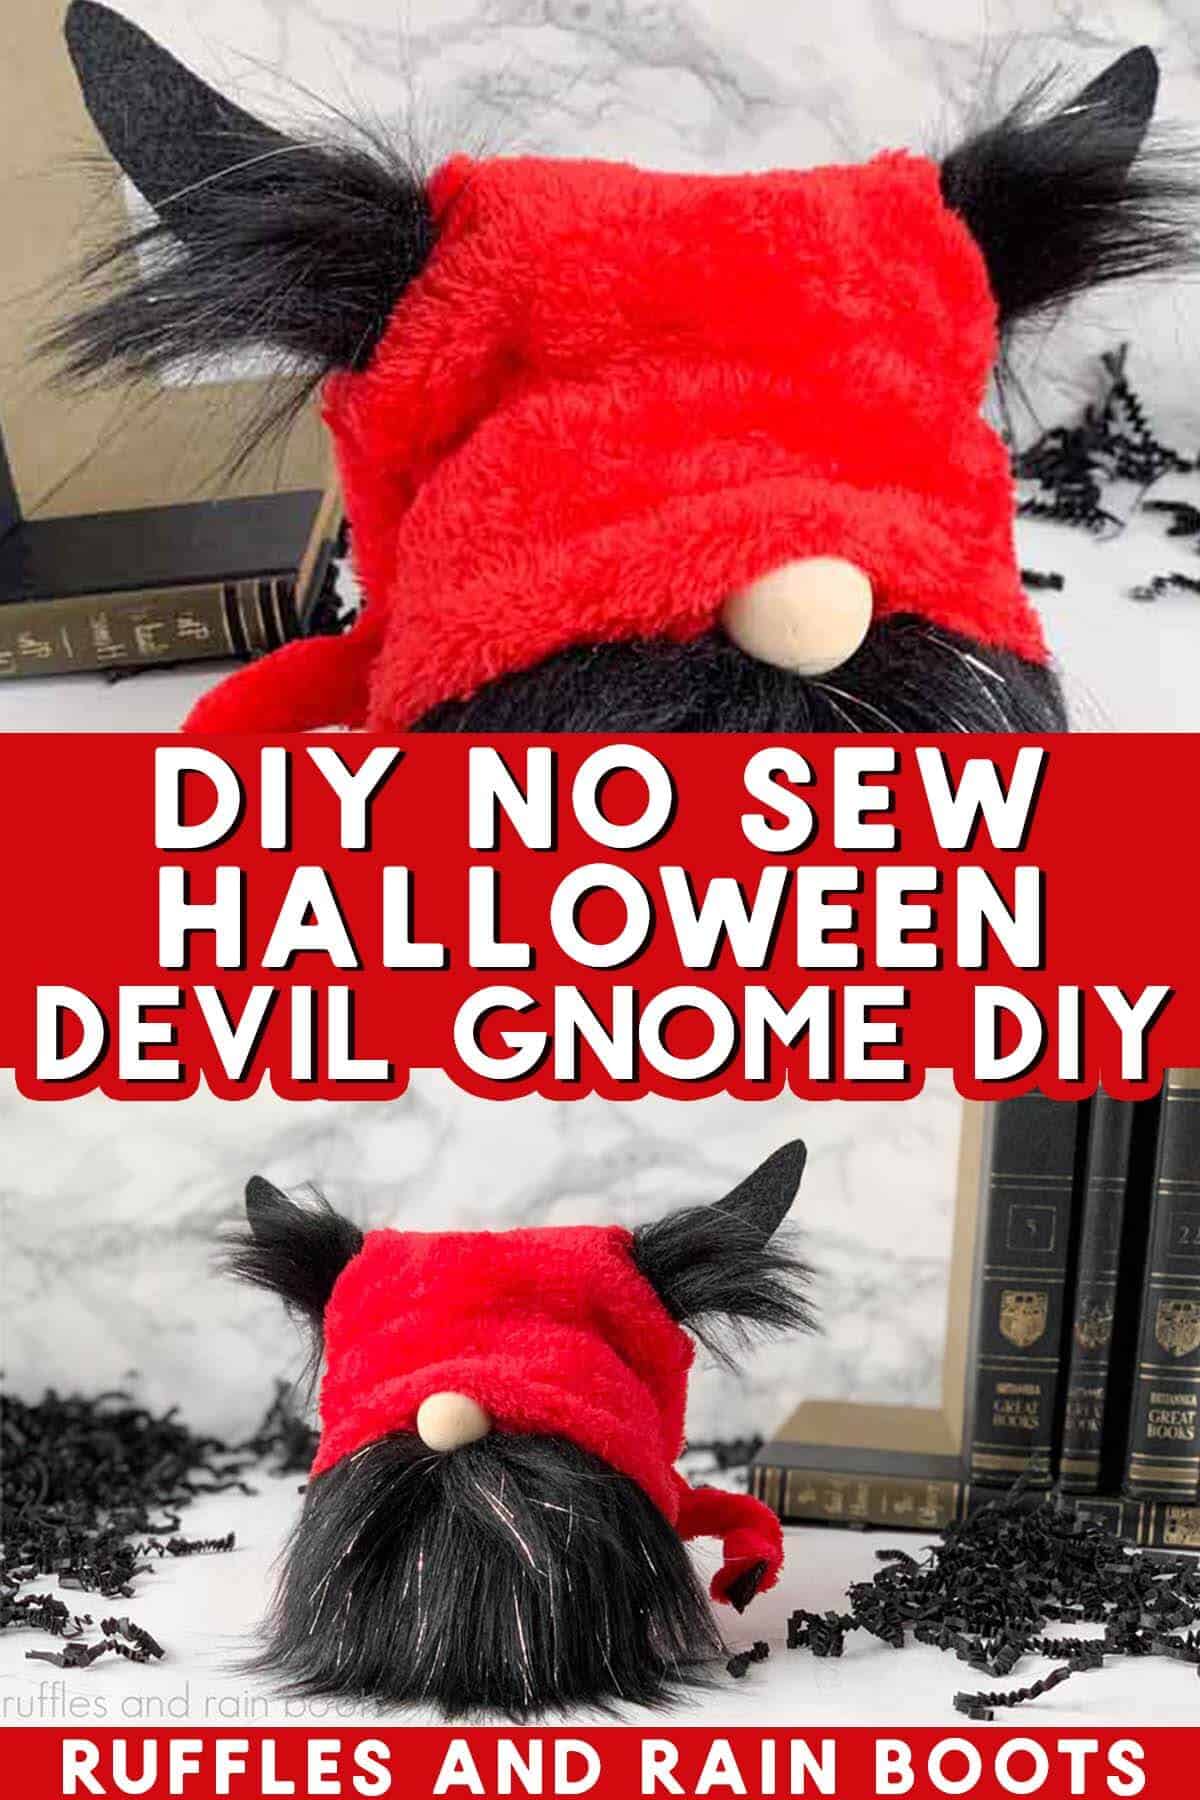
Devil Gnome with Horns and Tail
Here at Ruffles and Rain Boots, I’m gearing up for spooky season with a few creations. Most are being shared only on the YouTube channel (you can subscribe here), but this guy is too cute not to put here, as well.
This little guy comes together SO quickly using just a hot glue gun but for my friends who love to sew: the gnome pattern has those instructions, as well! It’s the best of both words for this devilish little fella.
If you want to make this but need to gather supplies, save this to a DIY gnomes pin board or share it on Facebook. Either will make this fun Halloween gnome idea easy to find when you’re ready to begin.

As an Amazon Associate, I could earn from qualifying purchases. There could be affiliate links within this article.
RELATED READING: DIY Witch Gnome Tutorial and Easy Witch Hat Pattern
Tips to Make This Fun Halloween Gnome Idea
- The Stout Gnome Pattern can be created with hot glue, as shown in this tutorial, or made with a sewing machine. The pattern has instructions for both.
- I used luxe fleece or minky fleece. If you want to use this, note that it can be quite messy when cutting. Use a lint roller (a lot).
- The faux fur I used has a tinsel woven in. It’s an inexpensive fur and sheds a lot when cutting, so a few good shakes will help settle the gnome beard.
- For the gnome nose, you can use a pompom, wood or plastic bead, a clay nose you form from polymer clay – the options are endless.
- The tail is optional for this devil gnome pattern and it’s also optional to wire it. I thought a posable tail would be cute and fun (it is), but you can create a smaller one to lie on the table, as well.

RELATED READING: DIY Christmas Gnomes – You Won’t Believe Your Options!
Supplies to Make This DIY Halloween Gnome Craft
Below are the supplies I used, however, I’d love to hear how you would make this cute devil. As always, remember to check your stash and remnants because you can always combine fabrics and even furs!
- Body Material (I used the fleece linked below and it’s SO soft)
- Faux Fur
- Stiff Felt
- Gnome Nose (I used a wooden bead but share options in the tips)
- Poly Pellets (for weight)
- Poly-Fil (for stuffing)

DIY Devil Gnome Tutorial
Below you will find the step by step process I used to create this cute easy DIY Halloween gnome. If you are a visual learner, watch the DIY Devil Gnome video tutorial (and be sure to subscribe).
For a printable version of this tutorial, scroll to the bottom of this page. Note: there are no images, so if you would like those, keep this page open while you craft.
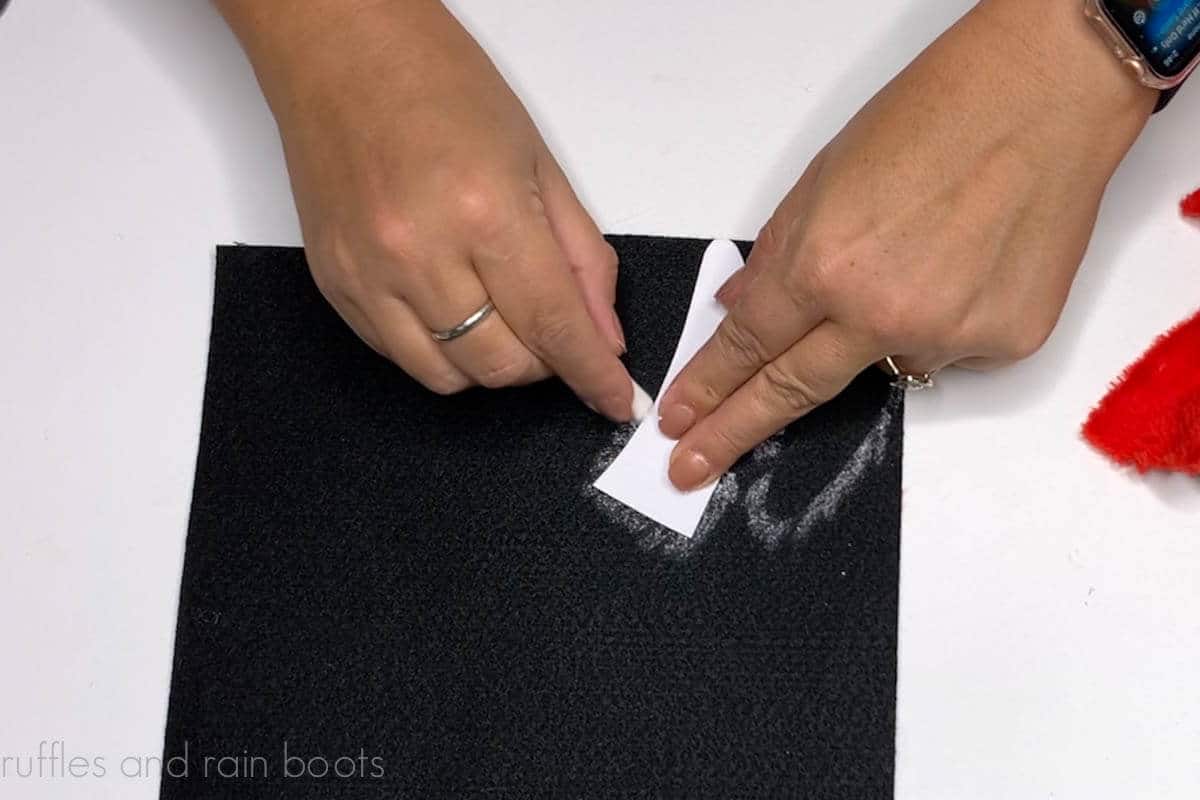
First, use chalk to trace the horns onto the black stiff felt. Cut them out and clean off any chalk.
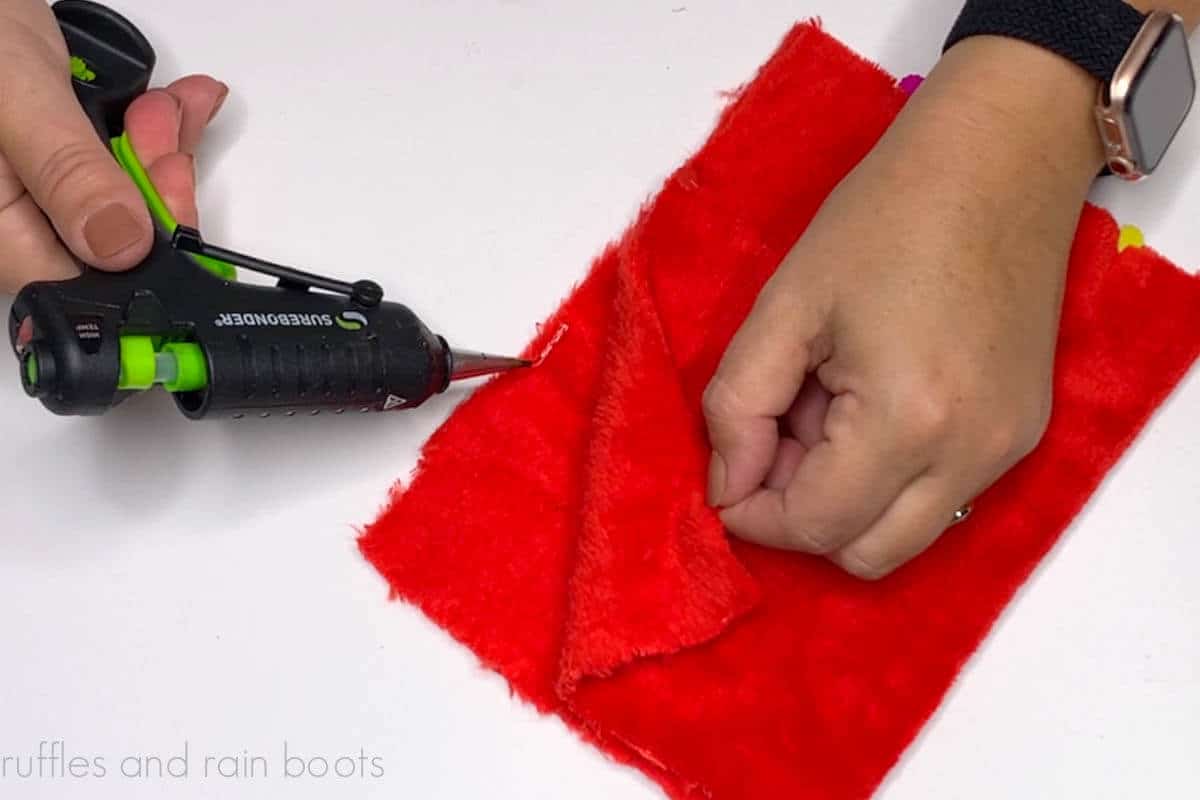
Cut the body and hat from luxe fleece using the Stout gnome pattern pieces. Pin together per the pattern. Use hot glue to secure the body of gnome, gluing along the side and bottom edges. Set aside to dry.
Open the body per the pattern, lining up the seam in the front middle and creating a diamond shape with the bottom. Create the box bottom by folding down the top and bottom diamond points in towards the middle and secure with hot glue. Let dry completely.

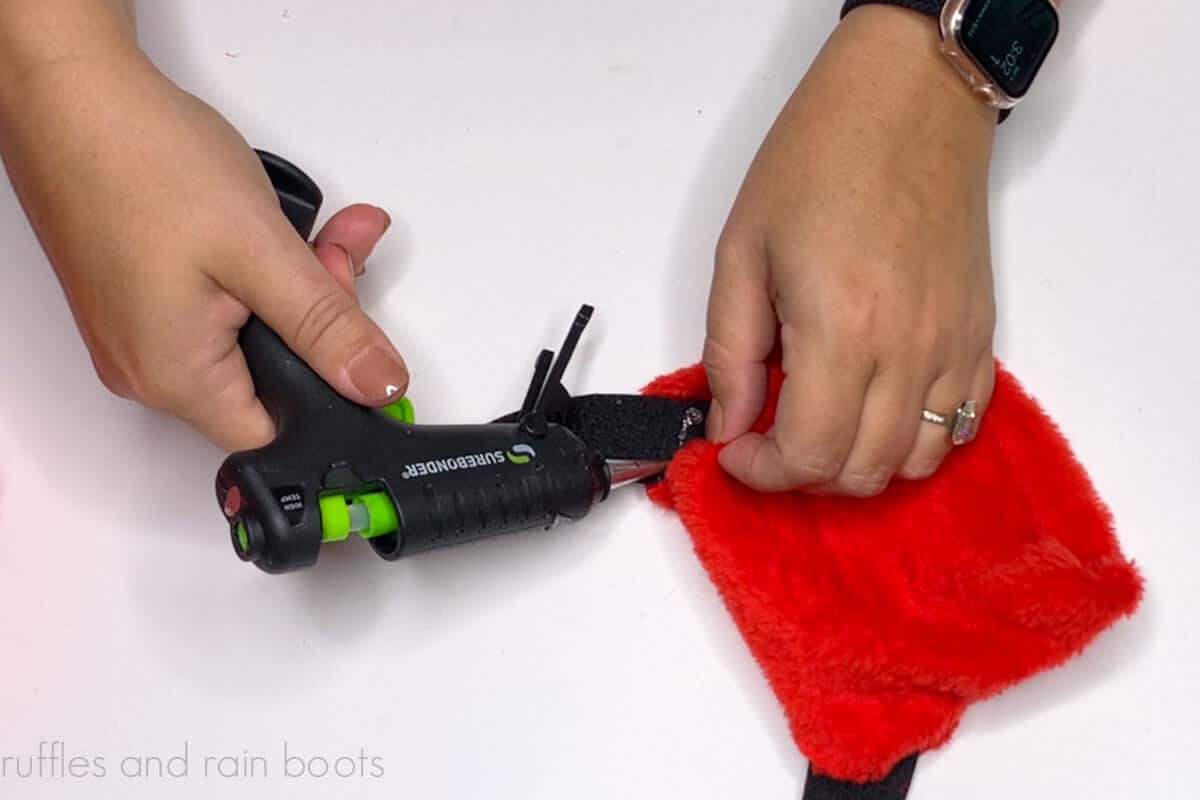
Create a brim to the hat, if using, by securing the bottom 1/2 inch up the wrong side of the fabric with hot glue. Secure the lower sides and top center of the hat with hot glue, leaving the horn portions open.

Flip the hat right sides out and tuck in each horn. Secure with glue by folding over the hat edges slightly and gluing them to the felt in front and back for both horns.
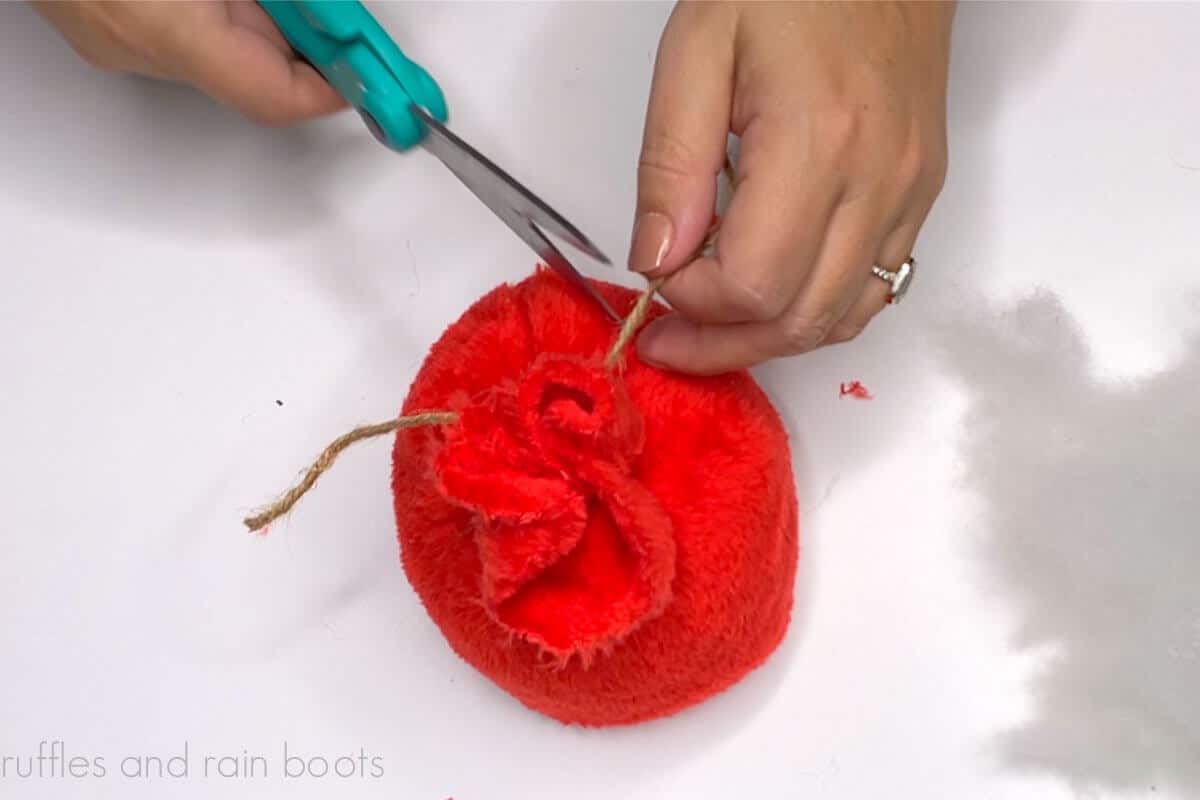
Flip the body right sides out and fill with at least 1.5 cups of poly pellets for weight. Add stuffing up to 1.5 inches from the top edge and secure with twine.
Place the hat on the body and size for the faux fur gnome beard. I used the width of the gnome and a couple inches high (dropped V-shape). Cut the faux fur fabric backing with an X-Acto knife and glue to the body of the gnome.
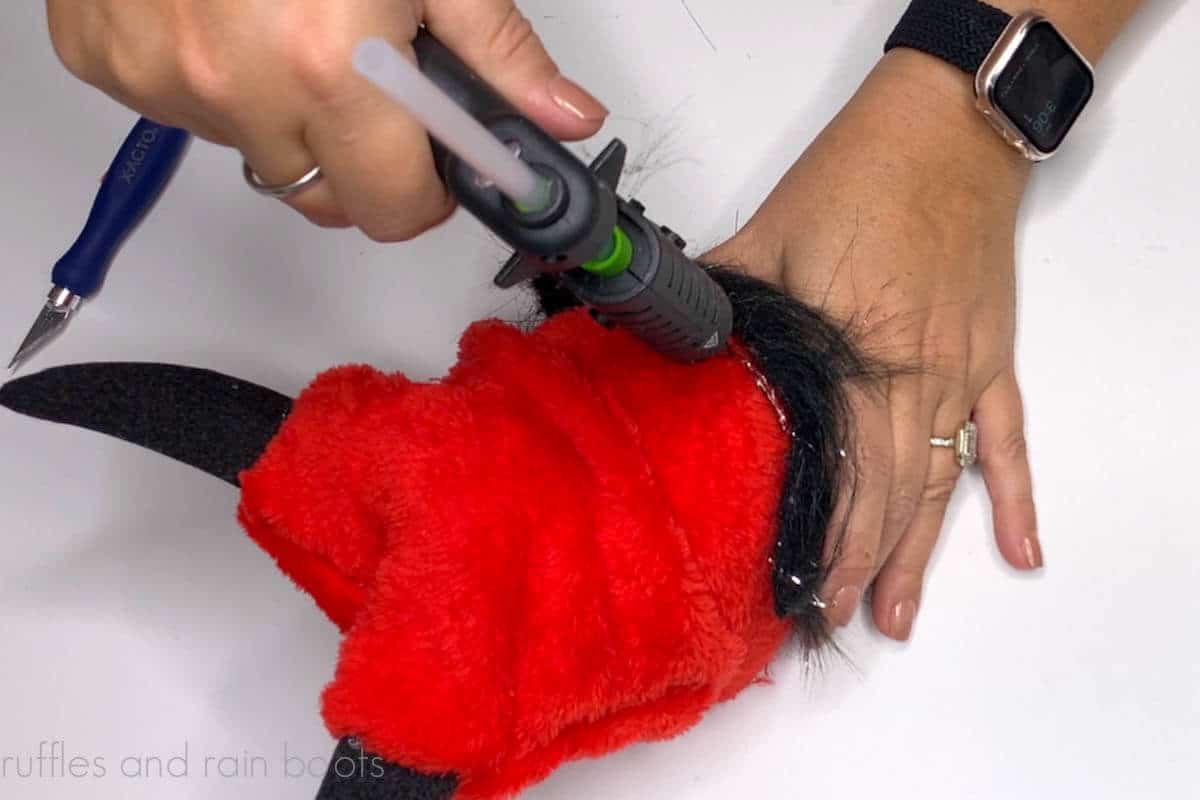
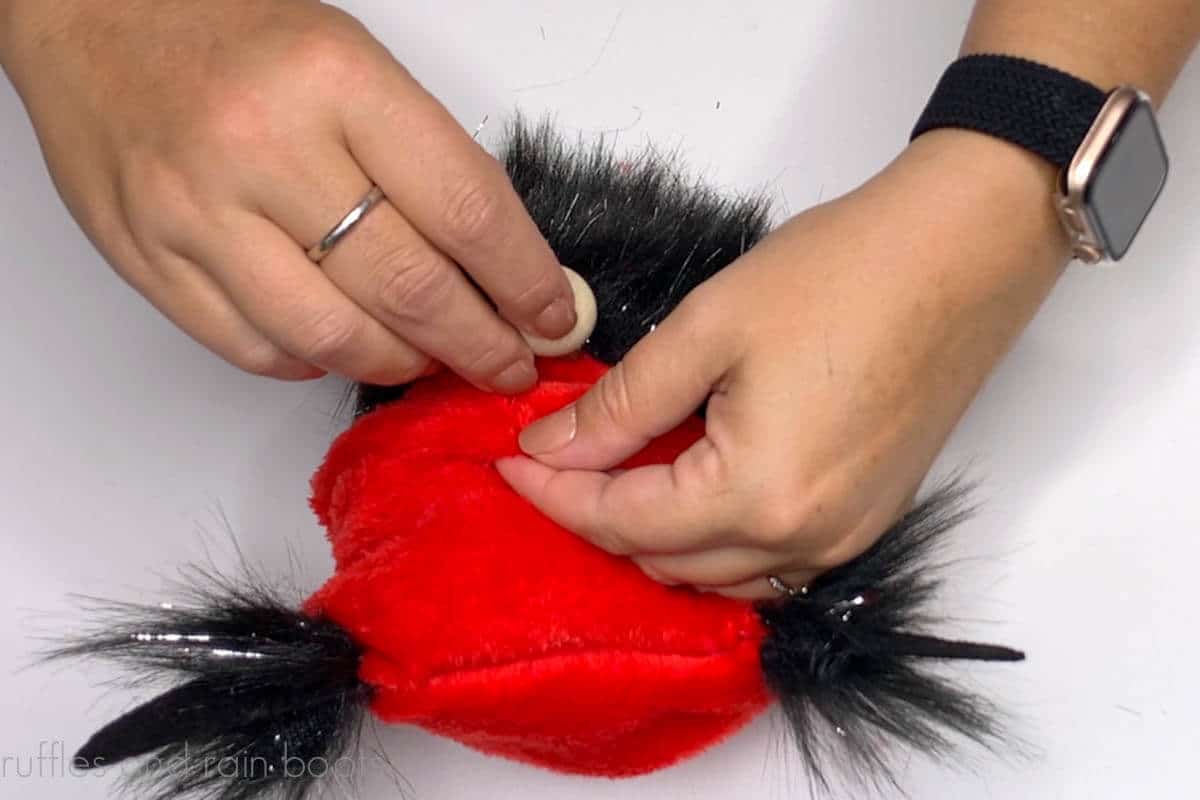
Split the fur to the fabric backing. Add hot glue and press on the nose. Glue the hat to the top of the nose (to hide the hole) and then secure the hat all the way around.
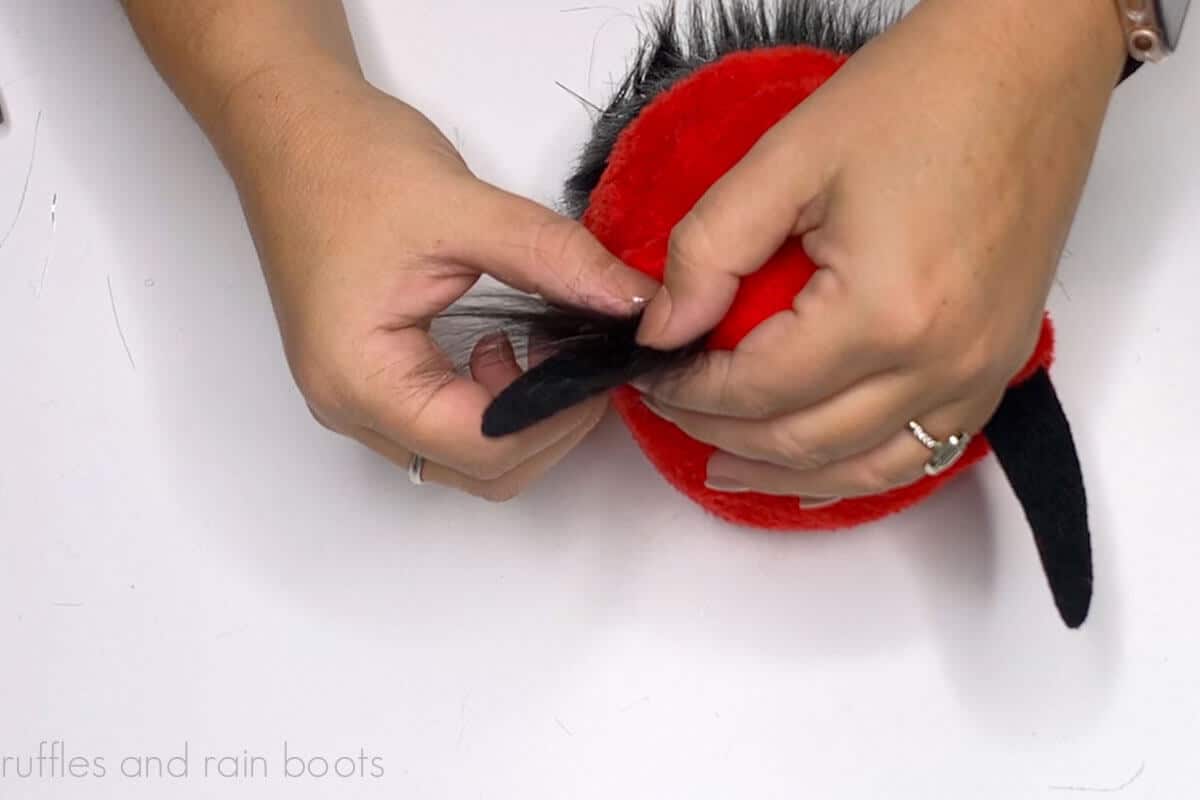
Optional: Cut two small pieces for each horn and glue to the felt. Trim, if desired.
Optional: Cut 2 small triangles of stiff felt and glue a piece of wire in between. Cover the wire with the luxe fleece and secure into and to the body for a devil tail.

More Halloween Gnome DIY Projects You Might Like
- DIY Mummy Gnome – This easy cone gnome is quick to come together and the shoes are just the cutest!
- Dollar Tree Bat Gnome – Using a staple from the dollar store, create a sock gnome in 10 minutes that will wow everyone.
- Halloween Gnome – This candy corn cutie is so stinkin’ cute – check out that beard (it’s easy to make)!
Please Save or Share This DIY Gnome Idea
Your shares are how this site grows and I am sincerely grateful. Please use the sharing buttons to save this to a fun Halloween crafts pin board or share it with your favorite craft group on Facebook.
How To
Meet the Creator
Hi there, I’m Sarah Nenni-Daher. I’m a crafty gal and always have at least 14 projects going at once. I am a crafter, designer, DIYer, and pattern maker. I share my creations here and in the Ruffles and Rain Boots® Shop.
Here at Ruffles and Rain Boots®, you’ll find DIY gnomes, crafts, gifts, cupcakes, laser crafts, and so much more. I love sharing video tutorials over on YouTube and chatting with other crafters in my Facebook groups. We’d love to have you!