
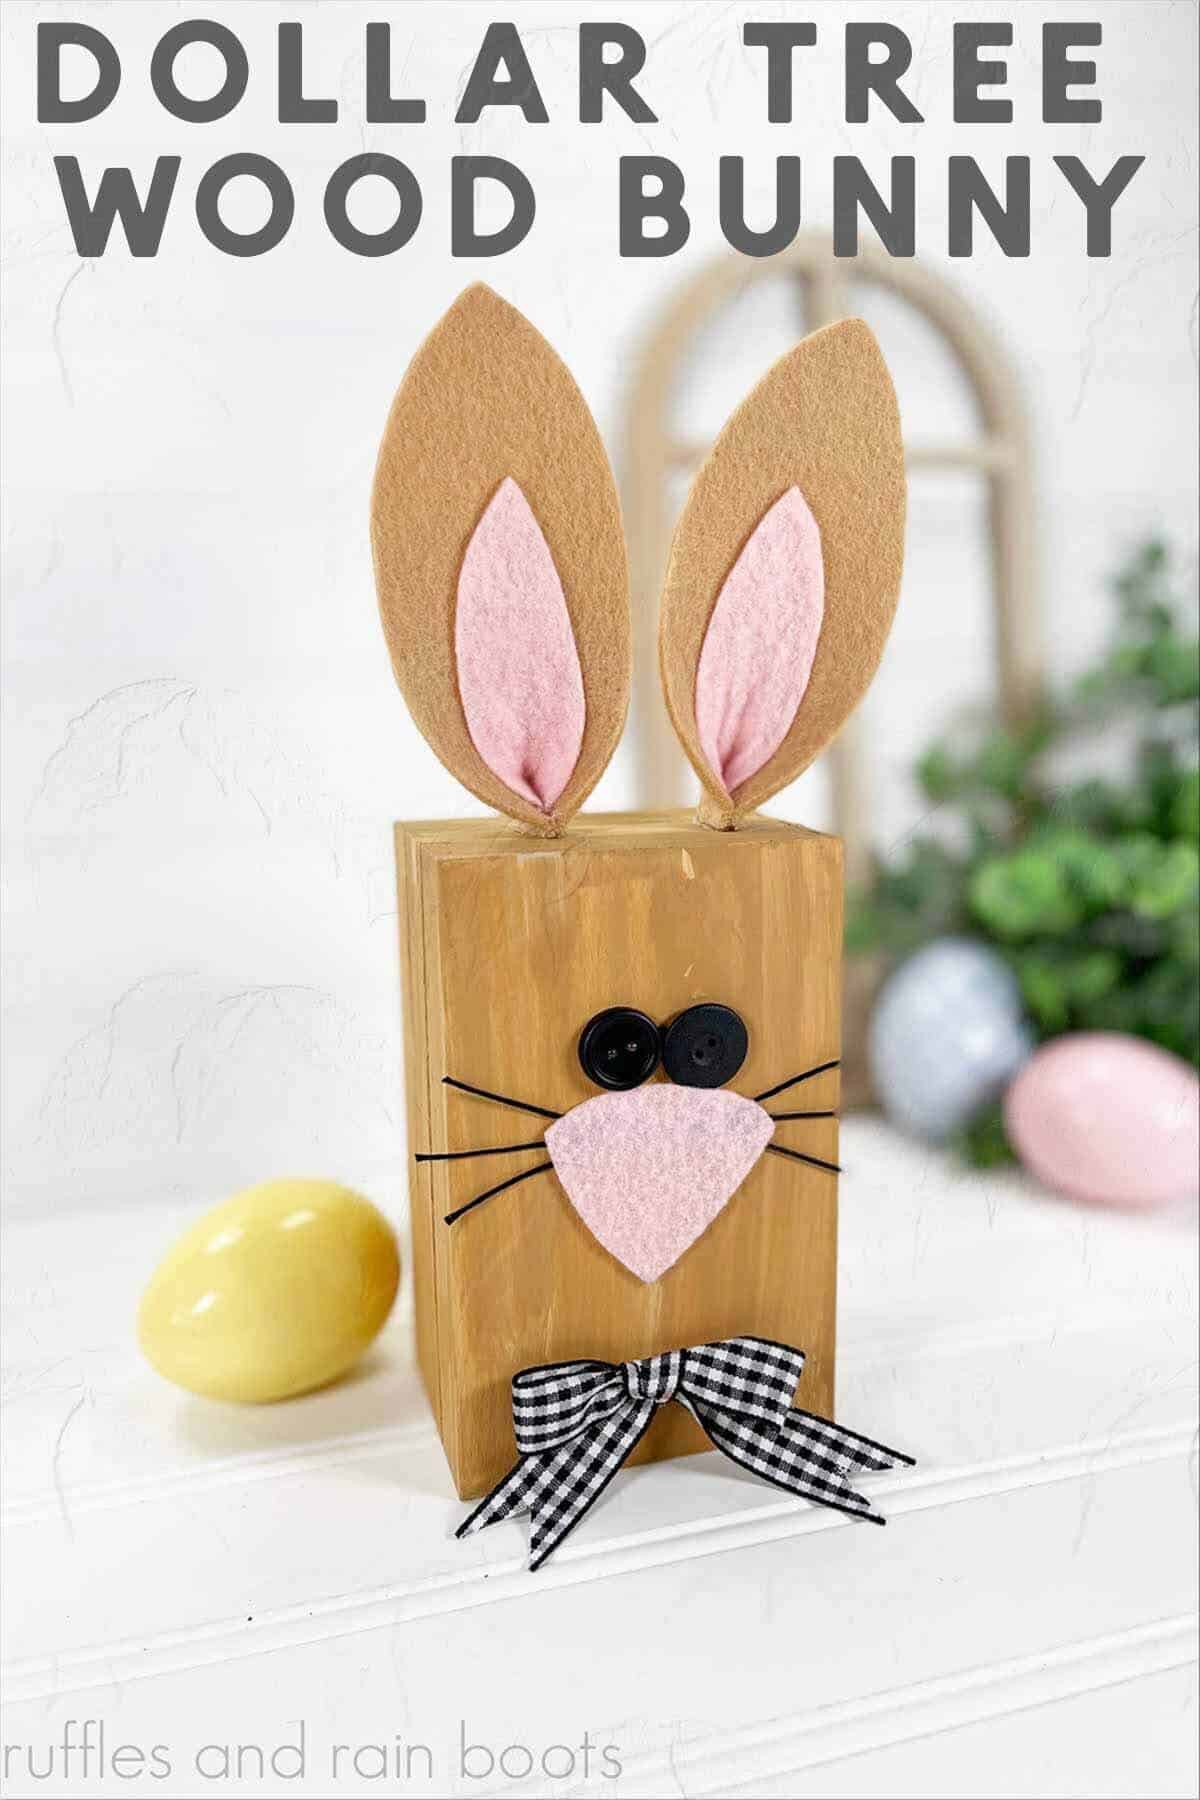
Wood Crate Bunny DIY – Dollar Tree Craft
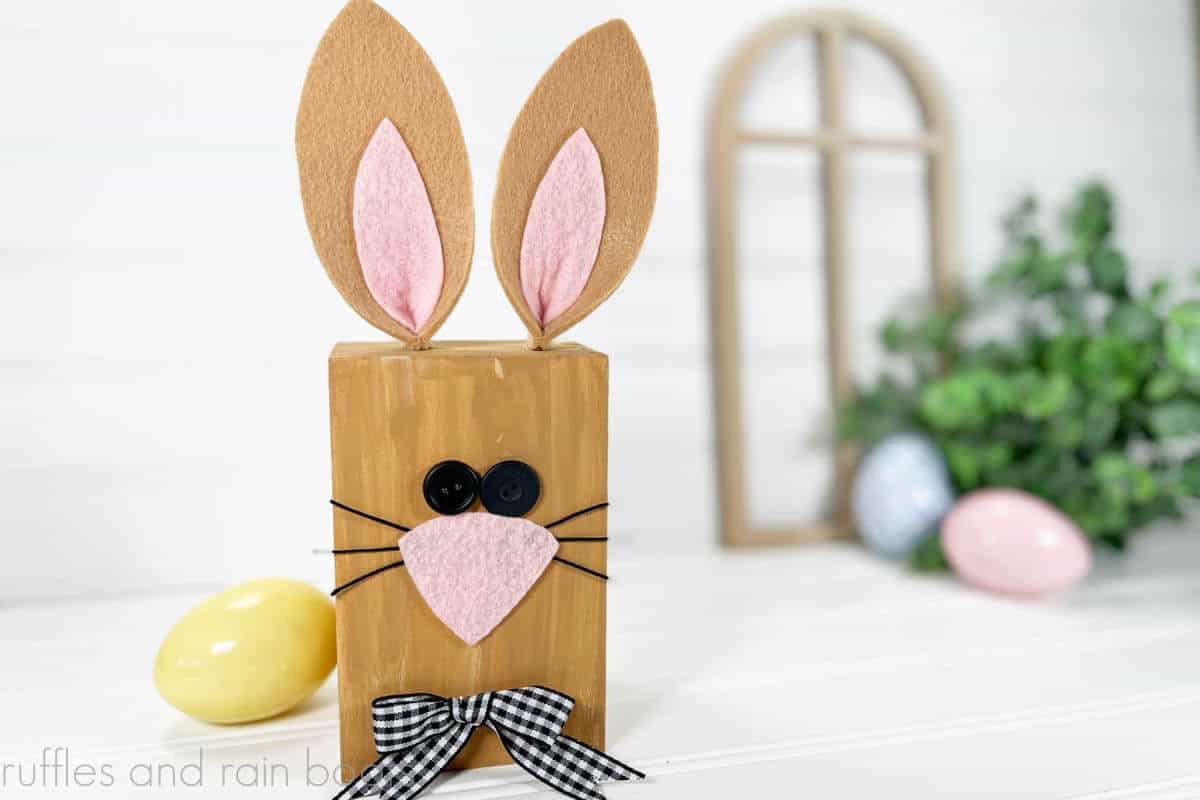
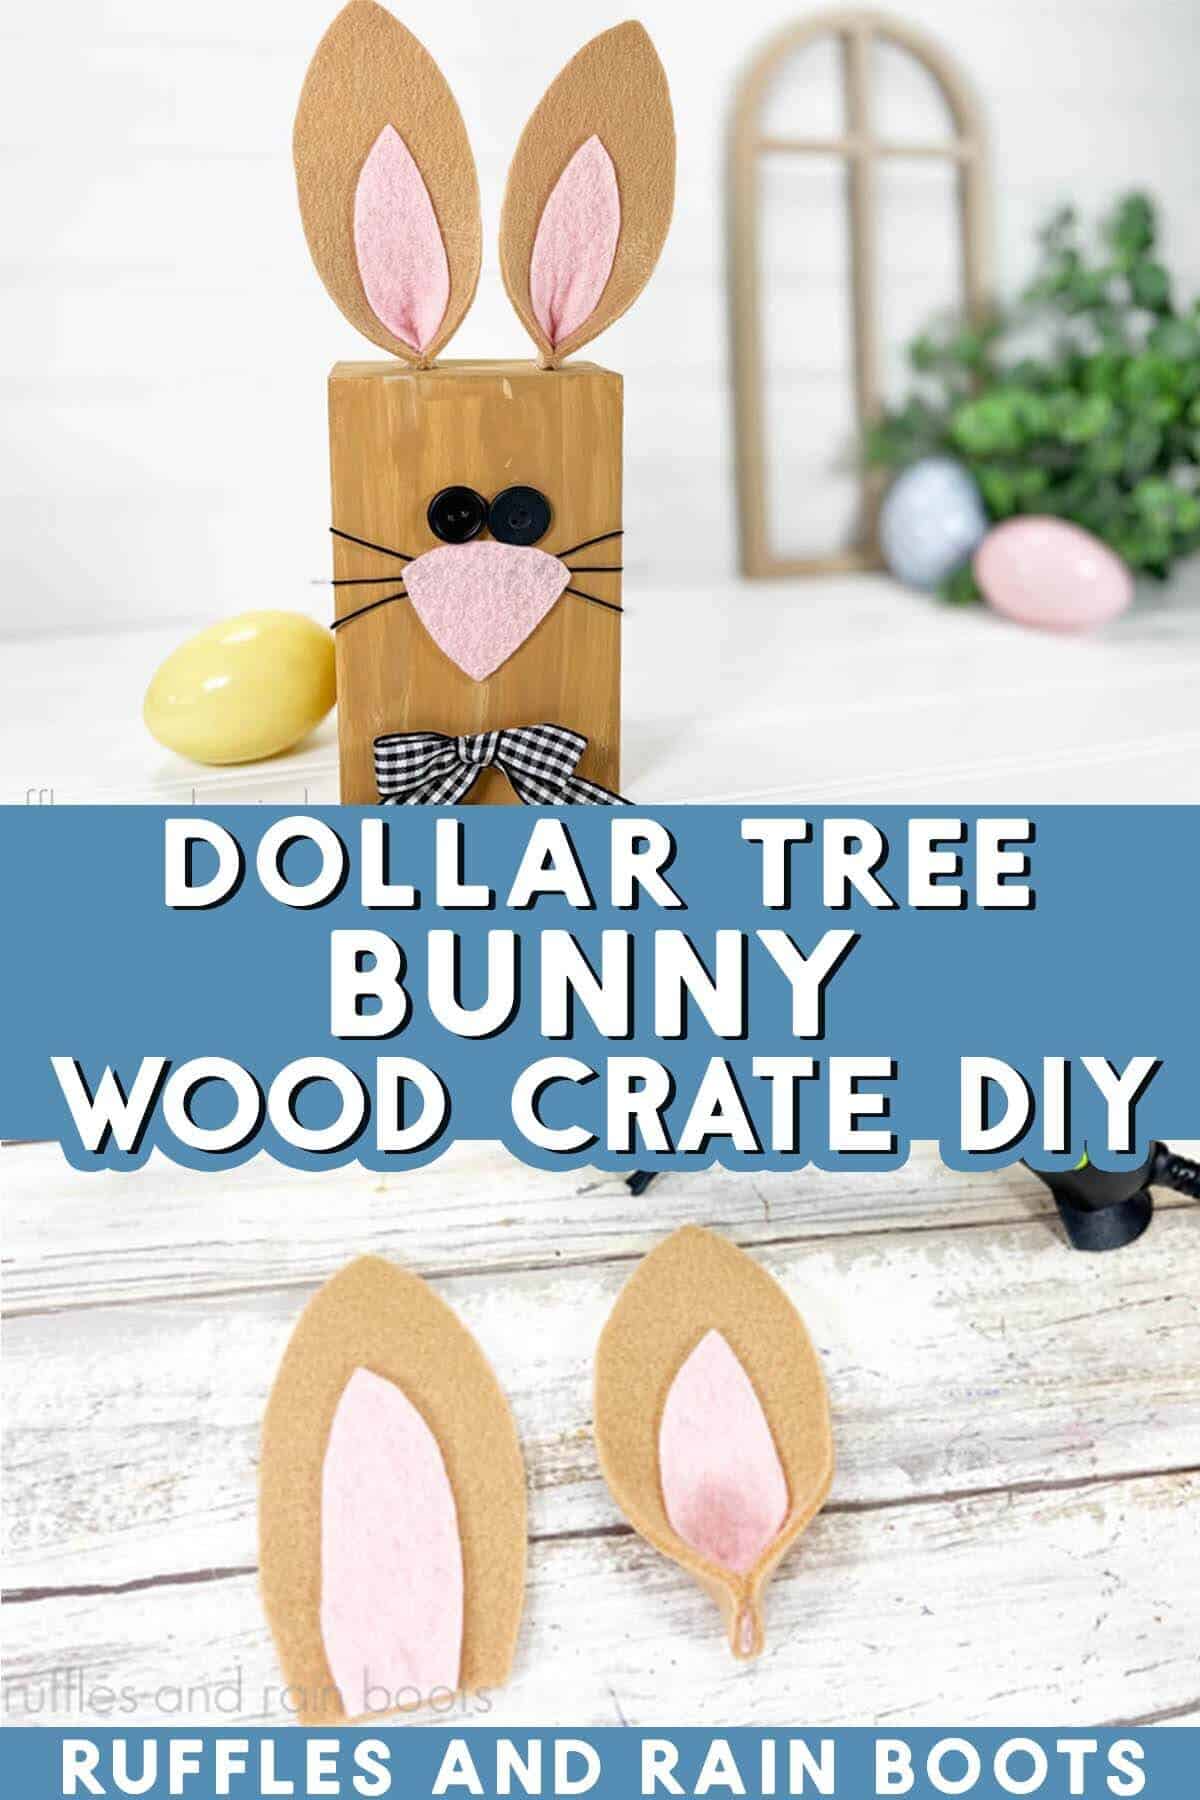
Today, I’m sharing how to make this adorable Dollar Tree Easter wood crate bunny craft. It’s a quick one to put together with materials you likely have on hand.
If you’re like me you have a few dollar store craft supplies you’ve been sitting on for… a while. Let’s use up some of the mini crates, buttons, and felt to create this adorable farmhouse bunny DIY.
RELATED READING: DIY Farmhouse Drop Cloth Bunny Craft
Easy Dollar Tree Easter Craft Idea
Here at Ruffles and Rain Boots, I’m on a mission to use up the craft supplies I found while prepping for a move halfway across the country. Totes and totes of dollar store finds were unearthed and well, they won’t be crafting themselves.
This week, we’re preparing our decorations for Easter and bunnies are on the brain. If you have a few of these mini wood crates from the Dollar Tree on hand, this is a fun craft you can make in just minutes.
No Time to Make This Now? Save or Share for Later
If you need to check your craft cabinet or head to the dollar store, save this post to a Dollar Tree Easter decor craft pin board or share it to Facebook. Use the sharing buttons to make this easy to find when you’re ready to begin.
As an Amazon Associate, I could earn from qualifying purchases. There could be affiliate links within this article.
Materials Needed for This Farmhouse Bunny Craft DIY
You might have everything you need on hand for this dollar store Easter craft idea. I’ll put the key supplies I used below, but be sure to check the instruction card at the end of this post for additional ideas.
- mini wood crate
- paint
- felt
- buttons
- embroidery thread
You will also need scissors and a glue gun. If you don’t want to use hot glue, craft or tacky glue can be used with clips (to hold the ear pieces together while they dry).
More Easy Dollar Tree Easter Crafts You Might Like
- Bunny Coasters and Tiered Tray Decor – Boredom is no match for crafts as fun as this, friends.
- Chick and Bunny Twine Eggs – If you like a rustic bunny craft, this is my favorite Easter craft from last year.
- Clay Pot Carrot Treat Bin – A little paint, a terra cotta pot, and felt produce cuteness on another level.
How to Make a Wood Crate Bunny
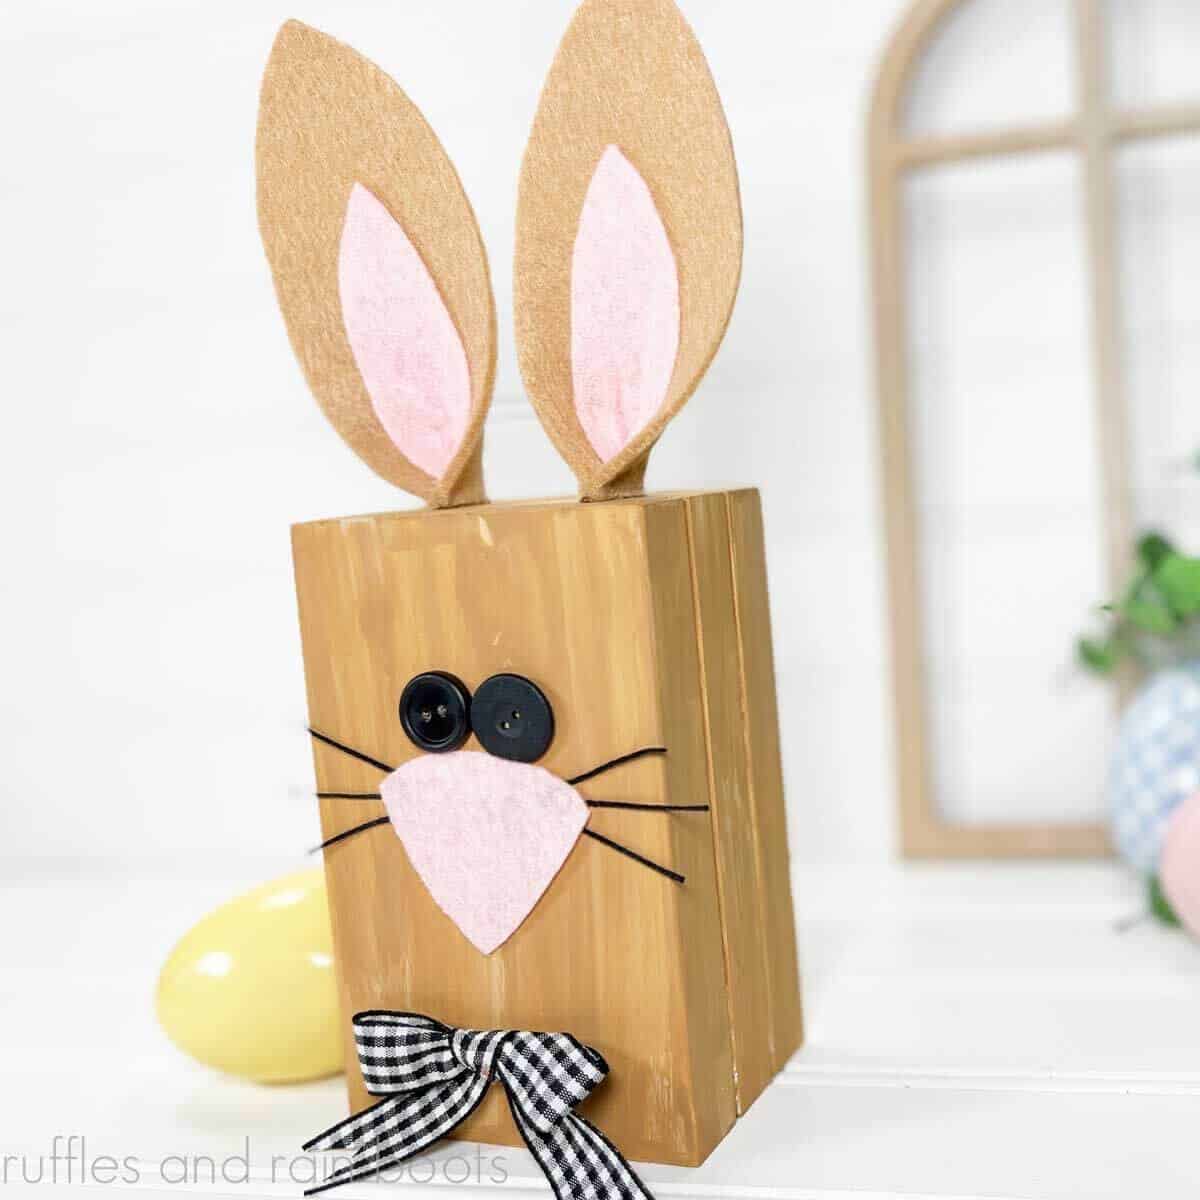
First, print the bunny ear template and cut out each piece if you need help with the ears. Otherwise, begin by painting the wood crate. I mixed the brown and cream together to try and match the felt I had on hand.

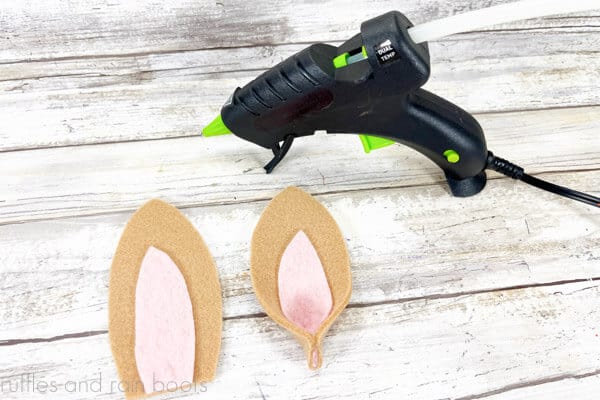
Next, trace the ear shapes onto the tan and pink felt. The smaller size should go with the pink ear inset.
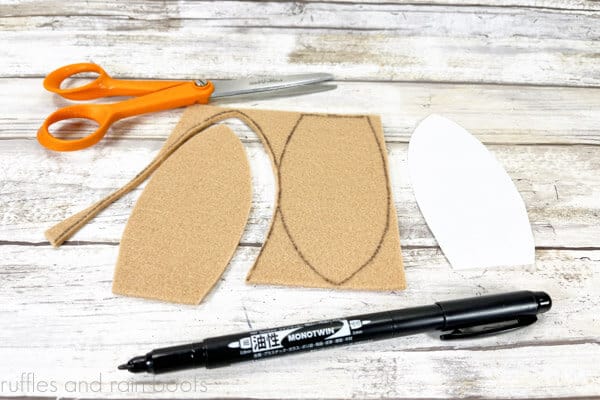
Now glue the pink felt shape onto the tan shape by lining up the bottoms. Add glue to the bottom sides and pinch the two edges together to form an inward shape to each ear.
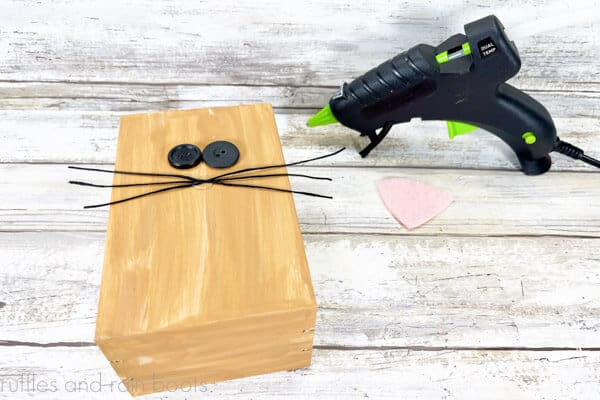
Next, glue the eyes to the wood crate. Cut 3 pieces of embroidery thread to 4 inches each and glue them right below the eyes in a criss-cross fashion.
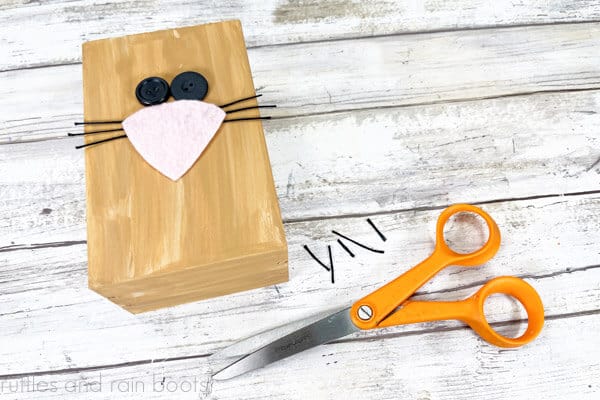
Add the pink nose just under the eyes to cover where the whiskers meet in the center to complete the face. Trim the whiskers, if needed.
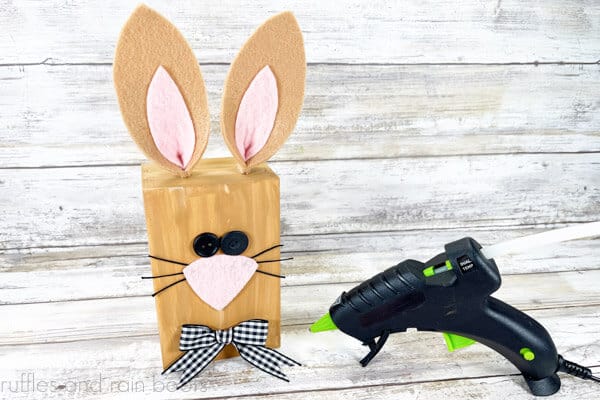
Finally, add hot glue to the bottom of each ear and glue each to the top of the wooden crate. Tie and glue on a ribbon bow, if desired.
More Easter Fun and Crafts for You
- 10-Minute Bunny Cocoa Bombs – These are the treat everyone wants in their Easter basket.
- Simple Carrot Patch Cupcake – Move over Martha, easy wins this Easter’s sweet treat.
- Lazy but Cute Carrot Wreath – Hit up the dollar store and whip this up in minutes (great for a last-minute Easter decoration).
Please Save or Share This Easy Easter Craft Idea
Friends, your shares are how this site grows and I am sincerely grateful. Please consider saving this to an Easter decor ideas pin board or share it with a crafty group on Facebook.
Wood Crate Bunny Easter DIY

Make use of those miniature wood crates from the dollar store and make this adorable bunny. Download the free template for the ears to get started on this cute and creative Easter craft idea for all ages. Included with the free bunny patter are step by step instructions to paint and decorate the wood crate from the Dollar Tree and turn it into this adorable big-eared bunny. This would be a good fit for farmhouse Easter decor or even a craft for a rainy afternoon.
Materials
- Rabbit Ear Pattern Here
- Mini Wood Crate
- Acrylic Paint (I used light brown and cream)
- Felt in Tan and Pink
- Small Buttons (3/4 inch)
- Ribbon
- Embroidery Thread (black)
Tools
- Hot Glue Gun and Glue Sticks
- Scissors
- Permanent Marker
- Paintbrush
Instructions
- First, print the bunny ear template and cut out each piece if you need help with the ears. Otherwise, begin by painting the wood crate. I mixed the brown and cream together to try and match the felt I had on hand.
- Next, trace the ear shapes onto the tan and pink felt. The smaller size should go with the pink ear inset.
- Now glue the pink felt shape onto the tan shape by lining up the bottoms. Add glue to the bottom of each side of the ear and pinch the two edges together inward. This curves the ears inward.
- Glue on the eyes and cut 3 pieces of embroidery thread to 4 inches each. Glue right below the eyes.
- Use the hot glue to affix the pink nose just under the eyes to cover where the whiskers meet in the center to complete the face.
- Next, add hot glue to the bottom of each ear and glue to the top of the wood crate. Tie and glue on a bow, if desired.
Notes
Use any color buttons for the eyes or gray or white thread for the whiskers.
Paint or stain the wood crate bunny body any color; just try and match the felt to the color for a cleaner look.
If you have card stock or foam, they would work for the ears and nose, as well.
Meet the Creator
Hi there, I’m Sarah Nenni-Daher. I’m a crafty gal and always have at least 14 projects going at once. I am a crafter, designer, DIYer, and pattern maker. I share my creations here and in the Ruffles and Rain Boots® Shop.
Here at Ruffles and Rain Boots®, you’ll find DIY gnomes, crafts, gifts, cupcakes, laser crafts, and so much more. I love sharing video tutorials over on YouTube and chatting with other crafters in my Facebook groups. We’d love to have you!