
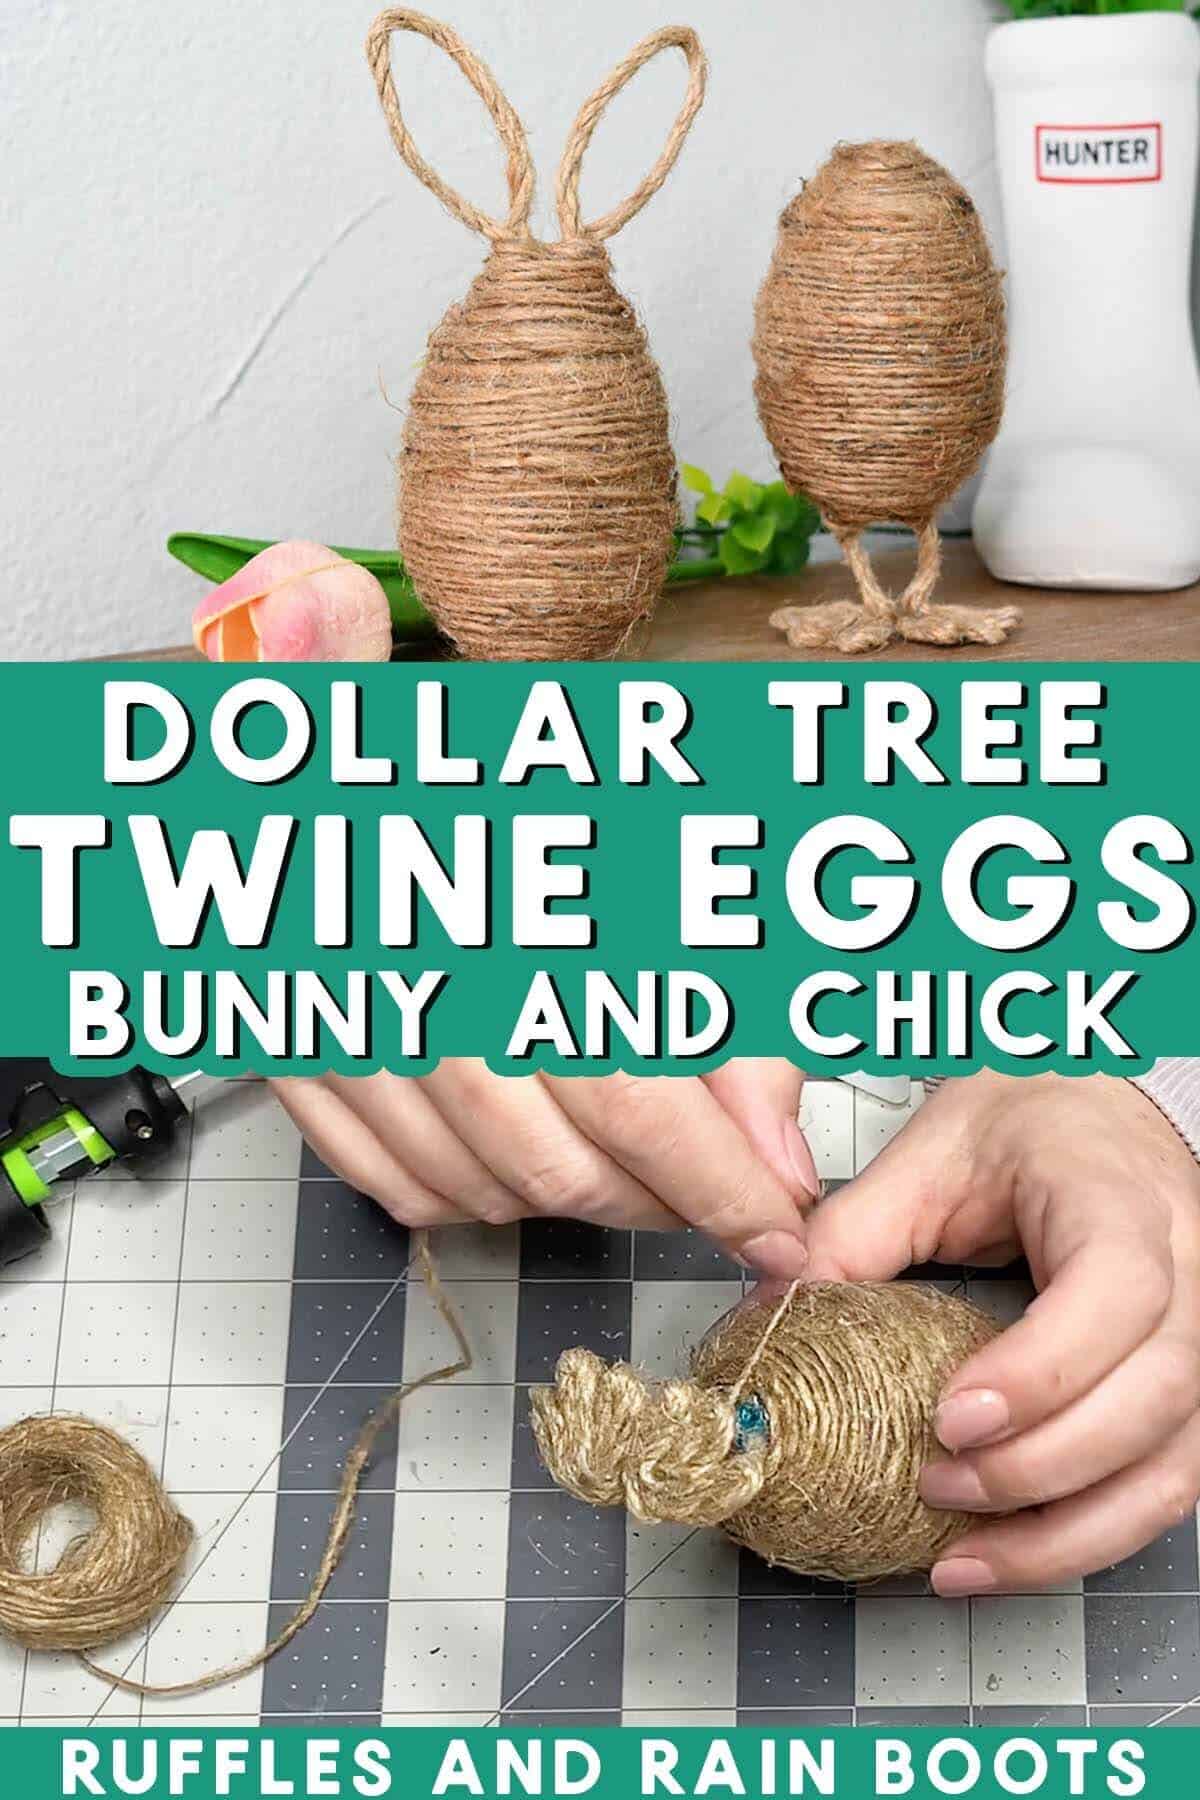
Dollar Tree Twine Easter Eggs Bunny and Chick
These twine wrapped Easter eggs made with dollar store supplies were spotted in the background of one of my videos and everyone went wild asking for them! Here’s how to turn a few plastic eggs into a wow-worthy farmhouse Easter DIY.

RELATED READING: The Cutest Easter Bunny Gnome DIY (Sew or Hot Glue)
Twine Wrapped Easter Eggs: Bunny and Chick
Here at Ruffles and Rain Boots, I like to add holiday decor tucked into my existing pieces. This year, I created a pastel scene for one of my end tables and decided it needed something without much color to go along with it.
Looking around my craft room, Dollar Tree plastic eggs were plentiful, as was Dollar Tree twine in various forms. I figured why not try and come up with something to use up what I had on hand, and this fun Easter DIY popped into my head.
RELATED READING: This Cute Farmhouse Gnome is Made with a Hot Glue Gun!
Think These Are The Bee’s Knees? Please Save or Share
If you want to make these but can’t gt started right now, please save this page to your Easter decor pin board or share it on Facebook. I really appreciate it.
As an Amazon Associate, I could earn from qualifying purchases. There could be affiliate links in this article.
Tips for Making These Farmhouse Easter Eggs Wrapped in Twine
- Paint and Prep – Paint the brightly-colored plastic eggs after you get the ears and legs put on but before you start wrapping them in twine or the egg color will show through.
- Wired Twine – I found wired twine at the Dollar Tree but wired twine is also available here online.
- Plastic Eggs – Use any egg and if you need to create a hole for legs if yours doesn’t have them, warm up a needle and press it through.
- Finger Guards or Mask Applicator – You’ll be close to the glue. The little silicone face mask applicators are now a staple in my craft room.
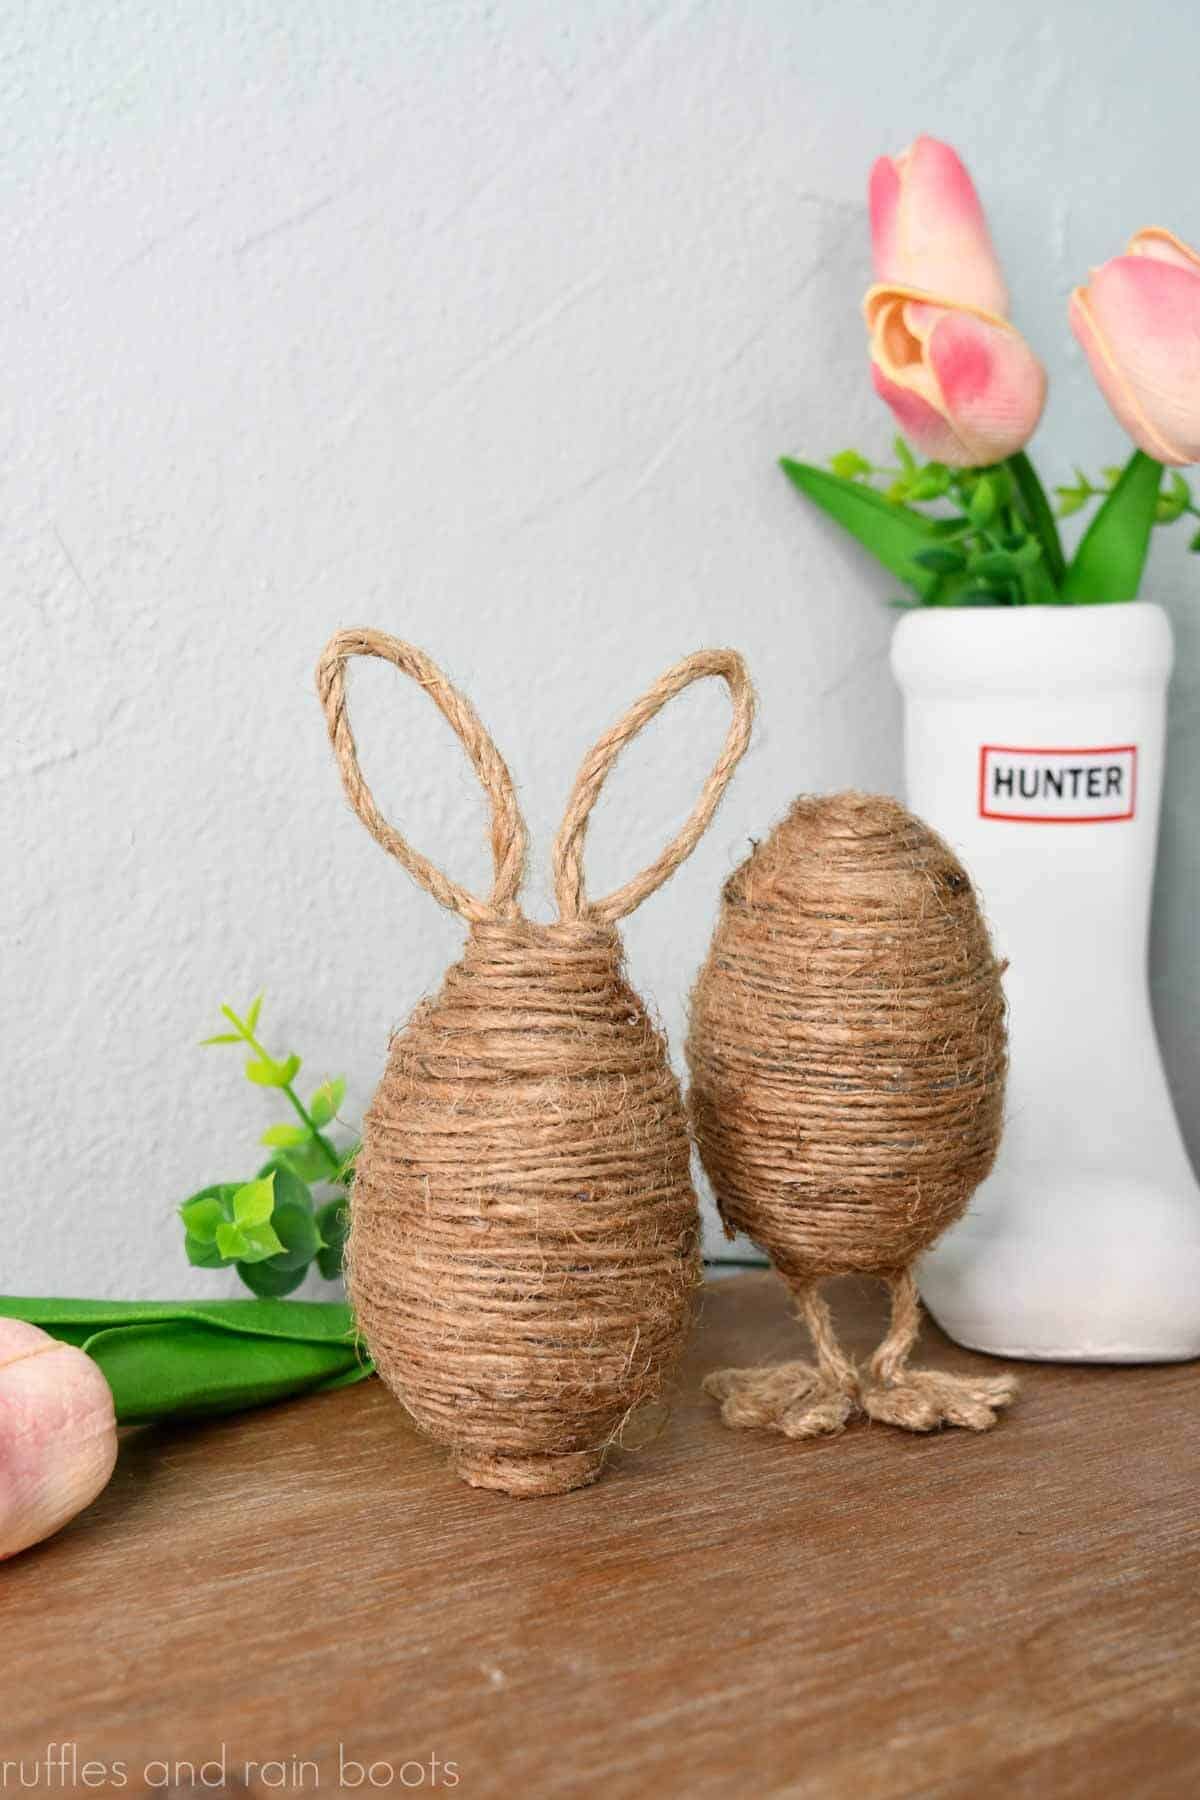
- Twine Bunny Egg – The bunny shaped Easter egg is too cute and easy to make. I added a cork bottom to mine for increased stability.
- Twine Chick Egg – To make the twine-wrapped chick egg stand, add a couple of small rocks to weight the bottom center.
- Heat Gun – Use a heat gun on the finished projects to remove any hot glue strings and melt any small glue blobs.

How to Make Farmhouse Twine Wrapped Bunny and Chick Easter Eggs
Below is the written and printable tutorial for these farmhouse DIY Easter eggs using dollar store supplies.
If you are a visual learner like I am, you can watch the bunny and chick Dollar Tree twine wrapped Easter egg video here on YouTube. It’s good to watch how I secure my pieces in place.
Bunny and Chick Twine Easter Eggs
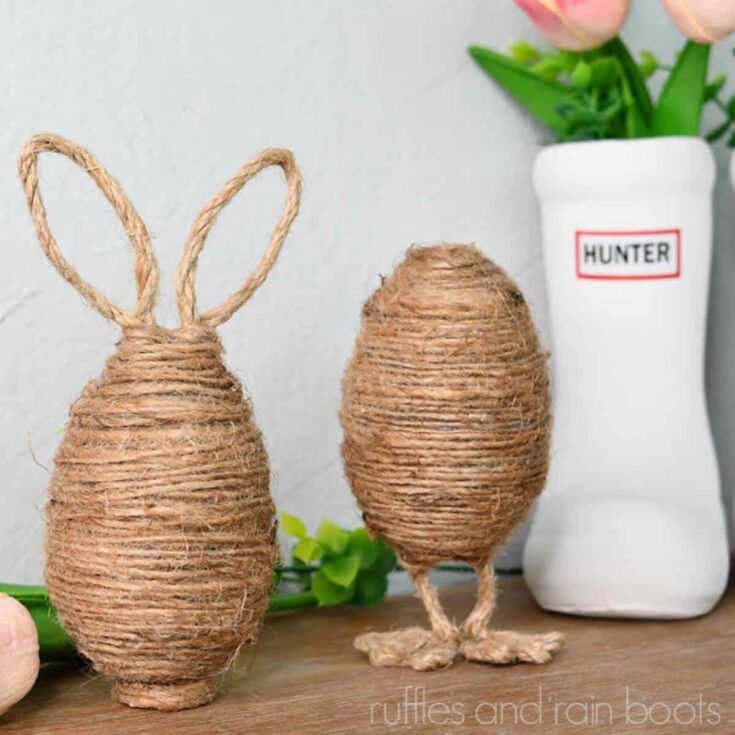
These adorable twine Easter eggs feature cute bunny ears and adorable chick feet. Use wired twine and jute cord to get the farmhouse look, perfect for tiered trays, dough bowls, and more.
Materials
- Plastic Easter eggs
- Wired Twine
- Twine
- Gray Chalk Paint
- Small Rocks
- Optional, Cork
Tools
- Detail Tip Glue Gun and Glue Sticks
- Scissors
- Foam Brush
- Optional, Heat Gun
- Optional, Wire Cutters
Instructions
Bunny Twine Easter Egg
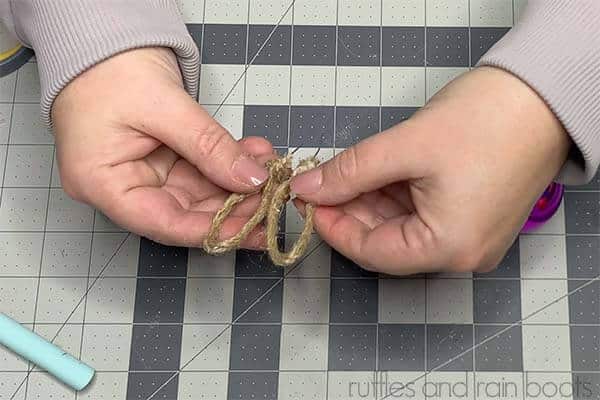
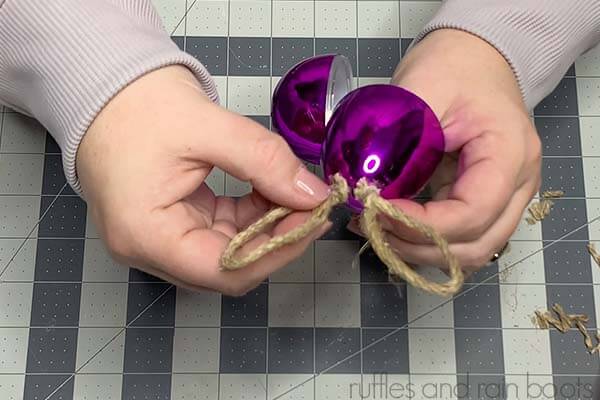
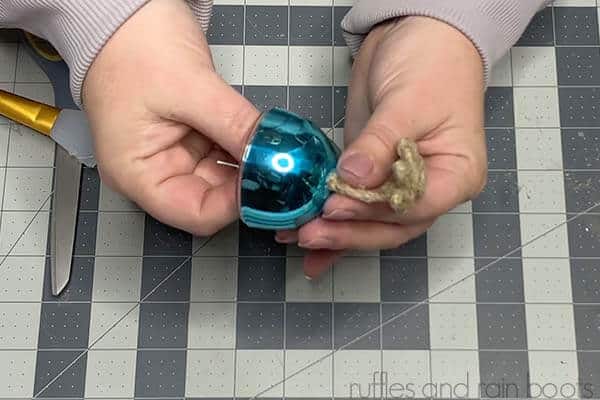
- Shape two bunny ears to fit the plastic eggs, leaving about an inch and a half of wire on each end to affix to the egg.

- Remove the twine on the inch and a half of wire and glue the ears to the top of the egg with the wire inside the small plastic egg holes. Secure the inside wire to the side of the egg.
Chick Twine Egg
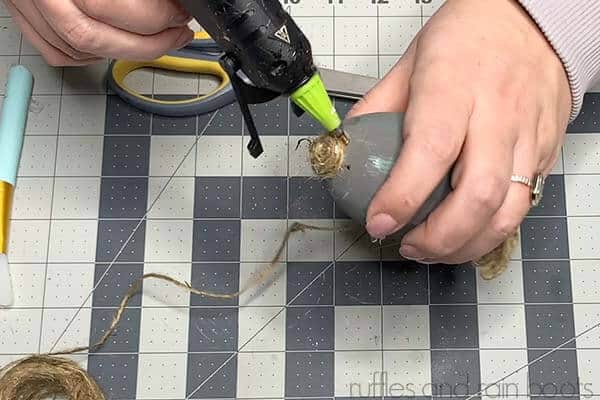
- Shape two legs for the chick, each with three toes glued together.
- Cut off three inches of wire above the toes to form the legs and remove the twine on the top inch or so. Glue the legs into the bottom of the plastic eggs with the wires inside. Wrap the wires together.
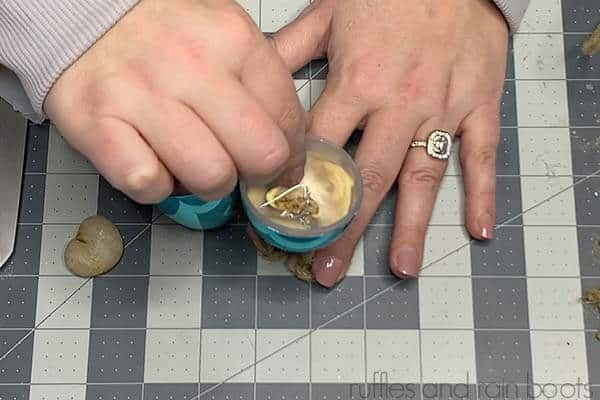
- Add glue and small rocks to the inside of the bottom of the egg.

For Both Wrapped Eggs
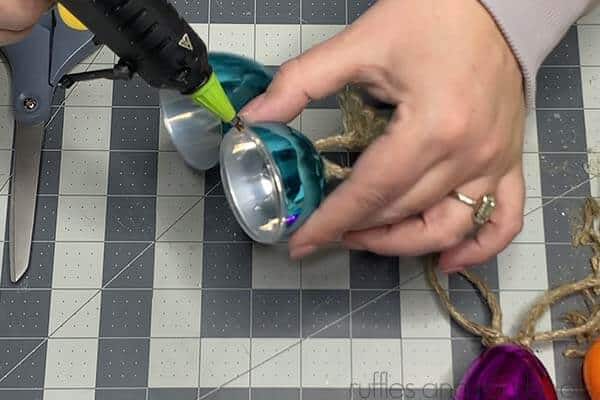
- Glue the egg shut.
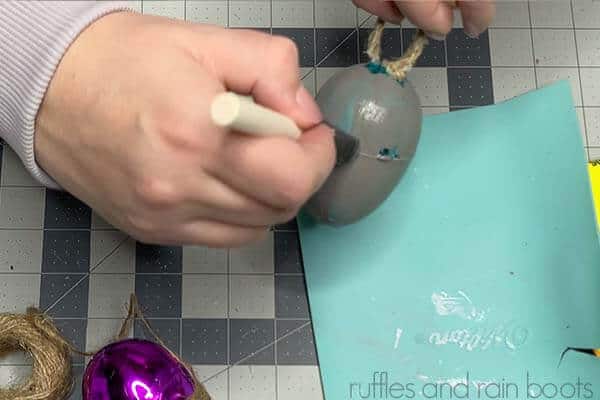
- Paint the egg with the foam brush and gray paint to minimize any color showing through.
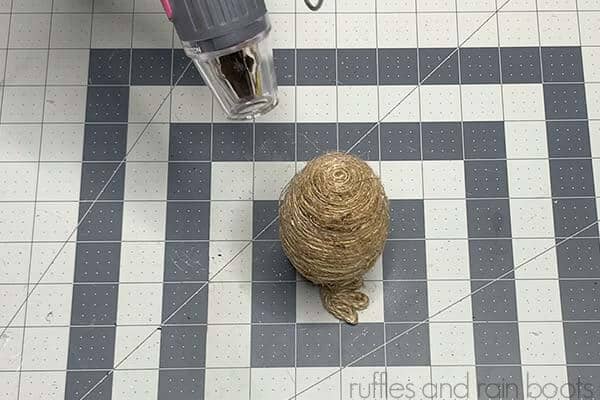
- Wrap the entire egg with twine until it is covered, securing each row with a small amount of hot glue.
- Optional: cut off a slice of cork, wrap in twine, and secure to the bottom of the bunny egg for stability.
Notes
Please read all tips in the article before starting. Here are few things to keep in mind:
- Paint the eggs before wrapping to dull the colors.
- Add weight to the chick.
- Use a heat gun once complete to remove strings and blobs of glue.
Recommended Products
As an Amazon Associate and member of other affiliate programs, I earn from qualifying purchases.

More Easter Crafts and Decor You Might Like
- Yarn-Wrapped Easter Eggs – If you have scraps of yarn and some ribbon, you can make a beautiful display to match any decor.
- Easy Easter Bunny Sock Gnome – This easy Easter DIY is perfectly sized for a tiered tray or bookcase.
- Hand Lettered Easter Eggs – You do not need to be a master at hand lettering to make your own lettered eggs. Grab a pencil…
Please Save or Share This Easter Decor Idea
Your shares are how this site grows and I am sincerely grateful. Please save this to an Easter DIY pin board or share it with a crafty group on Facebook.
Meet the Creator
Hi there, I’m Sarah Nenni-Daher. I’m a crafty gal and always have at least 14 projects going at once. I am a crafter, designer, DIYer, and pattern maker. I share my creations here and in the Ruffles and Rain Boots® Shop.
Here at Ruffles and Rain Boots®, you’ll find DIY gnomes, crafts, gifts, cupcakes, laser crafts, and so much more. I love sharing video tutorials over on YouTube and chatting with other crafters in my Facebook groups. We’d love to have you!