
Dollar Tree Bunny Rope Coasters
Make room on your side table for these sweet and show-stopping Easter bunny coasters made from rope. They’re simple to put together and they’re made using supplies that you can get at the Dollar Tree.

RELATED READING: Dollar Tree Twine Wrapped Easter Eggs
What You'll Find On This Page
Easter Bunny Coasters
Here at Ruffles and Rain Boots, I love all things Easter – the colors go from muted whites, grays, and blues of winter to the pastels and florals of Spring.
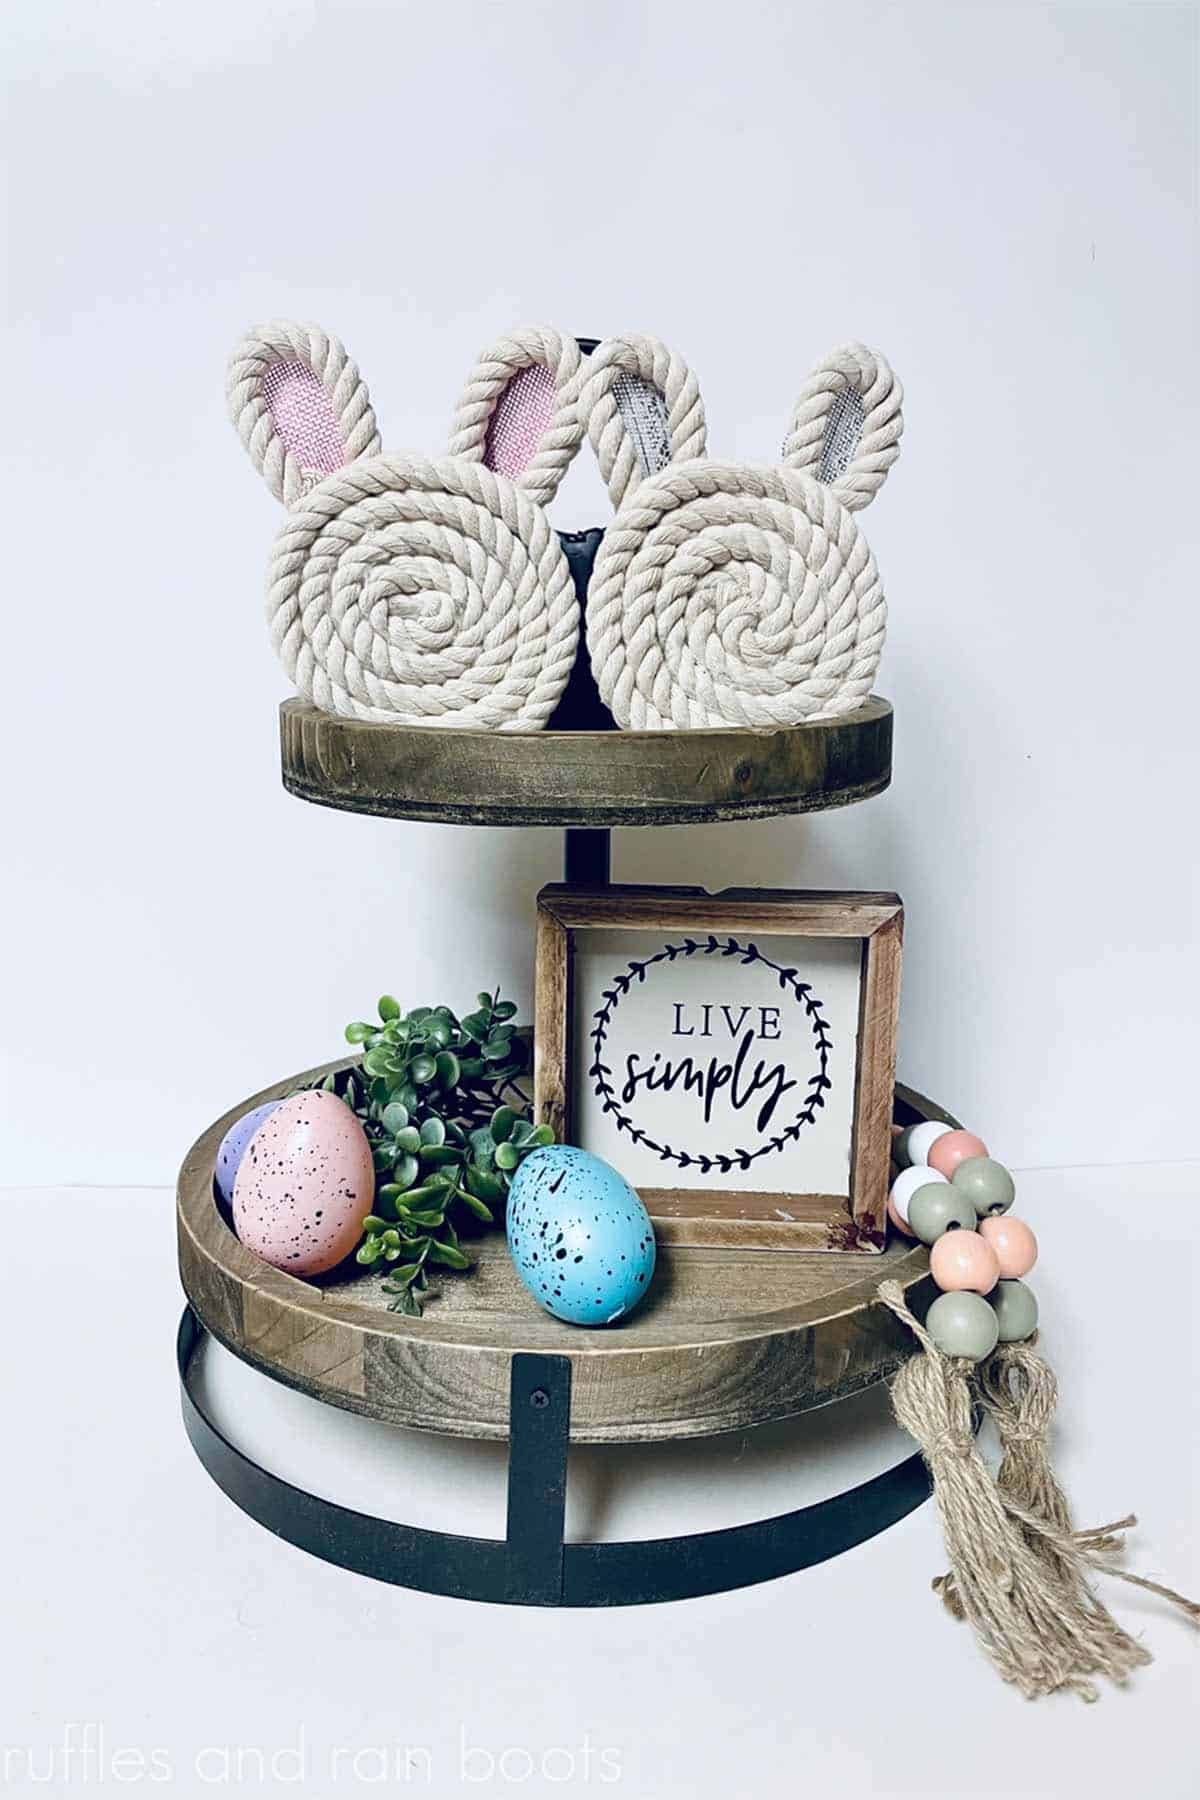
Making these bunny coasters and setting them on your side tables is an easy way to add a little color and festive fun. Everyone will be asking where you bought them!
Need to save this for later and come back to it? Save this to a Spring or Easter pin board or share it to your favorite craft group on Facebook. It will be here when you’re ready.
As an Amazon Associate, I can earn from qualifying purchases. There could be affiliate links within this article.
Tips For Making These DIY Rope Coasters
- If this is your first time making rope coasters, go slowly. The center swirl only takes a few minutes but starting it tightly is the key.
- If you want to make the bunny coaster bigger, add more rope. You can adjust the rope size also to make the bunny coasters bigger or smaller.
- Raid your ribbon stash and use up any scraps – you don’t have to stick to pastels.
- If you’d like, make a set and gift these this to hostesses, family, and friends. A small Dollar Tree basket filled with these and a nice beverage would make for a quick and thoughtful gift.
RELATED READING: Dollar Tree Bunny in a Pot Craft (kid-friendly)
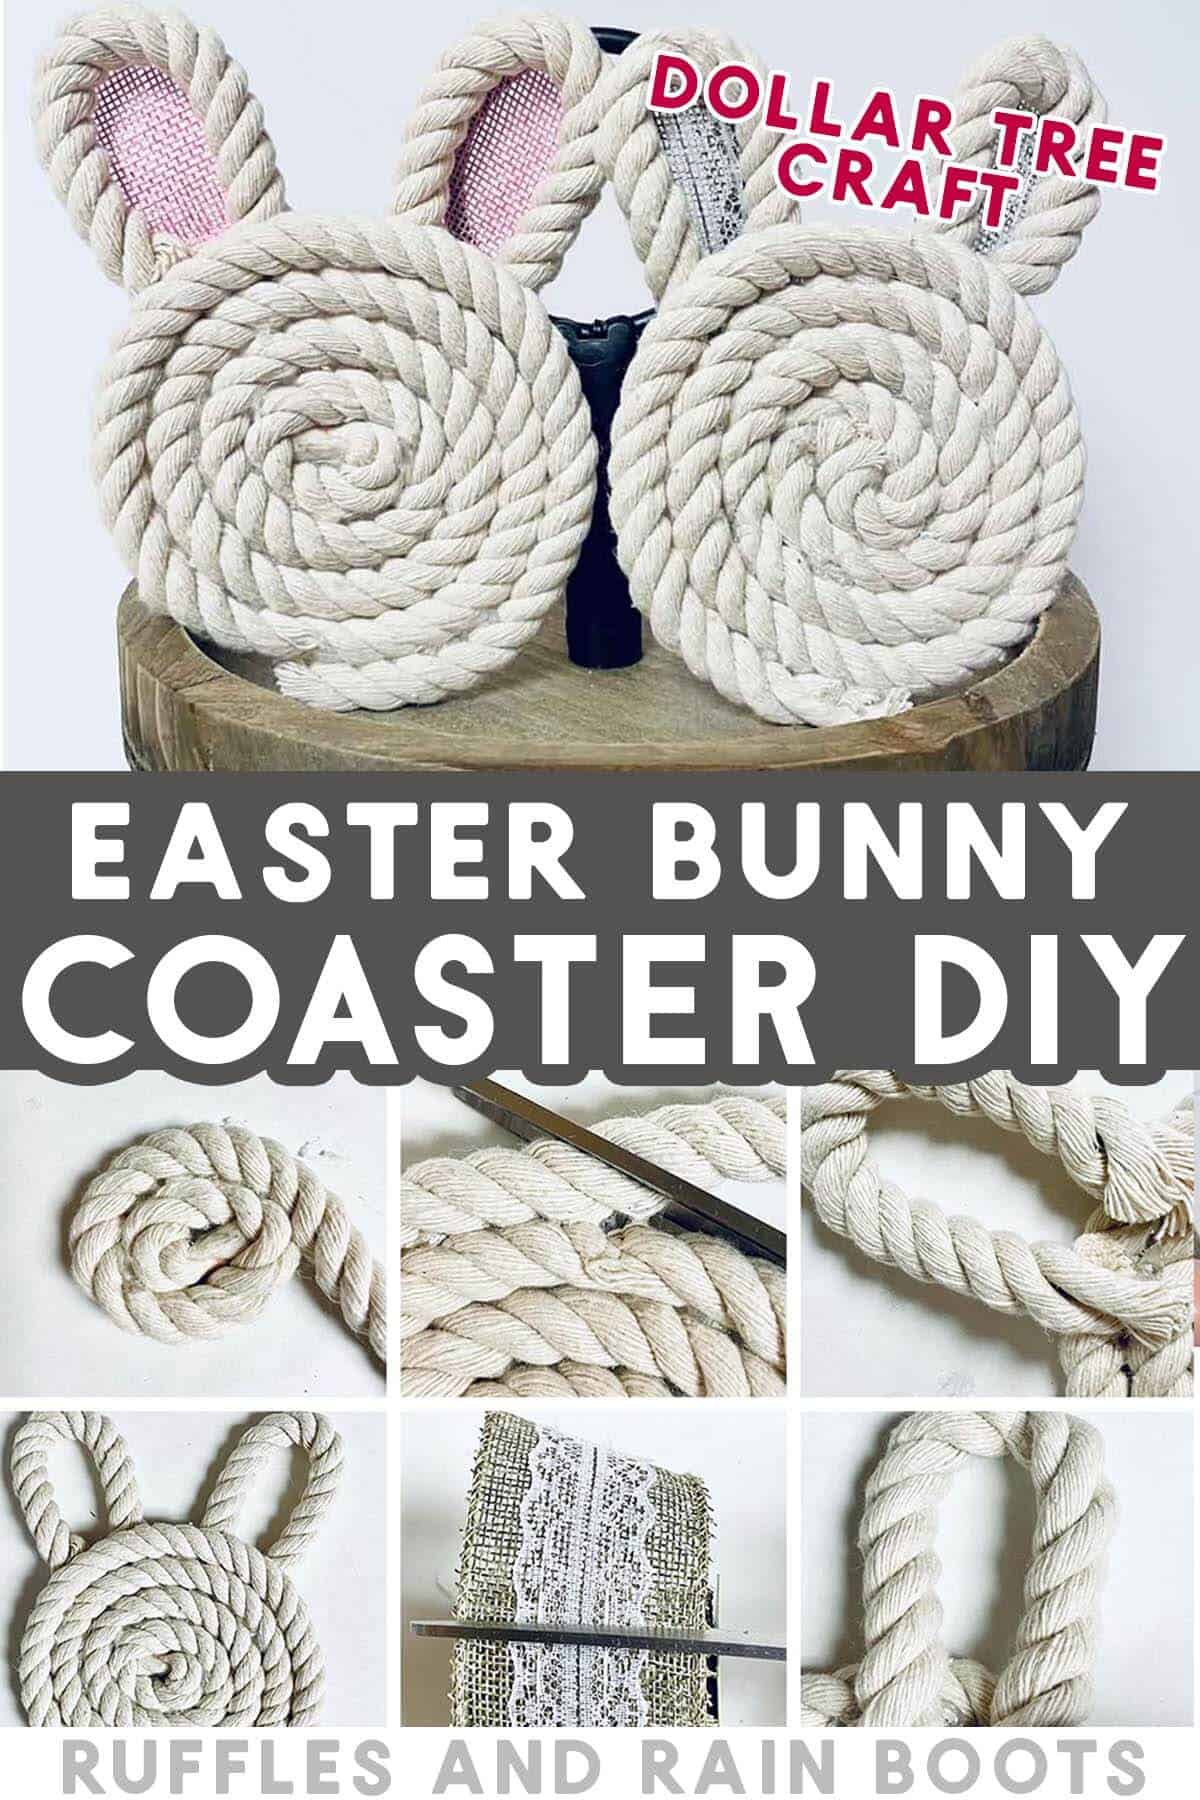
How to Make Dollar Tree Bunny Coasters with Rope
Below is the step by step for this easy Easter Dollar Tree craft. If you’d like a printable version without images, scroll to the bottom.
First, cut the ribbon so that you have two 4-inch portions. Cut four, 4-inch sections of rope, two for each coaster.
Put glue on the long part of the rope and create a tight coil, working out from the center. Add the glue and keep wrapping the rope around until the base is about 4 inches wide.
Once the coil is made, cut the rope and glue the end onto the outside edge.
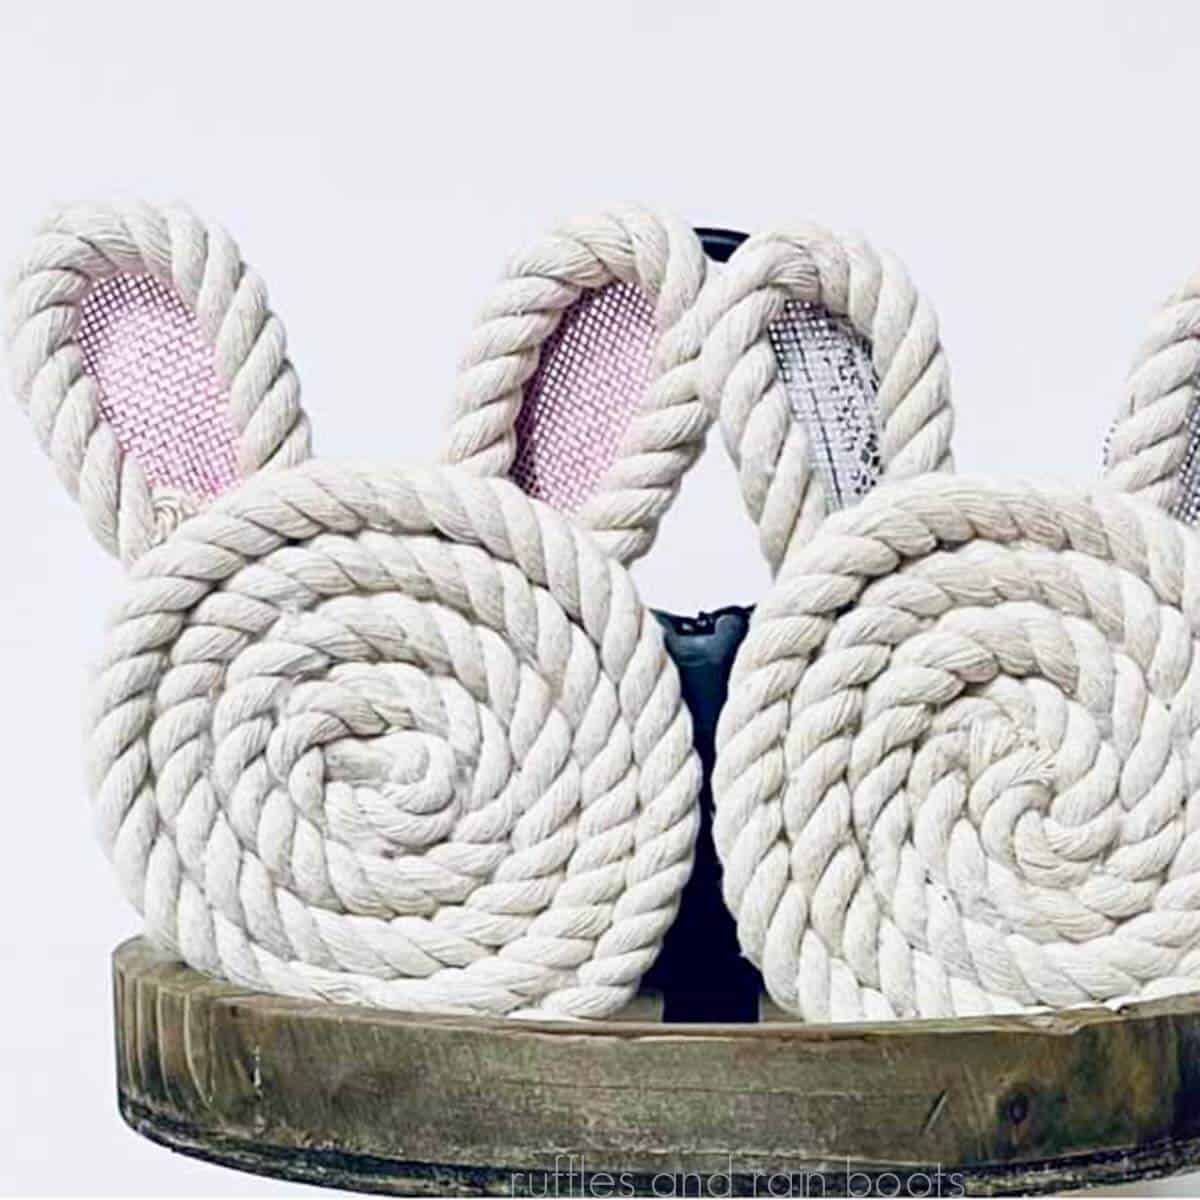
Next, form the 4-inch pieces of rope into ear shapes and glue to the back of the coil at the top, leaving a space in between the ears.
Glue the ribbon to the back of the ears so the pattern and color of ribbon show through to the front of the coaster.

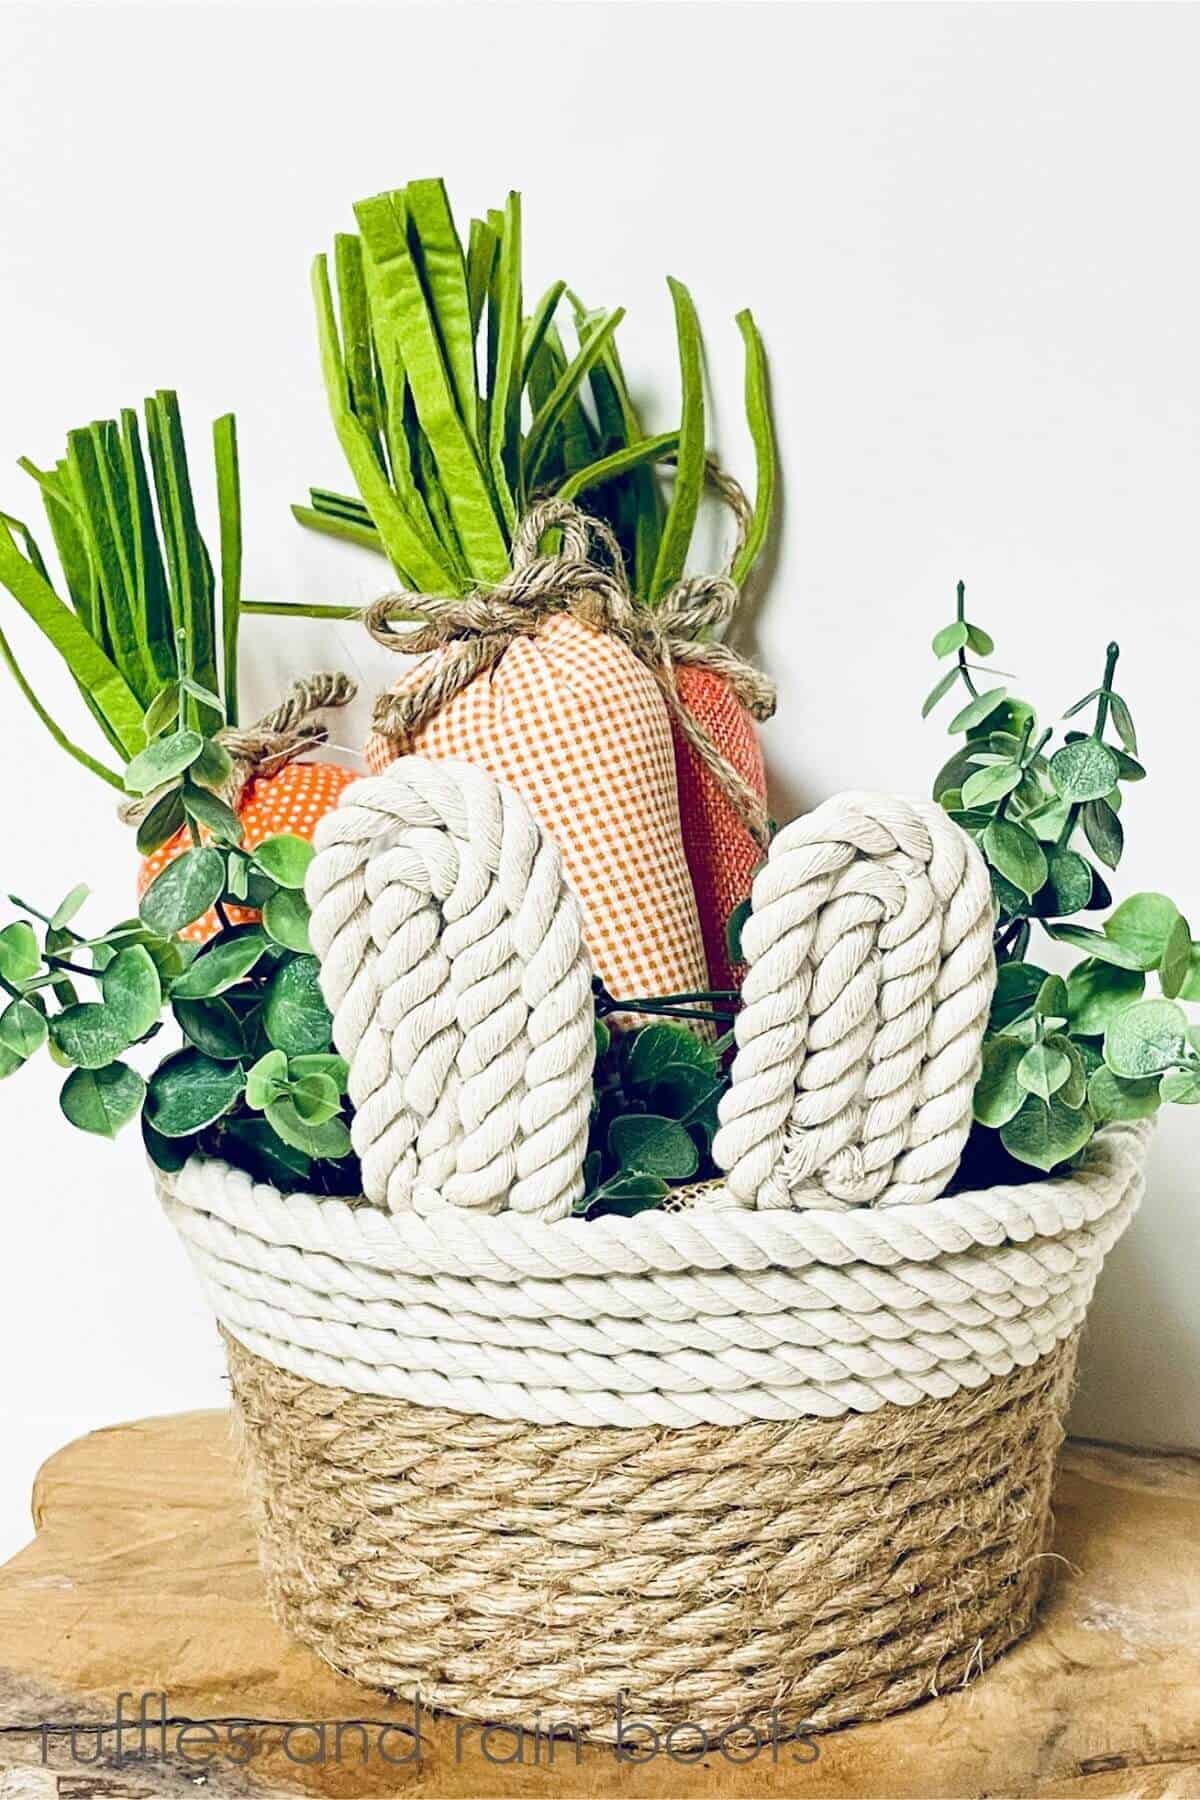
Dollar Tree Rope Bunny Basket
If you want to create another fun project for the holiday, make this Dollar Tree bunny basket. Pick up both the nautical rope and some sisal rope from the same section to complete this one.
More Easter Crafts and Treats
- Buffalo Check Easter Eggs – These Easter eggs are a fun and simple way to make some neutral farmhouse eggs. I stick them in a dough bowl or tucked into a garland.
- DIY Clay Pot Carrot Easter Craft – This is a great craft for a rainy day and it doubles as a festive decoration.
- Easy Easter Fudge – It’s colorful, easy, and always a hit. Whip up a batch of the most adorable fudge.
- Decoupage Easter Coasters – These adorable coasters are the creation of Vanessa at Tried and True and they couldn’t be any cuter.
Please Save or Share
Your shares are how this site grows and I am sincerely grateful. Please save this easy Dollar Tree rope coaster project to an Easter pin board or share it to your favorite group on Facebook.
Easter Bunny Coasters

You can make these adorable DIY bunny coasters from Dollar Tree supplies in about 30 minutes. Grab some rope, ribbon, and your glue gun.
Materials
- Nautical Rope ( at least 11 foot, if possible)
- Ribbon (I used pink and lace burlap)
Tools
- Hot Glue Gun and Glue sticks
Instructions
- First, cut the ribbon so that you have two 4-inch portions. Cut four, 4-inch sections of rope (two for each coaster).
- Put glue on the long part of the rope and create a tight coil, working out from the center. Add the glue and keep wrapping the rope around until the base is about 4 inches wide.
- Once the coil is made, cut the rope and glue the end onto the outside edge.
- Next, form the 4-inch pieces of rope into ear shapes and glue to the back of the coil at the top, leaving a space in between the ears.
- Glue the ribbon to the back of the ears so the pattern and color of ribbon show through to the front of the coaster.
Notes
Optional: Use felt or cork to back the coasters. Optional: Decorate a Dollar Tree wood crate and stack these inside to wrangle your rope coasters.
Meet the Creator
Hi there, I’m Sarah Nenni-Daher. I’m a crafty gal and always have at least 14 projects going at once. I am a crafter, designer, DIYer, and pattern maker. I share my creations here and in the Ruffles and Rain Boots® Shop.
Here at Ruffles and Rain Boots®, you’ll find DIY gnomes, crafts, gifts, cupcakes, laser crafts, and so much more. I love sharing video tutorials over on YouTube and chatting with other crafters in my Facebook groups. We’d love to have you!