
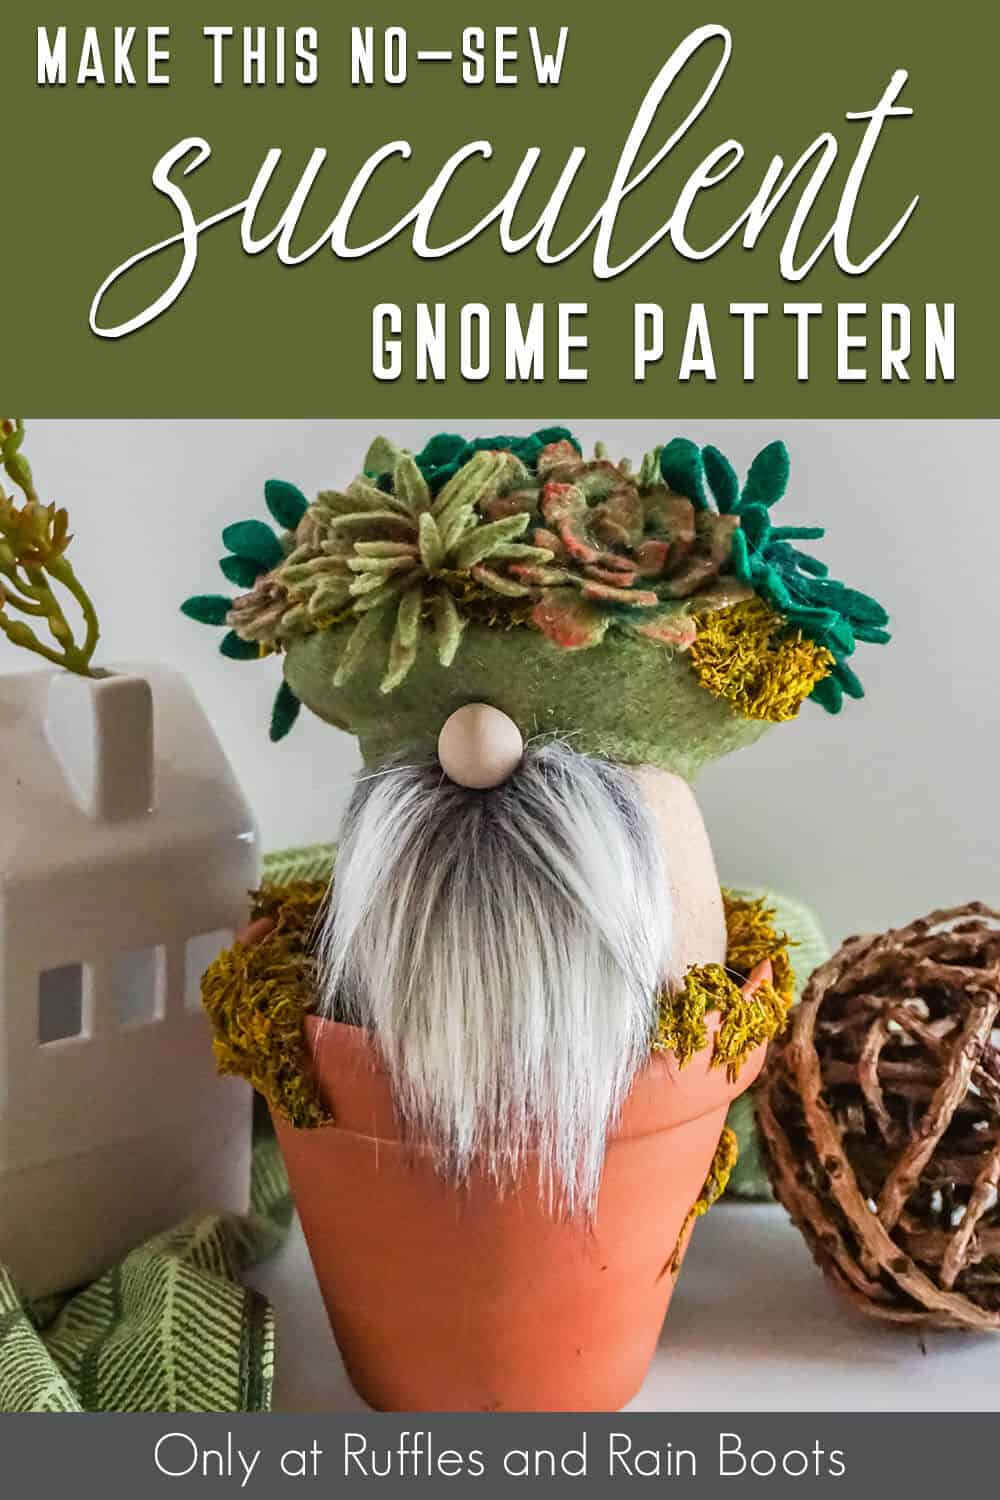
Make This Easy Succulent Gnome Pattern with Cricut or Silhouette
I seriously love this easy succulent gnome pattern because it’s not only simple and cute, but it’s a no-sew gnome so it’s fast!

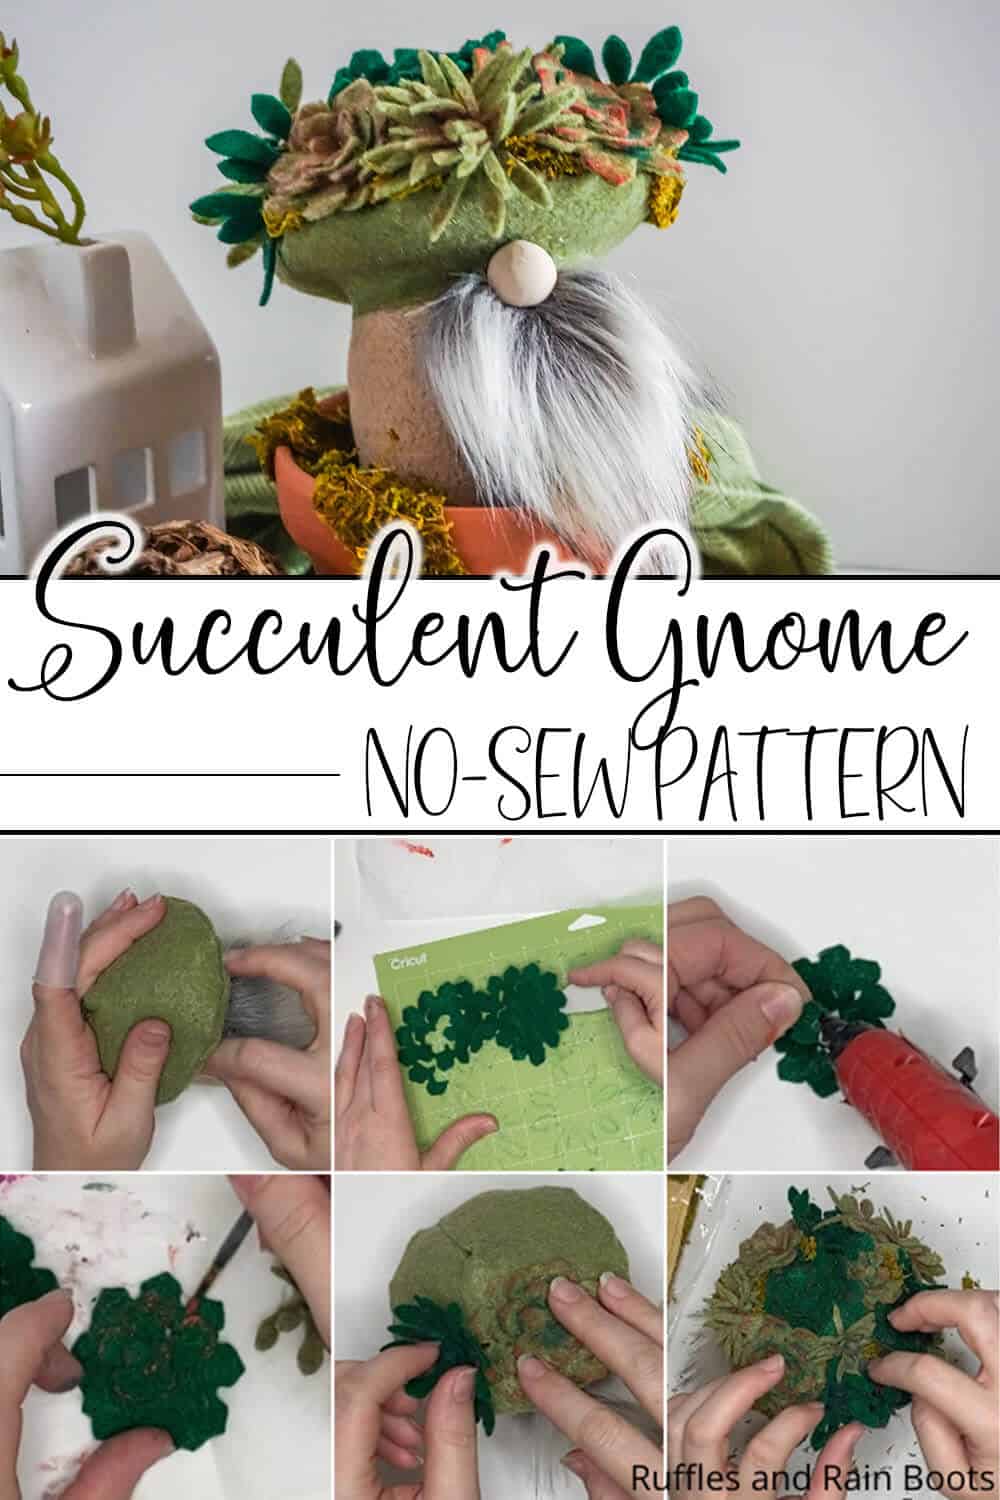
Succulent Gnome Pattern
Here at Ruffles and Rain Boots, we are all about making gnome patterns that are unique and fun to make. They’re the perfect gifts and just make a really fun statement. This particular gnome is exactly that.
RELATED READING: THE EASIEST NO-SEW GNOME PATTERN
Unique and fun to make, this gnome is seriously cute. For anyone that loves succulents, this is a great way to make a gnome that blends right in. So, grab your fabric scissors and finger guards and let’s get started.
No Time to Make This Now? Pin it for Later
You’re busy, I get it. Pin this to your favorite no-sew crafts board on Pinterest and it’ll be here when you’re ready.
As an Amazon Associate, I can earn from qualifying purchases.
Tips to Make a Gnome Pattern with Cricut or Silhouette
- Start by grabbing the Wild Gnome Pattern here for the detailed instructions to make this nisse – and SIX more gnomes! Each variation is a little more fun than the last, like the flower hat gnome, pine cone hat gnome, a mushroom gnome, a butterfly gnome, and a moss hat gnome.
- If you’re anything like me and making intricate cuts for several gnomes at once appeals to you, click here to grab a full set of cut files for Cricut or Silhouette with the Wild Gnome Pattern. So, in addition to being a no-sew gnome pattern, it can also be a scissors-free gnome pattern.
- Dollar Tree should have a pot that would work. I found mine in my garage, to be honest. So, just look around. The more important thing is that beautiful, luscious faux fur that you can find here.

Get the Gnome Pattern Here
Click below to add this fun pattern to your cart. So many gnomes can be made with this!

How Do I Make this Succulent Gnome Pattern?
I’m so glad you asked; below is our written tutorial. If you’re a visual learner (I am, too), here is our full-length succulent gnome video tutorial on YouTube.
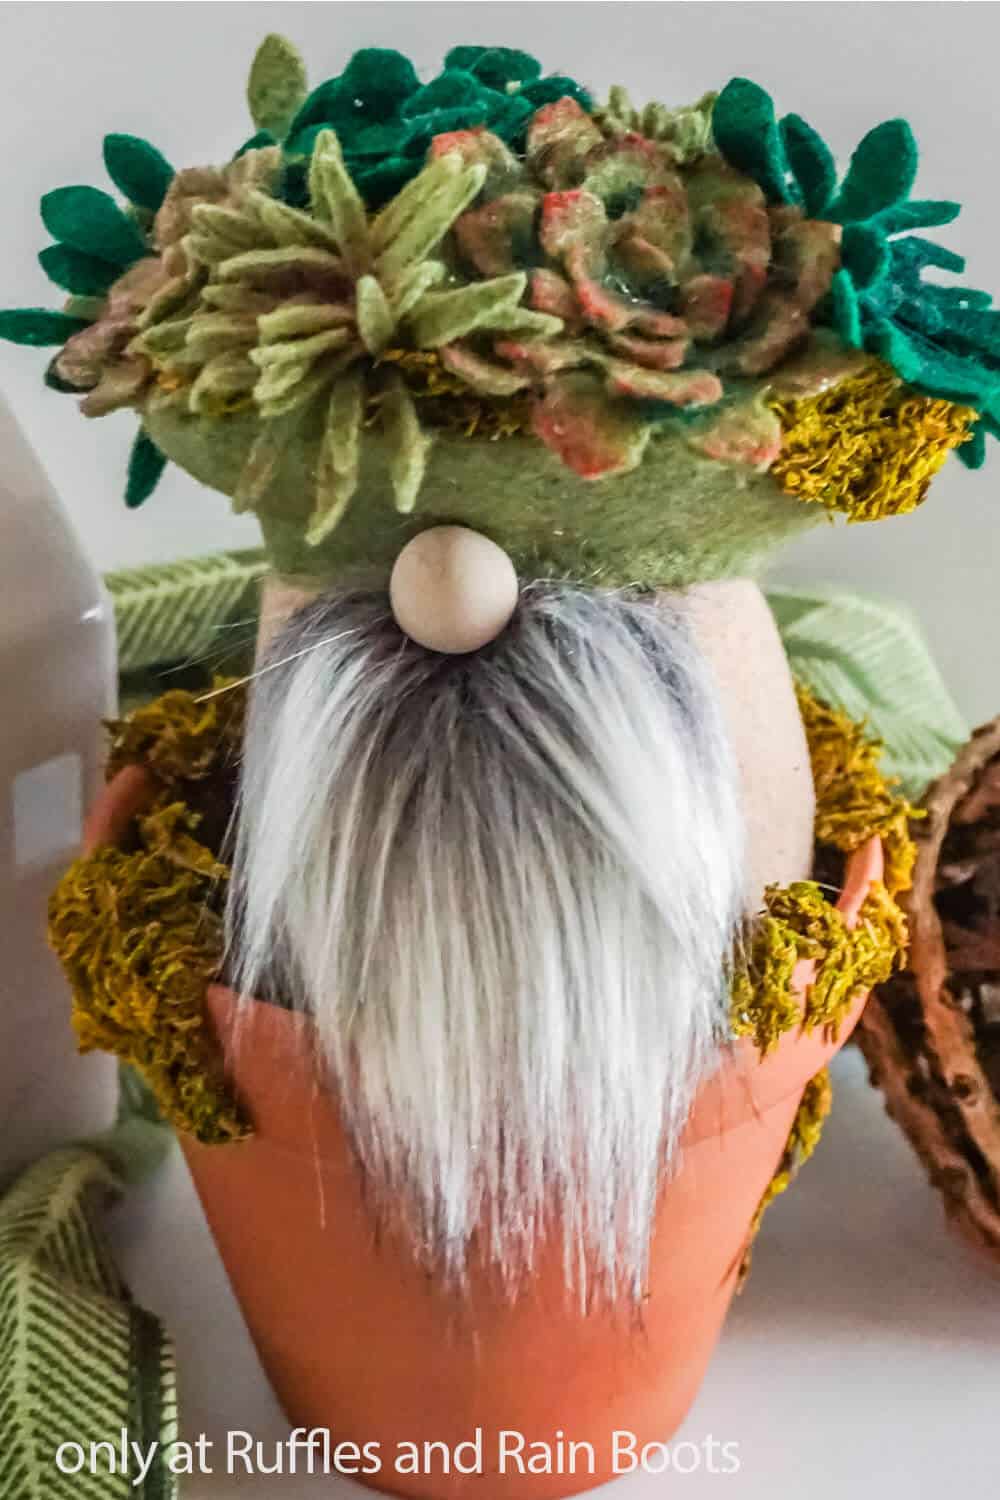
Succulent Gnome Pattern
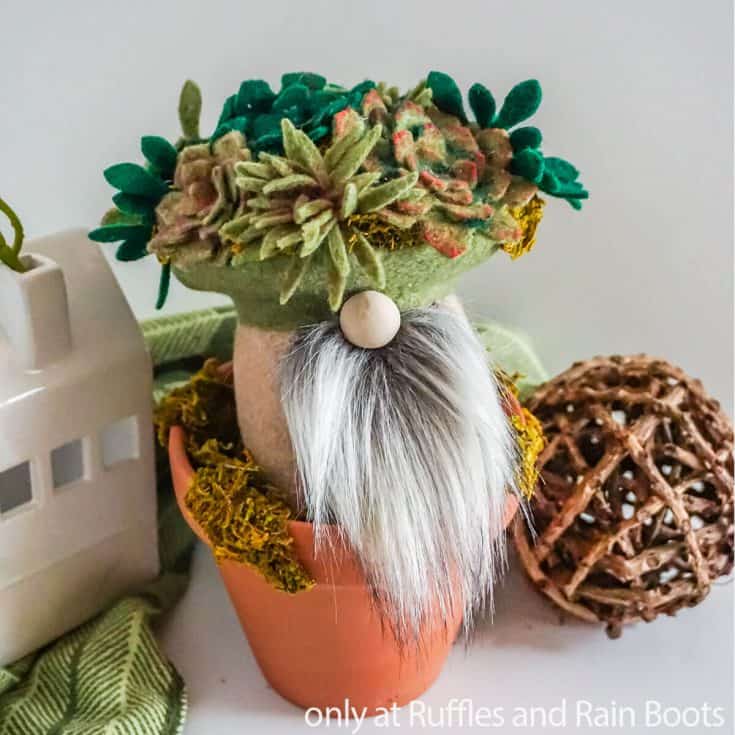
Potted or un-potted, this adorable succulent gnome pattern makes for the most unique jaw-dropping gnome you've seen. It is perfect for a tiered tray, to ship across the country, or just to tuck into your favorite reading nook.
Materials
- 1/8 yard Fleece Fabric, Beige
- 1/8 yard Felt, Moss Green
- 1/8 yard Felt, Dark Green
- Grey Frosted Mongolian Faux Fur
- Poly Fill
- 1/2 cup Poly-Beads
- 1 or 1 1/2-inch Wood Round (or other nose)
- Fabric Paint in Reds, Browns or Purples
- Moss
- Terra Cotta Pot, 4-inch
- Floral Foam
Tools
- Hot Glue Gun & Glue
- Scissors
- Razor Blade or Craft Knife
- Funnel
- Pencil or Fabric Marker, optional
- Cricut Maker or Cricut Explore Air 2
- Spatula Tool
- Rotary Blade
- Fabric Grip Mat
Instructions
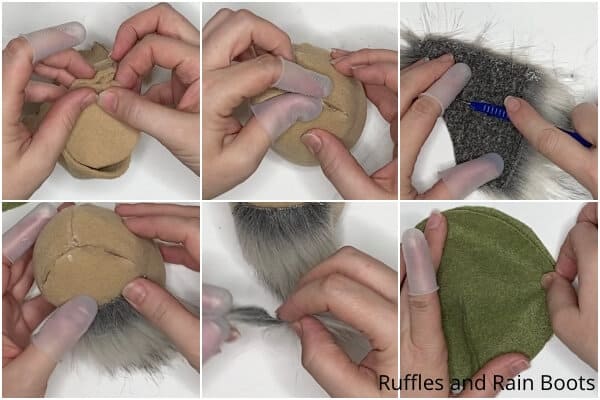
- Cut the body shape from the fleece fabric and fold it in half right-side to right-side. Pin the two tabs together and hot glue the tabs together.
- Align two of the three curved bumps on the top of the gnome and glue together ONE SIDE of the two aligned curved bumps together, then glue the two bumps together from the topmost point to the base only on 1/2 of the bump.
- Hot glue the base onto the bottom of the body shape.
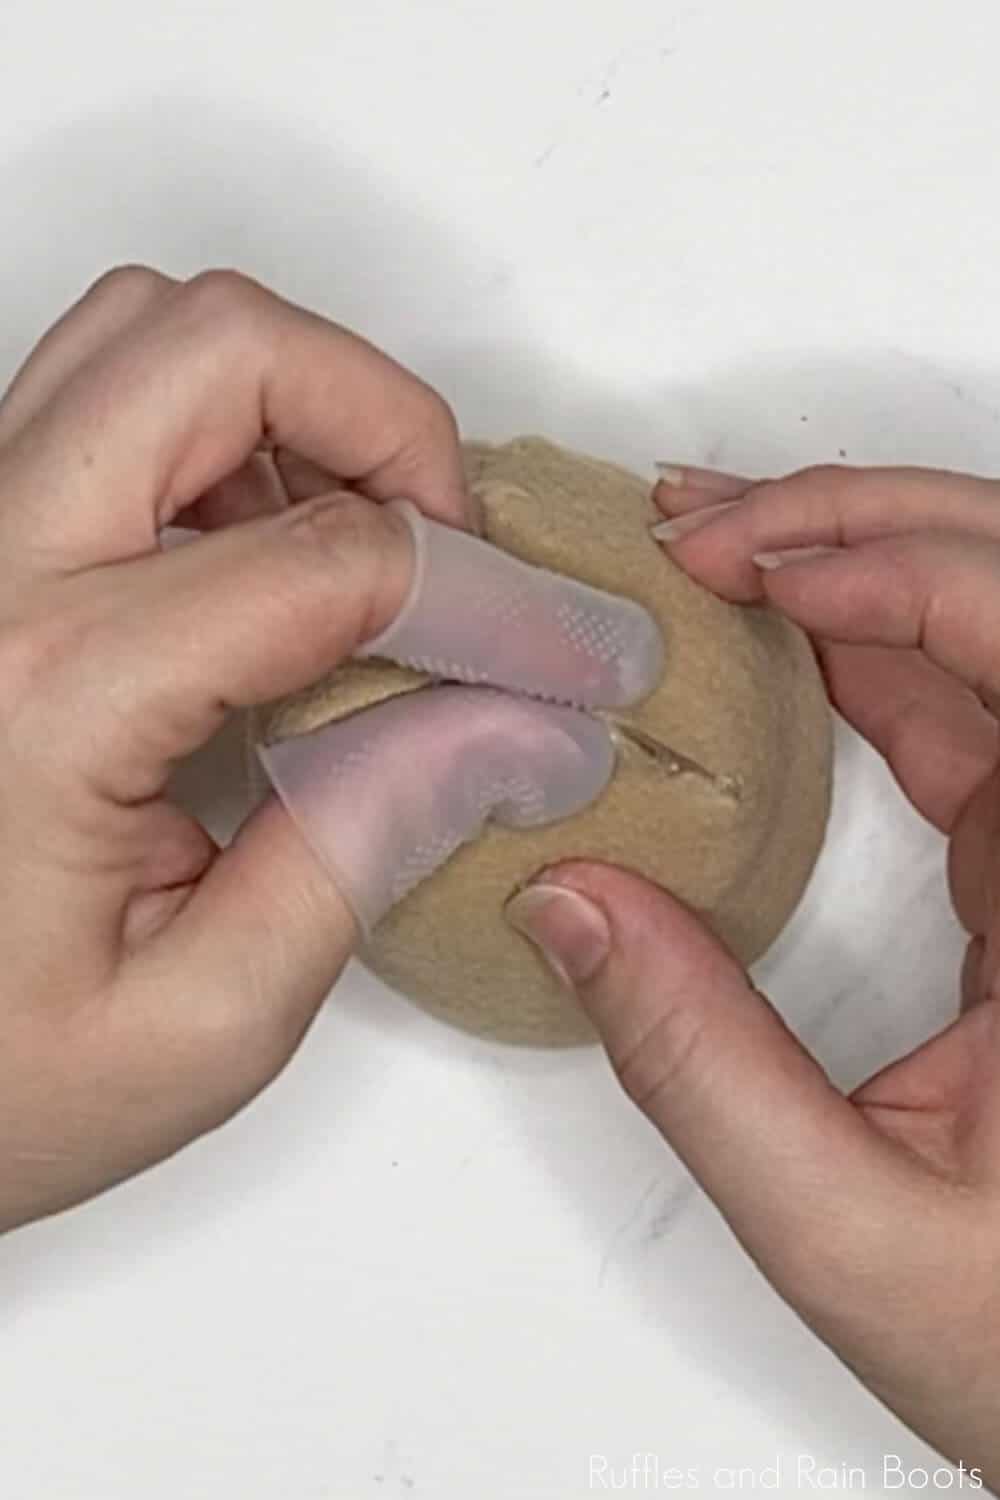
- Turn the body right side out and fill about halfway full with Poly Beads, stuffing the remaining portion of the body with Poly Fill. Close the top of the gnome by pinching the open bumps together, gluing them in place.

- Place your faux fur face down and, using your razor blade or craft knife, cut the fabric backing only into the shape you want for the beard. Hot glue the beard onto the front of the gnome. Allow the hot glue to cool completely. Cut a smaller rectangle (about 1-inch long by 1/2-inch wide) and part the fur in the middle, finger-brushing it to each side to make a mustache. Hot glue this about 1/2-inch from the top of the beard.
- Part the mustache fur to the fabric. Add a fair amount of hot glue then place the nose on top. Allow the hot glue to cool completely.
- To make the hat, cut one mushroom cap top hat shape from the moss green felt fabric and fold it in half, right-side to right-side. Hot glue the flat edge of the two halves together.
- Cut one mushroom cap bottom hat shape from the moss green felt fabric. Open the mushroom cap TOP hat shape and glue the top hat shape to the bottom hat shape around the outer edge, right-side to right-side. Glue the two pieces together around the outer edge only. Using the hole in the center of the mushroom cap bottom, turn the hat right-side out.

- Fill the edges of the hat with a little Poly Fill - just enough to help hold the round mushroom hat shape up.
- Place the hat on top of the gnome's head, tucking it down just above the top of the nose. Hot glue the hat in place in the back and sides, then one little dot above the nose. If you plan to add arms do so now.
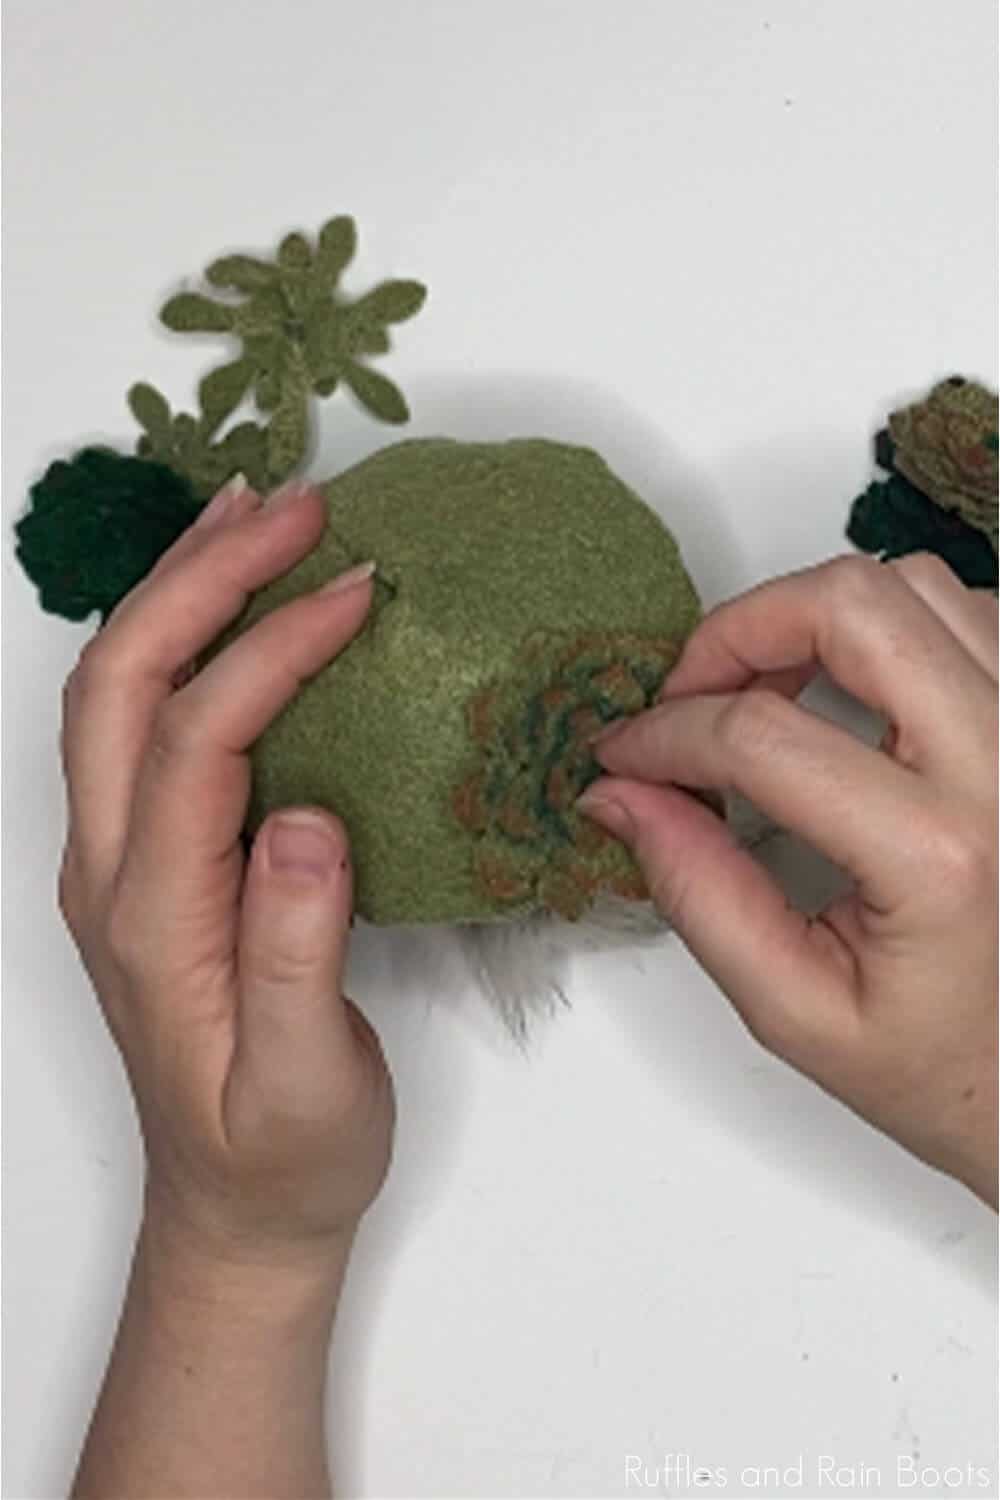
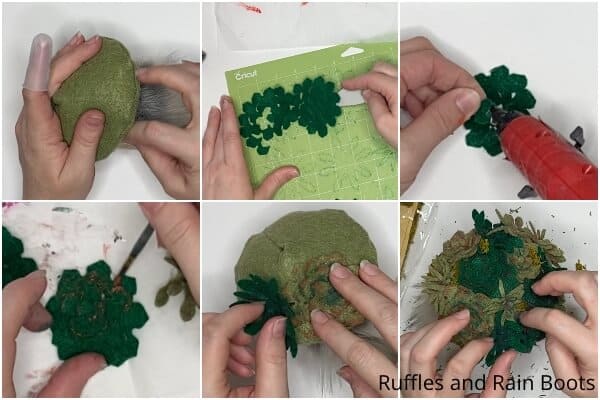
- Download the files to cut the succulent shapes, then upload them to Cricut Design Space. Follow the prompts to cut 5-6 of each shape in varying sizes, in the two different shades of green felt. Once cut, very gently remove the felt succulent shapes from the mat, using your spatula tool.
- Twist the succulent shapes tighter, stacking the petal shapes (or leaf shapes, whatever you'd like to call them), so that they overlap by about 1/4-inch on the bottom. Hot glue them in place on the back, to create a succulent shape.
- With the fabric paint, dry brush the edges of the flatter succulents and the insides of the stringy succulents. You do not have to do this with every succulent, but I found the process and results to be very fun. Allow the paint to dry completely before continuing.
- When the succulents are dried, randomly hot glue them to the top of the flat-ish cap, covering it entirely as best you can.
- Stuff the floral foam into the terra cotta pot to make a flat surface for your gnome, then cover the foam with the moss, hot gluing some to drag over the side of the pot. Fill any gaps in the gnome's cap with bits of moss hot glued in place.
- Place the gnome on top of the moss-covered terra cotta pot, then get ready to display your completed mushroom gnome!
Notes
For more fun gnome crafts, visit Ruffles and Rain Boots!
Recommended Products
As an Amazon Associate and member of other affiliate programs, I earn from qualifying purchases.


More Unique Gnome Crafts You Might Like
- Simple Farmhouse Gnome – An easy way to bring a little whimsy to your farmhouse decor!
- Elegant Bee Gnome – Amazing and easy, this gnome even has it’s own little DIY bee wings you’ll love!
- Mini Kissing Scandinavian Gnomes – Kissy-face gnomes are just the cutest and all sorts of simple to make!
Please Save This to Pinterest
Your shares are how this site grows and I am sincerely grateful. Know a friend who’d like this? Please share it on Facebook or save it to your favorite Cricut crafts board on Pinterest.
Meet the Creator
Hi there, I’m Sarah Nenni-Daher. I’m a crafty gal and always have at least 14 projects going at once. I am a crafter, designer, DIYer, and pattern maker. I share my creations here and in the Ruffles and Rain Boots® Shop.
Here at Ruffles and Rain Boots®, you’ll find DIY gnomes, crafts, gifts, cupcakes, laser crafts, and so much more. I love sharing video tutorials over on YouTube and chatting with other crafters in my Facebook groups. We’d love to have you!