
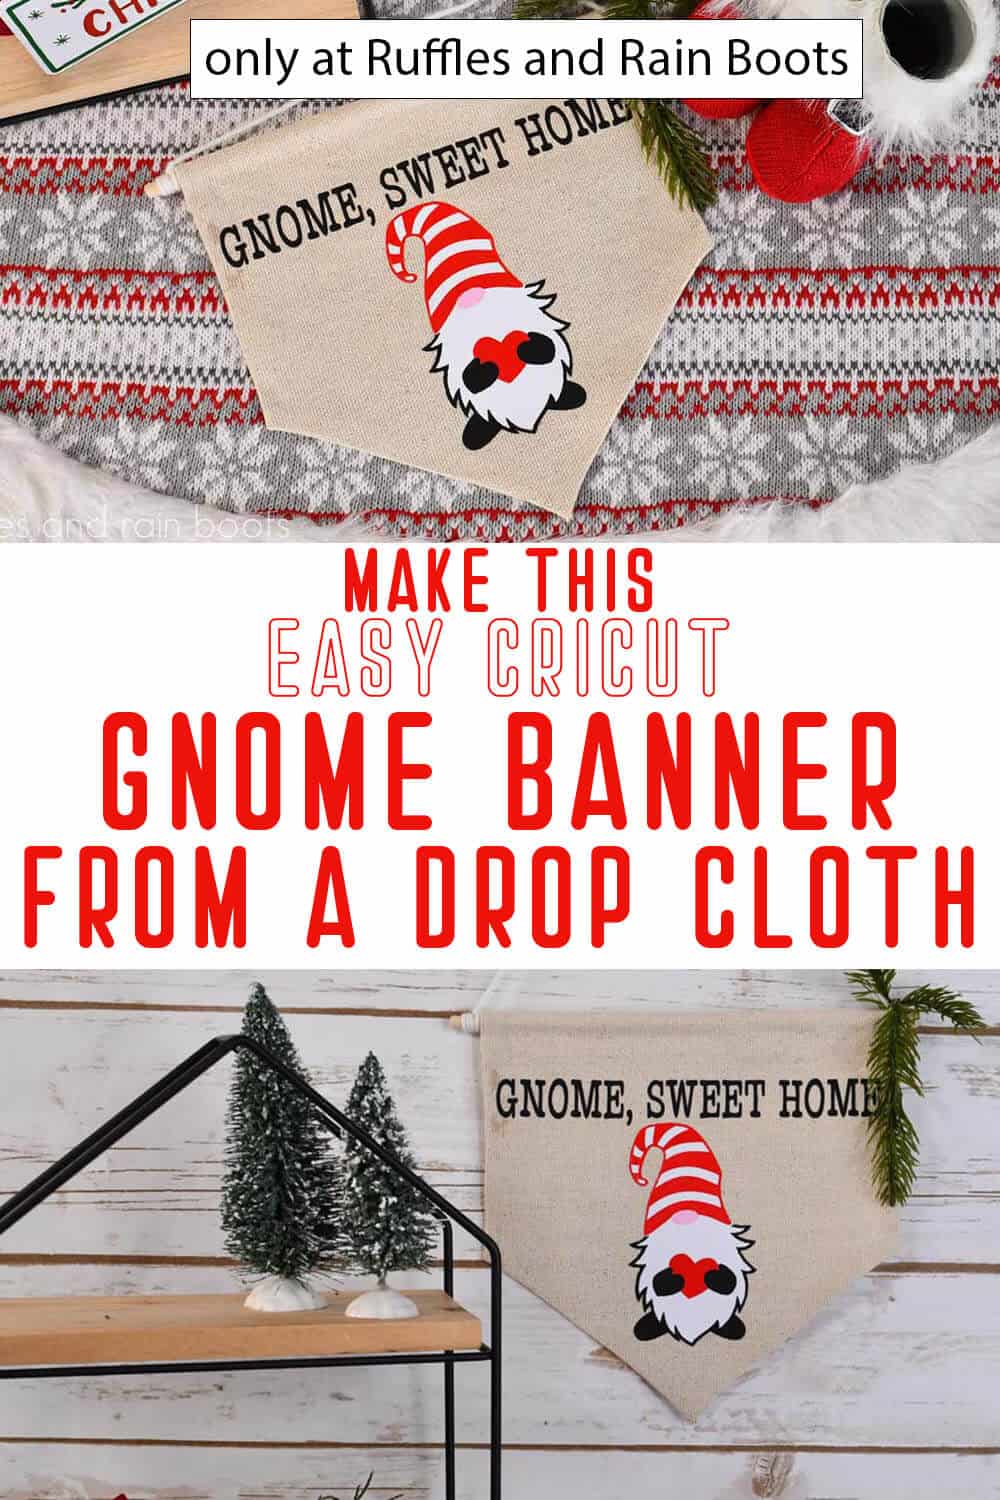
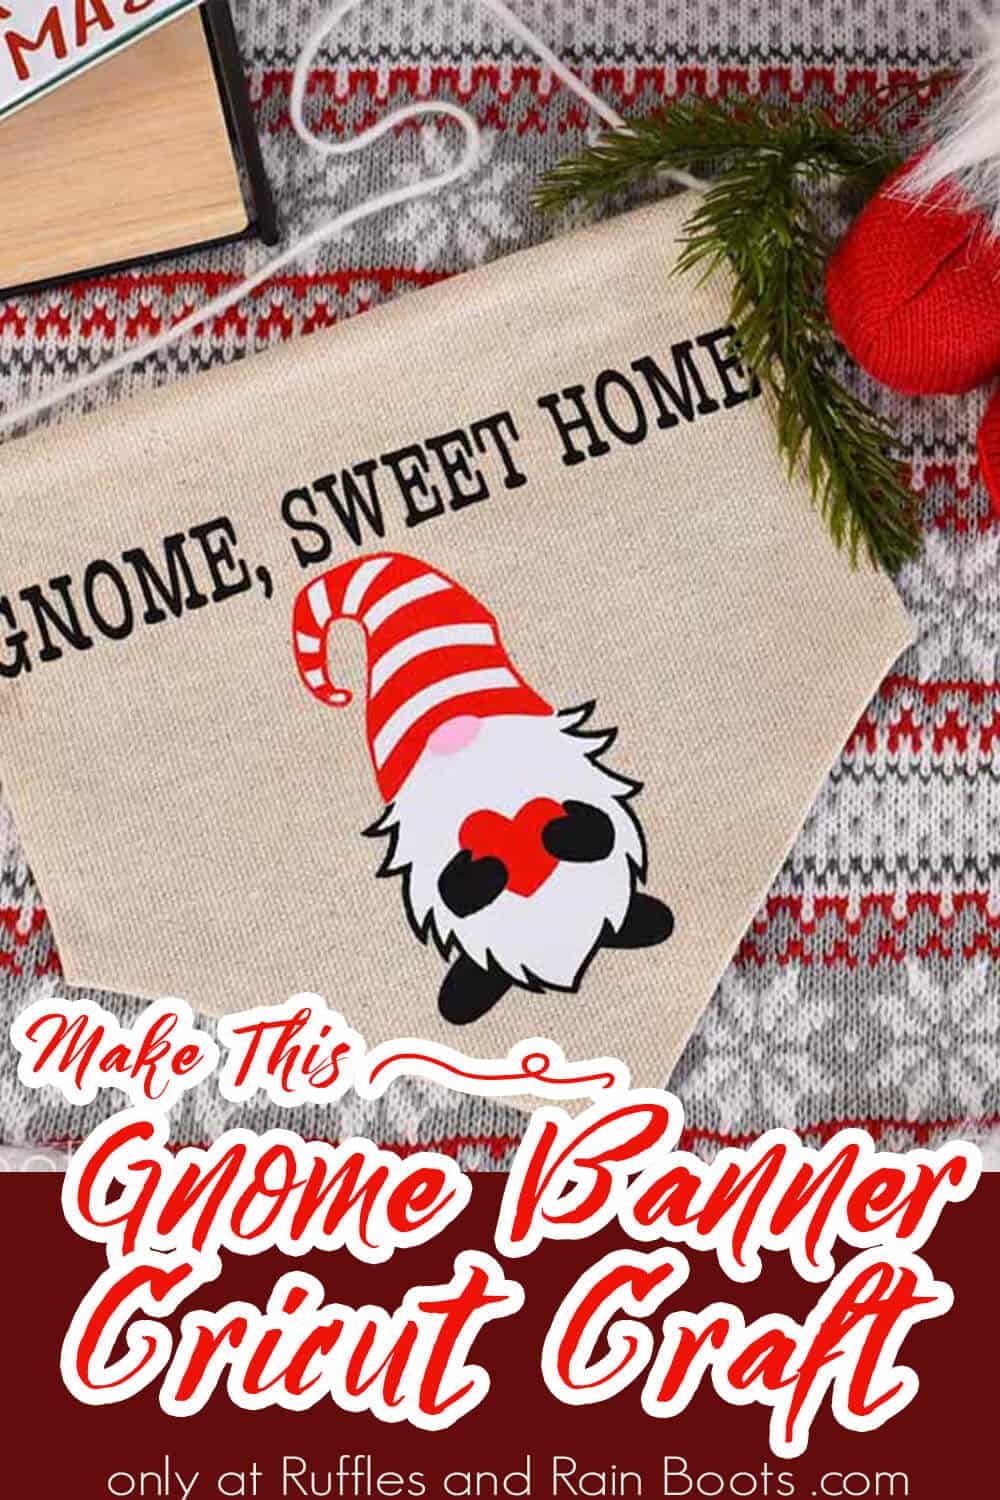
This Drop Cloth Gnome Banner for the Holidays is an Easy Cricut Craft
Making this fun and easy drop cloth gnome banner was a great way to start getting my decor ready for the holidays!

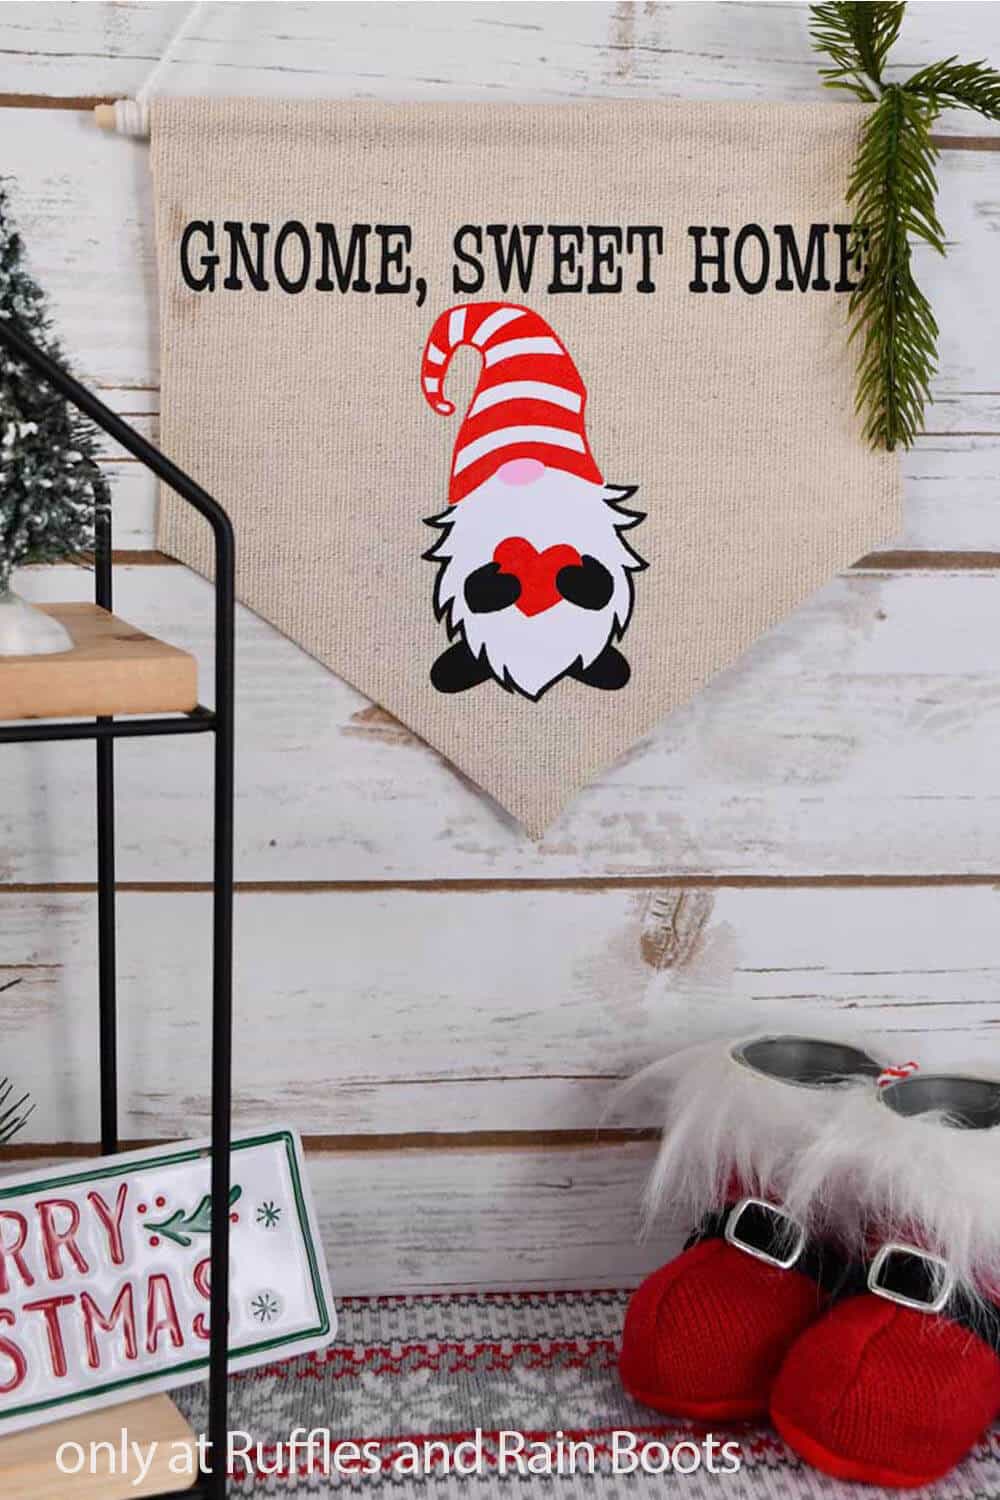
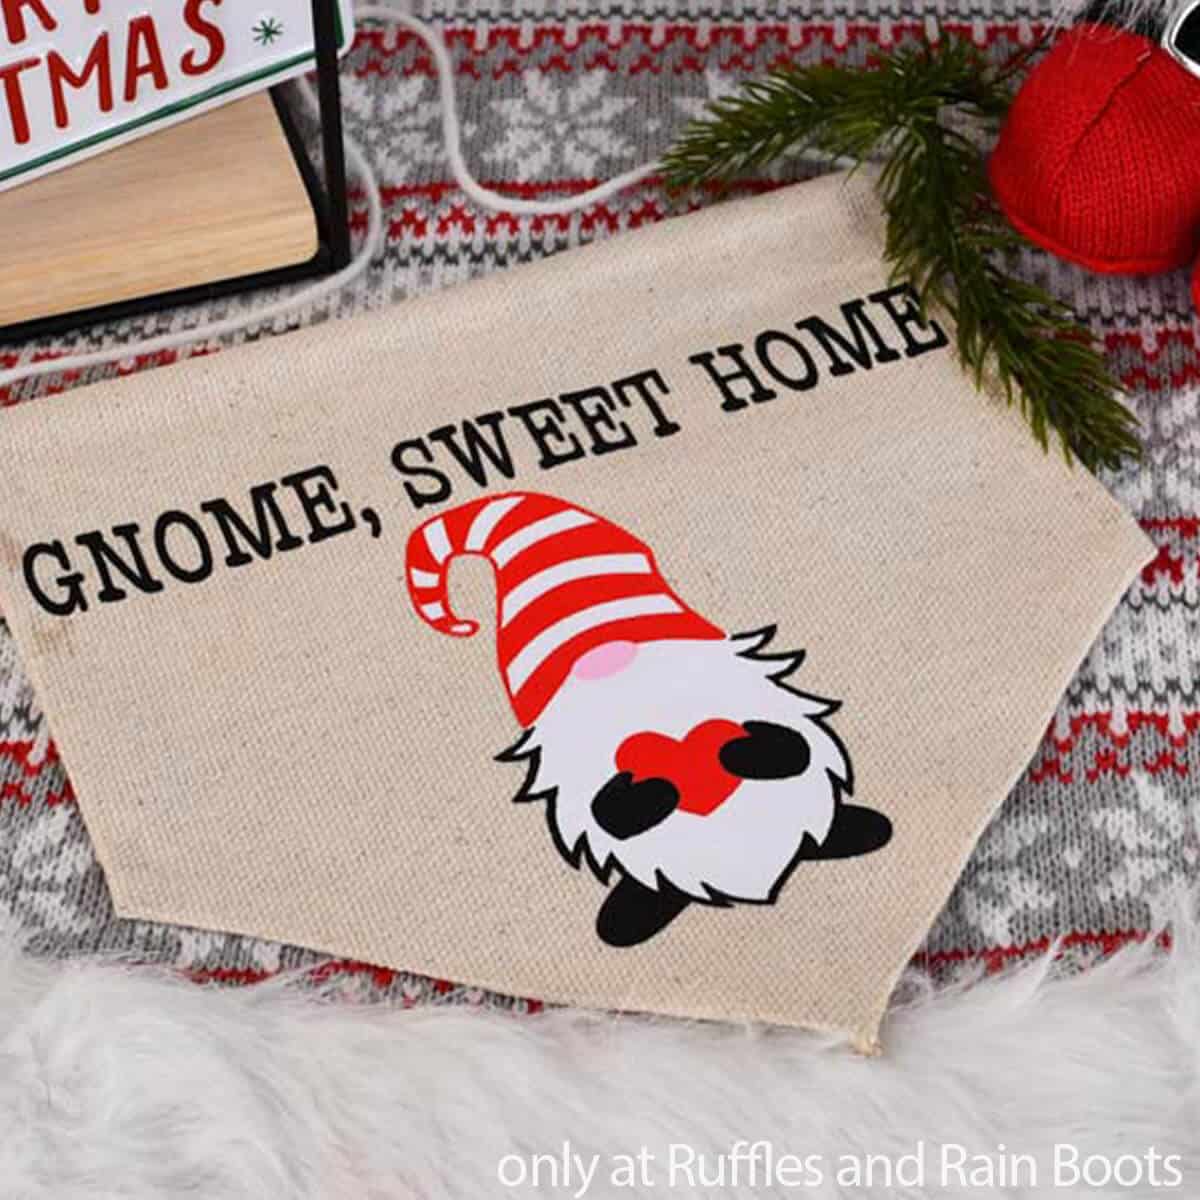
Drop Cloth Gnome Banner
Here at Ruffles and Rain Boots, we love finding easy and fast ways to make a statement piece for a little decor-refresher. And this easy drop cloth gnome banner is one of those epic gnome crafts that just really pops!
RELATED READING: WATERMELON GNOME TIE-DYE SUBLIMATION SHIRT
Fun and fast, you can have this easy holiday craft done in just a few minutes. If you’re ready to make a gnome holiday banner, let’s get started.
No Time to Make This Now? Pin it for Later
You’re busy, I get it. Pin this to your favorite gnome crafts board on Pinterest and it’ll be here when you’re ready.
As an Amazon Associate, I can earn from qualifying purchases.
Tips to Make This Gnome Cricut Craft
- When measuring your vinyl elements, make sure to account for the hot glue hems (I may have made that mistake – watch the video to find out). If you use the EasyPress on the hot glue hems, the hot glue will reactivate and bleed through onto the front of your banner.
- Don’t forget to mirror your design if there’s any text. I hate having a design all cut and ready to go – only to realize that I didn’t mirror it. Just a waste of vinyl that you can’t take back.
- Why drop cloth for this craft? This is an easy one. Drop cloth is cheap (yay!), easy to work with, and has great body (meaning it’s stiff). Just all around a great material that I will be using again!
How Do I Make this Gnome Banner?
I’m so glad you asked. Below is our written tutorial. If you’re making a holiday crafts playlist on YouTube, here is our drop cloth gnome banner video tutorial.
Drop Cloth Gnome Banner

This easy drop cloth gnome banner is a fast holiday gnome craft that you can make in just a few minutes - it's great for holiday decorating! Learn to use your Cricut machine with versatile permanent vinyl.
Materials
- Drop Cloth
- Heat Transfer Vinyl (Red, Black, White, and Pink)
- Thin Dowel
- Yarn (for Hanging)
Tools
- Cricut machine (Maker, Explore Air 2, Joy) and Mini (or iron)
- Hot Glue Gun and Glue
- Ruler
- Scissors
- Sewing Pins
- Pencil
- Weeding Tools
Instructions
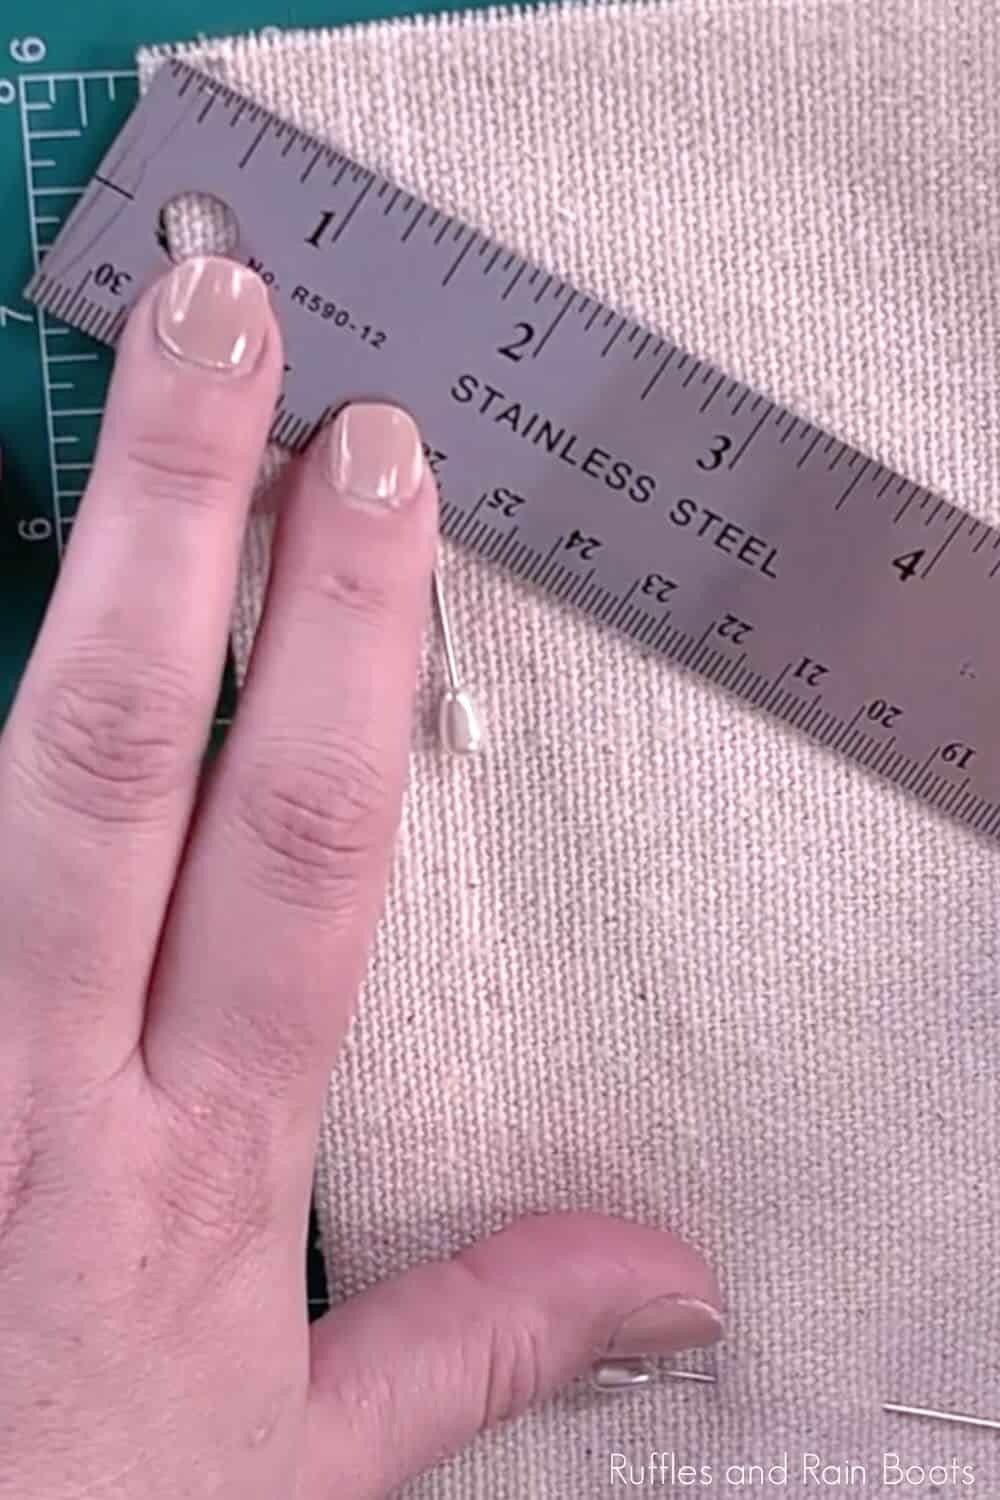
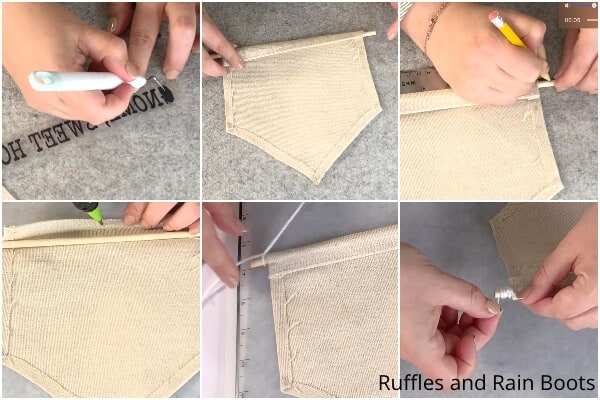
- Cut a rectangle of drop cloth about 8 1/2-inches wide by 8 3/4-inches tall. Fold the drop cloth rectangle in half along the wide side and pin it in place.
- To make the pennant shape, measure and mark a spot along the cut edge 3 inches from the corner, then measure and mark a spot 1/4-inch from the folded edge. Join these two points with your ruler and cut.

- Remove the pins and open the pennant shape, then fold the cut edges over by about 1/4-inch and hot glue them in place on the back side of your pennant. Make sure to bring the point of the pennant to a point. Measure the locations you want each of your design elements to be and note this. Additionally, note where you want the dowel to sit on the back side of the pennant by folding over the pennant around the dowel, then pinning it in place. Use this to measure, but take care to remove the fold before using the heat press so as not to affect the hot glue hem. Set aside the pennant.
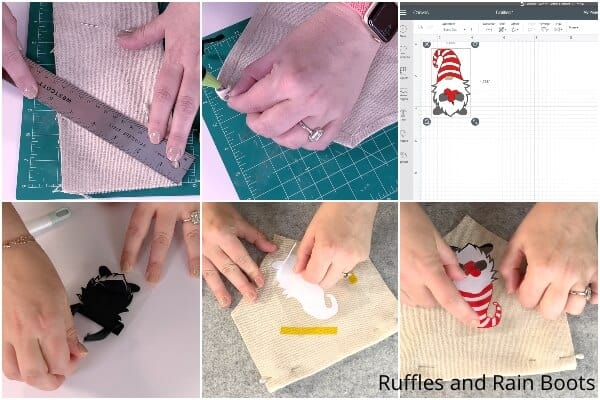
- To make the gnome and text elements, I purchased a design, then made a few tweaks to add a background and switch out the little thing the gnome is holding. All of this can be done in Design Space, but I elected to do it in another program. Once your design is prepped, load it onto the workspace in Design Space and resize it to fit on your pennant.
- Attach each of the color sets of elements on your design, to make layering the vinyl easy, then follow the prompts to "Make It" and setting the material type to heat transfer vinyl. Don't forget to mirror it if there is text.
- Prep your vinyl by loading it onto the light grip mat (shiny-side down) and loading the mat into the cutting machine. Cut each layer of the vinyl, then weed the excess vinyl from the transfer paper/tape.
- Layer the vinyl elements together onto your pennant, taking care not to heat press the edges of the pennant. I like to place one layer at a time onto my blank, pressing it just enough to get it to stay, then adding the next layer. Then, once all the layers are in place, I like to put a large piece of the carrier tape/paper onto the top of the vinyl and press it all for the time noted on the vinyl packaging to make sure that it all bonds well.

- Repeat the process by making your text elements, taking care to measure the area you want the text to appear INSIDE the hot glue hems on either side of your pennant.
- Attach text, to make placing the vinyl easy, then follow the prompts to "Make It" and setting the material type to heat transfer vinyl. Don't forget to mirror it.
- Prep your vinyl by loading it onto the light grip mat (shiny-side down) and loading the mat into the cutting machine. Cut the vinyl then weed the excess vinyl from the transfer paper/tape.
- Heat press your text onto the pennant, then remove the transfer paper/tape and discard.
- Flip your pennant over and fold the pennant over the dowel. Mark the dowel at 3/4-inch excess on either side of the pennant. Cut the dowel to this size. Hot glue the pennant to itself, taking care to work from the center and not using excess glue.
- Tie the yarn onto the dowel on each side of the pennant, pushing the knot close to the pennant. Wrap the ends of the yarn around the dowel 3-4 times, hot gluing them in place. It's time to hang your gnome banner!
Notes
For more fun gnome crafts, visit Ruffles and Rain Boots!
Recommended Products
As an Amazon Associate and member of other affiliate programs, I earn from qualifying purchases.

More Easy Gnome Crafts You Might Like
- Sunflower Gnome Pattern using Cricut – One of my favorite gnome patterns, it doesn’t get enough love, but it’s so very easy.
- Reindeer Gnome Garland – I cut this out with my Cricut and put it together in just a few minutes. And it makes a great addition to the tree or fireplace!
- Mini Scandinavian Kissing Gnomes – Cut with the Cricut, too, this easy pattern is fast and fun to put together – and they’re KISSY!
Please Save This to Pinterest
Your shares are how this site grows and I am sincerely grateful. Know a friend who’d like this? Please share it on Facebook or save it to your favorite holiday crafts board on Pinterest.
Meet the Creator
Hi there, I’m Sarah Nenni-Daher. I’m a crafty gal and always have at least 14 projects going at once. I am a crafter, designer, DIYer, and pattern maker. I share my creations here and in the Ruffles and Rain Boots® Shop.
Here at Ruffles and Rain Boots®, you’ll find DIY gnomes, crafts, gifts, cupcakes, laser crafts, and so much more. I love sharing video tutorials over on YouTube and chatting with other crafters in my Facebook groups. We’d love to have you!