
5 Minute Fall Gnomes DIY
Perfect weather and fun all around, it’s the season to make these fall farmhouse gnomes. With this free gnome pattern, free gather SVG, and a quick tutorial, I’ll show you how to make a fall display with your cute gnomes.
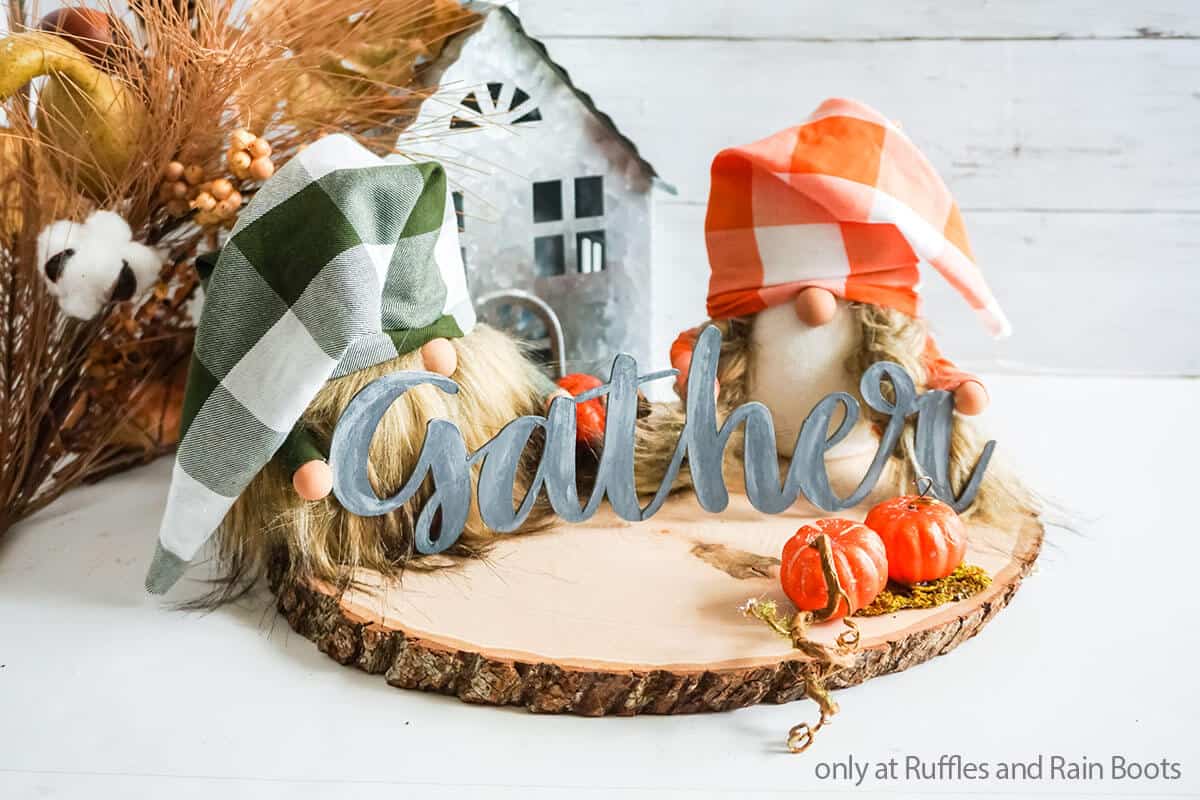
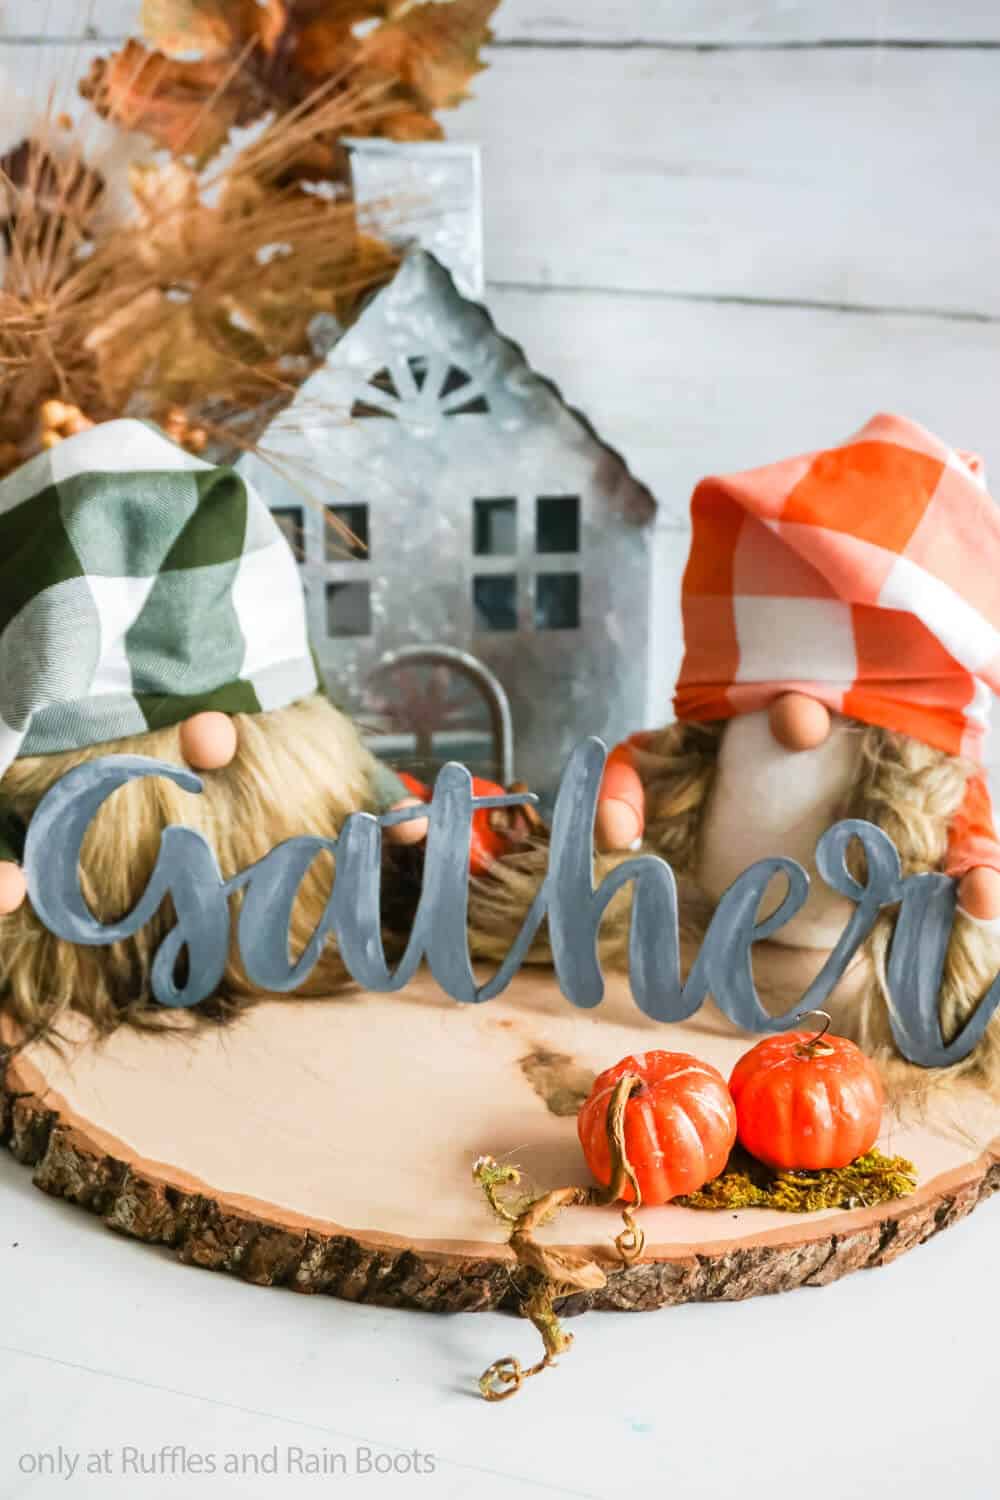
Create a pair of adorable fall sock gnomes using any fabric of your choosing and place them onto a wood round. This farmhouse style display is too cute not to make.
RELATED READING: DIY Fall Sock Gnome with Free Gnome Hat Pattern
What You'll Find On This Page
DIY Fall Farmhouse Gnomes with Socks
Here at Ruffles and Rain Boots, we have found that fall is a great season for gnomes. But for some reason, it all the fun you can have with fall gnomes gets overshadowed by winter and holiday gnomes.
And honestly, it’s even better than I imagined. It’s simple, but the gnomes are both so sweet and cute and the gather sign is well balanced by the tiny pumpkins. I just love the whole gnome display.
RELATED READING: NO-SEW GNOME MUG COZY PATTERN
No Time to Make This Now? Save or Share This Fall Gnome DIY for Later
If you love these adorable fall gnomes but can’t get started right now, save this to a DIY fall crafts pin board or share it on Facebook. Either will make this easy to find when you’re ready to begin.

As an Amazon Associate, I can earn from qualifying purchases. There could be affiliate links within this article.
RELATED READING: Easy DIY Fall Shelf Sitter Gnome with Legs
Tips to Make These Fall Gnomes
- Grab a large wood round like this one here. You want a large one, but not one that’s perfectly round. And I specifically wanted one with the live edge that looked rustic to go with my farmhouse gnomes!
- If you want to make this sign, grab the free gather SVG file here. This is the cut file I used to make the chipboard Gather sign held by my little fall gnomes.
- I used a pair of socks from the dollar store and got the moss and little mini-pumpkins from a craft store in the floral section.
- The gnome nose I chose is made of polymer clay, but you can use a wood bead or round.
- The faux fur for the gnome beards is a staple sold by all the craft stores starting in fall. You should use it for fall gnome DIY projects and even Christmas gnomes – it’s a beautiful brown full of depth.

Fall Farmhouse Gnomes Video Tutorial
If you’re a visual learner, here is the DIY fall sock gnome video tutorial on YouTube. While you’re there, be sure to subscribe – we have a lot of fun.

More Fall Gnome Tutorials You Might Like
- Pumpkin Spice Gnome – He’s a pumpkin-spice-addicted, fall loving hipster with a fun, floppy hat and a bright orange beard every pumpkin would be jealous of.
- Fall Elfin Gnome – One of my favorite fall gnomes, this orange bottom-buffalo check top. He’s just so cute and I really love that curled hat!
- Pumpkin Gnome – Speaking of pumpkin and orange – this gnome has a literal pumpkin for a butt and it’s the cutest thing you’ll ever see!
Please Save or Share This DIY Sock Gnome Idea
Your shares are how this site grows and I am sincerely grateful. Please share this with a crafty Facebook group or save it to a fall decor and crafts pin board.

How to Make These Fall Farmhouse Gnomes
Keep this page open and follow the step by step written tutorial for this fun gnome craft. You can print this easy fall gnome tutorial, as well.
Fall Farmhouse Gnomes
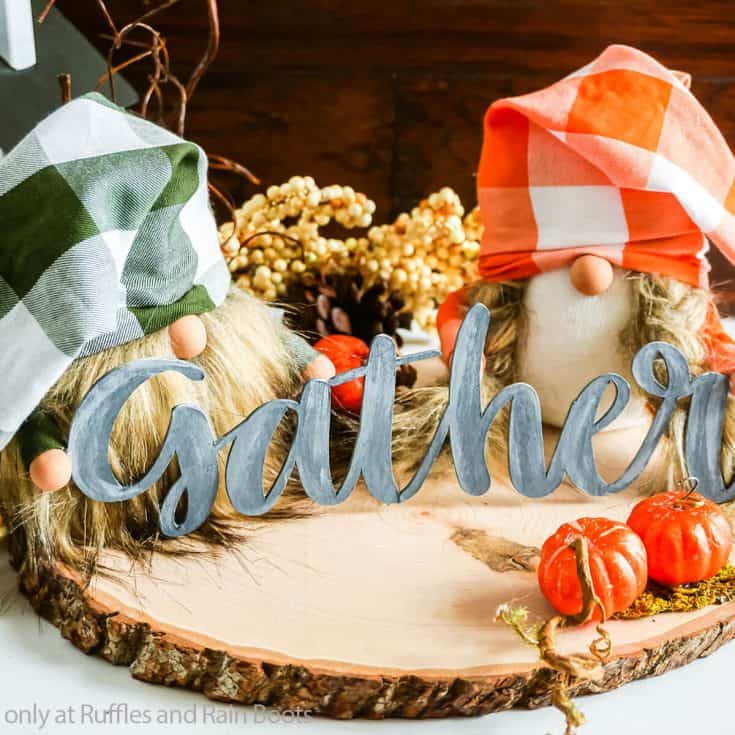
I can't get over this adorable fall farmhouse display. And it was so quick and easy to make, I definitely see making more for each season in my near future!
Materials
- 1 Sheet 12x12 Chipboard
- Grey Acrylic Paint
- White Acrylic Paint
- 3-4 Mini Pumpkins
- 1 Small Amount Moss Mat
- 1-2 Pieces of Bark
- 6 Small Wood Beads or Clay Balls for Noses and Hands
- 1/8 yard Green and White Buffalo Check Fabric
- 1/8 yard Orange and White Buffalo Check Fabric
- 1/8 yard Brown Mongolian Fur
- 2 White Knee Socks
- Small Amount of Polyfill
- 3-4 cups Polyfill Beads
- 2 Long Foam Hair Curlers
- Embroidery Thread
- Raffia Wrapped Floral Wire
Tools
- Cricut Explore Air 2 or Cricut Maker
- Masking Tape
- String Grip Mat
- Deep Cut Blade
- Scissors
- Hot Glue Gun & Glue
- Paintbrush
- Wire Cutters
- Chip Clip
Instructions
- Download the cut file for the Gather sign and upload it to Cricut Design Space. Follow the prompts to cut the sign from chipboard, taking care to tape the chipboard to the mat so that it doesn't move around while the machine does its work.
- Once cut, paint the sign with the grey paint. Then dry brush the sign with the white paint to make it look distressed. Allow the paint to dry completely.
- While the paint dries, start making your gnomes by filling one of the socks with the 1-2 cups of polyfill beads. Fill the sock with an additional 1-2 cups (or so) of polyfill, about up to the heel of the sock. Tie the sock closed and hot glue the knot of the sock snugly. Fold the excess sock fabric over the filled portion of the sock, then again if necessary to utilize all of the sock fabric in helping to keep the fabric from being too see-through. Repeat with the second sock.
- To make the slouchy hats, cut a section of the buffalo check fabric about 10-inches across (make sure this will wrap fully around the sock) and about 15 inches long. Fold this rectangle in half, then cut diagonally up the longer length of the fabric. Open the triangle and lay the fabric flat.
- Hem the base of the triangle of fabric using hot glue, then fold the fabric with the hem on the outside.
- Hot glue the two cut sides of the triangle together. Allow the hot glue to cool completely. Then turn the hat right side out. Repeat with the other color of buffalo check fabric.

- Tuck the hat down over the body and make sure you like the fit.
- Cut out a large rectangle shape from the Mongolian faux by turning the fur over and cutting only the fabric with the Exacto knife. To determine how big to make my beard I simply laid the filled sock over the fur and made a rectangle shape that would leave fur just at the edge of the sock and starting about 4 inches from the top of the sock--and about as wide as the entire front half of the sock. Hot glue the beard to the body.
- Hot glue the nose onto the body, just below where you want the hat to sit.
- Tuck the hat back down onto the gnome head and hot glue the brim in place over the nose with a cute wrinkle (the best part!). Pull the hat down low in the back and hot glue it in place. Leave the sides open to place the arms--we'll glue the sides down later.
- To make the girl gnome, cut 6 3/4-inch wide sections of faux fur about 8 inches long, using the method described above. Clip 3 of the strips together on one end and tape the clip to the table. Braid the three strips together and tie them off at each end with the embroidery thread. Repeat with the other 3 strips to make a second braid.
- Hot glue the braids on either side of the second gnome body, trimming the ends of the braids as desired. Hot glue the nose onto the body, just below where you want the hat to sit.
- Tuck the hat back down onto the gnome head and hot glue the brim in place over the nose with a cute wrinkle. Pull the hat down low in the back and hot glue it in place. Leave the sides open.
- With the scraps of fabric that you cut off the top of the hat shape, cut two 2-inch wide sections as long as you can get. Hem one long side of the fabric and one short side of the fabric.
- Cut the foam hair curler in half, maintaining the wire in the center, cutting it with the wire cutters. Roll one half of the hair curler in the hemmed rectangle of fabric, hot gluing it in place. The hemmed short side is the cuff of your arm. Tuck the other end of the arm up under the edge of the hat and hot glue it in place to the body of the gnome.
- Repeat with all of the other arms for each gnome.
- Hot glue wood beads on the ends of each arm for hands.
- Twist 3-4 pieces of raffia wrapped floral wire into tiny spirals and hot glue them in place as stems on the tops of the pumpkins.
- Cut small sections of moss, placing one on the front of the wood round and one on the back.
- Hot glue bark pieces on top of the moss and pumpkins in a pile on top of that, as desired.
- Place the gnomes on either side of the wood round and hot glue them down firmly to the wood.
- Place the gather sign in front of the gnomes and hot glue the arms in place holding the sign up. Then get ready to display!


Notes
For more fun farmhouse gnome crafts, visit Ruffles and Rain Boots!
Recommended Products
As an Amazon Associate and member of other affiliate programs, I earn from qualifying purchases.


Meet the Creator
Hi there, I’m Sarah Nenni-Daher. I’m a crafty gal and always have at least 14 projects going at once. I am a crafter, designer, DIYer, and pattern maker. I share my creations here and in the Ruffles and Rain Boots® Shop.
Here at Ruffles and Rain Boots®, you’ll find DIY gnomes, crafts, gifts, cupcakes, laser crafts, and so much more. I love sharing video tutorials over on YouTube and chatting with other crafters in my Facebook groups. We’d love to have you!