
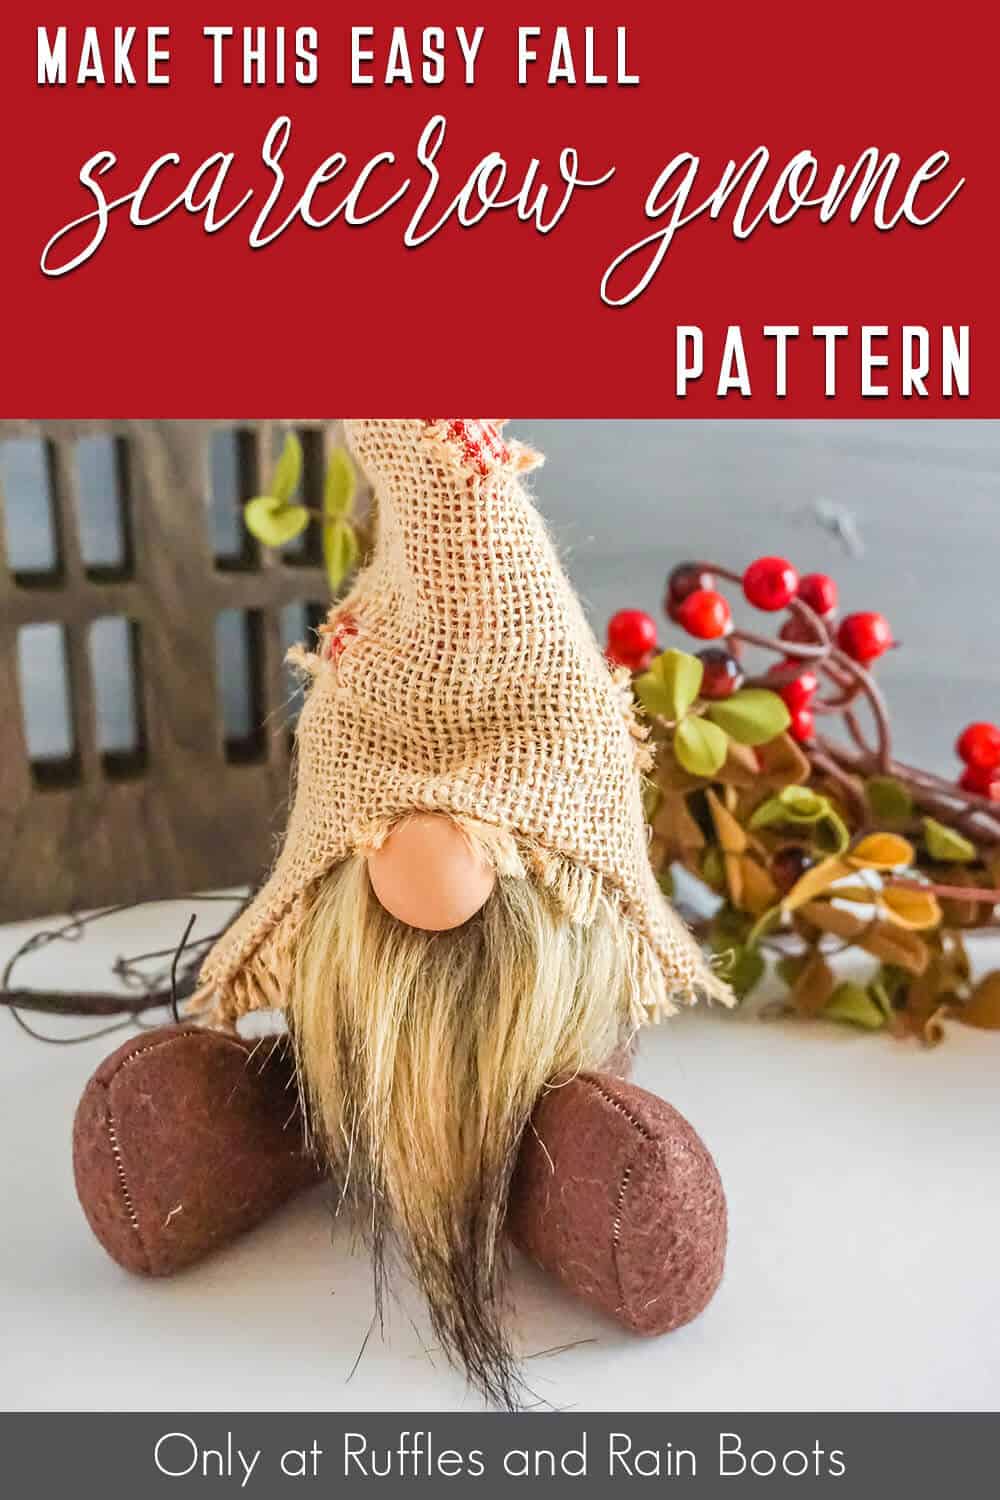
Make This Easy Farmhouse Scarecrow Gnome Pattern for Fall!
For a while, I have wanted a small farmhouse scarecrow gnome pattern for fall and this sewing pattern (or no-sew, your choice) is perfect!
RELATED READING: DIY Fall Sock Gnome with Free Gnome Hat Pattern
Farmhouse Scarecrow Gnome Pattern
Here at Ruffles and Rain Boots, I love fall. It’s just the perfect time, when hot weather is no longer menacing me and all the leaves get to show all the best colors they can. And one of the things I’ve wanted to make for a while is a farmhouse gnome pattern that can fit in my tiered tray.
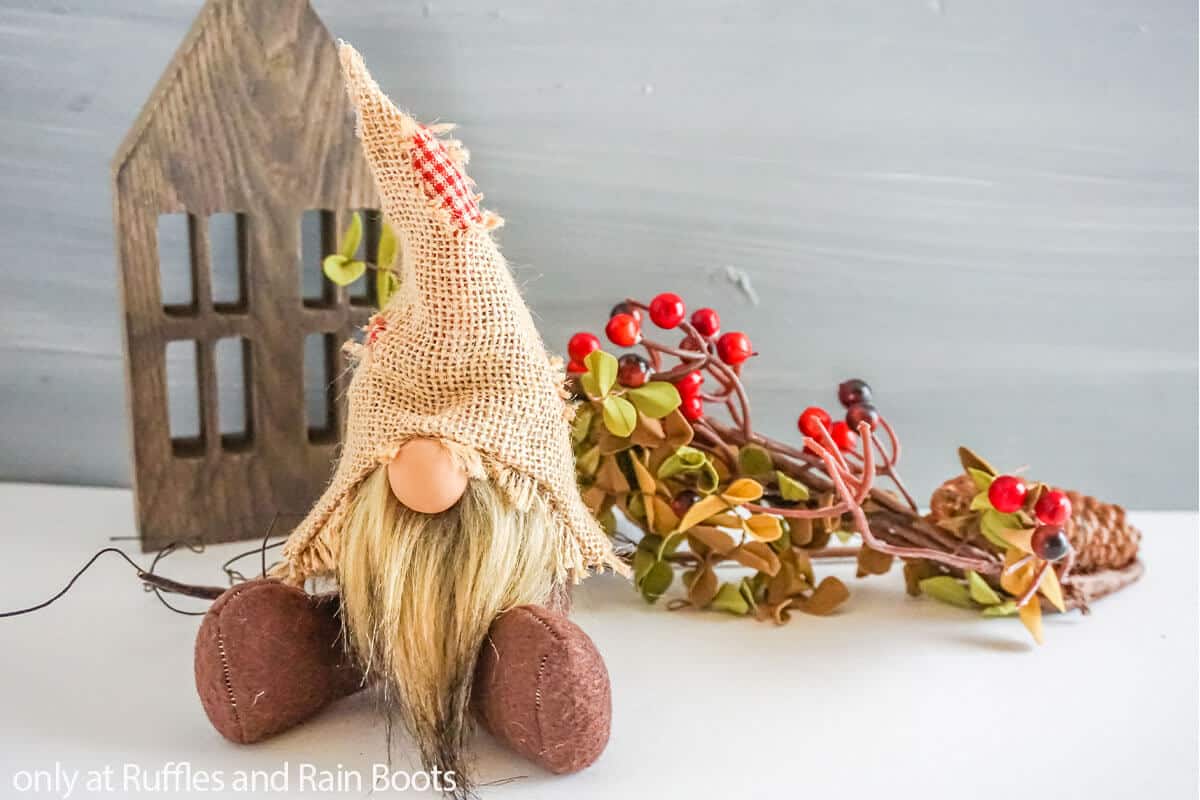
Yay for me, because I finally tackled this little DIY gnome and I LOVE his little boots, the scruffy hat with its patches. Couldn’t be cuter, honestly. So, grab your scissors and let’s get started.
RELATED READING: FALL FARMHOUSE GNOME DISPLAY
No Time to Make This Now? Pin it for Later
You’re busy, I get it. Pin this to your favorite DIY gnome patterns board on Pinterest and it’ll be here when you’re ready.
As an Amazon Associate, I can earn from qualifying purchases.
Tips to Make Gnome Pattern for Fall
- Based on my Icelandic Lovey Gnome Pattern here this gnome works up fast. There’s more than just the pattern for this one tomte in here, too. I made 4 different gnomes, plus the optional arms, legs/boots and a reversible hat – all in one pattern!
- If you want a cutting machine to do all of the work for you, get the Icelandic Lovey gnome pattern AND cut files for Cricut or Silhouette for the pattern.
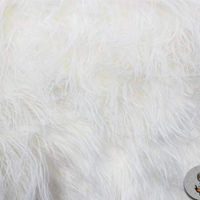
- This particular gnome beard is made with a rough, brown faux fur you can find at most craft stores (on the bolts, not in the precut fur section). If you are new to cutting fur, learn how to cut faux fur in this quick video tutorial.
Get the Gnome Pattern
Click below to add this fun pattern to your cart. So many gnomes can be made with this!

How Do I Make this Farmhouse Scarecrow Gnome Pattern?
I’m so glad you asked. Below is our written tutorial. If you’re making a DIY gnomes playlist on YouTube, here is our farmhouse scarecrow gnome pattern video tutorial.
Scarecrow Gnome Pattern

A great farmhouse fall project, this easy scarecrow gnome pattern is a cute and whimsical addition to your decor.
Materials
- 1/8 yard Burlap
- 1/8 yard Premium Felt in Dark Brown
- Scraps Red Buffalo Check Fabric
- Mongolian Faux Fur (or other beard material)
- Poly-Fill
- 1/2 cup Poly-Beads
- 1 or 1 1/2-inch Wood Round (or other nose)
- 1 14-gauge (or similar) Floral Wire
- Icelandic Lovey Gnome Pattern
- Icelandic Lovey Gnome Pattern Cut File Set, optional
Tools
- Hot Glue Gun & Glue (note: hot glue sticks for fabric do exist and should be used, if possible)
- Scissors
- Razor Blade or Craft Knife
- Funnel
- Pencil or Fabric Marker, optional
- Wire Cutters
- Needle and Thread
- Sewing Machine, optional
Instructions
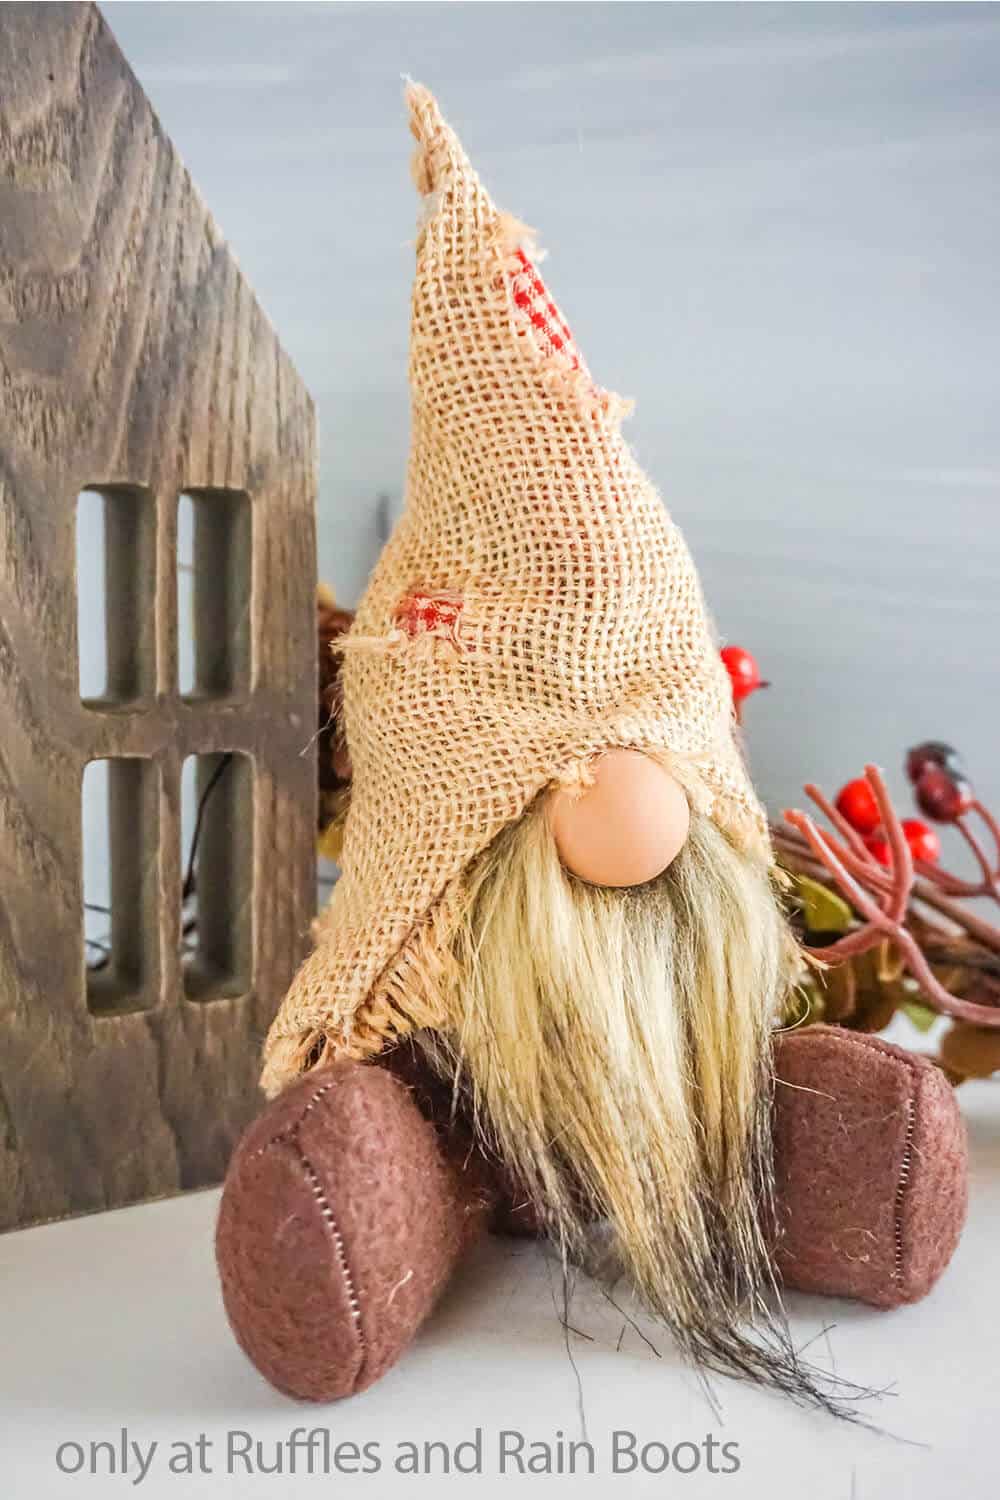
- Cut out the hat shape from the burlap fabric and hot glue hem all the way around the hat shape so that the burlap doesn't unravel. Set aside to allow the glue to cool completely.
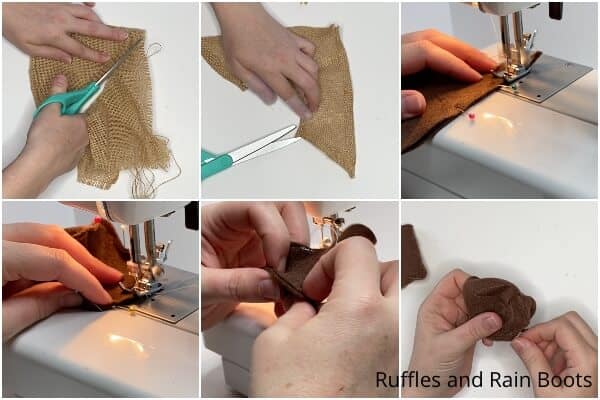
- Cut out the body shape, base, two feet and two sole shapes from the felt fabric. Fold the body shape in half, right-side to right-side and pin where noted, hemming per the pattern, leaving the body open where noted. Pin the base shape onto the bottom of the body and hem it in place.

- While the body is still wrong-side out, pinch together the marked dart locations on the base shape and pin in place. Hem each dart as noted on the pattern.
- Fold the shoe shapes in half and pin each of them together the back, then hem the seam. Pin the sole of the shoes onto each shoe then hem them in place.
- Turn the body and right side out as well as the two shoes.

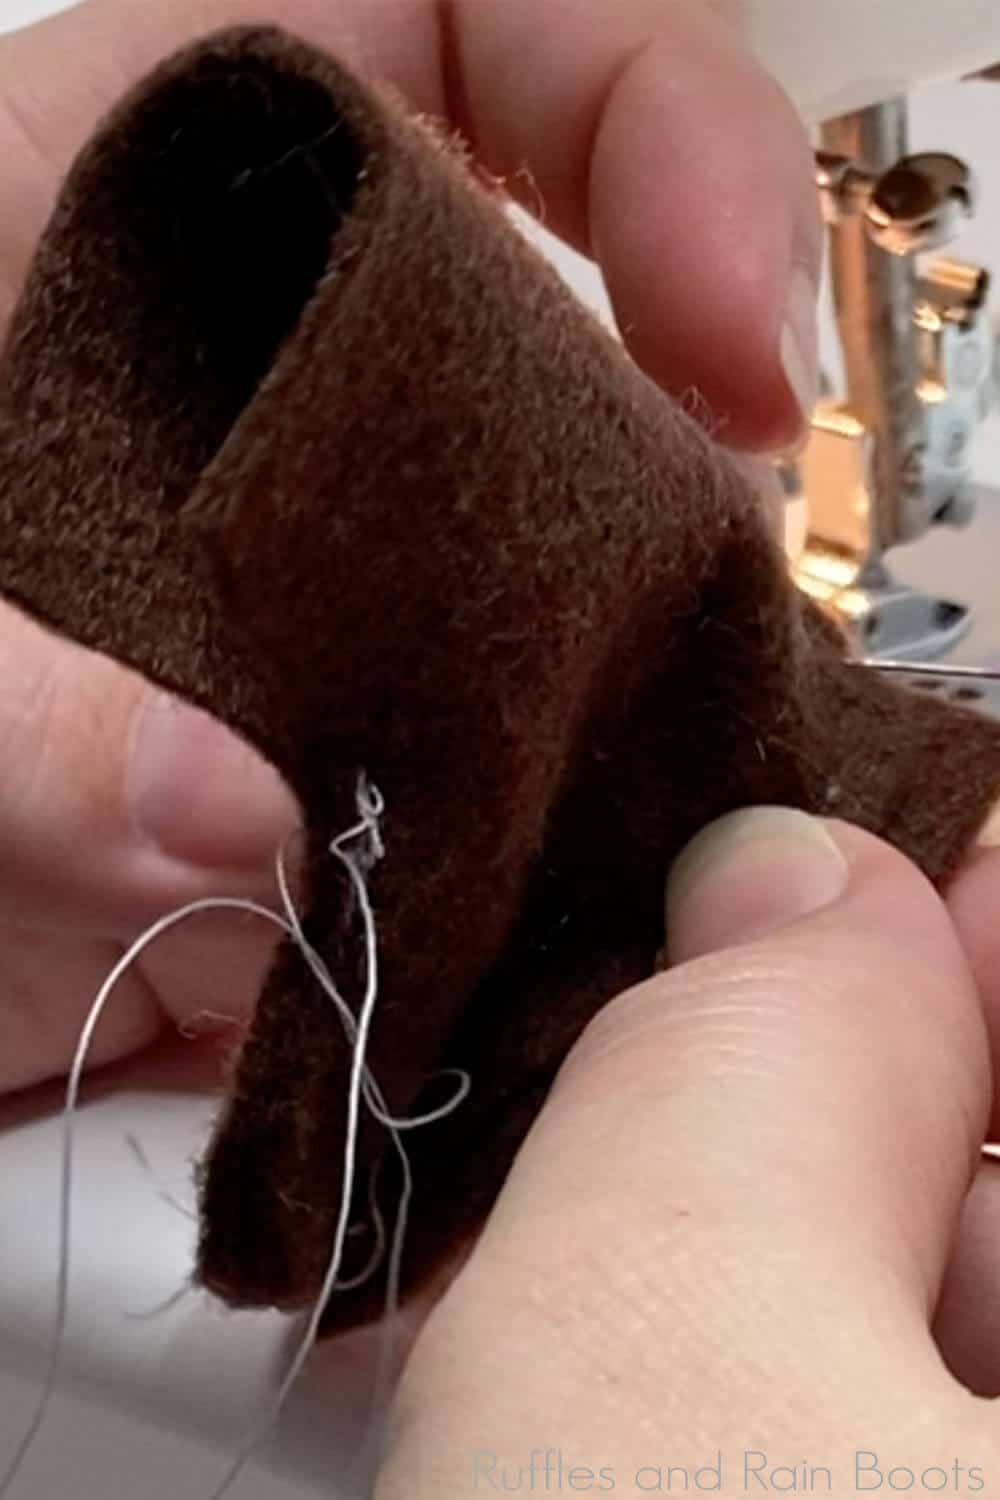
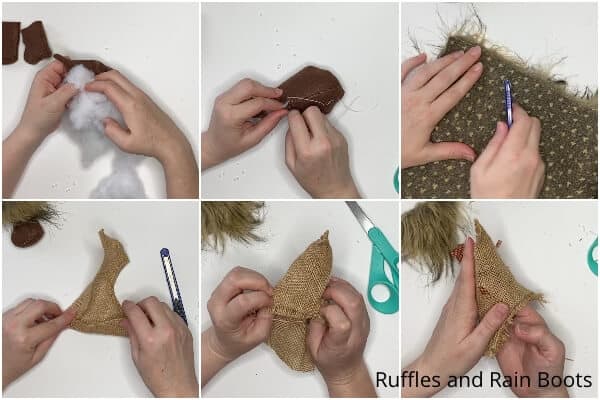
- Add about 1/2 cup of poly beads to the bottom of the gnome body. Fill the remaining portion of the body with polyfill. Tuck the wire inside the gnome’s body. Hand-stitch the body closed.
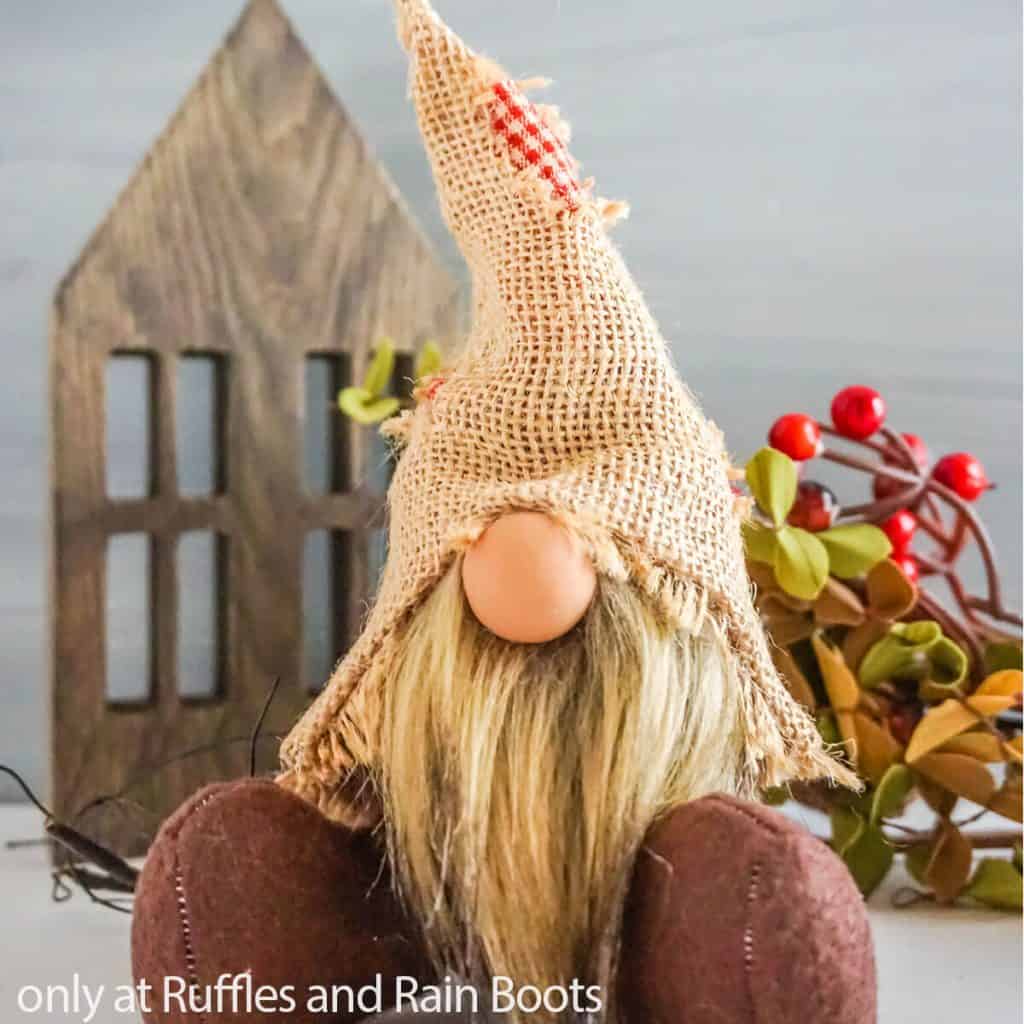
- Cut the faux fur into a beard shape and hot glue the beard to the gnome on the front. Part the faux fur and hot glue the nose in place. Allow the glue to cool completely.
- Fold the hat shape in half, wrong-side to wrong-side. Hot glue the long edge together, then allow the hot glue to cool completely.
- Add half-unraveled bits of burlap to the open brim of the hat, to give it a definitive scarecrow look. Cut 2-4 holes in the hat, then carefully hot glue a scrap of buffalo check fabric to the inside of the hat to patch each hole.
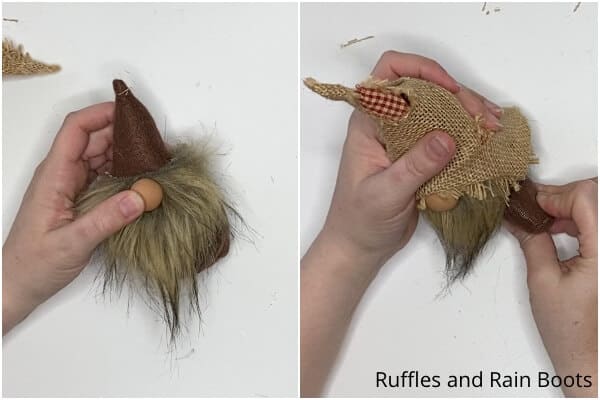
- Tuck the hat down over the body. Hot glue the hat down over the nose, creating a little wrinkle or scrunch to the fabric. Hot glue the hat down in the back and around the sides. Allow the hot glue to cool completely.
- Fill each shoe with a bit of stuffing and hand-stitch the open edge of the ankle section closed, leaving the shoe opening open. Fold-over about 1/4-inch of the hem into the opening of the boot, then hot glue each of the boots in place on either side of the gnome's body. Then get ready to display your gnome because he's done!
Notes
For more fun fall gnome tutorials, visit Ruffles and Rain Boots!
Recommended Products
As an Amazon Associate and member of other affiliate programs, I earn from qualifying purchases.


More Fall Gnome Patterns You Might Like
- Pumpkin Spice Gnome – All the pumpkin spice you can handle in a gnome – who is in a cup of pumpkin spice. It’s fall perfection.
- Sunflower Gnome Pattern – Early fall is all about that sunflower and cute gnome sneakers.
- Woodsman Shelf Sitter Gnome Pattern – Make this fun pattern in just a few minutes that is perfect for late fall, with a cute little twist on top!
Please Save This to Pinterest
Your shares are how this site grows and I am sincerely grateful. Know a friend who’d like this? Please share it on Facebook or save it to your favorite fall crafts board on Pinterest.

Hi Sara, I have a couple questions please.
1. Where can I find that exact fur name and location of the faux fur for the beard of the scarecrow with the burlap hat?
3. For your dollar tree fall pumpkin gnomes, I cannot locate the mold for the feet. The link takes me to a etsy site that shows sold out.
Thanks
Hi there, Tracy. For the pumpkin feet, I am so sorry, I can’t control if she’s sold out. You can look on Amazon for different molds, though – they work the same way: press the clay in, de-mold, and bake. A lot of people in the Facebook group use a pink set made for fondant / cakes.
As for the fur, it was purchased at Joann’s craft store on the bolt (the fabric rolls). It’s a shaggy, multi-color (brown with black tips) but I don’t have a name, nor can I find it online. I have much better luck going into the stores to see their fur offerings.