
DIY Pumpkin Snowman for Winter Decor
Bring this stacked pumpkin snowman to life with a few simple craft items like paint, buttons, felt, and ribbon. This adorable pumpkin stack snowman is a fast and easy craft idea for winter.
The best part is that you can start with a pre-made pumpkin stack or glue together your own to customize it to your space. And the best part is that this snowman DIY can be placed alongside Christmas decor and stay through winter.

RELATED READING: Adorable Dollar Tree Embroidery Hoop Snowman DIY (SO CUTE)!
What You'll Find On This Page
Pumpkin Snowman Craft
Here at Ruffles and Rain Boots, we happened to find a stacked pumpkin at the end of the season. As I walked around with it in my hand, I saw the cutest gingham ribbon and immediately imagined what a handsome snowman we could make.
The only thing better than having people think we bought this smart-looking snowman at the local box retail or craft store is that he only cost about $2. And friends, an inexpensive craft is my favorite kind of craft!
No Time to Make This Now? Save or Share
Save this easy winter craft project to a craft pin board or share it on Facebook. Using the sharing button will make it easy when you are ready to begin this easy craft idea and I really appreciate it.

As an Amazon Associate, I could earn from qualifying purchases. There may be affiliate links within this article.
Tips for Making a Stacked Snowman Craft
- If you can’t find a stack of pumpkins, pick up a few different-sized ones from a dollar store and glue them together.
- Due to the porous foam material the pumpkin stack is made from, it took us three coats of white paint to properly cover its natural color.
- Making a notch at each end of the ribbon will help it keep from fraying over time. You can also use Fray Check (love this stuff).
- Instead of using ribbon for the scarf, you can also use a piece of fabric, notched at the ends or a scrap of fleece fringed at the ends.

Supplies for a Stacked Snowman
Below are what I had on hand or found easily at the dollar or craft stores. If you can’t find rhinestones, use beads, buttons, or draw them on with a black permanent marker.
- Three Pumpkin Stack (or make your own)
- Black buttons, small
- Black rhinestones, self-adhesive
- Black and white gingham ribbon (or fleece)
- Hot glue gun and glue sticks
- White acrylic craft paint
- Scrap of orange craft felt
- Paintbrush
- Scissors
- Ruler

How to Make a Stacked Pumpkin Snowman
Each step for this snowman craft is detailed below so it’s easy to follow. Keep this page open while you are creating this stacked pumpkin snowman. If you would rather have a printable how-to, just scroll down and select the print button.
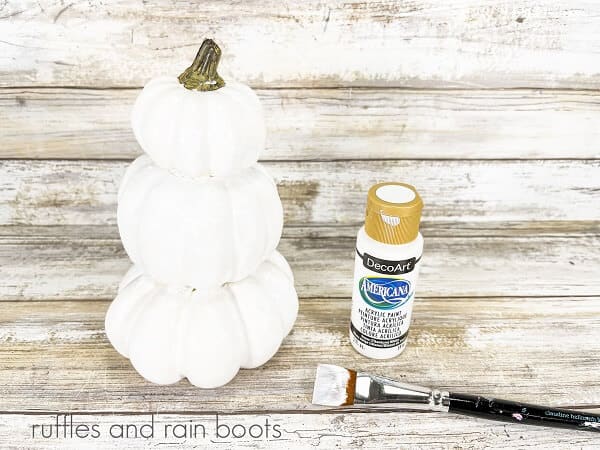
Paint pumpkins with white acrylic craft paint. It might take a couple of coats to make them opaque.

Cut a twelve-inch length of black and white gingham ribbon, tie it around the neck, and secure with a dot of glue. Another idea for a snowman scarf would be a strip of fleece or fabric with fringed edges.

Cut a small triangle from orange craft felt and glue it on the snowman’s face. Um, I placed mine a little too far to the right, but I like my derpy snowman. :)
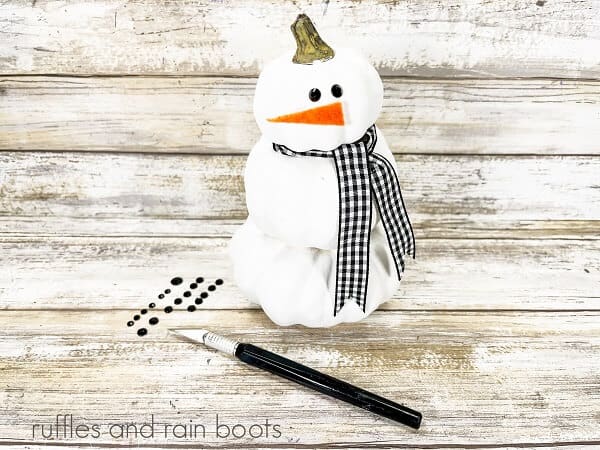
Next, attach two small black rhinestones for the eyes. If you couldn’t find any rhinestones, use beads or even some of the buttons.
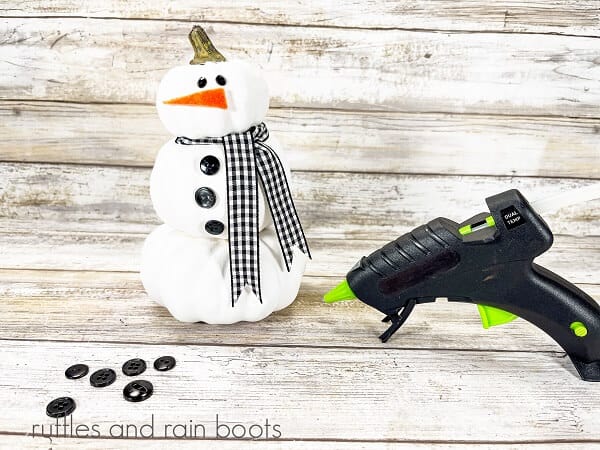
Now, attach small black buttons down the front of the snowman’s middle section.

This adorable and fun winter craft idea is now ready for display.
Notes on Making a Stacked Pumpkin Snowman Craft
- Some pre-made pumpkin stacks are multi-colored, dark hues. Use a primer or white gesso before you begin to use the white acrylic paint on it (you’ll use less).
- If you don’t have access to a hot glue gun, you can use white or tacky glue for the nose, scarf, and button trim. Use a liberal amount, hold it in place, and allow it to dry completely before moving on to the next step.
- Another way to change up this look would be to attach a few small sticks to the middle pumpkin to make snowman arms.
More Snowman Craft Ideas and Treats You May Like
- Melted Snowman Cupcakes: Easy? Yes. Adorable? You bet! These cute winter cupcakes are perfect for a class party – everyone will love them!
- DIY Cork Snowman Craft: Have a few wine corks lying around? Use them to create a natural or painted cork snowman – you have to see this.
- Fun Snowman Hot Cocoa Bombs: Everyone LOVES my 10 minutes hot chocolate bombs and these snowman hot cocoa bombs are so simple (check out those sprinkles).
- Adorable Snowman Treat Jar – Oh. My. Word! This snowman mason jar is so precious and the kids LOVE them filled with treats (or not).
Please Save or Share
Your shares are how this site grows and I sincerely appreciate it. Please save this craft to your favorite craft project pin board or share it on Facebook.

Pumpkin Snowman DIY

This quick and easy stacked pumpkin snowman craft comes together in just about 30 minutes with just a few simple supplies. This cute snowman makes a great holiday gift for teachers, family, and friends as well as to keep for yourself. Our snowman is the perfect size for a winter-inspired tiered tray display or to put on your tabletop or mantel. His minimalistic look will fit perfectly into your primitive or farmhouse winter décor.
Materials
- Three Tier Stacked Pumpkin (or stack your own)
- Black Buttons, small
- Black Rhinestones, self-adhesive
- Ribbon, Fabric, or Fleece for Scarf
- White Paint
- Scrap of Orange Felt
Tools
- Hot Glue and Glue Sticks
- Scissors
- Ruler
- Paintbrush
Instructions
- Paint pumpkins with white acrylic craft paint. Let dry, and apply a second or third coat, if necessary.
- Cut a twelve-inch length of black and white gingham ribbon. Tie around the snowman’s neck and secure using the glue gun. Using scissors, trim any long ends into a notch.
- For the snowman’s nose, cut a small triangle from orange craft felt. Using the glue gun, attach to the snowman’s face.
- Attach two small black rhinestones for the eyes.
- Using the glue gun, attach a few small black buttons down the front of the snowman with a glue gun.
Meet the Creator
Hi there, I’m Sarah Nenni-Daher. I’m a crafty gal and always have at least 14 projects going at once. I am a crafter, designer, DIYer, and pattern maker. I share my creations here and in the Ruffles and Rain Boots® Shop.
Here at Ruffles and Rain Boots®, you’ll find DIY gnomes, crafts, gifts, cupcakes, laser crafts, and so much more. I love sharing video tutorials over on YouTube and chatting with other crafters in my Facebook groups. We’d love to have you!