
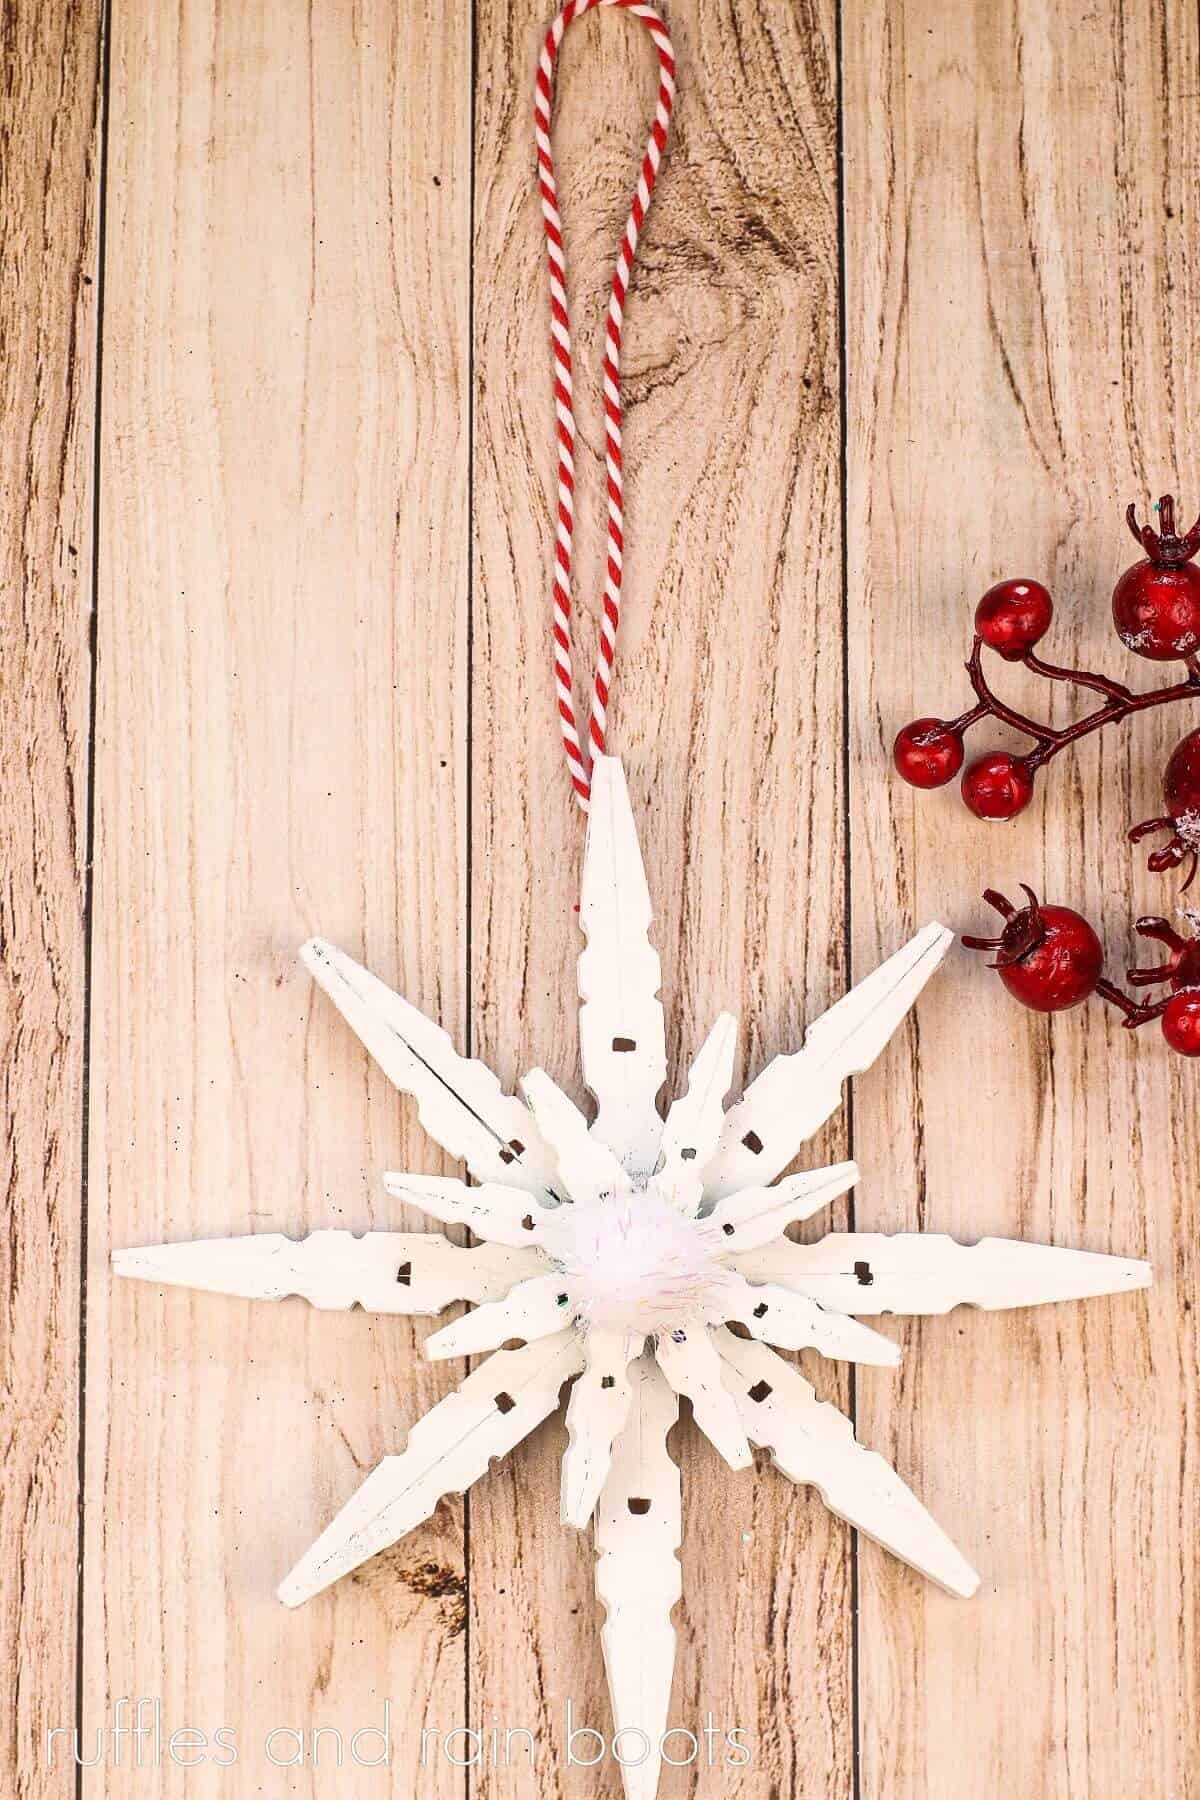
Dollar Tree Clothespin Snowflake Ornament
Dress up your tree with this primitive clothespin snowflake ornament. You can easily put this together in a matter of minutes with simple household items you can get from the dollar store.
If you love rustic Christmas decor, this easy ornament craft is fun for adults or kids. You will need clothespins, twine, and some paint to get started. That is all you need to get your holiday decorating game on.

RELATED READING: Primitive Cinnamon Stick Santa Ornaments
What You'll Find On This Page
Farmhouse Snowflake Christmas Ornament
Here at Ruffles and Rain Boots, I love anything that fits a simple style and that includes Christmas crafts. A few clothespins, some paint, and glue can produce such a beautiful Christmas snowflake ornament.
I love the primitive philosophy that you can take new items and make them into something that looks like it was made generations ago. And the sweet part of this easy craft project for Christmas is that you will be able to enjoy it for years to come. And the kids will love helping you make this Christmas snowflake ornament.
No time to Make This Now? Save or Share
Need to gather supplies? Save this DIY Christmas ornament idea to your favorite craft or Christmas pin board or share it on Facebook. Using the sharing buttons will make it easy when you are ready to make your ornament.
As an Amazon Associate, I could earn from qualifying purchases. There may be affiliate links within this article.
Tips for Making Your Primitive Christmas Ornament
- If you are out of acrylic paint or don’t have a paintbrush on hand, spray paint will work fine (I use this one a lot). To make it easier on yourself, look for a can that has a primer, the paint, and possibly a sealant all in one.
- Because you have so many pieces to glue together, I recommend using a hot glue gun.
- If you have littles at home that want to help, find a very strong liquid glue that is safe for them to use but know that it will take a while to set and you’ll have to work in stages.
- If you find it difficult to break the wire from the wooden clothespins, use a sturdy wire cutter like this one.

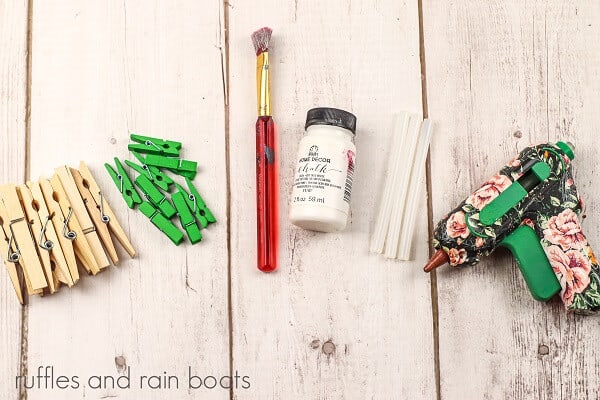
Supplies to Make DIY Ornaments
You can paint or stain the clothespins any color – get creative. I think these white ones would look great done in a chippy wood style or even stained with a bit of antique wax for a more rustic look.
The Dollar Tree (and other low-cost stores) will usually have clothespins in various sizes. Check there (and thrift shops) to keep the cost of easy holiday craft idea low.
- Standard-size wooden clothespins
- Mini wooden clothespins
- White paint
- Foam brush
- Small pom poms
- Ruler
- Scissors
- Hot glue gun
- Ribbon or twine to hang the ornament
How to Make a Snowflake Ornament Using Clothespins
Each step for this ornament craft is detailed below so it’s easy to follow. Keep this page open while you are creating your Christmas ornament. If you would rather have a printable how-to, scroll down and select the print button.
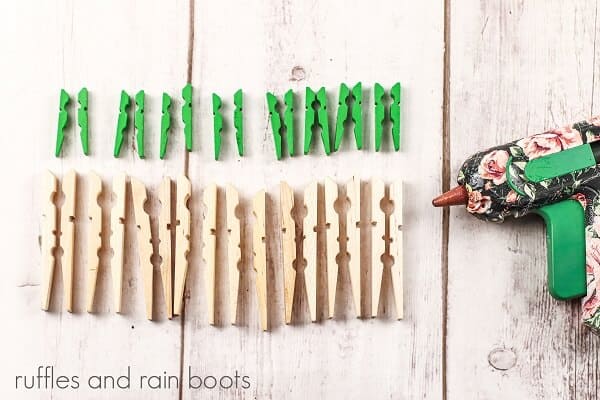
Remove the metal springs from the large and small clothespins.

Attach two of the wooden pieces of the clothespin, flat sides together.
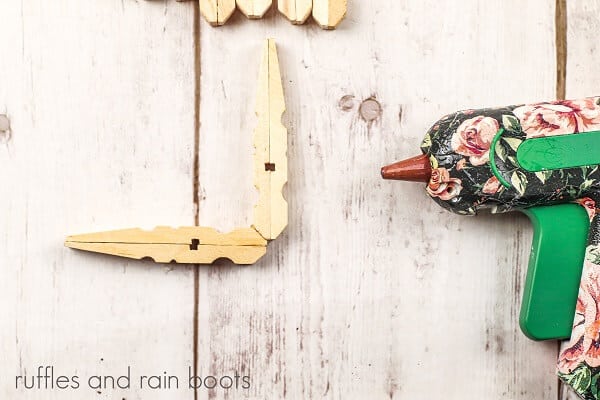
Take two of the large, connected pieces and form a right angle. Repeat.

Using the craft glue or the hot glue gun, attach the two sections together.
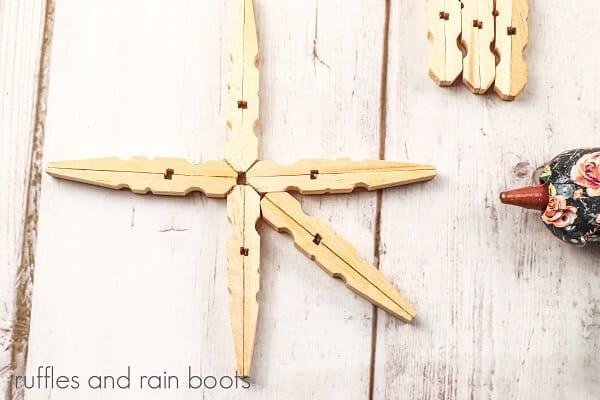
Attach each of the 4 “Arms” into each “V”, forming a large snowflake.

Repeat Steps 3-5 for the smaller clothespin pieces. Glue the snowflakes together.
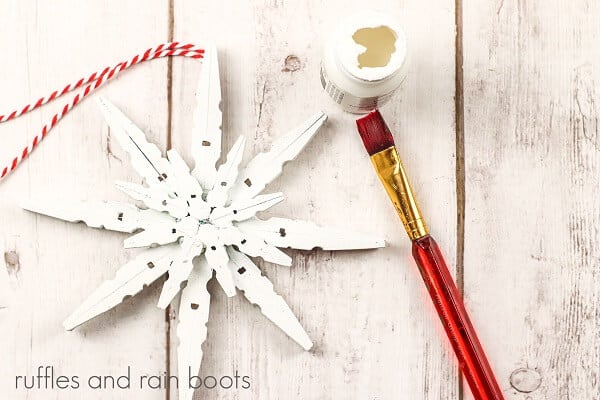
Paint the snowflake white and attach the ribbon for hanging on the tree.
Notes for Making a Snowflake Ornament from Clothespins
- If you want to give this ornament craft for your holiday decorating an aged look, you can use some sandpaper and rough up the edges. I love using a sanding block because it’s easier on my hands.
- To make it easier to sand the clothespins, paint a very thin layer of distilled water over the completely dried paint.
- A method to distress wood that I like to use is using a wire brush to rough up the wood before painting it.
Christmas Crafts You May Like
- Easy DIY Santa and Mrs. Claus Ornaments: Your kids are going to have the best time making these easy Santa and Mrs. Claus ornaments for the tree! This is such an easy Christmas ornament idea.
- Moss Holiday Farmhouse Tiered Tray Crafts: This easy DIY is a great way to dress up a tray, display, or bookcase using Dollar Tree basics.
- Make Fun Grinch Bath Salts for Christmas: These fun Grinch Christmas bath salts are a WOW-worthy DIY gift for the holidays.
Please Save or Share
Your shares are how this site grows and I sincerely appreciate it. Please save this primitive Christmas tree ornament to your favorite holiday craft pin board or share it on Facebook.

Primitive Clothespin Snowflake Ornament

This Primitive Clothespin Snowflake Ornament is an easy and inexpensive Christmas craft. It just takes a handful of clothespins, some glue, and paint. You can have this pretty ornament completed in less than 30 minutes and for less than $1. If you have bored kiddos at home, give them some supplies to put this primitive ornament together. It will make a great addition to your ornament collection.
Materials
- Standard size wooden clothespins
- Mini wooden clothespins
- White paint
- Small pom poms
- Ribbon or twine to hang the ornament
Tools
- Ruler
- Scissors
- Hot Glue Gun and Glue Sticks
- Foam Brush
Instructions
- Remove the metal springs from 8 large and 8 small clothespins.
- Attach two of the wooden pieces of the clothespin, flat sides together with the craft or hot glue gun. Repeat with the remaining large and small clothespins.
- Take two of the large, connected pieces and form a right angle. Using the craft or hot glue gun, attach them together. Repeat once more.
- Using craft glue or the hot glue gun, attach the two sections together, forming a “+”.
- Next, take the remaining 4 pieces, and using the craft glue or the hot glue gun, attach each of the 4 “Arms” into each “V”, forming a large snowflake.
- Repeat Steps 3-5 for the smaller clothespin pieces, making a smaller snowflake.
- Position the smaller snowflake on top of the larger one, rotating it so the tips of the pieces intersect with the “V” of the larger snowflake. Using the craft glue or the hot glue gun, attach the smaller snowflake to the larger snowflake. Paint with white acrylic paint.
- If desired, using the craft glue or glue gun, attach your pom pom to the middle of the snowflake.
- Cut a 6” length of ribbon or twine, form a loop, and using the craft glue or glue gun, attach it to the top of the back side of the craft stick. Allow drying completely before hanging.
Meet the Creator
Hi there, I’m Sarah Nenni-Daher. I’m a crafty gal and always have at least 14 projects going at once. I am a crafter, designer, DIYer, and pattern maker. I share my creations here and in the Ruffles and Rain Boots® Shop.
Here at Ruffles and Rain Boots®, you’ll find DIY gnomes, crafts, gifts, cupcakes, laser crafts, and so much more. I love sharing video tutorials over on YouTube and chatting with other crafters in my Facebook groups. We’d love to have you!