
Laser Cut Football Templates
If you’re wondering what to make for the Big Game or the team’s biggest fan, here are some free laser cut football templates you can use. The football snacks sign and the candy dish are quick, beginner laser projects.
RELATED READING: Laser Cut Strawberry Bag Tag
What You'll Find On This Page
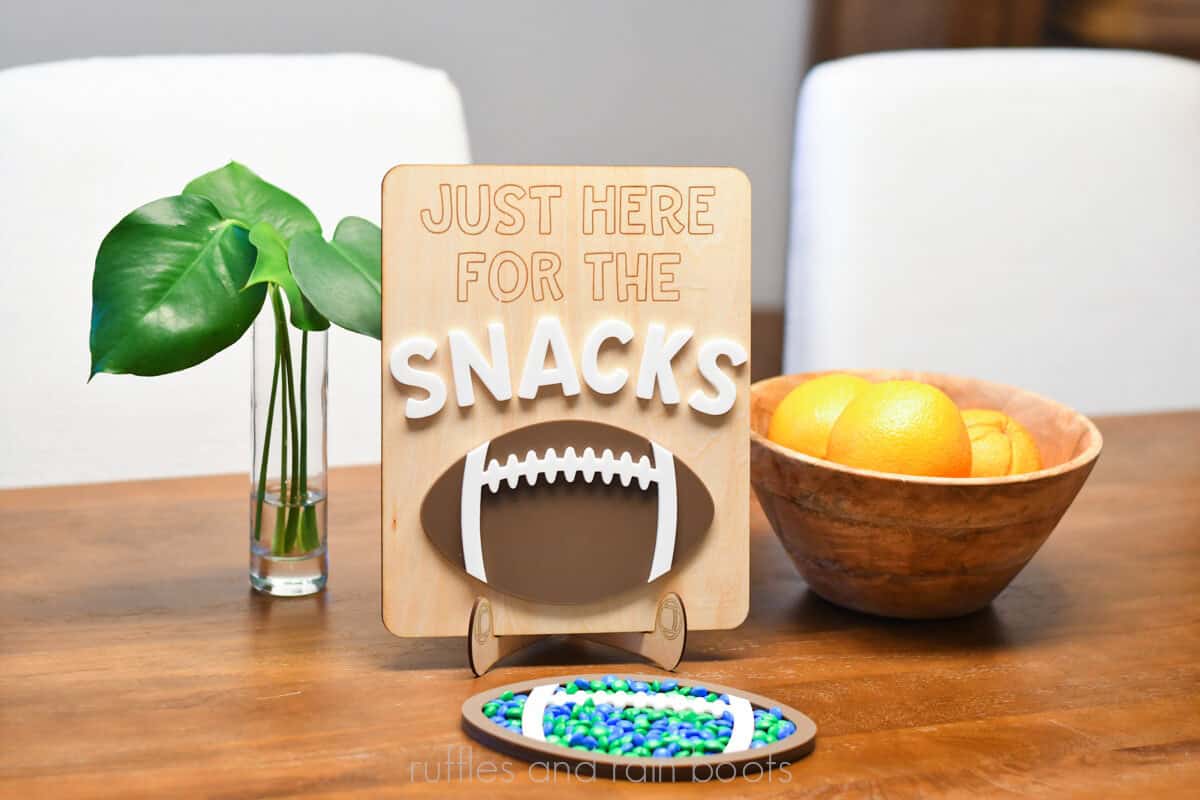
Laser Cut Football Sign and Dish
Here at Ruffles and Rain Boots, we’re rooting for the Seahawks in this year’s big game. Today, I made a set of projects that are going to help decorate the dessert table and you can make them, too.
You only need a couple of materials and about 30 minutes to create both projects. And, because I cannot stand waste, you’ll be able to use a cut off from one project on the other.
As an Amazon Associate, I could earn from qualifying purchases. There could be affiliate links within this article.
Laser Cut Football Projects Video
If you’re a visual learner, watch how quickly these projects come together in this quick laser cut football ideas video tutorial. And, you’ll get to see one of my favorite laser materials in action!

RELATED READING: Free Easter Basket Tags Laser Cut Files
Materials You Will Need
I’ll put what I used below, but I want to really sing the praises of my favorite laser material that I always keep on hand: adhesive tape. The tape is what makes this a quick project (though the done-for-you laser files do help). ;)
- 3M 467MP (I used the 6 inch wide tape roll for this)
- 3mm brown acrylic and 3mm white acrylic (diode users: there IS white friendly diode material and see my note about craft plastic below)
- 3mm basswood plywood
- free file (XCS) on Atomm – let me know if you need another format
If you’re new to laser cutting and you have a diode laser, never forget about craft plastic. It’s a thin, flexible but sturdy material that most diodes can cut. This is an amazing addition to your stash if you want to be unlimited by the diode laser’s color restrictions.
More Laser Project Ideas You Might Like
- 4th of July Laser Project Ideas – Use these files or get inspiration to start crafting for Independence Day.
- How to Engrave Leather Patches – Have you ever wondered how we create a gradient image on a leather patch? Wonder no more…
- Make a Laser Cut Sunflower with Flex – This BEST-SELLER is actually very easy to make.
- DIY a Laser Cut Mirror Acrylic Sign – Mirror acrylic is gorgeous, but there are a few things you need to know before putting it into your laser.
How to Make These Football Laser Cut Files
Keep this page open and follow along or watch the video before or after reading through these instructions. For a printable version, scroll to the bottom of the page.
Open the XCS file, navigate to the football candy dish canvas, and adjust ALL pieces to the size you would like. Note: if you’re making the football snack sign as well, you might have to adjust that to accommodate your changes.
Place 3M 467MP on the back of the brown acrylic for the size you need (width and height of the two football layers – not the base piece. Leave off the tape for the base piece size. See video for example.
Place 3M 467MP on the back of the white acrylic for the size you need. Note: if you’re making the snack sign as well, add 3M for that measurement, as well (after the next step).
Indicate your processing mode (honeycomb), your material, and auto-measure. If using a camera-based system, position the designs onto the material. If using a Pin-Point Positioning™ system, mark the area and drag your material into place. Turn OFF the the output for the stitching.
Set parameters. For the football candy dish, I used the xTool P2 and my settings were cut at 88, 13, 1 pass with airflow reduced to 30%. Process the cut and remove the football pieces.
Place the 3M-backed white acrylic into the laser. Indicate your processing mode (honeycomb), your material, auto-measure, and position the design.
Set parameters. I processed the white acrylic at the same settings (88, 13, 1). Remove the pieces.
Place the basswood ply into the laser (no 3M backing). Indicate your processing mode (honeycomb), your material, auto-measure, and position the design.
Set parameters. Cut: 80, 15, 1; Score: 20, 125, 1; Engrave: 15, 225, 120, 1Process the basswood sign and the stand (2 pieces).
Wipe all pieces down to remove processing remnants.
Place the base layer of the football down, remove 3M tape cover from the cut piece (frame + stitching), and press into place on the base. Remove the tape cover from the frame piece and press on, followed by the white stitching layer. Clamp (protect the acrylic from the clamps, if needed).
Remove the 3M tape cover from the back of the football and press into place. Note: you have time to adjust the 3M if it’s not perfect (see video). Remove the 3M tape cover from the back of the letters and press each into place over the score lines. Remove any masking and clamp.
Clean the acrylic candy dish before adding food items. Place the stand pieces together (one slot goes into the other) and put the sign onto it.
Please Save or Share This Free Laser Template for Football Fans
Your shares are how this site grows and I am sincerely grateful. Please share this to a laser group on Facebook or save it to a laser projects pin board.

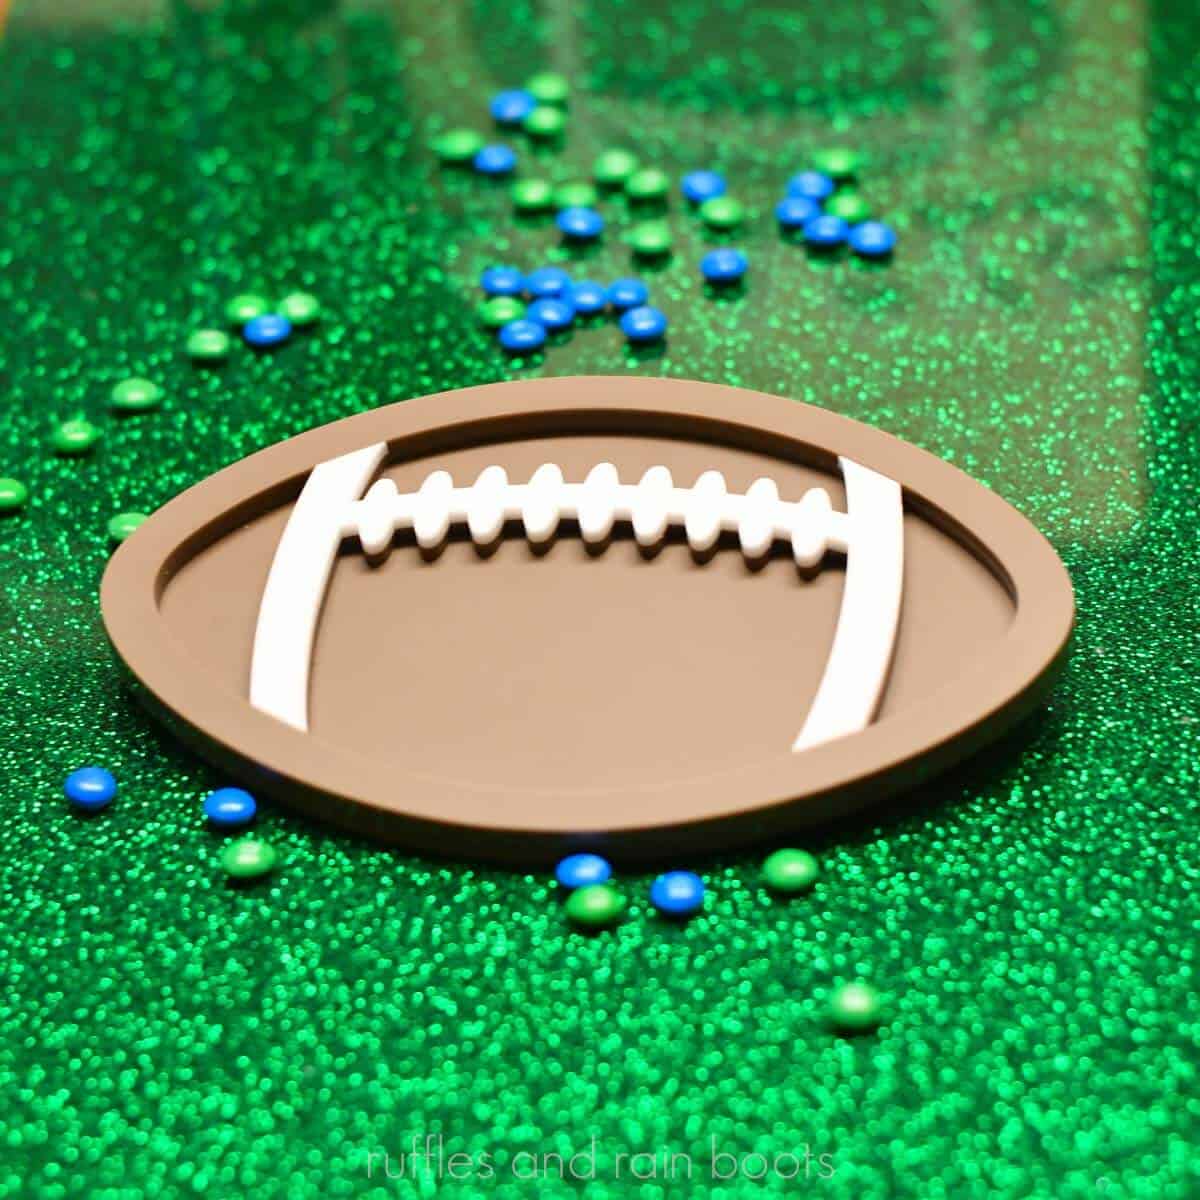
Laser Cut Football Sign and Candy Dish

Use acrylic or wood to make this fun laser cut football sign and candy dish decorations for the Big Game! These free laser cut files are perfect for a snack table or a football themed party.
Materials
- 3mm Brown Acrylic
- 3mm White Acrylic
- 3mm Basswood Plywood
- 3M 467MP Adhesive Tape
- free Atomm football set
Tools
- Laser (CO2 or Diode); xTool P2
- xActo Knife or Plastic Razor
- Cloth and/or Sand Paper (Clean Up)
Instructions
Prep the Material and File
- Open the XCS file, navigate to the football candy dish canvas, and adjust ALL pieces to the size you would like. Note: if you're making the football snack sign as well, you might have to adjust that to accommodate your changes.
- Place 3M 467MP on the back of the brown acrylic for the size you need (width and height of the two football layers - not the base piece. Leave off the tape for the base piece size. See video for example. Place 3M 467MP on the back of the white acrylic for the size you need. Note: if you're making the snack sign as well, add 3M for that measurement, as well (after the next step).
- Indicate your processing mode (honeycomb), your material, and auto-measure. If using a camera-based system, position the designs onto the material. If using a Pin-Point Positioning™ system, mark the area and drag your material into place.
- Turn OFF the the output for the stitching.
Process the Candy Dish and Sign
- Set parameters. For the football candy dish, I used the xTool P2 and my settings were cut at 88, 13, 1 pass with airflow reduced to 30%. Process the cut and remove the football pieces.
- Place the 3M-backed white acrylic into the laser. Indicate your processing mode (honeycomb), your material, and auto-measure. If using a camera-based system, position the designs onto the material. If using a Pin-Point Positioning™ system, mark the area and drag your material into place.
- Set parameters. I processed the white acrylic at the same settings (88, 13, 1). Remove the pieces.
- Place the basswood ply into the laser (no 3M backing). Indicate your processing mode (honeycomb), your material, and auto-measure. If using a camera-based system, position the designs onto the material. If using a Pin-Point Positioning™ system, mark the area and drag your material into place.
- Set parameters. Cut: 80, 15, 1; Score: 20, 125, 1; Engrave: 15, 225, 120, 1
- Process the basswood sign and the stand (2 pieces).
Clean and Assemble the Football Laser Cuts
- Wipe all pieces down to remove processing remnants.
- Place the base layer of the football down, remove 3M tape cover from the cut piece (frame + stitching), and press into place on the base. Remove the tape cover from the frame piece and press on, followed by the white stitching layer.
- Clamp (protect the acrylic from the clamps, if needed).
- Remove the 3M tape cover from the back of the football and press into place. Note: you have time to adjust the 3M if it's not perfect (see video).
- Remove the 3M tape cover from the back of the letters and press each into place over the score lines. Remove any masking and clamp.
- Clean the acrylic candy dish before adding food items. Place the stand pieces together (one slot goes into the other) and put the sign onto it.
Notes
While I used 3M adhesive tape for these projects, you can also use a liquid adhesive.
Always clean acrylic items before adding food.
Meet the Creator
Hi there, I’m Sarah Nenni-Daher. I’m a crafty gal and always have at least 14 projects going at once. I am a crafter, designer, DIYer, and pattern maker. I share my creations here and in the Ruffles and Rain Boots® Shop.
Here at Ruffles and Rain Boots®, you’ll find DIY gnomes, crafts, gifts, cupcakes, laser crafts, and so much more. I love sharing video tutorials over on YouTube and chatting with other crafters in my Facebook groups. We’d love to have you!