
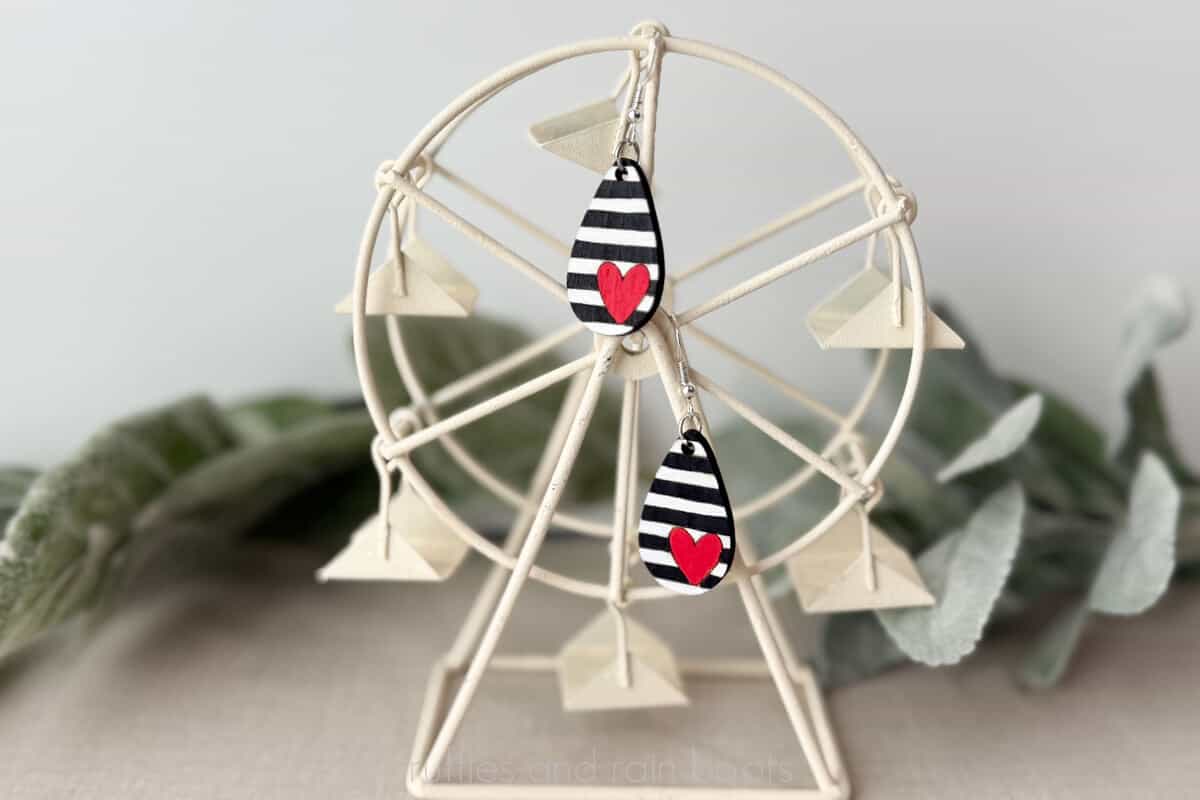
Laser Cut Heart Earrings and Free SVG
These laser cut heart earrings with a free SVG bundle are the perfect DIY or product to sell for Valentine’s Day. You can cut and paint them yourself or sell them as paintable kits.
RELATED READING: DIY Acrylic Strawberry Bag Tag (So Cute and a Best-Seller)
Free Laser Cut File for Valentine’s Day Wood Earrings
Here at Ruffles and Rain Boots, I’m gearing up for the sweetest of holidays and my xTool M1 Ultra is helping. Today, I designed these Valentine’s Day earrings with a quick score and cut design.
For this project, you will need a laser (diode or CO2) and a few basic items. I used:
- free laser heart earrings bundle
- 3mm (1/8th inch) basswood plywood
- sandpaper or sanding sponge
- spray sealant
- earring findings (hooks and jump rings)
As an Amazon Associate, I could earn from qualifying purchases. There could be affiliate links within this article.
Valentine’s Day Laser Cut Earrings Video Tutorial
If you’re a visual learner, watch the very quick Valentine’s Day laser cut earrings video tutorial. While you’re there be sure to subscribe, but grab your free bundle first!

How to Make Laser Cut Heart Earrings
In this example, I will show you how to do this project with the xTool M1 Ultra (my laser pick for crafters). The free laser cut heart earrings bundle contains SVG, EPS, DXF, PNG, and PDF files along with a complete XCS file (for xTool lasers).
For a printable tutorial, scroll down. Otherwise, keep this page open and follow along.
First, place the 3mm material into the bed of the laser and secure. Ensure the material is level, whether using slats or a honeycomb bed. Turn on the machine.
If using the M1 Ultra, position the crosshairs over the material. Close the lid.
Load the SVG into laser software or open the .XCS file. TIP: create a duplicate canvas to keep the original file intact as you make changes (just in case anything goes awry).
Set the material, auto-measure, and any processing parameters (my settings are below for the 10 watt M1 Ultra) processing on the honeycomb. The video details each of these steps.
As shown in the video, you can combine the score lines into a vector and/or combine vectors to speed up processing. Note: if you combine vectors after you’ve set your processing parameters, you must reset them.
Once the earrings have the parameters set, mark the processing area. Select the shape (rectangle), position the crosshair at the top left of the processing area, and select the white button. Move the crosshairs to the bottom right of the processing area and select the white button. Close the lid.
In the software, select the earrings and position them into the marked area. Select processing and then start in the software. Press start on the machine.
Once the earrings have been scored and cut, wipe down any edges and seal. Paint and seal or sell as paintable earrings.
More Laser Craft Ideas You Might Like
- Valentine’s Day Laser Project Ideas – Whether you are making for yourself or profit, here is a lot of inspiration to get you started.
- Mini Ruler Laser Project – A little engraving and a quick cut means these mini rulers are perfect for a classroom Valentine.
- How to Make a Laser Cut Suncatcher – These are the materials (and tricks) you should know to make and sell laser cut sun catchers!
Please Save or Share This Valentine’s Day Laser Product Idea
Your shares are how this site grows and I am sincerely grateful. Please save this project to a DIY laser pin board or share it on social media in a laser group.

Laser Cut Valentine's Day Heart Earrings

These heart earrings are a perfect beginner laser cutting project because they have a free cut file and a step by step tutorial to walk you through working with the M1 Ultra. This free laser cut file set can be used with diodes or CO2 lasers and contains SVG, EPS, PNG, PDF, DXF, and XCS file types.
Materials
- Laser Cut Heart Earring SVG Bundle
- 3mm (1/8th Inch) basswood plywood
- sand paper or sanding sponge
- spray sealant
- paints or paint pens
- earring findings (hooks and jump rings)
Tools
- xTool M1 Ultra laser with honeycomb bed (optional)
- xTool AP2 (air purifier)
- cloth (for cleaning any soot)
Instructions
- In this example, I will show you how to do this project with the xTool M1 Ultra (my laser pick for crafters). The free laser cut heart earrings bundle contains SVG, EPS, DXF, PNG, and PDF files along with a complete XCS file (for xTool lasers).
- First, place the 3mm material into the bed of the laser and secure. Ensure the material is level, whether using slats or a honeycomb bed. Turn on the machine.
- If using the M1 Ultra, position the crosshairs over the material. Close the lid. \
- Load the SVG into laser software or open the .XCS file. TIP: create a duplicate canvas to keep the original file intact as you make changes (just in case anything goes awry).
- Set the material, auto-measure, and any processing parameters (my settings are below for the 10 watt M1 Ultra) processing on the honeycomb. The video details each of these steps.
- As shown in the video, you can combine the score lines into a vector and/or combine vectors to speed up processing. Note: if you combine vectors after you’ve set your processing parameters, you must reset them.
- Once the earrings have the parameters set, mark the processing area. Select the shape (rectangle), position the crosshair at the top left of the processing area, and select the white button. Move the crosshairs to the bottom right of the processing area and select the white button. Close the lid.
- In the software, select the earrings and position them into the marked area. Select processing and then start in the software. Press start on the machine.
- Once the earrings have been scored and cut, wipe down any edges and seal.
- Paint and seal or sell as paintable earrings.
Notes
Settings M1 Ultra 10 watt
- Score 80/50/1
- Cut 90/5/1
Meet the Creator
Hi there, I’m Sarah Nenni-Daher. I’m a crafty gal and always have at least 14 projects going at once. I am a crafter, designer, DIYer, and pattern maker. I share my creations here and in the Ruffles and Rain Boots® Shop.
Here at Ruffles and Rain Boots®, you’ll find DIY gnomes, crafts, gifts, cupcakes, laser crafts, and so much more. I love sharing video tutorials over on YouTube and chatting with other crafters in my Facebook groups. We’d love to have you!