
Free Gnome Pattern – Made 3 Ways
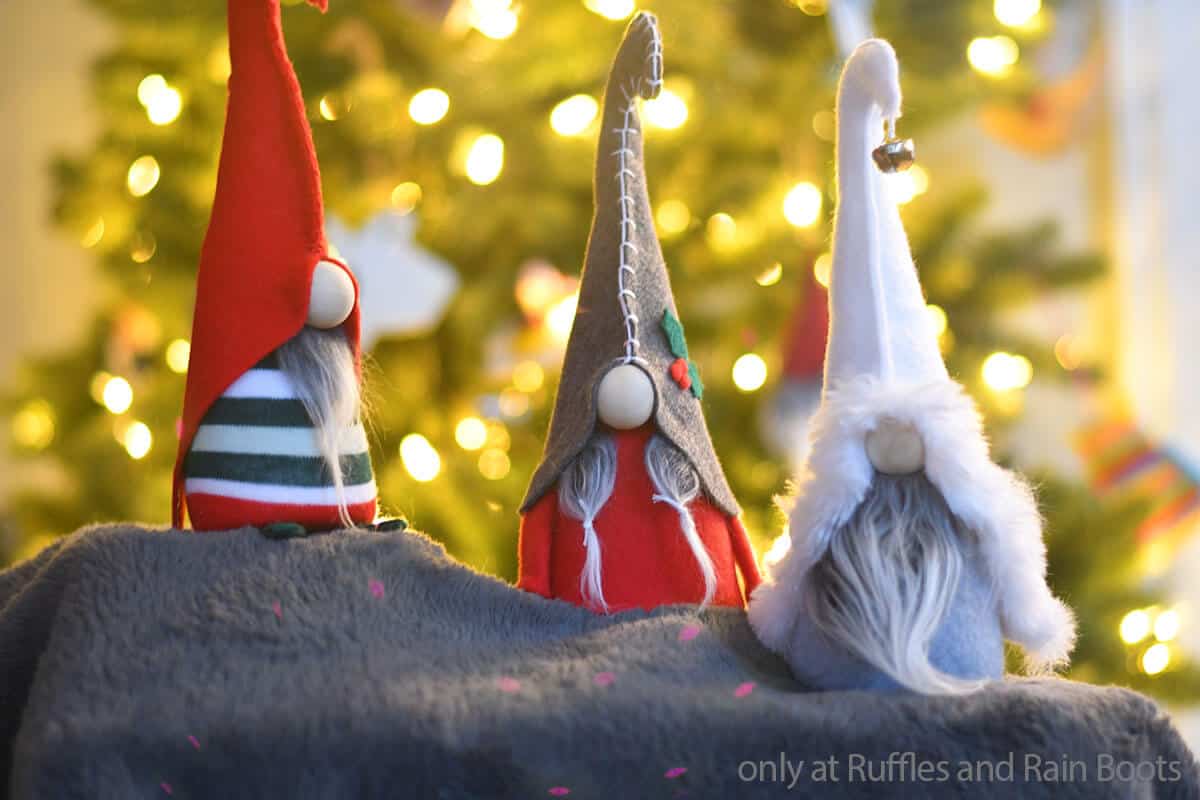
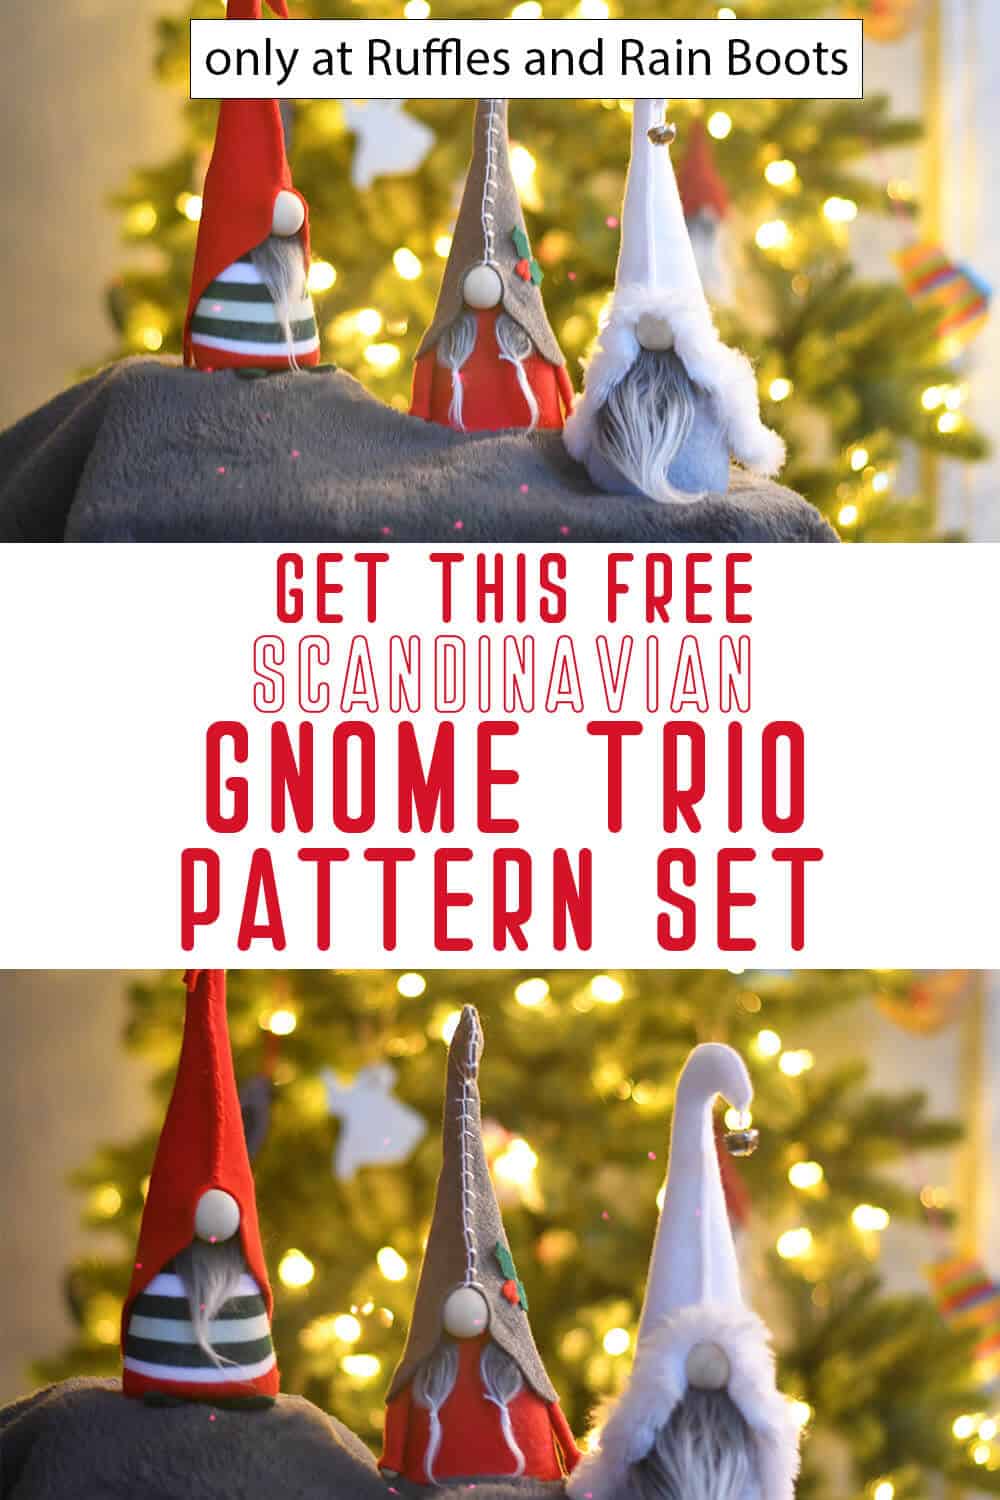
Whether you’re new to gnome-making or it’s old-hat, this free gnome pattern with a hooked gnome hat is going to make for a trio of gorgeous, easy gnomes. Create felt gnomes, fleece gnomes, and gnomes with Dollar Tree materials in just about 20 minutes.
This hooked hat gnome pattern is a fun way to bring a traditional look to your decor or gifts. It can be assembled with hot glue, a sewing machine, or hand sewn for a rustic feel. It’s really different from the lanky Jack Frost winter gnome or the traditional Christmas gnome with arms and legs.
Free Gnome Pattern with Hooked Gnome Hat
Here at Ruffles and Rain Boots, I love to challenge myself by creating new gnome patterns with fun details. While they are everywhere in stores now, that wasn’t always the case and honestly, there’s so much joy to be had in making a DIY gnome.
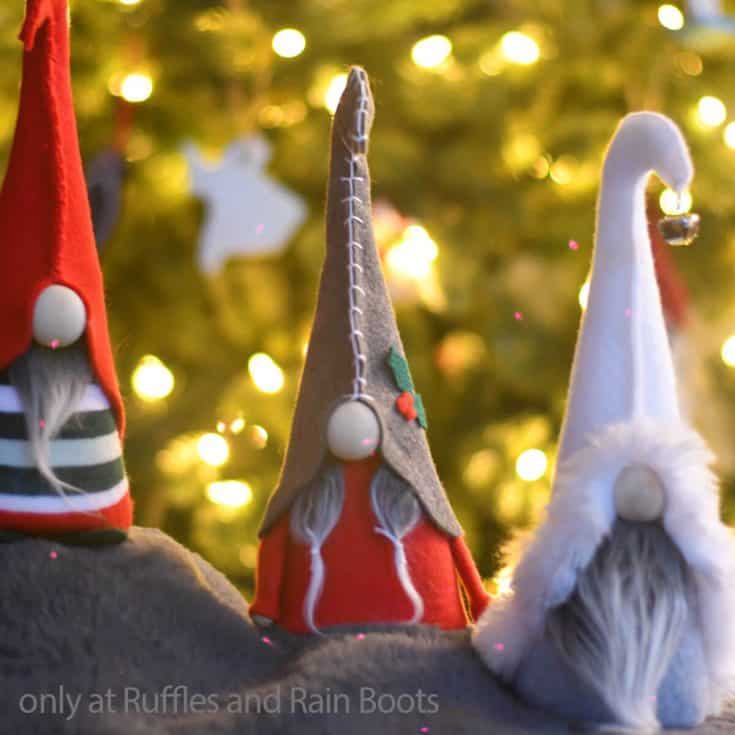
This little joyful set of felt gnomes I recently made is offered as a free gnome pattern so you could enjoy this hooked hat style. Although they look the same, the three gnomes you see here are made three different ways.
RELATED READING: Tucked Gnome No-Sew Gnome Pattern
No matter where you’re at in your gnome-making journey, there’s something for you in this pattern set. If you’re ready to make a trio of gnomes you’re going to love, let’s get started.
Need to Gather Supplies? Save or Share This Felt Gnome DIY
If you need to check your stash and gather supplies, save this hooked gnome hat pattern to your favorite DIY pin board or share it to Facebook. Use the sharing buttons to make this easy for you to find when you’re ready to begin.
As an Amazon Associate, I can earn from qualifying purchases. There could be affiliate links within this article.
RELATED READING: How to Make Skiing Gnomes without Sewing
Tips to Make This Pattern for Gnomes (Felt and Fleece)
- First things first, grab the free felt gnome pattern set here. Or, if you’re more interested in having your cutting machine do all the heavy scissor lifting for you, check out the SVG cut file set here.
- I used socks for one of the gnomes and usually, they can be found in any theme, color, or combination you can think of. If you’re not having luck finding what you want, head online – I found an alternative red and white striped sock here that will work nicely.
- Any number of items can be used for gnome noses. I tend to make noses from a wood bead, a pom pom, or a rolled ball of polymer clay. I love using wood beads like these, though, because they’re consistent and handy to keep on hand. These are what I used for all three of the gnomes in this pattern set.
- My favorite gnome beard-making material is Mongolian fur. It’s so luxurious and long with a 3-inch pile and turns most DIYs into something which looks high end. Even using just a tiny amount on these little gnomes makes for a beautiful and professional-looking gnome.

Get the Free Pattern Here
Click below to add this fun pattern to your cart. So many gnomes can be made with this!

Make Felt Gnomes or Fleece Gnomes with This Pattern
Below is the written tutorial which will have a step by step guide for you to follow along. If you happen to be a visual learner like I am, check out the full felt gnome video tutorial here.
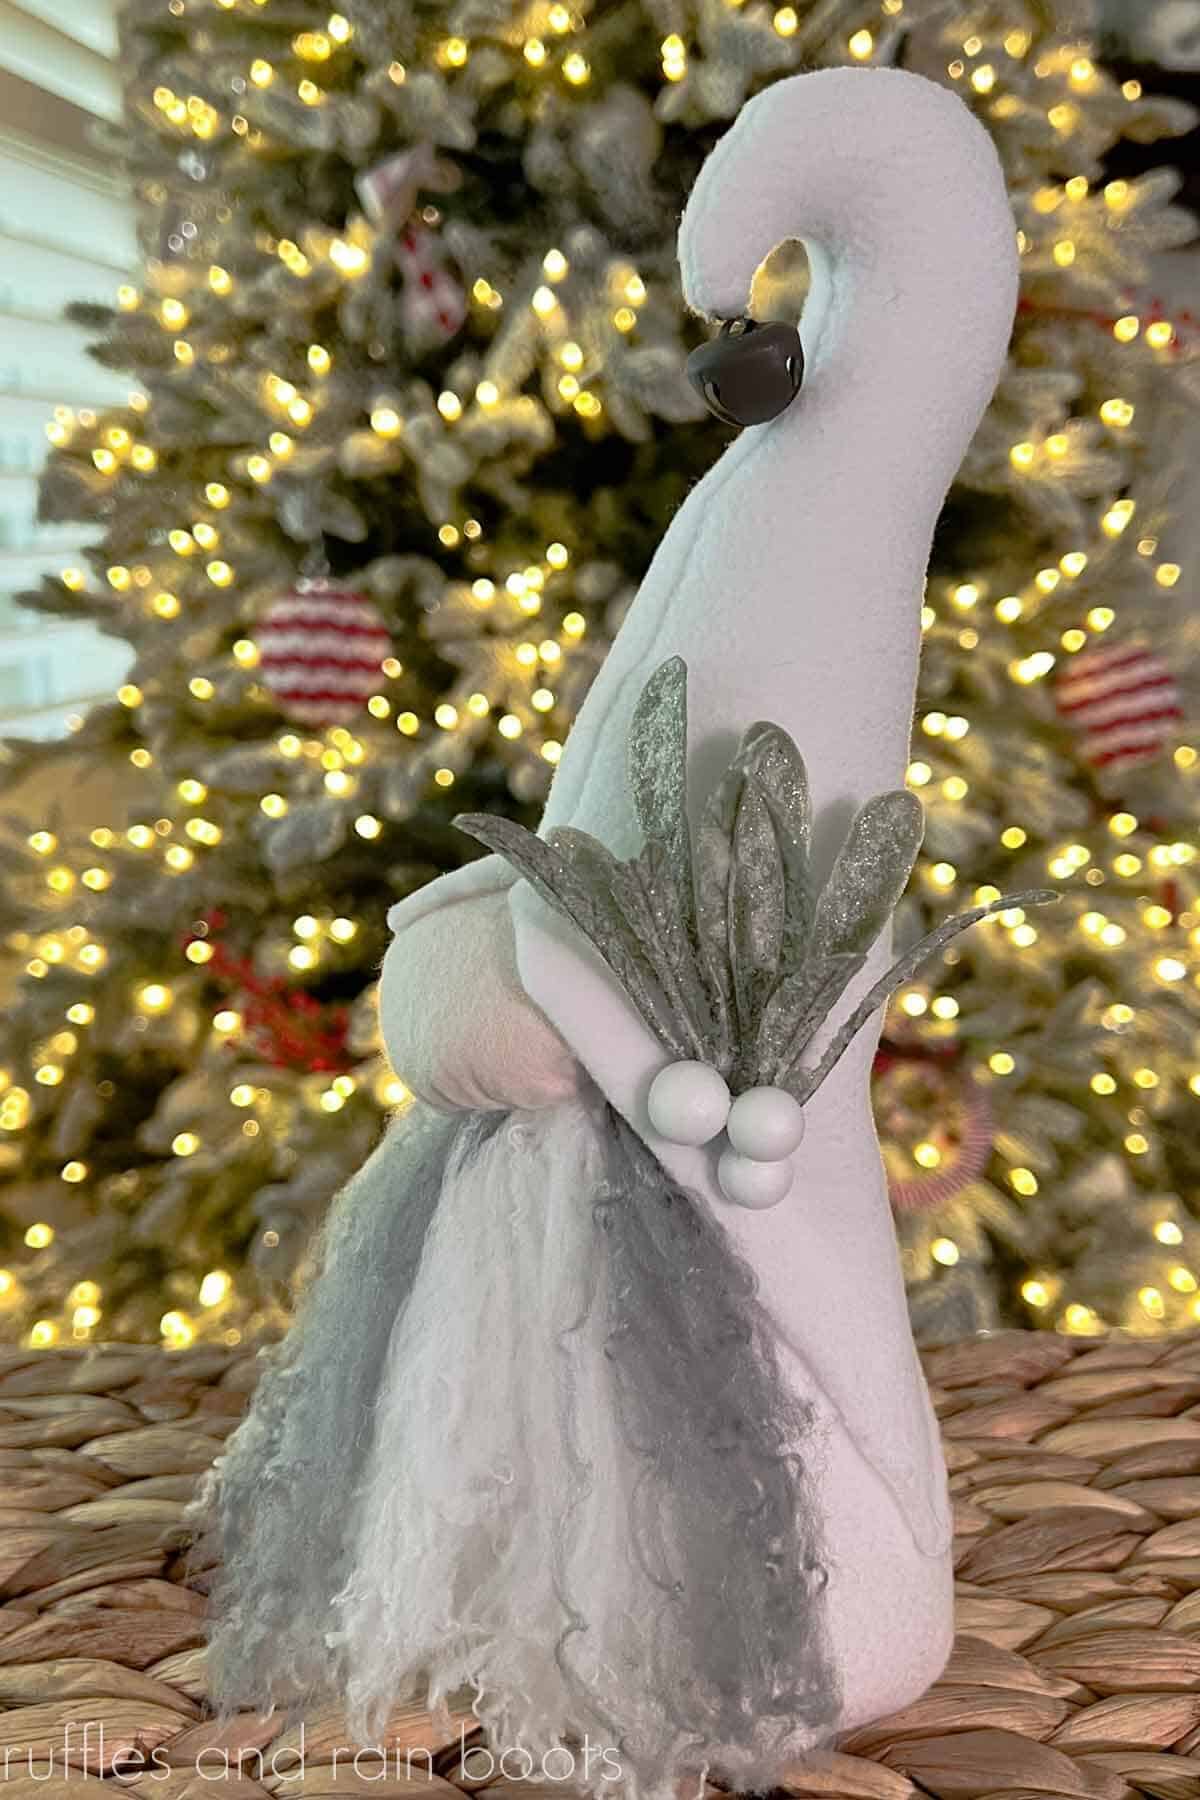
Recently, I made a new gnome using this same pattern and used fleece instead of felt. You can find the winter gnome with a free gnome pattern video tutorial here.

More Gnome Patterns You Might Like
- Cozy Gnome Beginner Sewing Gnome Pattern – A squishy, softy gnome that you can make any themed gnome with. If you want to sew a professional-looking gnome, this easy pattern is everything.
- 17 Gnome Boot and Shoe Patterns – Stepping up your gnome-making game calls for adding shoes and boots; and these 10 different and unique gnome shoe patterns in one pattern set is all you need to do just that.
- Mug Cozy Gnome Pattern – He’s an adorable gnome and keeps your coffee cup from scorching your fingers, so he’s helpful too! This pattern is so fun to make and is a great gift.
Please Save or Share This Felt Gnome Tutorial
Your shares are how this site grows and I am sincerely grateful. Please share this to a crafty group on Facebook or save it to your favorite easy DIY crafts pin board.
Free Gnome Pattern for Felt Gnomes
Whether you have never ever made a gnome before or this is a diversion you've done for years, this easy and free gnome pattern for felt gnomes is going to knock your socks off with how fun and simple it is!
Materials
The Sock Gnome
- 7-inch Styrofoam Cone (not a floral cone, they are not the same size)
- 1 Adult-Sized Sock
- Premium Felt in Red & Green
- 1 Wood Bead
- Scrap Mongolian Faux Fur
- Red Embroidery Thread
- Small Amount of Polyfill
The Paper Mache Cone Gnome
- 7-inch Paper Maché Cone
- Premium Felt in Red & Grey
- 1 - 1-inch Wood Round Bead for a Nose
- 2 - 1/2-inch Wood Round Beads for Hands
- Scrap Mongolian Faux Fur
- White Embroidery Thread
- Small Amount of Polyfill
The Sewn Gnome
- Premium Felt in White & Grey
- 1 Wood Bead for a Nose
- Scrap Mongolian Faux Fur
- Small Amount of Polyfill
- White Plush Fur or Chenille Yarn for Trim, optional
- 1/2 to 3/4 cup Poly Beads
Tools
- Hot Glue Gun & Glue
- Scissors
- Razor Blade or Craft Knife
- Straight Pins
- Embroidery Needle
- Sewing Machine, optional
Instructions
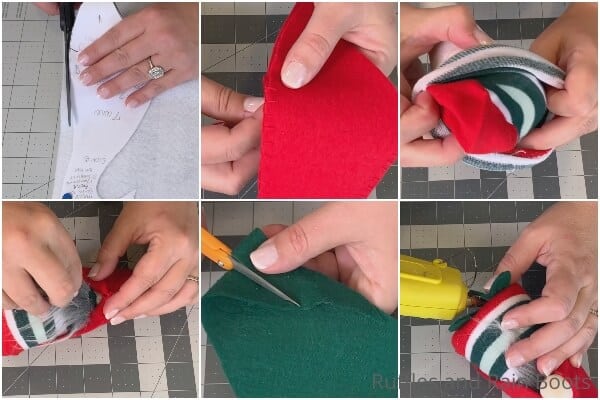
- The Sock Gnome: Cut two hat shapes from the pattern from felt and with a blanket stitch, sew the two cutouts together and fill with a small amount of polyfill.
Pull the sock over the cone from the bottom and hot glue it in place, using cut tabs to make the sock pattern straight on the cone.
Tuck the hat down onto the sock-covered body and cut a small rectangle of Mongolian fur to make a beard. Hot glue this in place on the gnome, just below the brim of the hat.
Hot glue a wood bead onto the top of the beard, tucking the hat down to cover the sides of the nose.
Cut out the shoe shapes and glue them together, then glue them onto the bottom of the gnome and you're ready to display him!
- The Paper Mache Cone Gnome: Cut two hat shapes from the pattern from felt and with a blanket stitch, sew the two cutouts together and fill with a small amount of polyfill.
Cut out one body piece from the pattern and hot glue it to the paper mache cone to create the gnome body.
Tuck the hat down onto the felt-covered body, then cut two small rectangles of Mongolian fur to make pony tails and hot glue them in place on the gnome, on either side of the face area, just below the brim of the hat.
Hot glue a wood bead onto the gnome face area, just below the brim of the hat, tucking the hat down to cover the sides of the nose.
Cut out the arm shapes and fold them in half, hot gluing them in this shape. Tuck a wood bead onto one end of each arm and hot glue them in place to make arms.
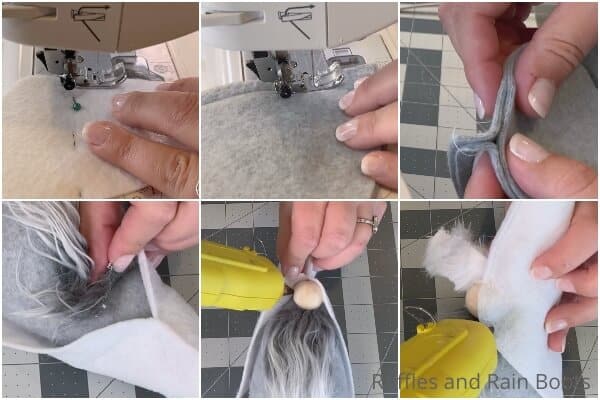
Tuck the arms up under the hat and hot glue them in place. Add an embellishment to the hat and enjoy! - The Sewn Gnome: Cut two hat shapes from the pattern from felt, then top stitch the two cutouts together and fill the hook with a small amount of polyfill.
Cut a body shape from the felt and fold it in half, pinning the two long edges together, then sew along that edge.
Line up the circle base with the bottom of the gnome body piece and pin it in place then sew around the edge of the circle.
Turn the body right side out and fill the bottom with poly beads. Stuff the remaining body volume with polyfill then tuck the hat down onto the gnome body.
Cut a small rectangle of Mongolian fur to make a beard and hot glue this in place on the gnome, at or above the brim of the hat.
Hot glue a wood bead onto the top of the beard, tucking the hat down to cover the sides of the nose. Trim the beard with the plush fur then enjoy your gnome!

Notes
For more fun gnome patterns (so many more), visit Ruffles and Rain Boots!
Recommended Products
As an Amazon Associate and member of other affiliate programs, I earn from qualifying purchases.


Meet the Creator
Hi there, I’m Sarah Nenni-Daher. I’m a crafty gal and always have at least 14 projects going at once. I am a crafter, designer, DIYer, and pattern maker. I share my creations here and in the Ruffles and Rain Boots® Shop.
Here at Ruffles and Rain Boots®, you’ll find DIY gnomes, crafts, gifts, cupcakes, laser crafts, and so much more. I love sharing video tutorials over on YouTube and chatting with other crafters in my Facebook groups. We’d love to have you!