
Make So Many Easy Gnomes with This Cozy Gnome Pattern
I adore this fun cozy gnome pattern I pulled together. It’s so simple, fun and can be modified to make so many fun gnomes. It’s seriously my new favorite.
What You'll Find On This Page
Cozy Gnome Pattern
Here at Ruffles and Rain Boots, we LOVE making gnomes. It’s like a fun craft that really can be relaxing and just give me a way to kind of work out the stress. Which I kind of need a lot lately. Just me? Hmmm…But regardless, I have been working on this adorable gnome pattern for a while, making several gnomes to perfect it.
RELATED READING: TUCKED GNOME NO-SEW GNOME PATTERN
And now that it’s ready, I’ve got the pattern set and perfect–and I’m ready to share. So if you’re ready to make an awesome gnome SO MANY WAYS, well, click here to get the gnome pattern and then let’s get started.
DIY Christmas Gnome Tutorials
If you’re looking for the best DIY Christmas gnome tutorials, you have come to the right place. Check out all of my favorite tomte tutorials for the holidays!
No Time to Make This Now? Pin it for Later
You’re busy, I get it. Pin this to your favorite easy DIY ideas board on Pinterest and it’ll be here for when you’re ready.
As an Amazon Associate, I can earn from qualifying purchases.
Tips to Make THIS Easy Pattern for Gnomes
- Start by clicking here to get this easy gnome pattern. It’s the basis for all of the gnomes shown on this post. So you’re going to start with this, then customize!
- Although this pattern is sewn, if you use a fabric that won’t fray like fleece or felt, then you can avoid having to do things like turn the arms right-side-out. Just tuck the hem in beside the body.
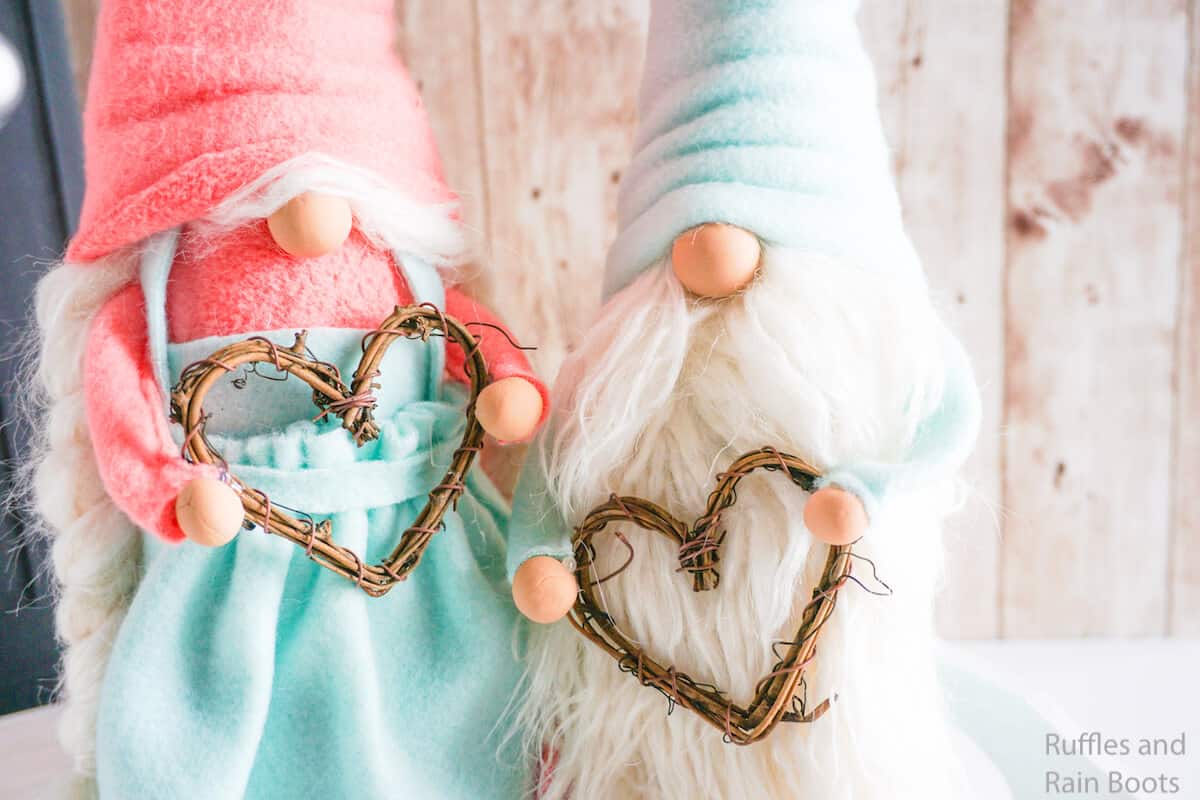
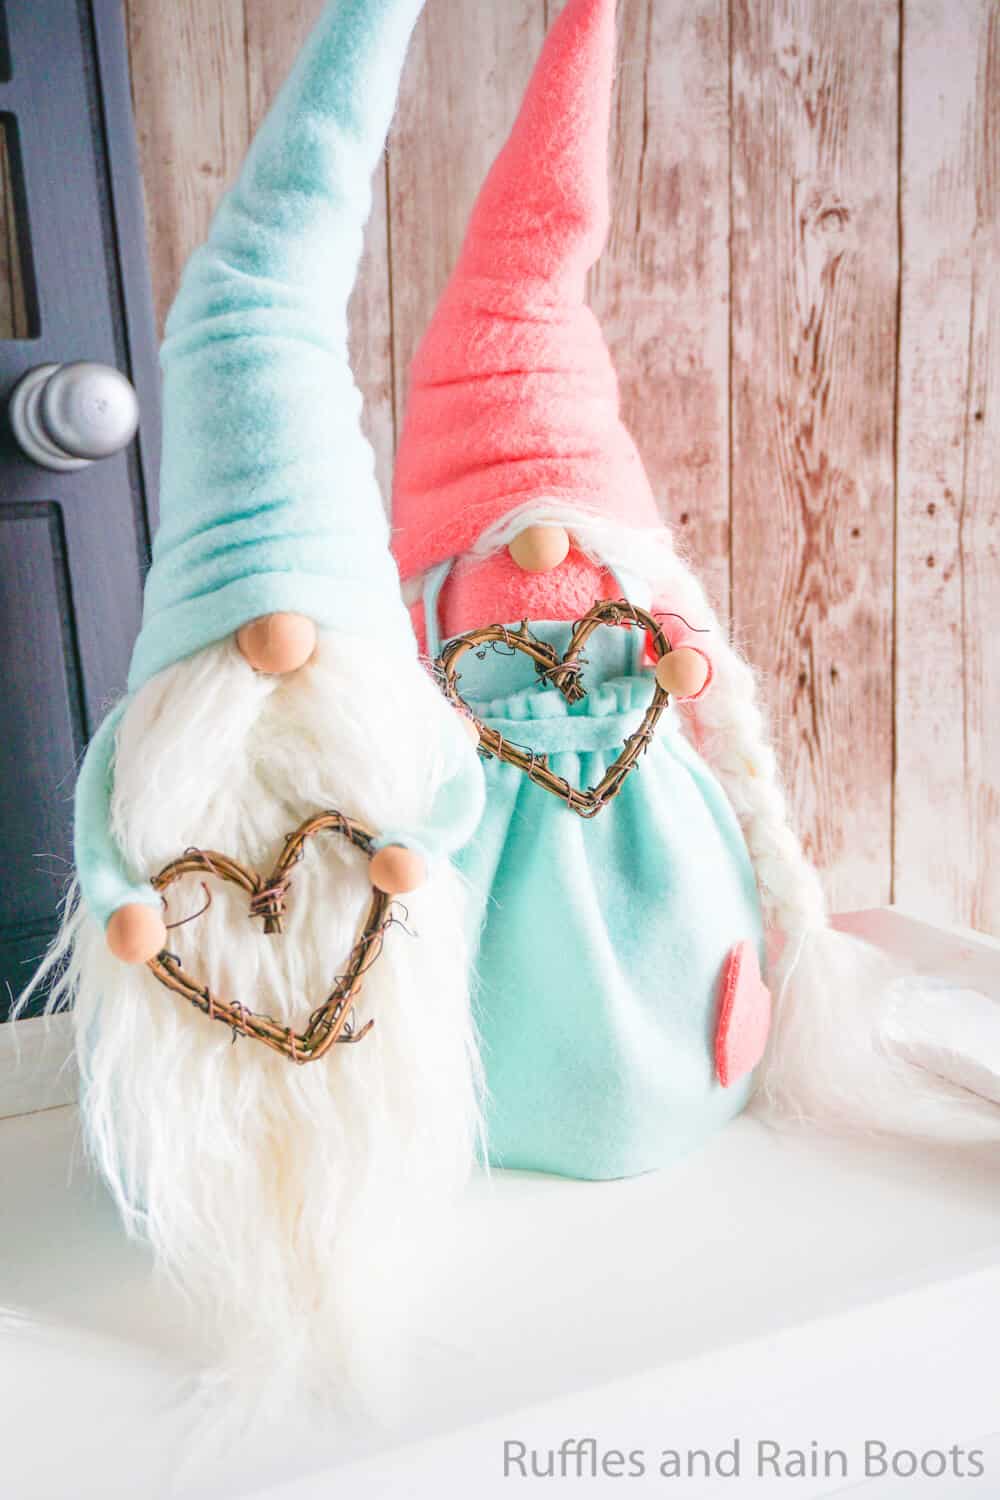
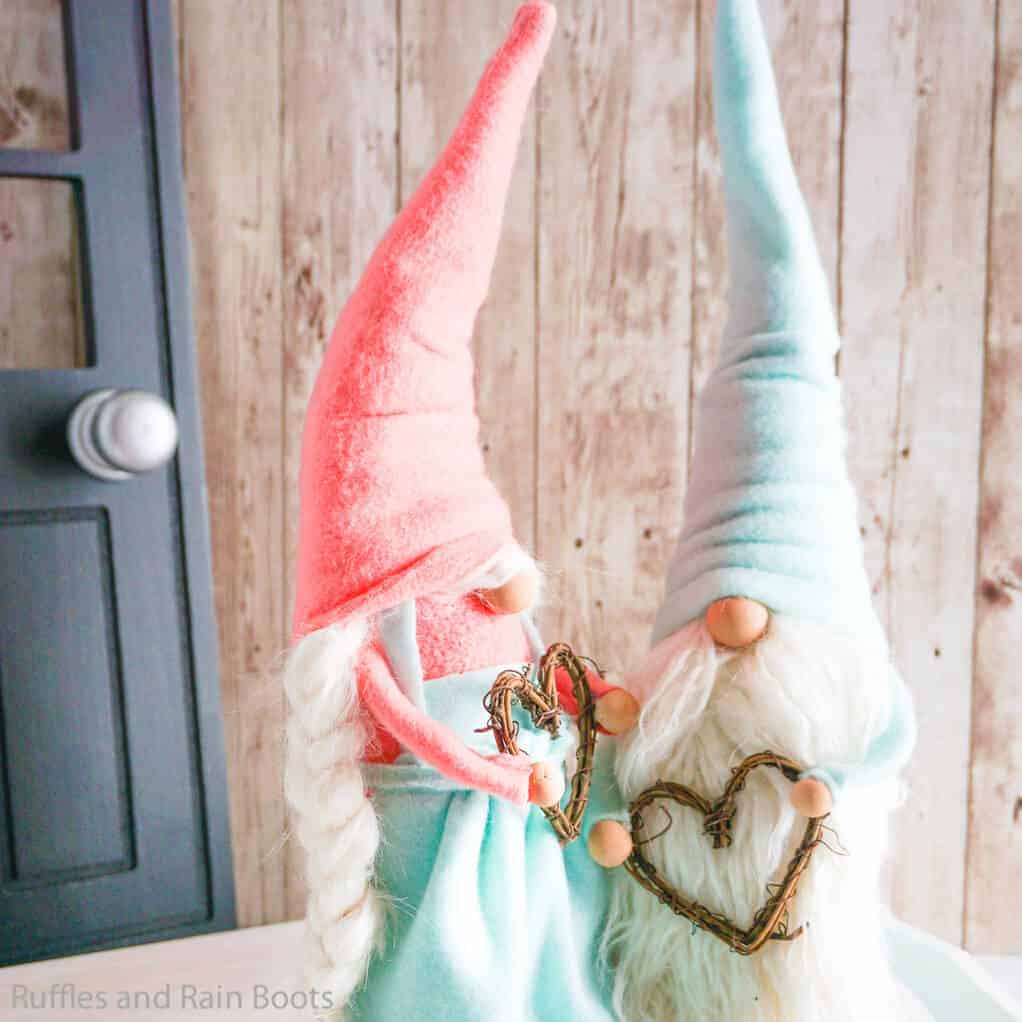
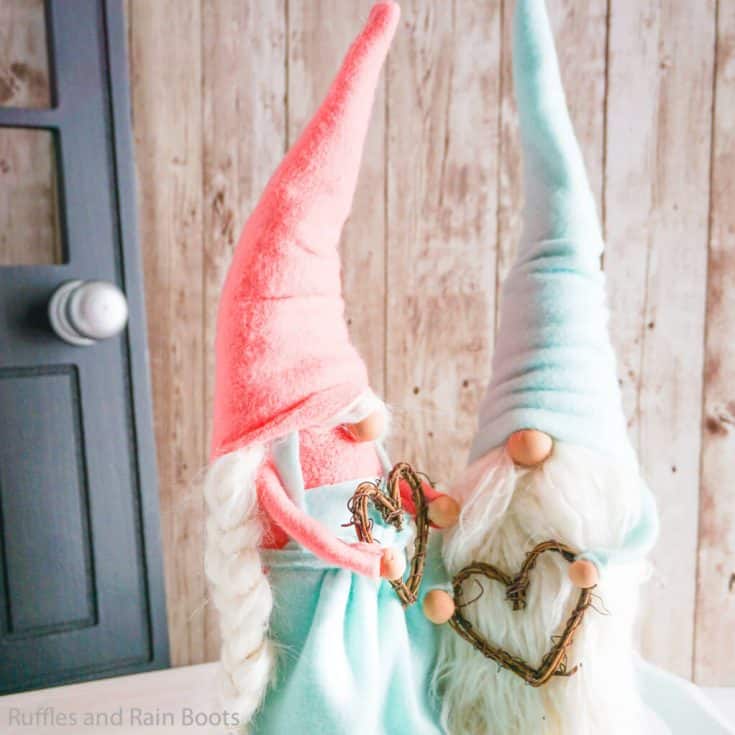
- To make this little set, I used pink and blue fleece I found in the clearance section at my local fabric store. They’re the lighter fleece, not the super thick stuff, but the pattern can be made using either fabric weight.
- I love putting a little bauble in my gnome’s hands. And for this little gnome couple, I went with tiny grapevine wreath hearts like these. Nothing special, but it really makes the gnome seem finished–and sweet.
Get the Cozy Gnome Pattern
Click below to add this fun pattern to your cart. So many gnomes can be made with this!
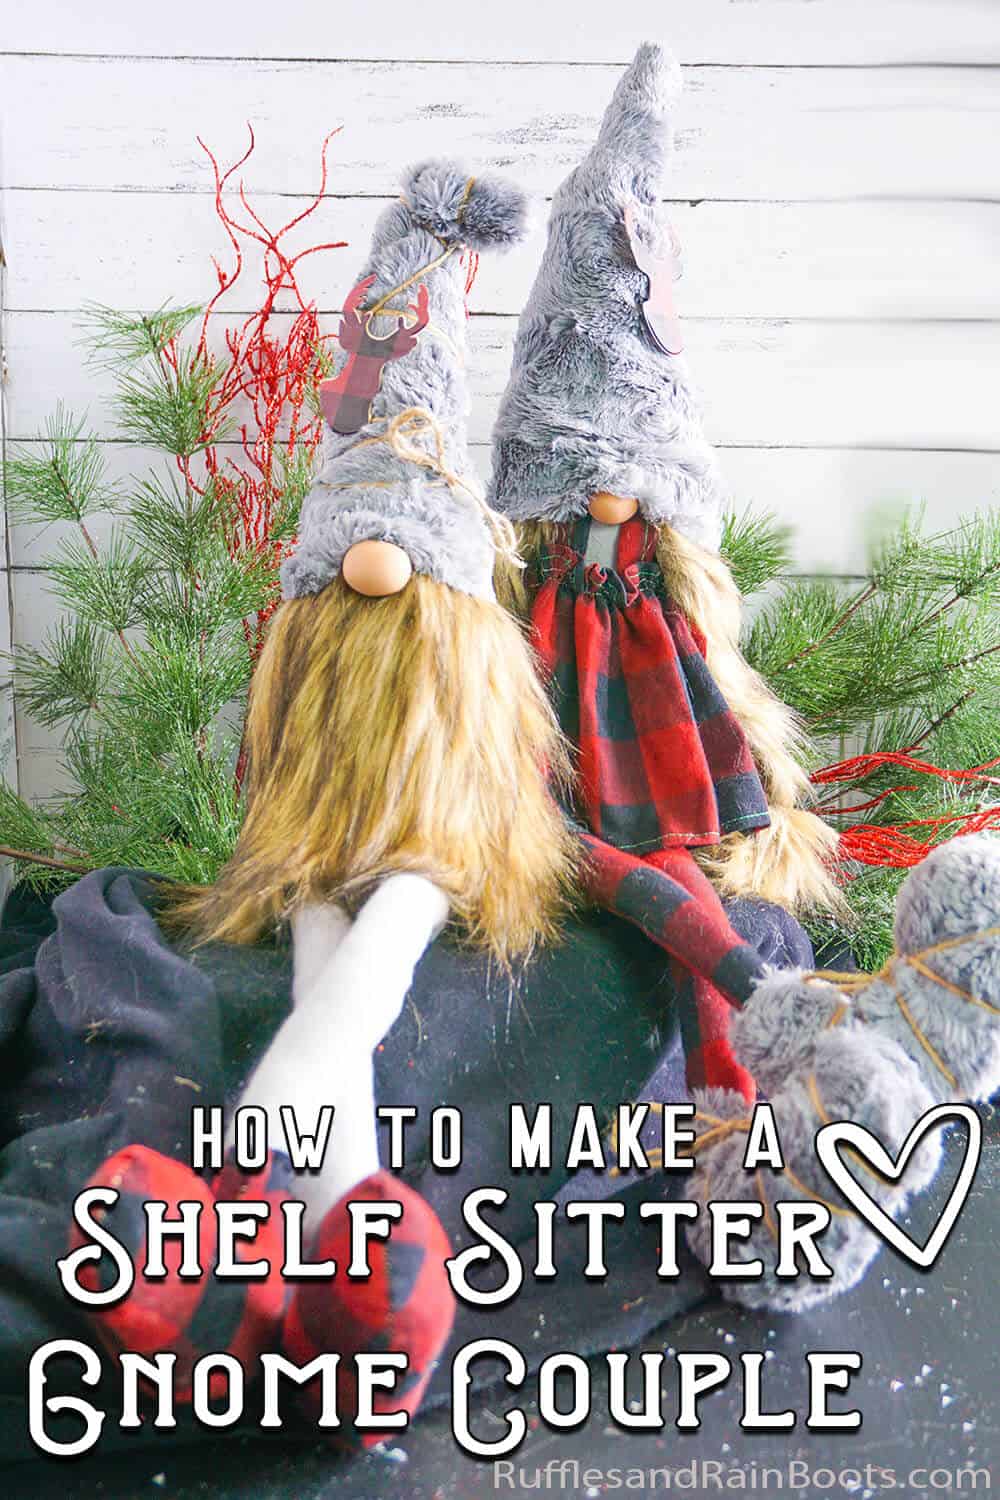
Tips to Make THIS Gnome Pattern into Shelf-Sitter Gnomes
- This was the first set of gnomes I made with this gnome pattern, but they were so perfect, I knew I’d be making more, so that’s why I ended up drawing out the pattern more carefully so I could share it. Sooooo, that also meant some shortcuts were taken. Like arms. I didn’t put any arms on these little guys. My bad.
- I modified the beard for this pattern (seeing as it was the first one I made, is that really a modification, or was it before I refined it? what came first–the chicken or the egg?) so it wraps around the gnome all the way, like a big giant body. But it’s not the body, technically. But that’s a great idea for a future gnome.
- I made the bodies out of a really light flannel, the hats out of a swirled minky fabric (so squishy, I love it) and the apron from a cotton blend fabric.
- The little bauble I put on their hats is a deer head silhouette I cut out from wood and buffalo check vinyl. Super simple, but adds a lot of character. Then, for the little guy gnome, I just wrapped some twine around his hat to make it even more snug on the cone body.
- The boot pattern for this little gnome pair is not included in the pattern set–because I’m putting together a set of 10 gnome boot patterns and these will be included. So, look for that to come soon!
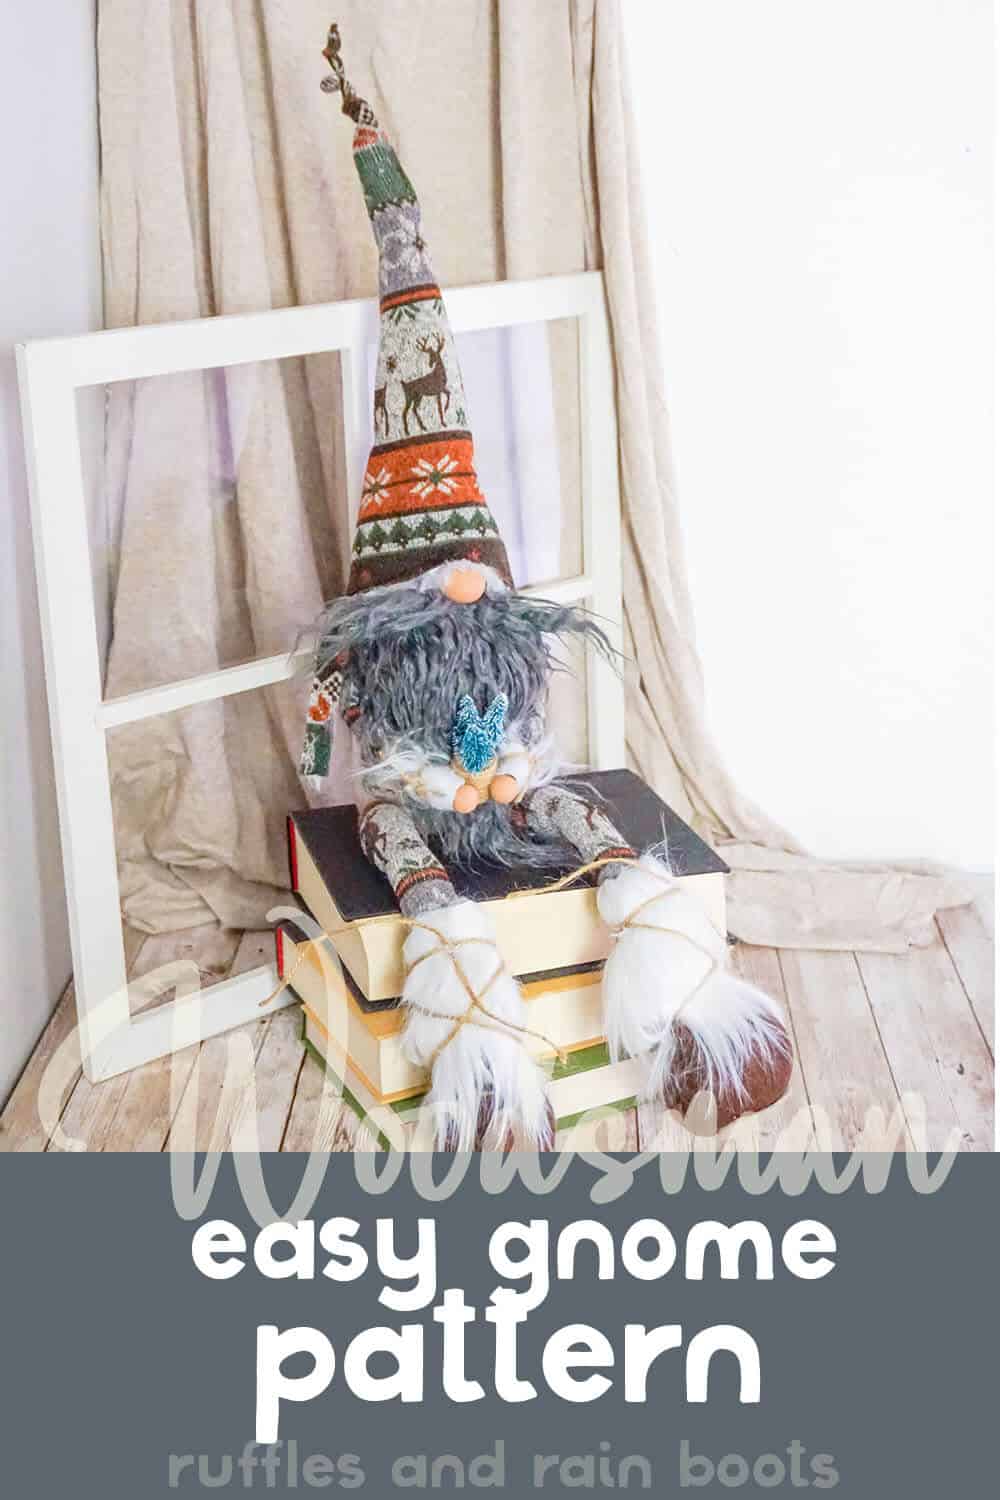
Tips to Make THIS Gnome Pattern into a Tree-Hugger Gnome
- This little tree hugger gnome’s body is made with beige felt and the hat, arms and legs are made from a knitted fabric I found on ETSY. Looks like the seller is out of it, but it’s a simple nordic type holiday print.
- I made the hat along the general lines of the hat pattern, but I lengthened the hat’s point and gave it some thin flaps at the ears. Then I lined it with a little white faux fur. Made it seem a little more wintery. Then I added a twist to the tip of the hat by stuffing a twisted paper clip up in there and just kind of let it push the knit fabric into the twisted shape.
- For the arms, I added a little white faux fur around the wrists to look like the sleeves of his shirt were lined.
- The boot pattern for this little tomte is not included in the pattern set–because I’m putting together a set of 10 gnome boot patterns and these will be included. So, look for that to come soon!
- For the little bauble this nordic gnome is holding, I just took a few tiny bottle brush trees like these and pulled their bottoms off and pressed them into the top of a wine cork. Then I wrapped the wine cork in twine to kind of finish the look and make it seem like he was holding a flower pot of teeny trees.
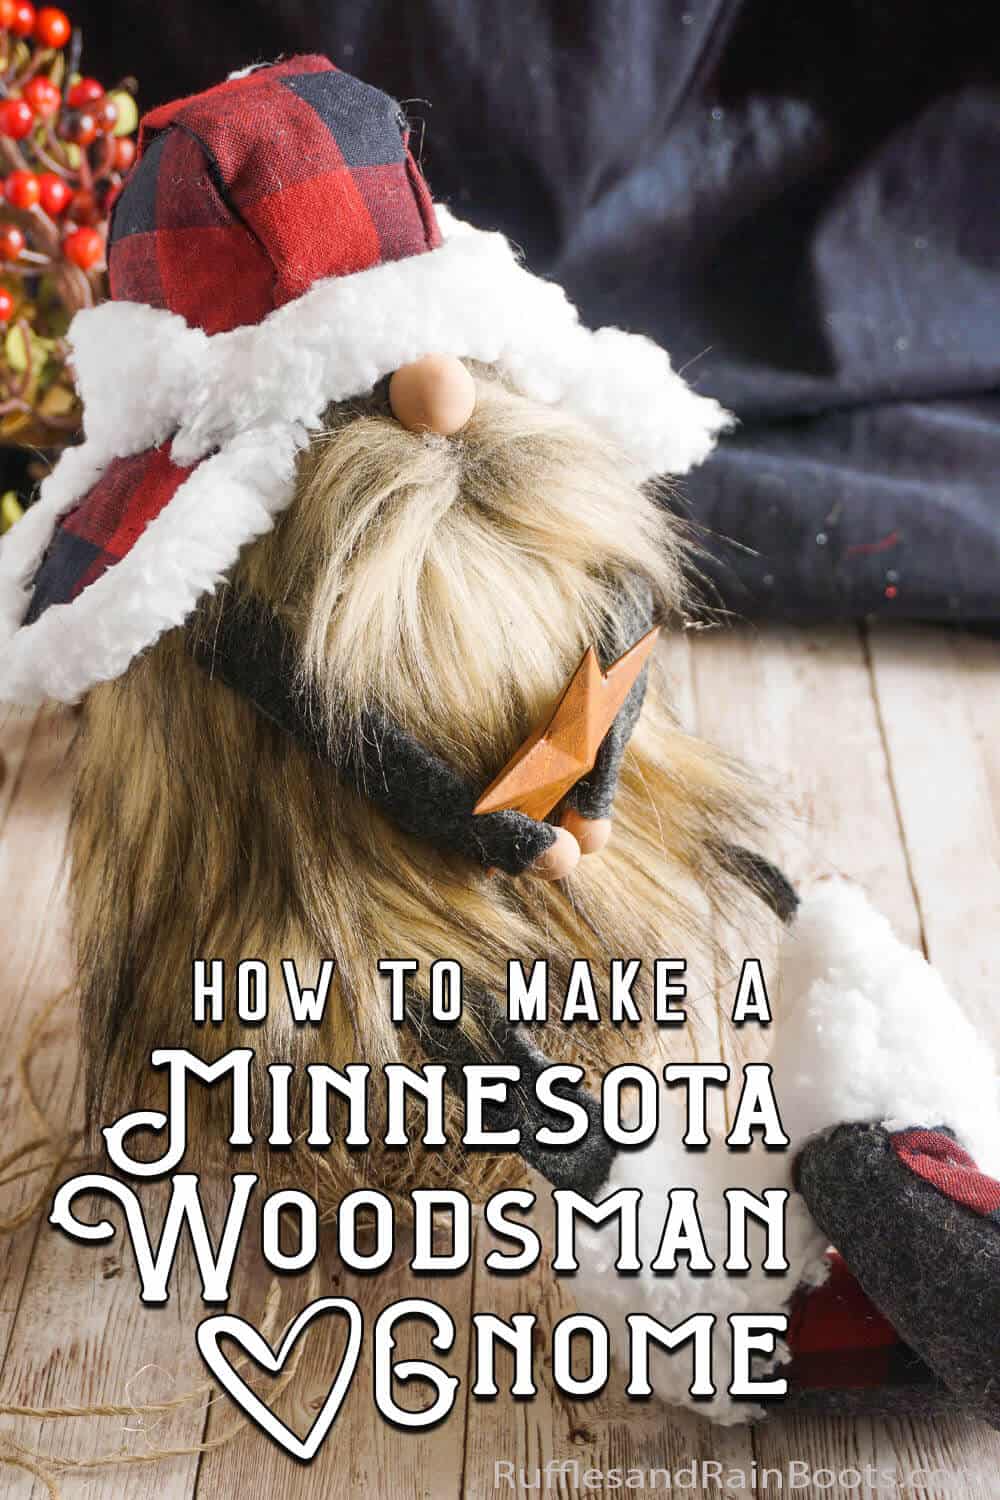
Tips to Make THIS Easy Gnome Pattern into a Minnesota Woodsman Gnome
- I made this adorable little woodsman gnome using the same wrap-around beard style that I did on the shelf sitter gnome. Just looks like his body is made from the beard–it’s actually a charcoal felt.
- This hat is not pointed, so to make it fit, I chopped off the top of the body. Then I made the hat –which is not included in the pattern set, but I plan to make a set of patterns for hats, in which this will be included. The hat is a doosey, so I link that pattern when I get there, but basically, it’s just 2 half circles and a center strip, sewn together then two flaps added to the half circles and lined with lambswool fabric.
- The boot pattern for this little gonk is not included in the pattern set–because I’m putting together a set of 10 gnome boot patterns and these will be included. So, look for that to come soon!
- To give this little woodsman gnome a bauble to hold, I grabbed a little rusty tin star like these that I use on my Christmas tree sometimes as an ornament. So cute and I love it.
Tips to Make THIS Easy Gnome Pattern Into a Valentines Conversation Heart Gnome
- One of my favorite variants on this gnome pattern, I made this little guy from a dark purple flannel for the body, then a linen cotton cheesecloth type material for the hat and arms.
- I added feet to this little guy instead of legs, just for funzies.
- To make the heart, I just cut two giant hearts from craft foam, made a strip to go between them and then made some letters with my Cricut out of felt.
- I hand painted this beard using watercolor paint. You can check out this AWESOME video I made of how to paint faux fur. In that I show several ways to do that and make your beard as custom as you’d like.

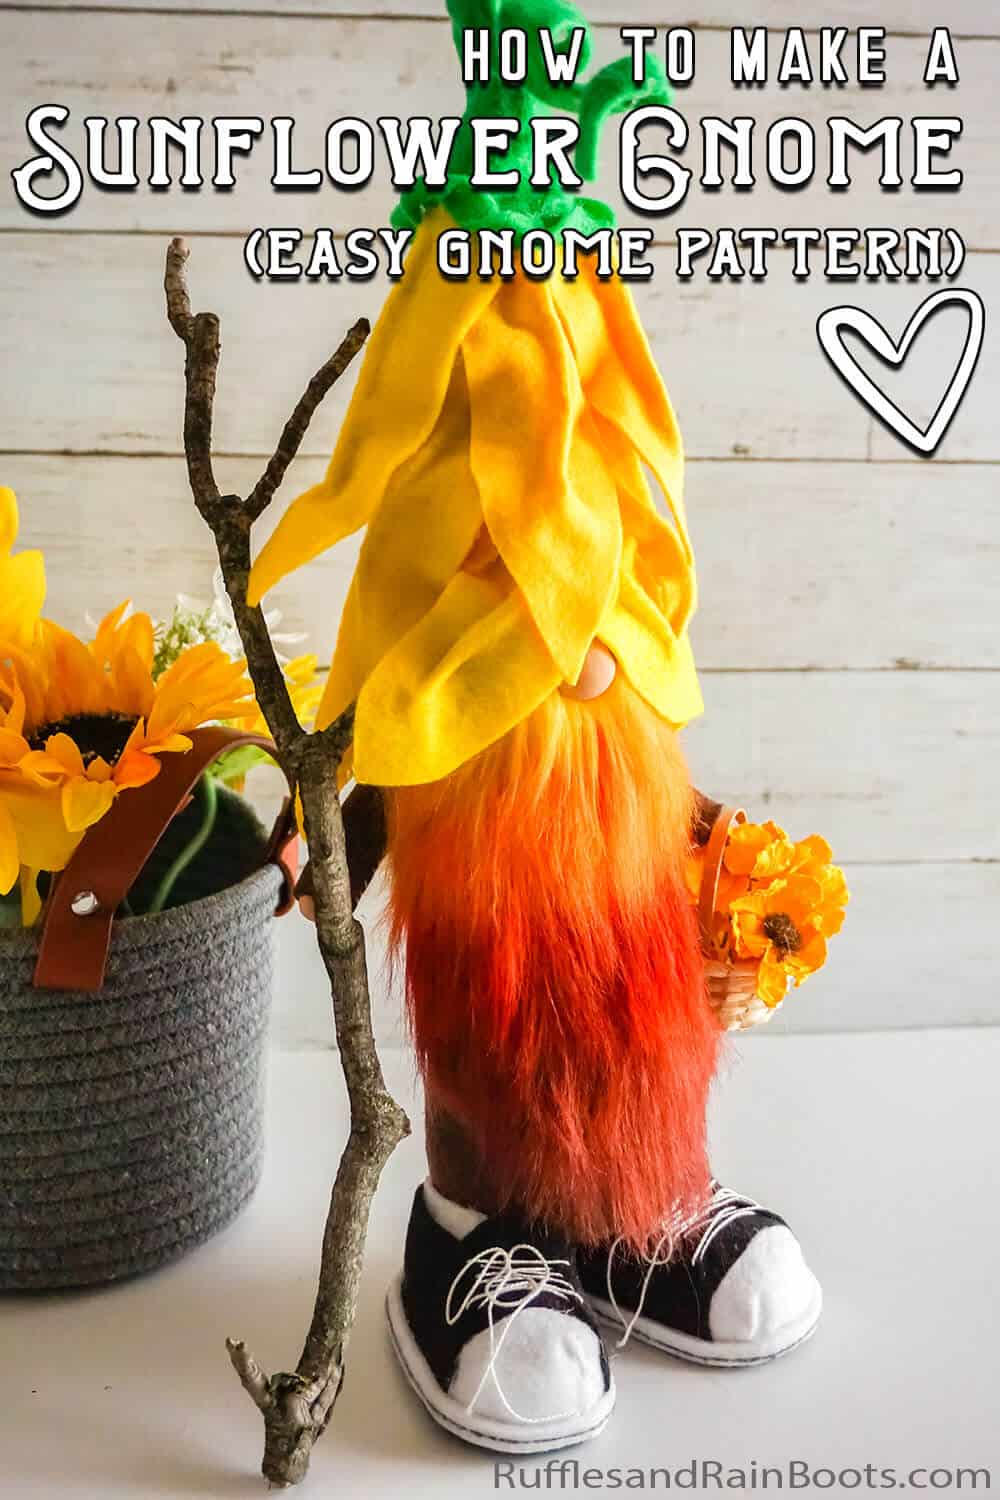
Tips to Make THIS Easy Gnome Pattern Into a Sunflower Gnome
- Literally one of the most amazing variations on the cozy gnome, this sunflower gnome is such an easy but awesome twist on a “normal” gnome. The hat is what sets the stage and it’s so easy! Just grab the sunflower hat SVG here, then add the green top and layer on the petals!
- I added some little sneakers on this tomte, for which I’ll share the pattern soon. They’re really simple and I didn’t add any legs, just tacked the shoes on to the nisser’s bum.
- To make the little basket, I just used a leftover mini-basket from Easter, then tossed some dried sunflowers into it.
- Like the conversation heart gnome, I hand painted this beard. But instead of using watercolor paint, I used fabric dyes and WOW! I love the way the beard turned out. Until I get the video for the sunflower gnome published, you can check out this AWESOME video I made of how to paint faux fur. In that I show several ways to do that and make your beard as custom as you’d like–just know that the sunflower gnome video will have a different variation to get that awesome ombre effect.
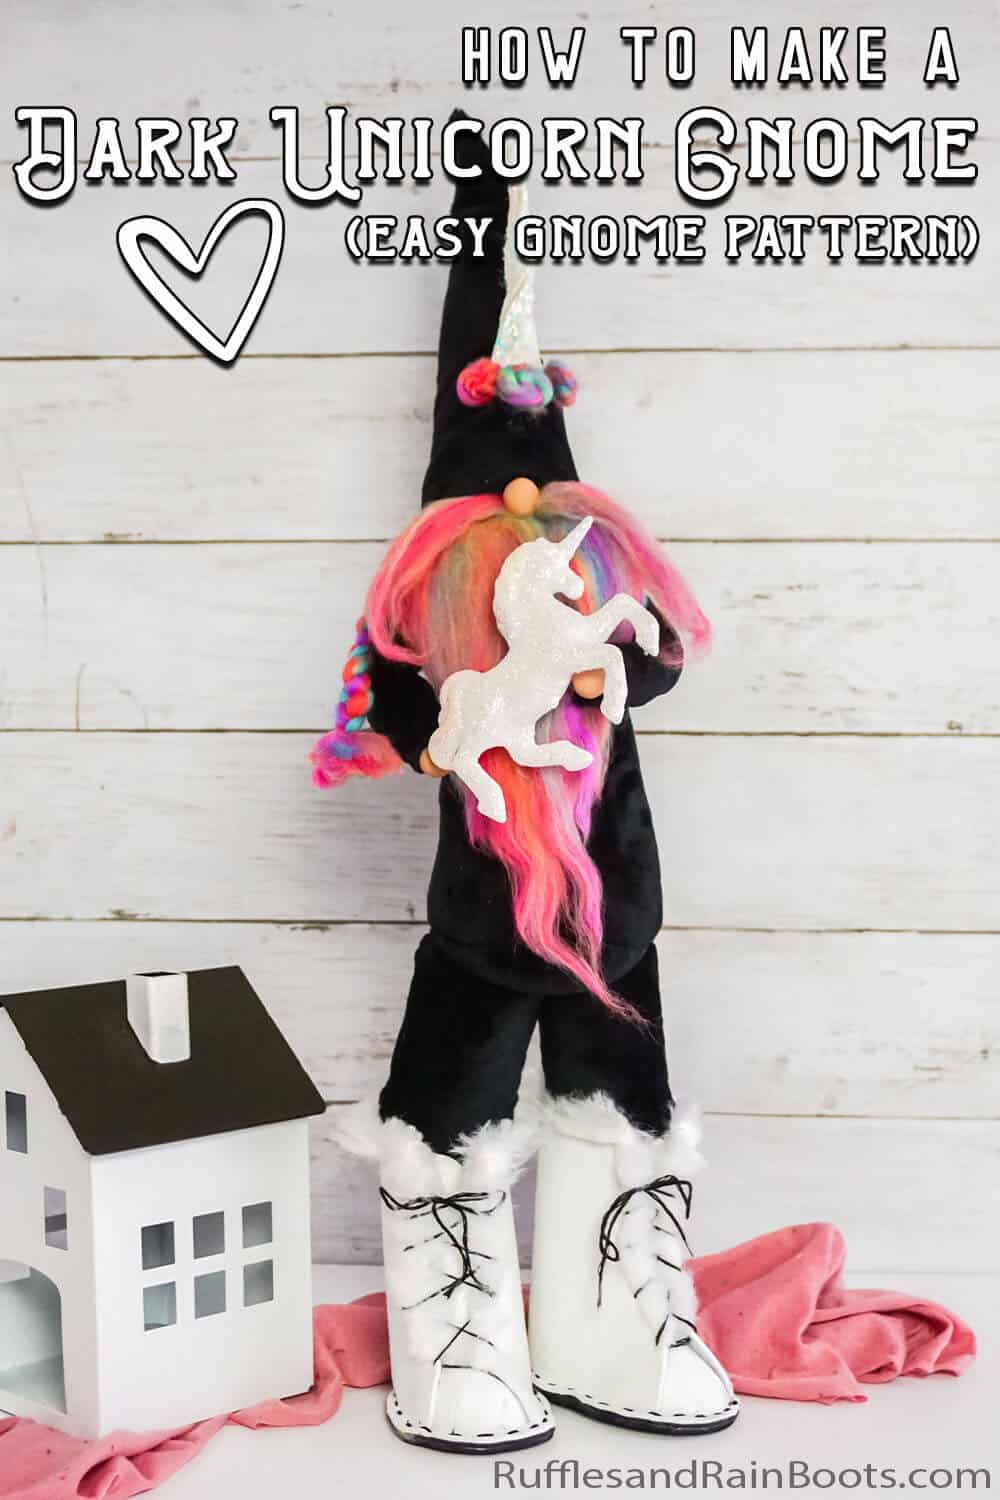
Tips to Make THIS Easy Gnome Pattern Into a Dark Unicorn Gnome
- I am all about this fun dark unicorn gnome. It’s so simple and the only real trick to make any gnome into a unicorn is to make or find a unicorn horn to stick on the hat. For this particular gnome, I cut a large triangle from glitter canvas ribbon, then used hot glue to hold it in place as I twisted the horn and thinned it out. Once the horn was made, I slid a floral wire into it and tuck that into the hat. Easy, see?!
- Because he was just SO EPIC, I made some unique boots just for him. I’ll share that tutorial separately, because it’s a bigger commitment to make boots for gnomes and I’ll get those all out soon.
- I just used a little unicorn bauble I found at the craft store last holiday season to make a fun little “baby unicorn” that this dark unicorn tomte could hold. Because he’s not a barbarian–he’s there to take care of the baby unicorns! LOL!
- The beard for this fun unicorn gnome is EPIC. And ridiculously easy. I didn’t dye anything or do anything crazy. I found some rainbow-colored roving, brushed it out, glued it to a piece of felt to create a backing and then slapped it on the nisser body. I even made little rolled flowers from the same material to put around the base of the horn!
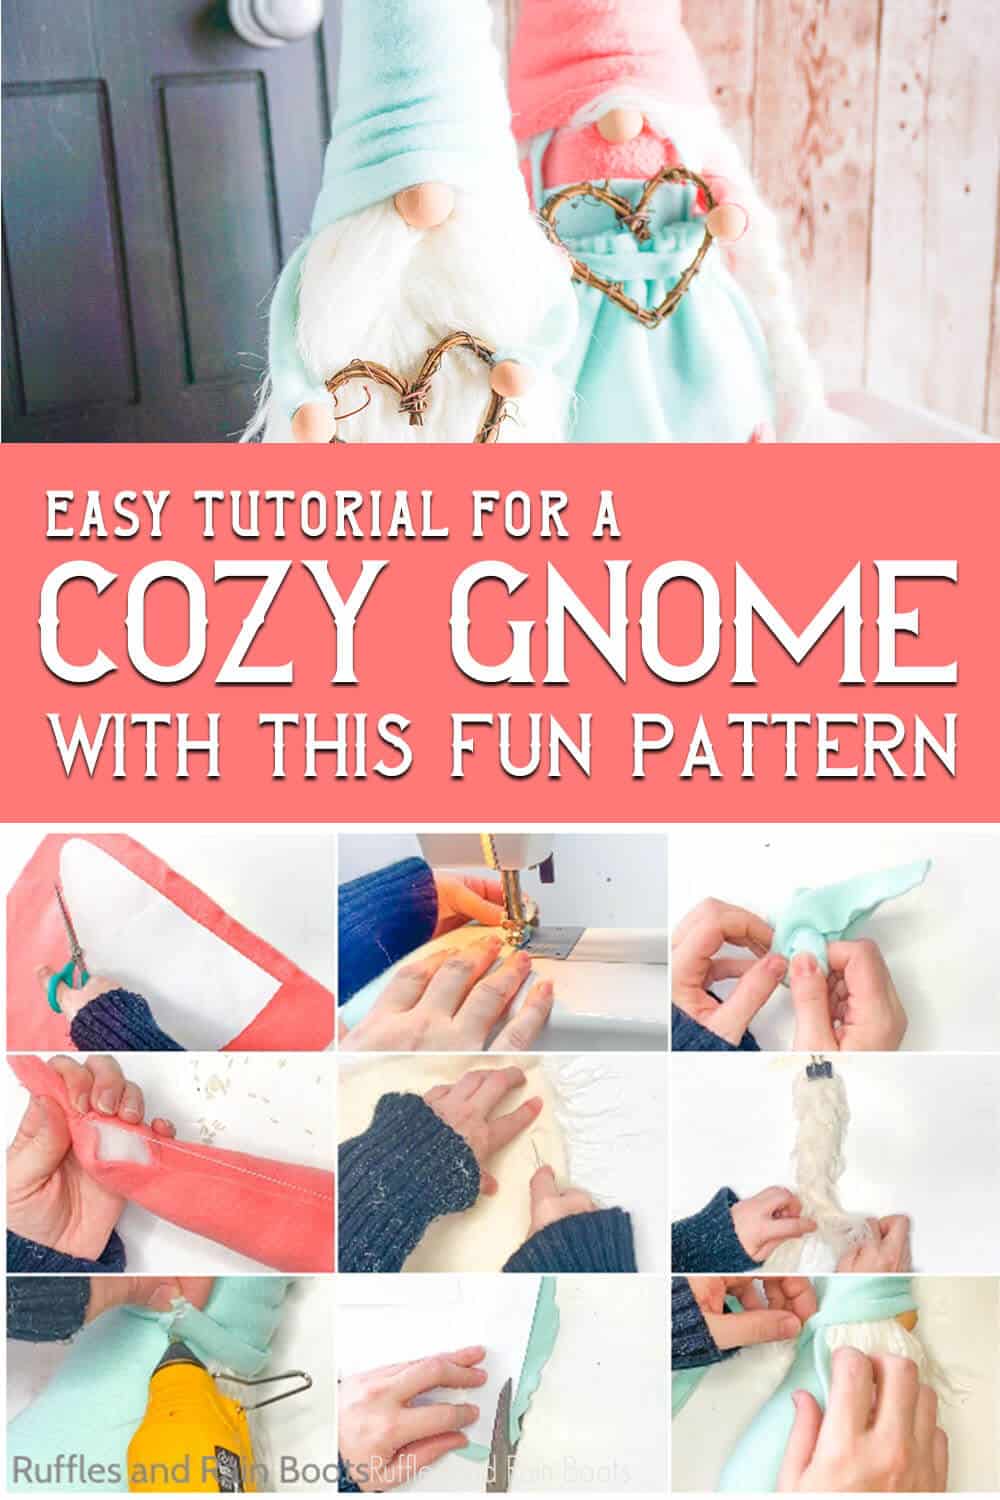
How Do I Make this Cozy Gnome Pattern?
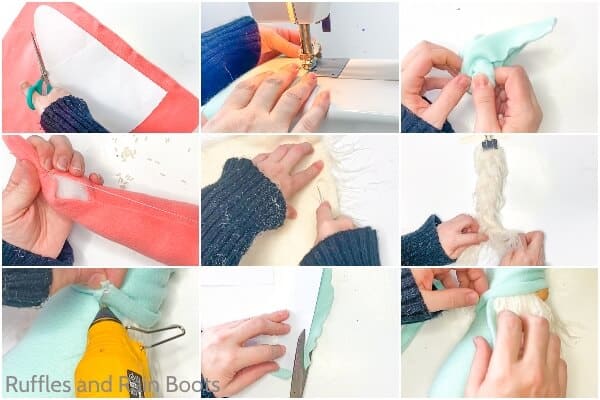
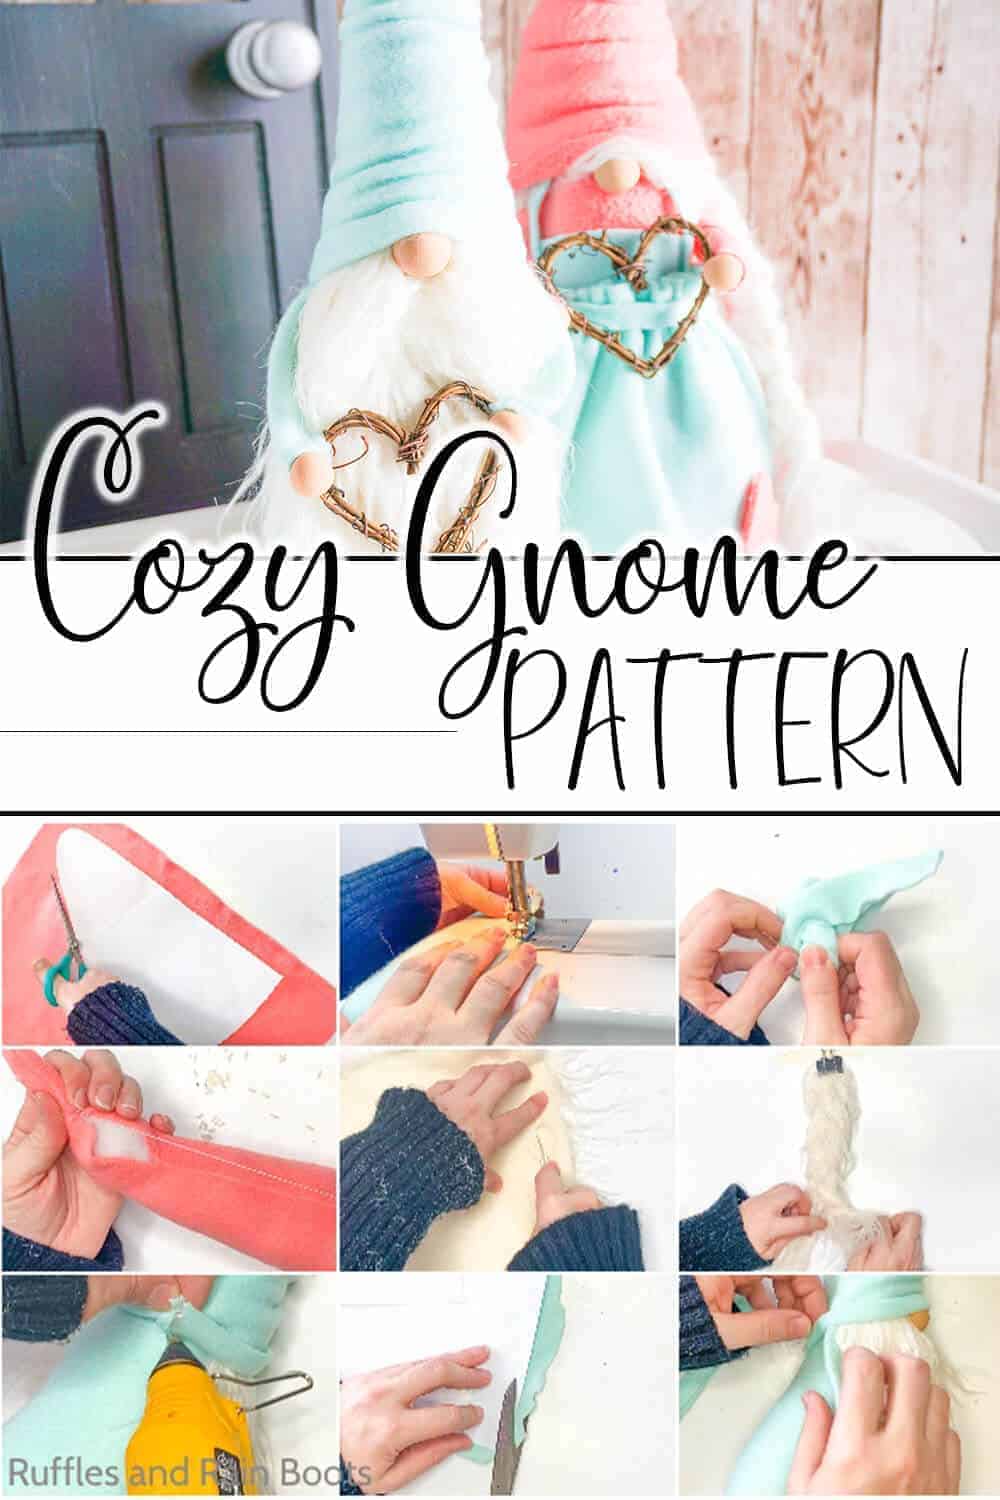
I’m so glad you asked. Below is our written tutorial. If you’re a visual learner like me, please see this video to show how easily the cozy gnome sewing pattern comes together.
Make your gnome nose and hands by combining a portion of light brown and white polymer clay until you have the color you want. Roll a quarter-sized portion of this clay into a neat ball. This is the nose. Set aside. Roll two nickel-sized portions of this clay into two neat balls. These are the hands. Bake the nose and hands per the clay package’s directions. Allow them to cool fully.
Trace and cut out the gnome body shape, bottom circle shape, and hat shapes out of the fabric, per the pattern.
Fold the gnome body shape in half and run a hem along the open side with your sewing machine. Be sure to leave the small portion open on the side seam, as directed in the pattern. Attach the bottom circle shape by hemming it in place then turn the body of the gnome right side out.
Fill the gnome body with the polyfill beads. Tuck a small portion of polyfill into the top of the gnome body to fill out the cone shape of the head, tuck the floral wire inside, and sew the body closed.
Fold the hat piece in half then run a hem along the seam. Turn the hat right side out.
Cut out the beard shape from the faux fur by turning the fur over and cutting only the fabric with the exacto knife. Hot glue the beard to the body.
Hot glue the nose in place about 1 inch below the top of the beard. Place the hat on top of the gnome’s head, tucking it down over the top of the nose.
Cut out two arm shapes from the fabric. Fold the arm shapes in half and hem them in a long tube. Slip the arm up into the hat on the side and hot glue it in place. Trim arm as desired (make sure your bauble will fit nicely before trimming). Hot glue the hands in place on the ends of the arms. Attach the bauble to the back sides of the hands. Then you have a gnome!
More Gnome Patterns You Might Like
- Elfin Gnome Pattern – This is SUCH a cute gnome pattern that, even though it’s not my original pattern, I have made so many variations, it’s clear it’s one of my favorite gnome styles.
- Gnome Knitting Pattern – If you want to knit a gnome, this is a great basic pattern to get you started to make a little knitted tomte.
- Spring Sock Gnome with Boots – For real the cutest sock gnome I think I’ve made in a while, he’s perfect for spring and absolutely adorable with his chunky boots.
Please Save This to Pinterest
Your shares are how this site grows and I am sincerely grateful. Know a friend who’d like this? Please share it on Facebook or save it to your favorite easy DIY ideas board on Pinterest.
Cozy Gnome Pattern
You are going to love this cozy gnome pattern and tutorial. It's just so super easy and the options for the gnome itself is so awesome!
Materials
- 1/4 yd Fleece Fabric (in each color)
- White Mongolian Faux Fur
- Small Amount of Polymer Clay in light brown and white
- 2 cups Polyfill Beads
- Small Amount of Polyfill
- 2 Sections of Floral Wire (optional)
- Baubles (I chose a grapevine wreath)
- Easy Gnome Pattern
Tools
- Sewing Machine (optional)
- Needle and Thread
- Razor Blade or Exacto Knife
- Hot Glue Gun and Glue
- Oven
Instructions
- Make your gnome nose and hands by combining a portion of light brown and white polymer clay until you have the color you want. Roll a quarter-sized portion of this clay into a neat ball. This is the nose. Set aside. Roll two nickel-sized portions of this clay into two neat balls. These are the hands. Bake the nose and hands per the clay package's directions. Allow them to cool fully.
- Trace and cut out the gnome body shape, bottom circle shape and hat shapes out of the fabric, per the pattern.
- Fold the gnome body shape in half and run a hem along the open side with your sewing machine. Be sure to leave the small portion open on the side seam, as directed in the pattern. Attach the bottom circle shape by hemming it in place then turn the body of the gnome right side out.
- Fill the gnome body with the polyfill beads. Tuck a small portion of polyfill into the top of the gnome body to fill out the cone shape of the head, tuck the floral wire inside, and sew the body closed.
- Fold the hat piece in half then run a hem along the seam. Turn the hat right side out.
- Cut out the beard shape from the faux fur by turning the fur over and cutting only the fabric with the exacto knife. Hot glue the beard to the body.
- Hot glue the nose in place about 1-inch below the top of the beard. Place the hat on top of the gnome's head, tucking it down over the top of the nose.
- Cut out two arm shapes from the fabric. Fold the arm shapes in half and hem them in a long tube. Slip the arm up into the hat on the side and hot glue it in place. Trim arm as desired (make sure your bauble will fit nicely before trimming). Hot glue the hands in place on the ends of the arms. Attach the bauble to the back sides of the hands. Then you have a gnome!
Notes
This gnome stands 14-15-inches (ish, depending on how twisty you make your hat, of course).
For more fun gnome patterns and tutorials, visit Ruffles and Rain Boots (we have lots...).
Meet the Creator
Hi there, I’m Sarah Nenni-Daher. I’m a crafty gal and always have at least 14 projects going at once. I am a crafter, designer, DIYer, and pattern maker. I share my creations here and in the Ruffles and Rain Boots® Shop.
Here at Ruffles and Rain Boots®, you’ll find DIY gnomes, crafts, gifts, cupcakes, laser crafts, and so much more. I love sharing video tutorials over on YouTube and chatting with other crafters in my Facebook groups. We’d love to have you!