
This Easy No-Sew Gnome Mug Cozy Makes an AWESOME Gift!
There’s nothing like making a fun gift for a friend and this no-sew gnome mug cozy is the perfect DIY gift idea for any gnome-lover!

What You'll Find On This Page
No-Sew Gnome Mug Cozy
Here at Ruffles and Rain Boots, we make gnomes. All the gnomes all the time. And I gift them, oftentimes. So, when a friend’s birthday was coming up, of course I decided it was a grand idea to make a fun no-sew gnome pattern for a mug cozy for her!
RELATED READING: HOW TO MAKE A NO-SEW GNOME
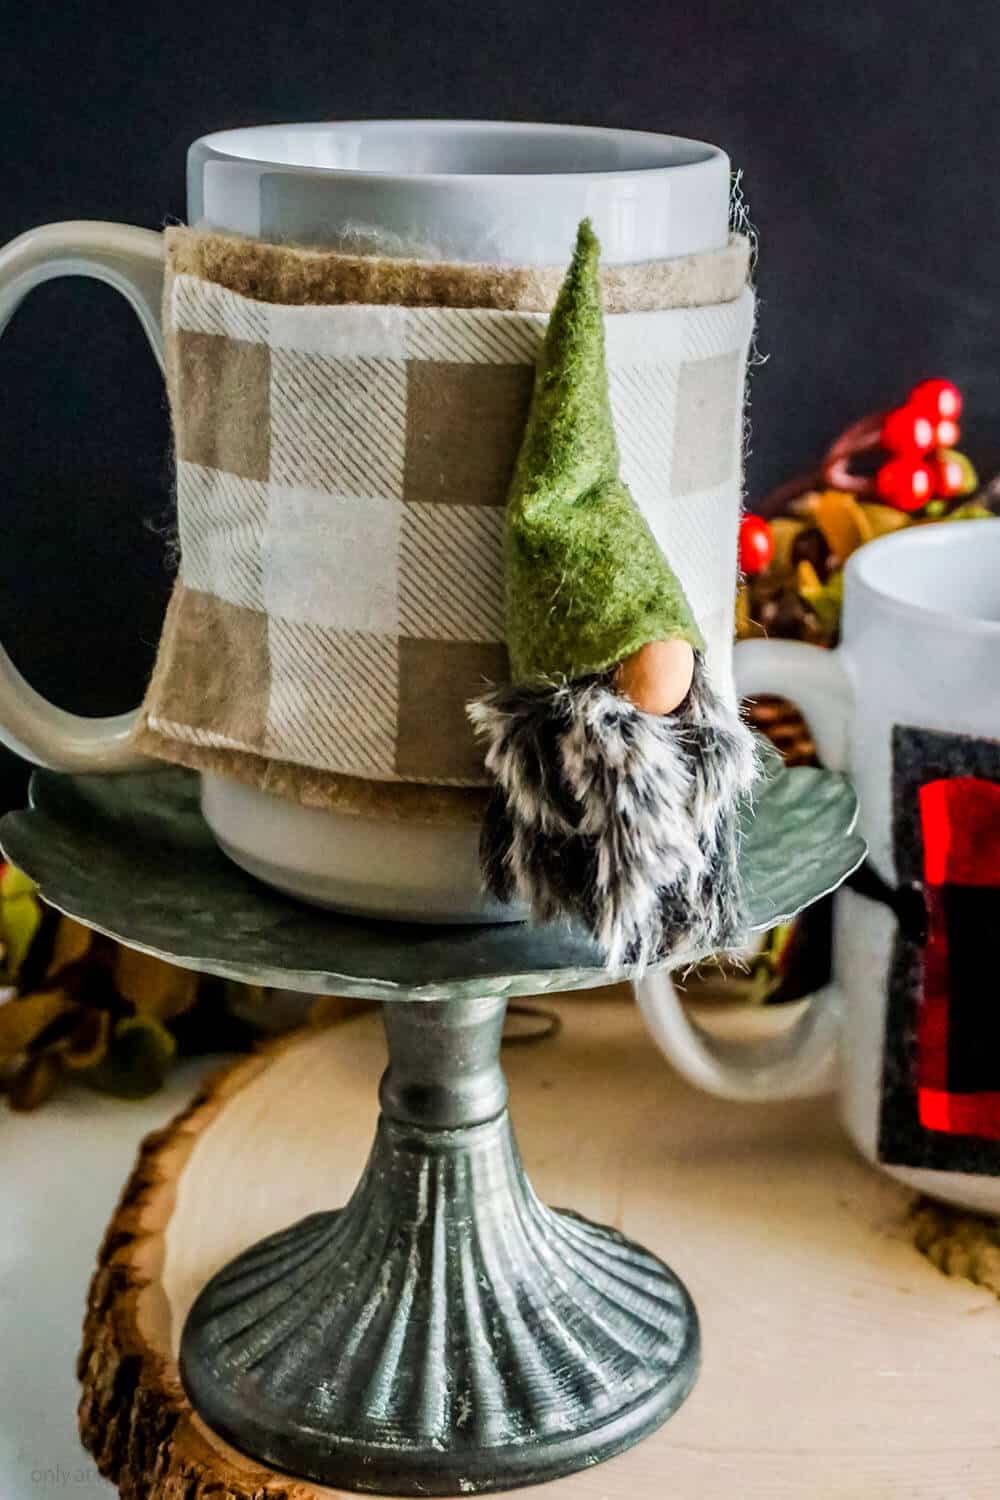
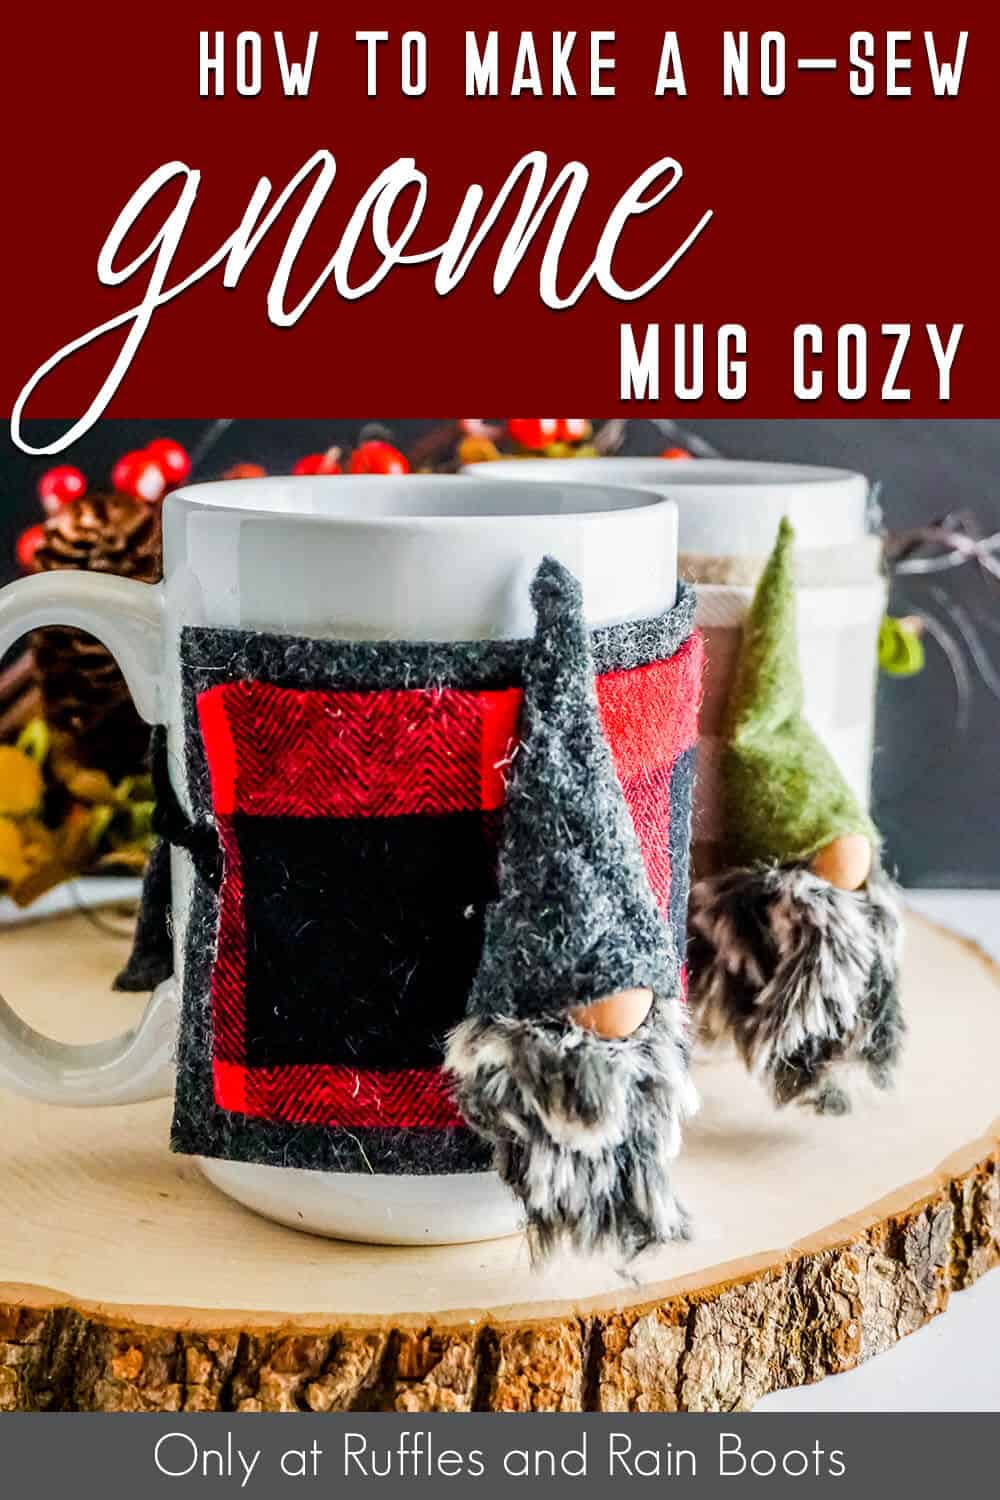
You’ll also notice there are two versions…the red and black and the green and brown. Yes, I made one for myself. But also, I made it to show that you can make this in so many different variations that you can make it unique to your own tastes. So, if you’re ready to make a great gift of a no-sew gnome mug cozy, let’s get started.
DIY Christmas Gnome Tutorials
If you’re looking for the best DIY Christmas gnome tutorials, you have come to the right place. Check out all of my favorite tomte tutorials for the holidays!
No Time to Make This Now? Pin it for Later
You’re busy, I get it. Pin this to your favorite easy DIY gift ideas board on Pinterest and it’ll be here for when you’re ready.
As an Amazon Associate, I can earn from qualifying purchases.
Tips to Make This No-Sew Gnome Pattern
- Start by grabbing the no-sew gnome mug cozy pattern here. It’s super easy, and you can totally make it without using a cutting machine, but if you’d like to, you can download the pattern and SVG cut file set for Cricut or Silhouette here.
- Let’s talk gnome noses. I used polymer clay (a tiny bit of light brown with a fair lot more of white mixed together) and baked per the directions on the package. But you don’t have to do all that–I just did it because it’s convenient and I didn’t have anything else I wanted to use. You could use wood beads, buttons, pom poms, literally anything. Don’t feel like you have to go out and buy clay.
- What about that epic little beard? Now, I know that I USUALLY would say “oh, I love using faux fur with the long pile” but the deal is, this no-sew mug cozy gnome is a TOTALLY different project. I wanted more control over the fur and I wanted it to be a little looser. Reasons. So, I went with this fun (and insanely soft) eyelash yarn. It so soft and looks like fur, but it’s shorter pile makes for less furry fly-aways when you’re drinking your hot cocoa or coffee.
- Need a nice mug to gift with this fun gnome mug cozy? I found that making this cozy was so much easier around a straight-sided mug, so I grabbed these here–and the fact that you can use them for sublimation was kind of a bonus if I want to use them for future Cricut projects!

Get the Gnome Pattern Here
Click below to add this fun pattern to your cart. Check out what else you can make!
How Do I Make this No-Sew Gnome Mug Cozy?
I’m so glad you asked. Below is our written tutorial.
No-Sew Gnome Mug Cozy

I am a little in love with this easy no-sew gnome pattern. And the fact that it's a no-sew gnome mug cozy just makes this easy craft idea so much more fun--because it's actually useful!
Materials
- Craft Felt in One or Two Colors
- Flannel Fabric
- 1 Large Button
- Small Amount of Eyelash Yarn
- Small Amount of Yarn
- Polymer Clay Ball or Wooden Bead for Nose
- Pattern
- SVG, optional
Tools
- Hot Glue Gun and Glue
- Scissors
- Cricut Explore Air 2 or Cricut Maker, optional
Instructions
- Cut out the following: 1 large rectangle from craft felt, 1 large rectangle from flannel (trust me, the pattern is not wrong) and 1 triangle from craft felt. If you're using a cutting machine, follow the instructions in Design Space to cut each piece.
- Flip over the flannel cutout and fold over each edge onto itself to form a hem and hot glue that in place.
- Hot glue the flannel cutout to the felt cutout, equidistant from each edge. Leave a small 1-inch section of the edge on one of the shorter sides open.
- Roll the triangle of felt into a cone and hot glue it in place in the back to make a nice pointy hat, leaving the bottom open.
- To make the beard, wrap 3-4 of your fingers with the eyelash yarn about 10-15 times. Wrap a small section of the yarn around the center and tie it in a double knot to hold it tight. Cut the loose wrapped ends on one side close to the knotted yarn, then cut the loose ends on the other side of the wrapped yarn in half to make the loose beard ends. Trim as desired.
- Stuff the knotted end of the beard into the hat and hot glue it in place.
- Immediately tuck the nose up under the edge of the hat, making a little wrinkle in the hat and hot glue the nose in place onto both the hat and the beard. Allow this hot glue to dry completely before moving on so you don't mess up the nose placement.
- Wrap the felt and flannel rectangle pieces (the wrap) around your mug, with the opening on either side of the handle. Identify where you want the gnome to sit on the wrap based on the wrap's placement. Take note of where you left the opening section on the wrap--this will be the end where you want the gnome to be as you'll want the button on the other side. So make sure that the gnome will sit on the same end of the wrap as the opening. Lay the wrap back onto the table, keeping in mind the location you want the gnome to sit.
- Flip the gnome over and place glue on the back side of the hat toward the center, then immediately place the gnome onto the wrap where you want it to permanently sit. Allow the hot glue to dry completely.
- Hot glue the button onto the wrap opposite from the side the gnome is located. Allow the hot glue to dry completely.
- Place the wrap around the mug again and wrap a portion of yarn around the button, pulling it snug to show you how long you need to cut the yarn to hold the wrap snug around the mug. Remove the wrap from the mug and trim the yarn to just fit under the edge of the opening you left between the two parts of the wrap. Tuck the ends of the yarn inside and hot glue them in place. Allow the hot glue to dry completely then get ready for some coffee!


Notes
For more fun no-sew gnome patterns, visit Ruffles and Rain Boots!
More No-Sew Gnome Patterns You Might Like
- Mushroom Cap Gnome – You’re not going to be sorry about making this amazingly adorable mushroom cap gnome. I’m a little in love–and there’s no sewing necessary.
- DIY Farmhouse Gnome – I am going to be honest, this was one of the very first gnomes I made and I come back to the basic design time and again. I love it–and he’s still on my shelf!
- Super Easy No-Sew Gnome Pattern – If you’re into gnomes and you definitely want to make an easy one, this fun pattern is PERFECT for a beginner maker or an expert just looking to have fun!
Please Save This to Pinterest
Your shares are how this site grows and I am sincerely grateful. Know a friend who’d like this? Please share it on Facebook or save it to your favorite easy DIY ideas board on Pinterest.

Meet the Creator
Hi there, I’m Sarah Nenni-Daher. I’m a crafty gal and always have at least 14 projects going at once. I am a crafter, designer, DIYer, and pattern maker. I share my creations here and in the Ruffles and Rain Boots® Shop.
Here at Ruffles and Rain Boots®, you’ll find DIY gnomes, crafts, gifts, cupcakes, laser crafts, and so much more. I love sharing video tutorials over on YouTube and chatting with other crafters in my Facebook groups. We’d love to have you!