
This Woodsman Shelf-Sitter Gnome Pattern is a Fun Fur-Booted Gnome!
If you want a fun gnome craft for the coming winter, this woodsman shelf-sitter gnome pattern with fur boots is the tops!

Woodsman Shelf-Sitter Gnome Pattern
Here at Ruffles and Rain Boots, I love to make a gnome that works for more than just one holiday sometimes. A full season gnome for spring or fall is great – but winter? That’s FUN. Warm and cozy, all dressed up in furs? That’s my jam.
RELATED READING: EASY GNOME SEWING PATTERN
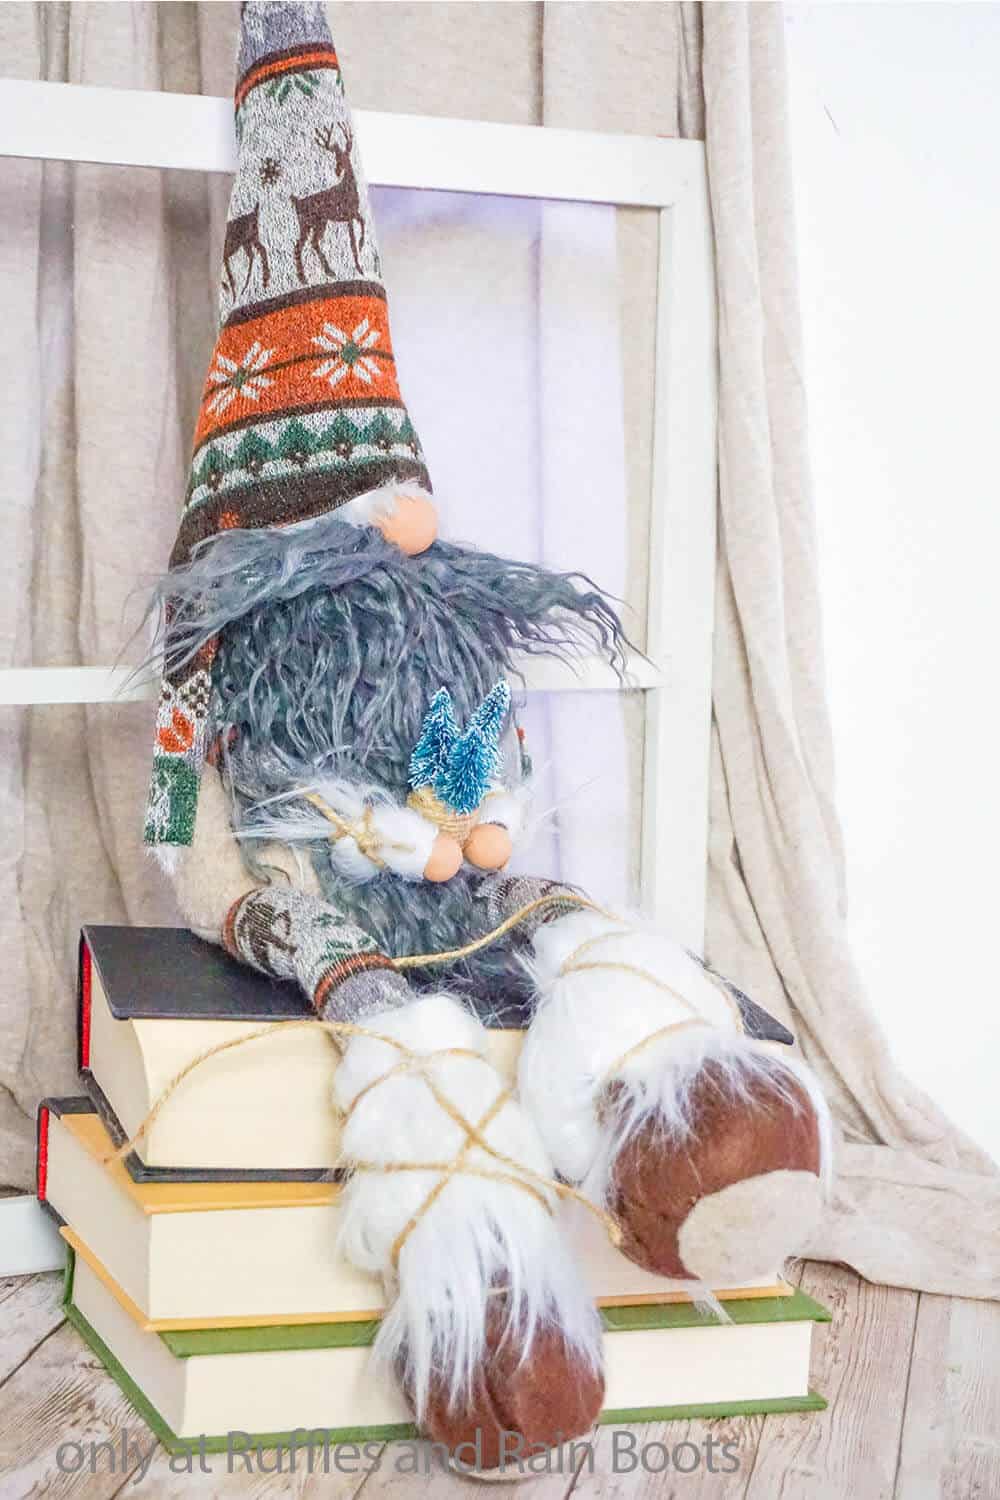
So of course I made this fun woodsman shelf-sitter gnome with that in mind. All winter long, he can chill on a shelf, letting those cute fur boots dangle off and cuddle his little winter trees close. Let’s get started.
No Time to Make This Now? Pin it for Later
You’re busy, I get it. Pin this to your favorite gnome crafts board on Pinterest and it’ll be here when you’re ready.

As an Amazon Associate, I can earn from qualifying purchases.
Tips to Make a Woodsman Gnome
- Grab the shelf-sitter gnome pattern here. It’s one of my most popular gnome patterns that is just so easy and simple to customize.
- To make the shoes, I used the fur-boot pattern here. Simple and fast, these boots are one of 17 gnome shoe patterns in the package, so it’s a lot of options! Like with the gnome pattern, the gnome shoe patterns can also be made with a cutting machine with the gnome shoe pattern and cut file set here.
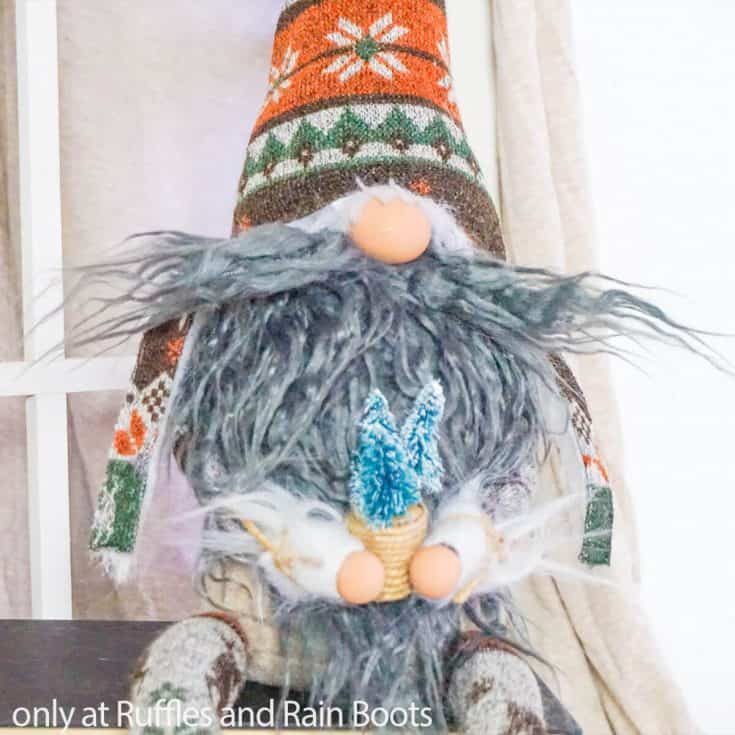
- And the last element you’d need to recreate this gnome is the specialty hat. It’s more than just the standard hat that’s included in the gnome pattern linked above – although you can certainly use the hat in that pattern, of course. This particular hat has a twisty tip and a couple of dangly bits on either side of the face. Super cute. You can get the woodsman hat pattern here.
- For this gnome, there’s a lot of faux-fur cutting. Check out this quick and simple video of how to cut faux fur, so you know exactly how to do it without getting those chunky, non-natural edges.
- I used a fun knitted fabric for this gnome that I found online. But, I can’t the same fabric available anywhere :( But any knitted, stretchy sweater-type fabric would work. Even a repurposed sweater would work.

Get the Gnome Pattern Here
Click to add the pattern to your cart and be sure to grab the free hat pattern, too!

How Do I Make this Woodsman Shelf-Sitter Gnome Pattern?
I’m so glad you asked. Below is our written tutorial. If you are making a playlist of gnome tutorials, be sure to add our video tutorial for this Woodsman Shelf-Sitter Gnome Pattern here.
Woodsman Shelf-Sitter Gnome Pattern
You are going to love this woodsman shelf-sitter gnome pattern and tutorial. It's just fast and easy and absolutely precious.
Materials
- 1/4 yd Knitted Fabric
- 1/4 yd Beige Felt
- 1/8 yd Brown Felt (for boots)
- Grey Crinkle Mongolian Faux Fur
- White Mongolian Faux Fur
- Small Amount of Polymer Clay in light brown and white
- 1 cups Poly Beads
- Small Amount of Poly Fill
- 1 Sections of Floral Wire (optional)
- Twine
- Wine Cork
- 3 Mini Bottlebrush Trees
- Cozy Gnome Pattern
- Woodsman Gnome Hat Pattern
- Gnome Fur Boot Pattern
- Gnome Fur Boot Pattern with Cut File Set (optional)
Tools
- Sewing Machine (optional)
- Needle and Thread
- Razor Blade or Craft Knife
- Hot Glue Gun and Glue
- Oven
Instructions
- Make your gnome nose and hands by combining a portion of light brown and white polymer clay until you have the color you want. Roll a quarter-sized portion of this clay into a neat ball. This is the nose. Set aside. Roll two nickel-sized portions of this clay into two neat balls. These are the hands. Bake the nose and hands per the clay package's directions. Allow them to cool fully.
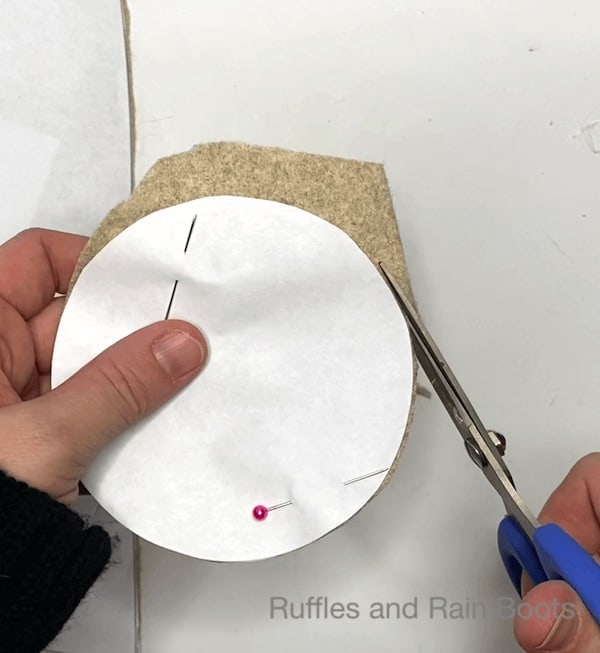
- Trace and cut out the gnome body shape, base shape, and sole shape from the beige felt; cut the arm, leg and hat shape out of the knitted fabric; cut the shoe sides from the dark brown felt; all per the patterns.

- Fold the gnome body shape in half and run a hem along the open side with your sewing machine. Be sure to leave the small portion open on the side seam, as directed in the pattern. Attach the base circle shape by hemming it in place then turn the body of the gnome right side out.
- Fill the gnome body with the Poly Fill beads. Tuck a small portion of Poly Fill into the top of the gnome body to fill out the cone shape of the head and sew the body closed.
- Fold the hat piece in half then run a hem along the seam. Turn the hat right side out. Hem the bottom edge and add white Mongolian faux fur trim, per the pattern. Insert the floral wire into the top of the hat and twist it into the desired shape.

- Cut out the beard shape from the faux fur by turning the fur over and cutting only the fabric with the craft knife. Hot glue the beard to the body.
- Hot glue the nose in place about 1-inch below the top of the beard. Cut a small rectangle of faux fur to make a mustache, brushing the faux fur to either side, then hot glue in place under the nose.

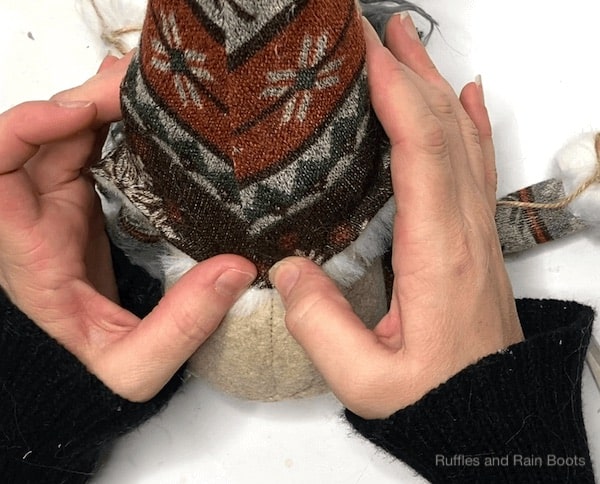
- Place the hat on top of the gnome's head, tucking it down over the top of the nose. Pull the hat low over the nose and hot glue it in place with a little wrinkle and the trim showing. Pull the hat low in the back of the gnome, opening up the face, then hot glue it in place. Do not hot glue the sides in place yet on the sides - you will want to add the arms there.

- Make the arms by folding the arm shapes in half right-side to right-side and hemming them on the long side. Turn the arms right side out. Add a small amount of Poly Fill into the arms, then hand stitch or hot glue them to the sides of the gnome, under the hat, exposing only enough length to bring the ends together in front of the gnome. Add white Mongolian fur as trim on the cuff of the sleeve, hot gluing one of the polymer clay hands onto the end. Wrap a bit of twine around each fur cuff and hot glue in place. Repeat for the other arm. Finish hot gluing the sides of the hat in place over the arms to finalize the hat.

- Cut the bases off of the three bottlebrush trees, leaving the wire hanging out of each. Press each wire from the base into the top of the wine cork. Wrap the wine cork in twine, hot gluing it in a single layer from top to bottom. Then place between the hands and hot glue in place.

- Make the legs by folding the leg shapes in half right-side to right-side and hemming them on the long side. Turn the legs right side out. Add a small amount of Poly Fill into the legs, then hand stitch or hot glue them to the bottom of the gnome, approximately in line with the arm locations on each side.

- Make the boots by following the pattern, filling the larger circle shape with Poly Fill and closing the top. Glue or hand-stitch the top of each shoe onto the bottom of each leg, then wrap the base of the leg and top of the shoe in white Mongolian faux fur. Wrap a bit of twine around each fur cuff and hot glue in place. Then get ready to display your gnome because he's done!


Notes
This gnome stands 14-15-inches (ish, depending on how twisty you make your hat, of course).
For more fun gnome patterns and tutorials, visit Ruffles and Rain Boots (we have lots...).
More Gnome Crafts You Might Like
- Farmhouse Gnome Pattern – I’ll tell you right now that this gnome is one of my very favorites – squishy, cute and fun!
- Scandinavian Kissing Gnomes – Smoochie smoochie, these magnetic gnomes are everything kissy-face! LOL!
- Pine Cone Gnome Pattern – Fun for fall or winter, this easy tiered tray gnome pattern is cute with the pinecone hat and wittle nose!
Please Save This to Pinterest
Your shares are how this site grows and I am sincerely grateful. Know a friend who’d like this? Please share it on Facebook or save it to your favorite holiday crafts board on Pinterest.

Meet the Creator
Hi there, I’m Sarah Nenni-Daher. I’m a crafty gal and always have at least 14 projects going at once. I am a crafter, designer, DIYer, and pattern maker. I share my creations here and in the Ruffles and Rain Boots® Shop.
Here at Ruffles and Rain Boots®, you’ll find DIY gnomes, crafts, gifts, cupcakes, laser crafts, and so much more. I love sharing video tutorials over on YouTube and chatting with other crafters in my Facebook groups. We’d love to have you!