
DIY Rope Jack-O-Lanterns – Macrame Pumpkins
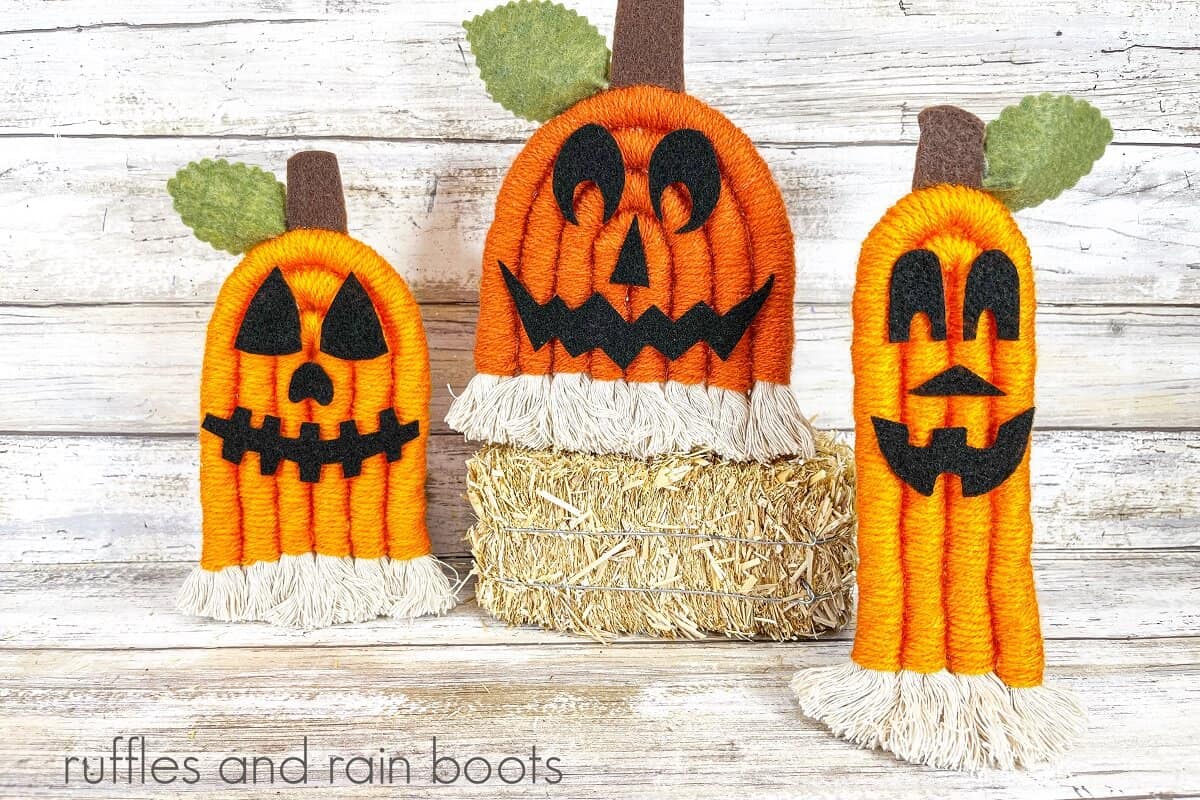
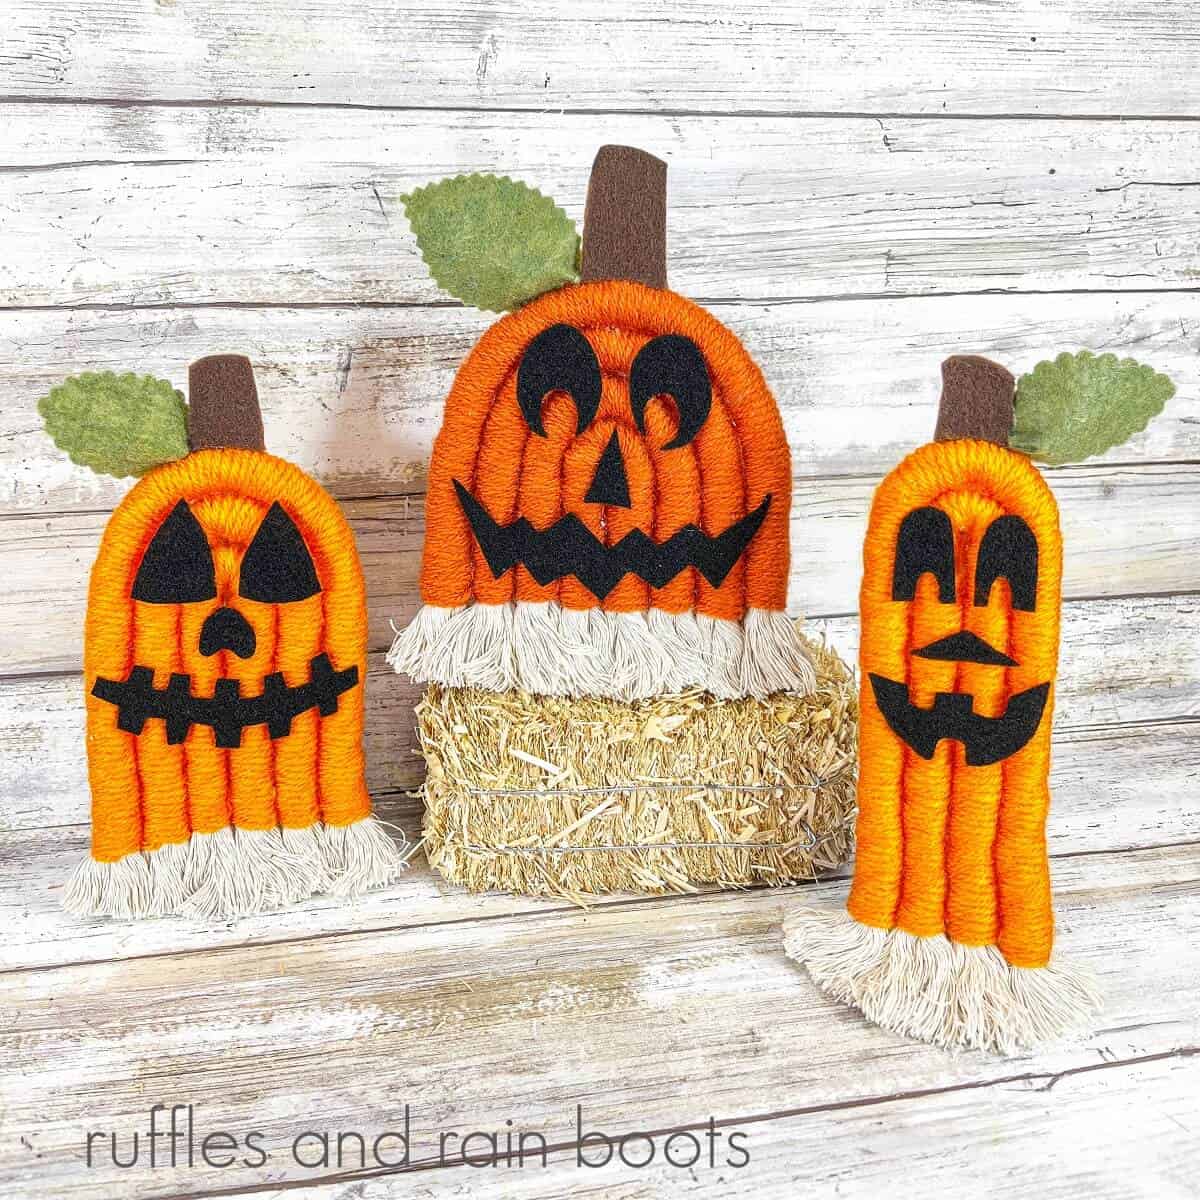
I absolutely love how these DIY rope Jack-O-Lanterns turned out. And they are so versatile: one side is a cute fall pumpkin craft. Turn them over and you have a playful jack-o-lantern on the other side for Halloween!
Once the rope is wrapped with the yarn, the rest of this Halloween macrame craft idea comes together in a flash. All it takes is a bit of patience and less than an hour of your time.
RELATED READING: Quilled Pumpkin Jack-O-Lantern (Craft for Kids)
What You'll Find On This Page
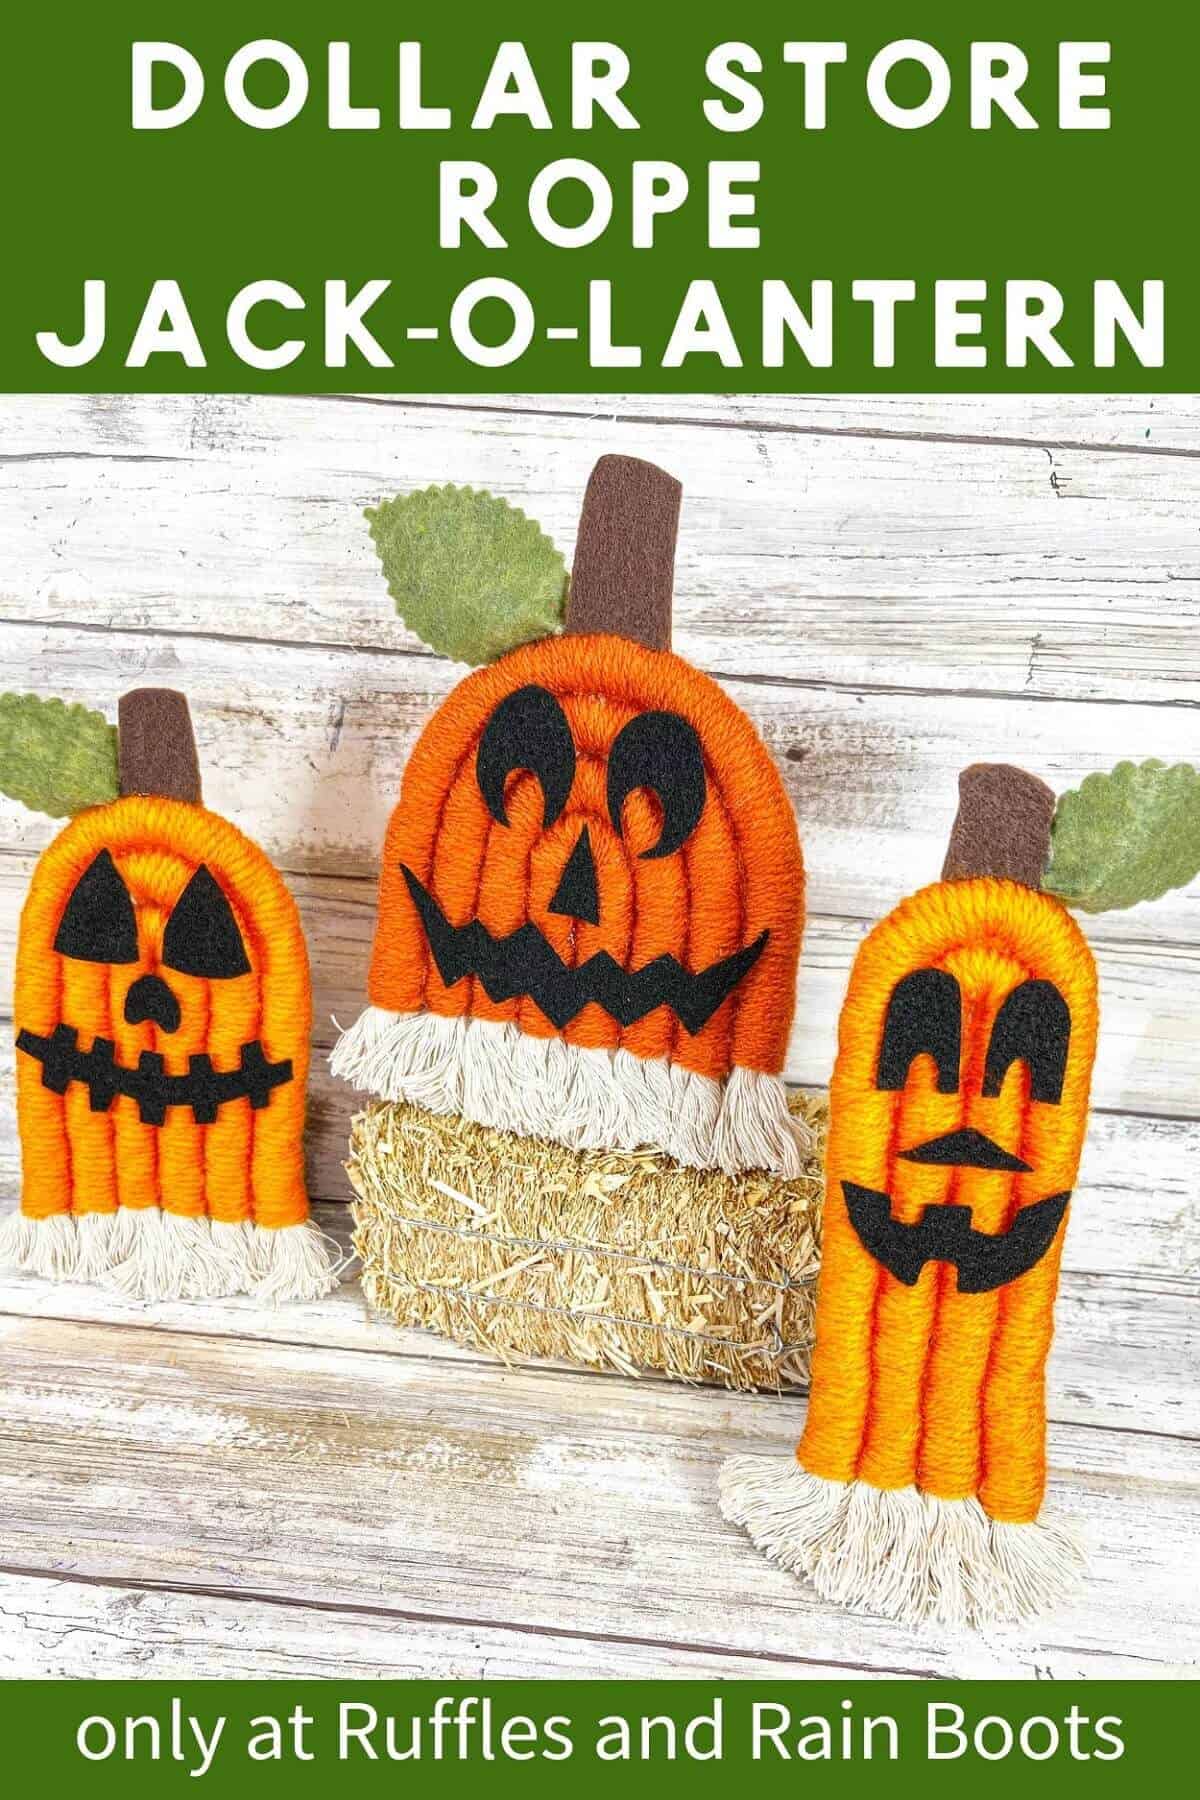
Dollar Store Rope Jack-O-Lanterns
Here at Ruffles and Rain Boots, we are slightly obsessed with Halloween. The love dressing up, decorating and of course, crafting unique projects like these DIY rope jack-o-lanterns. In my opinion, nothing beats a homemade craft to show off in my home.
The idea for these came to me when I was shopping at the Dollar Tree. I saw the cotton and tried to think of what I could make with it. Then this rope jack-o-lanterns came to me. I had the orange yarn left over in my craft bin along with virtually all of the other supplies.
If you need to gather the supplies for this Halloween-themed craft, bookmark this page to make it easy to come back to when you are ready.

As an Amazon Associate, I could earn from qualifying purchases. There may be affiliate links within this article.
RELATED READING: DIY Rope Ghost (Macrame Ghost)
These Macrame Pumpkins Are a Fun Halloween Craft
Forget about having bored kids in the house. This is a great craft to keep tweens and teens busy for about an hour. They will be so proud of their work once these cute jack-o-lanterns are completed!
We can all appreciate an inexpensive craft. You can make three of these for about $2. Depending on how much rope you have, you can make even more and cut the cost dramatically.
These are great to share them with friends and family. If you have a booth at a fall craft fair, add a few of these into the mix and see if they sell in your area.
RELATED READING: Dollar Tree Crystal Ball Vase (SO Spooky and Fun)
More Dollar Tree Rope Crafts
I know you’re eager to jump into this adorable bunny basket DIY, but check out these other rope crafts I’ve shared. From Disney to down-right adorable, make use of that inexpensive rope.
- Mickey Mouse Basket – Use either jute or cotton rope to create this adorable DIY.
- Beehives or Bee Skeps – No matter what you call them, this Dollar Tree craft idea is perfect for Spring decor.
- DIY Wrapped Rope Pumpkins – This beginner macrame craft couldn’t be more simple (and fun)!
- Cute Macrame Rope Ghost – The popular Halloween DIY is made even easier with a bit of Dollar Tree rope and cardboard.
Tips for Making Rope Jack-O-Lanterns
- If you aren’t able to find any cotton rope at the dollar store, you can head to the craft store – go near the jewelry section and look for macrame rope (cotton rope).
- Yarn can slide on the synthetic rope while you are wrapping it. To prevent this, keep a strong hold on the yarn and you will be fine!
- Use whatever yarn you have on hand for this project. You can use cotton, wool, acrylic, or other type of yarn. They will all work perfectly.
- Not everyone may have painter’s tape to wrap around the lengths of the rope. Instead, you can use masking or artist’s tape. Just know the masking tape is a bit stickier than the other two.
- This Halloween macrame idea can be done while watching television or listening to an audio book.
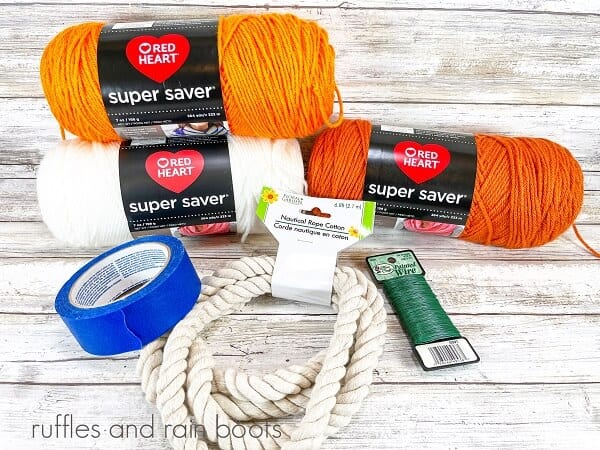
Supplies for the DIY Macrame Jack-O-Lanterns
Below are the supplies I used to make my DIY rope jack-o-lanterns. Before you head to the Dollar Store to get what you need, check your stash to see what you have on hand. For information on working with a different kind of rope other than cotton, read the tips above.
- Bright and Dark Orange Craft Yarn
- Thick Cotton Rope (rope or macrame cord)
- Permanent Marker
- Olive Green, Black, and Brown Craft Felt Sheets
- Bright Green Acrylic Paint and Paintbrush
- Painter’s Tape
- Glue Gun and Glue Sticks
- Pencil with New Eraser
- Ruler and Scissors
- Pinking Shears (optional)
- Straight Pins
- Comb or Brush
- Rope Jack-O-Lanterns Patterns
How to Make DIY Wrapped Rope Jack-O-Lanterns
Each step for this Halloween craft is detailed below to make it easy to follow. Keep this page open while you are creating a DIY rope jack-o-lantern. If you would rather have a printable how-to, scroll down and select the print button.

Measure the lengths of each of the pumpkins as follows: For the tall pumpkin, you need one 10″ and one 12″. Small Pumpkins are one 8″, one 9.5″, and one 11″. The wide pumpkin is one 6″, one 7.5″, one 9″, and one 11″.
Take the painter’s tape and tape in the middle where you will cut the rope. This will prevent fraying on each of the ends.
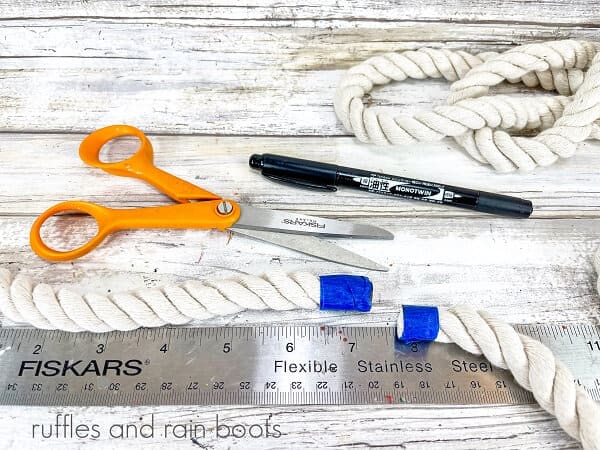
Cut each length of rope.
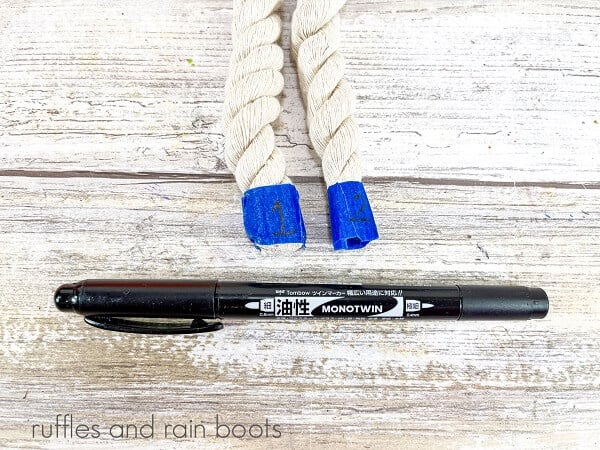
Keep track of all the lengths of the rope by numbering them with a permanent marker.

Starting with the wide pumpkin, line up the rope sections from smallest to largest on your work surface/table.

Place a small line of hot glue on the end of the smallest rope and place the end of the yarn into the glue. Allow it to cool. Begin wrapping the rope tightly with the dark orange yarn.
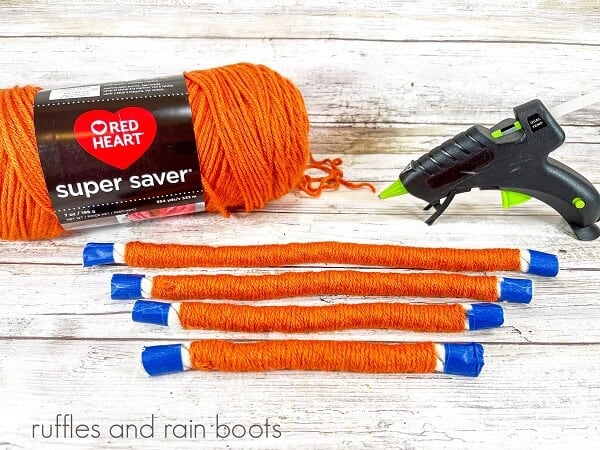
Continue to wrap each length of cotton rope with the dark orange yarn. Wrap the yarn tightly and keep the rows close together so you do not see any of the rope. At the end of each rope, cut the yarn, and secure it with a small dot of hot glue.

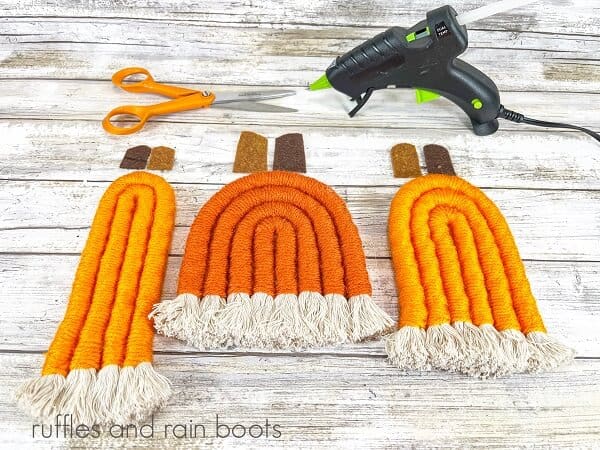
Beginning with the smallest length, fold it in half, and apply a thin line of hot glue to the center of the yarn-covered rope. Hold it together until the glue cools. With the remaining lengths, glue around the rope, making an arch until the pumpkin is complete.

Carefully remove the tape from the ends of the cotton rope with scissors.

Gently comb or brush out the ends of the cotton rope to create fringe.

Trim the fringe evenly with scissors. Repeat the above steps to create the tall pumpkin and the small pumpkin.
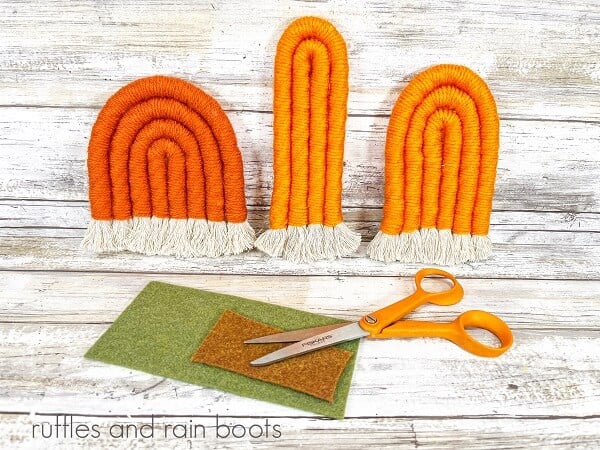
Once all three pumpkins are complete, create the stems and leaves. Download, print, and cut out the stem and leaf patterns. Trace three leaves on the olive green felt, and six stems on the brown felt.
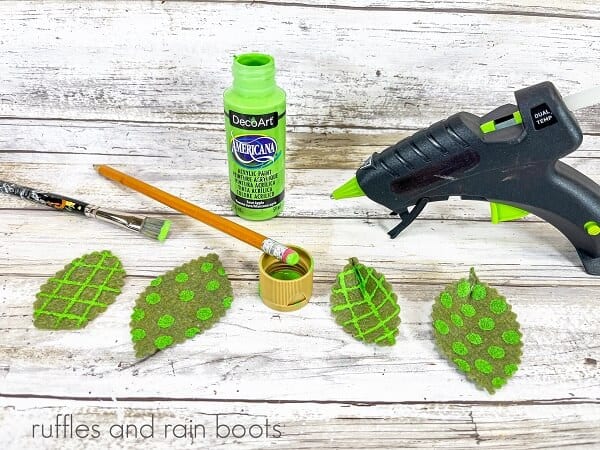
Using green acrylic craft paint and a new pencil eraser, create polka dots on a few of the leaves. Next, make a plaid pattern on the other leaves with a flat paintbrush.
Glue the brown felt stems together.
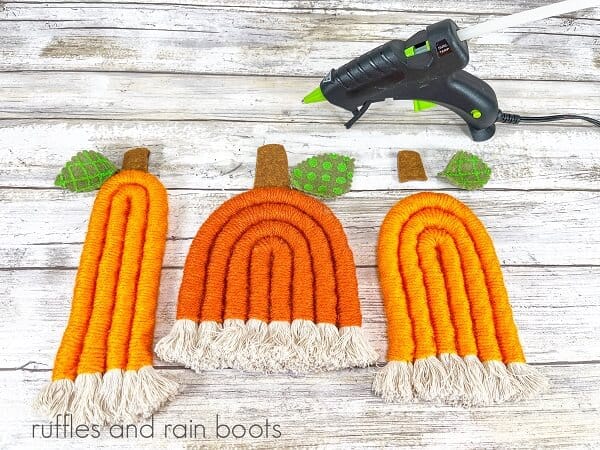
Attach the stems and leaves to the pumpkins using the glue gun. Now you have three completed pumpkins with decorated leaves.
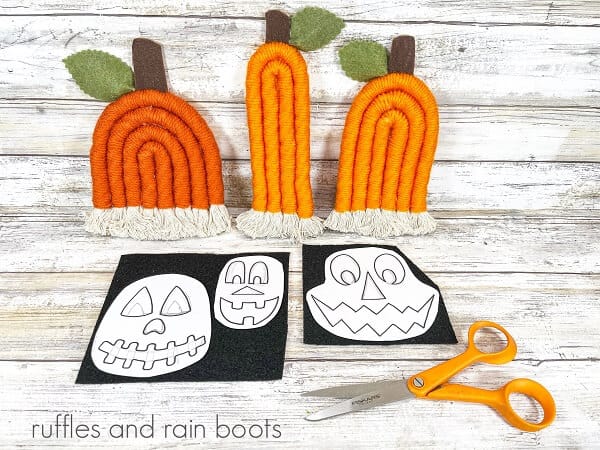
Download and print the jack-o-lantern face patterns. Roughly cut out the template with scissors and attach them to black felt with straight pins. Cut out the facial features with scissors.

Turn the pumpkins over and attach the felt jack-o-lantern facial features to the back of the pumpkins with a glue gun. Now you have a jack-o-lantern on the back of the pumpkins.
Notes for Making a Dollar Tree Macrame Jack-O-Lantern
- We strongly recommend using a wide-tooth comb or dog brush for this project. If you use a standard comb, it may pull on the rope and cause it to break or pull.
- When using a synthetic yarn or rope, we recommend placing the smallest drop of glue periodically on the rope as you wrap it. This will help keep the yarn from shifting while you are wrapping it around the rope.
- Keep a pair of fine-point scissors on hand when cutting out the jack-o-lantern’s face. They will be great for those points and semi-circles.
More Halloween Crafts You May Enjoy:
- DIY Halloween Gnomes: Learn to make several gnomes for Halloween. We have a witch gnome, a mummy gnome, a ghost gnome, and more! Each gnome comes with a video tutorial to make them easy for you to create.
- Fun Spider Mason Jar Craft: This cute little guy is a craft virtually kids of all ages can make. You just need a jar, paint, glue, and some googly eyes. He is full of silly spookiness you will love.
- Geode Skull Halloween Craft: Our gorgeous craft only takes a few minutes to make, but boy does it have the “wow factor”. We loved making this Halloween craft.
- Dollar Tree Pumpkin Crafts – Use these fun finds at the dollar store to transform basic materials into amazing Halloween and Fall crafts.
Please Save or Share This Fun Beginner Macrame Craft Idea
Your shares are how this site grows and I sincerely appreciate it. Please save this craft to your favorite fall or Halloween craft pin board or share it on Facebook.

DIY Rope Jack-O-Lantern

With a few simple supplies from the Dollar Store, create a trio of cute as-can-be DIY rope jack-o-lanterns. All you need is some rope, yarn, painter's tape, scissors, and a few other materials and you can create these adorable jack-o-lanterns. You can place them on your mantle, or tabletop, or gift them to a friend or family member. Make three of these jack-o-lanterns in under an hour. This is a great craft project for tweens and teens.
Materials
- Bright and Dark Orange Craft Yarn
- Thick Cotton Rope
- Olive Green, Black, and Brown Craft Felt Sheets
- Bright Green Acrylic Paint
- Jack-O-Lantern Face Patterns
Tools
- Pencil with New Eraser
- Marker
- Ruler
- Paintbrush
- Scissors
- Pinking Shears
- Wide-tooth Comb or Brush
- Painter's Tape
- Glue Gun and Glue Sticks
Instructions
- You will measure the lengths for the tall pumpkin, one 10″ and one 12″. Small Pumpkins are one 8″, one 9.5″, and one 11″. The wide pumpkin is one 6″, one 7.5″, one 9″, and one 11″. Take the painter’s tape and tape in the middle where you will cut the rope. This will prevent fraying on each of the ends.
- Cut each length of rope.
- If you need to keep track of all the lengths of rope, number them with the permanent marker.
- Starting with the wide pumpkin, line up the rope sections from smallest to largest on your work surface/table.
- Place a small line of hot glue on the end of the smallest rope and place the end of the yarn into the glue. Allow it to cool. Begin wrapping the rope tightly with the dark orange yarn.
- Continue to wrap each length of cotton rope with the dark orange yarn. Wrap the yarn tight and keep the rows close together so you do not see any of the rope. At the end of each rope, cut the yarn, and secure it with a small dot of hot glue.
- Starting with the smallest length, fold it in half and apply a thin line of hot glue to the center of the yarn-covered rope. Hold it together until the glue cools. With the remaining lengths, wrap around the rope, making an arch until the pumpkin is complete.
- Carefully remove the tape from the ends of the cotton rope with scissors.
- Gently comb or brush out the ends of the cotton rope to create fringe.
- Trim the fringe evenly with scissors. Repeat the above steps to create the tall pumpkin and the small pumpkin.
- Once all three pumpkins are complete, create stems and leaves. Download, print, and cut out the stem and leaf patterns. Trace three leaves on the olive green felt, and six stems on the brown felt.
- Using green acrylic craft paint and a new pencil eraser, create polka dots on one leaf. Next, make a plaid pattern on the second and third leaves with a flat paintbrush.
- Glue the brown felt stems together.
- Attach the stems and leaves to the pumpkins using the glue gun. Now you have three completed pumpkins.
- Download and print the jack-o-lantern face patterns. Roughly cut out the template with scissors and attach them to black felt with straight pins. Cut out the facial features with scissors.
- Turn the pumpkins over and attach the felt jack-o-lantern facial features to the back of the pumpkins with a glue gun. Now you have a jack-o-lantern on the back of the pumpkins.
Meet the Creator
Hi there, I’m Sarah Nenni-Daher. I’m a crafty gal and always have at least 14 projects going at once. I am a crafter, designer, DIYer, and pattern maker. I share my creations here and in the Ruffles and Rain Boots® Shop.
Here at Ruffles and Rain Boots®, you’ll find DIY gnomes, crafts, gifts, cupcakes, laser crafts, and so much more. I love sharing video tutorials over on YouTube and chatting with other crafters in my Facebook groups. We’d love to have you!