
These No-Sew Death Star Mickey Ears are Perfect for Star Wars: Galaxy’s Edge
Make these no-sew Death Star Mickey ears and dabble in the Dark Side. With or without the bow, any Star Wars fan would LOVE to wear these at Galaxy’s Edge.

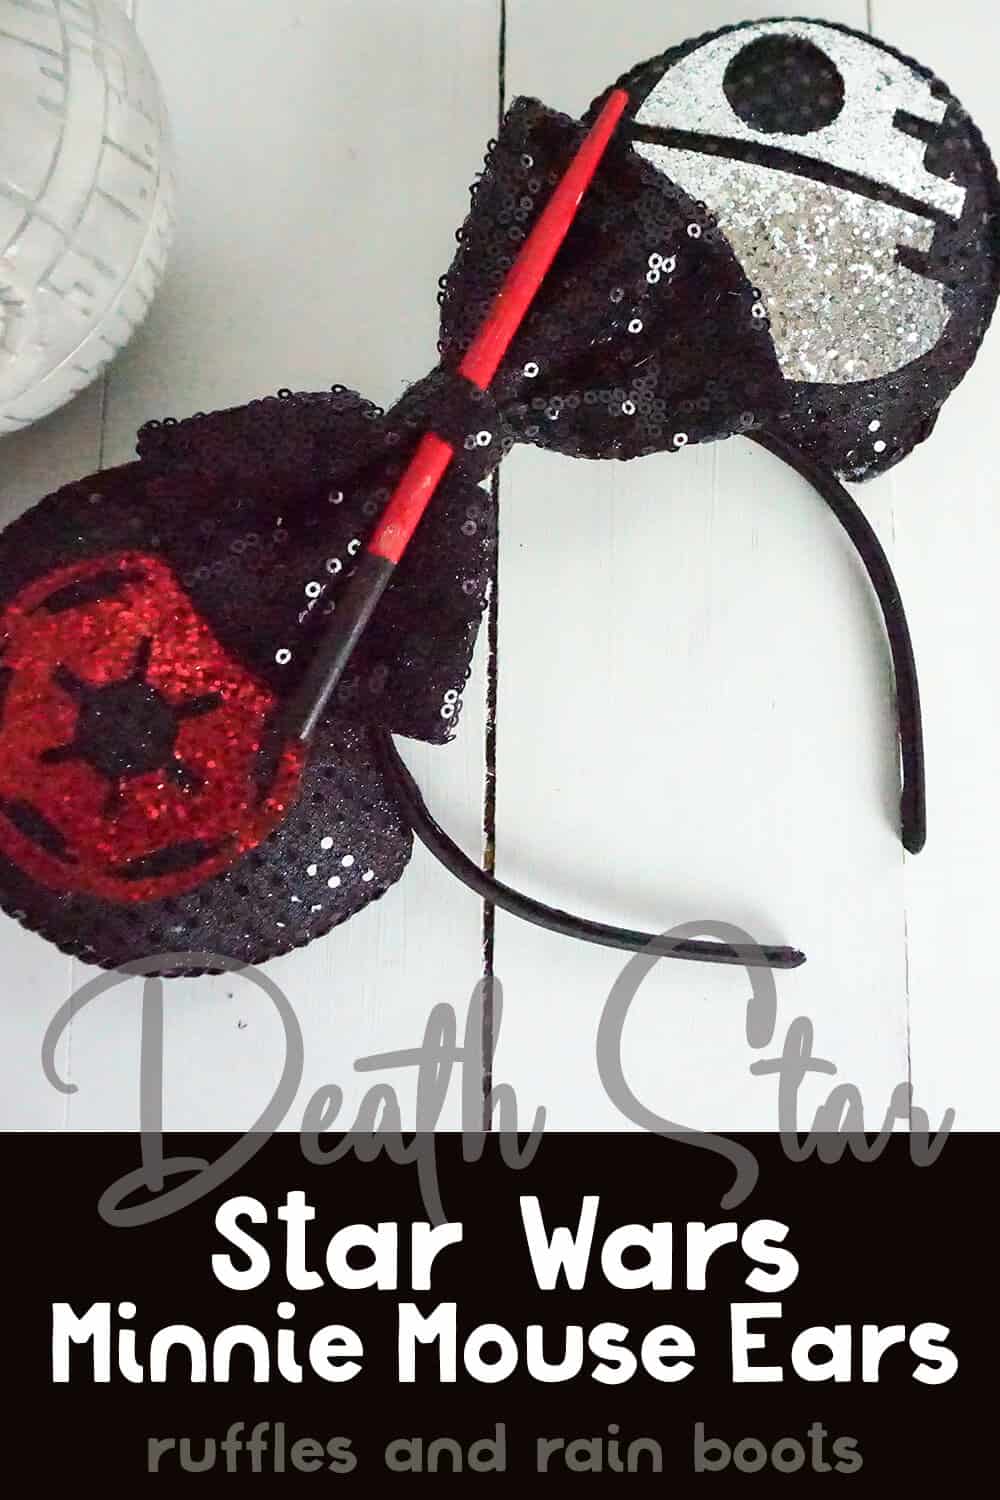
Death Star Mickey Ears
Here at Ruffles and Rain Boots, we have been busy making the most amazing DIY Star Wars Mickey ears for Disney. It’s so much fun to come up with creative ways to show of our favorite characters (especially the villains – they’re wicked fun).
And who’s the biggest baddie in Star Wars? It’s debatable, but the Death Star comes to mind. It blows up planets and ends up a weird moon for the Endor, where the Ewoks live (oh yes, we’re making Ewok Mickey ears and they are AMAZING).
For this fun Disney DIY, I made a puffy, fun Death Star Mickey ears set. Welcome to the Dark Side. Let’s get started.
No Time to Make This Now? Pin it for Later
Need supplies to make these? Pin this to your favorite Star Wars or Disney board on Pinterest and it’ll be here for when you’re ready.

Tips to Make these Star Wars Mickey Ears for Galaxy’s Edge
- Get your free printable pattern for these Death Star Mickey Ears here. Or, if you’re using a cutting machine, click here for an SVG file for the Empire emblem and click here for an SVG of the Death Star.
- You can use foam core board (not the squishy foam stuff) or cardboard as the base for your ears. You can even dish scrubbies as we did for these pretty Disney cruise ears (a great option for those torrential Disney downpours)!
- If you take your time cutting the glitter canvas, but it still frays, paint the edges. That won’t always work, but in this instance, because the Death Star Mickey ears bases are black, you can do that on the edge and “get rid” of the frayed edges visually without too much fuss. No one can tell, even up close.

How Do I Make these Death Star Mickey Ears?
I’m so glad you asked. Below is our written tutorial. If you’re making a Star Wars Mickey ears for Galaxy’s Edge playlist on YouTube, here is our Death Star Mickey ears video tutorial.
Death Star Mickey Ears

Sometimes, you feel the need to dabble in the Dark Side. When making my Star Wars Mickey ears for Galaxy's Edge, I couldn't help but make Death Star Mickey ears.
Materials
- 4 Cardboard or Foam Core Board Circles 4-inches in Diameter
- 1 Black Headband
- Black Sequin Fabric
- Black Rope Ribbon
- Red Glitter Canvas
- Silver Glitter Canvas
- Black Craft Paint
- Red Craft Paint
- 1 5-Inch Black Sequin Bow
- Small Amount of Polyfill
- wooden chopstick
Tools
- Hot Glue Gun & Glue
- Scissors
- Exacto Knife
- Paintbrush
- small piece of sand paper
Instructions
- Start by making your red lightsaber by cutting a wooden chopstick down to about 6-inches long. Sand it smooth. Paint the top ¾ red and the remaining ¼ black. Allow paint to dry fully.
- Lay headband over two of the cardboard circles and sketch where you want the ears to sit on the headband. I use a 4-inch bowl to get it right. Cut out area of ears from the cardboard which is unnecessary.
- Trace and cut out the same shape onto each of the other cardboard circles, making pairs that match exactly.
- Trace the new shape of each ear onto the back of the black sequin fabric, adding about ½ inch all the way around the outside edge of the ear in extra fabric. Cut out all 4 ear shapes from the fabric.
- Lay the cardboard ear shapes face down onto the back of the black sequin fabric. Affix the fabric to the cardboard by wrapping the extra around to the back and glueing the edge down on the upper part of the ear only, leaving the bottom of the ear open and leaving excess fabric on the front of the ear--do not pull the fabric tight. We're going to stuff it with polyfill.
- Repeat with all 4 ear shapes.

- Work a small amount of polyfill into the space between the extra fabric and the cardboard, smoothing it out. Lumpy is not the Dark Side’s style.
- Finish affixing the fabric to the cardboard cutouts by wrapping the bottom of the loose fabric around to the back and hot glueing it in place. While doing this, you may now pull the fabric taught, but tight.
- Hot glue each set of ears back-to-back (each ear gets 2 pieces). Hot glue the black ribbon rope along the edges of the black sequin ears at the seams.
- Hot glue the two ears in place on the headband, taking care to hold them firmly until the hot glue is completely cooled.
- Trace and cut out the red Galactic Empire emblem on the back of the red glitter canvas sheet. Trace and cut out the silver Death Star from the silver glitter canvas. Trim excess and frayed edges of each. Optional: Paint the edges of the galactic empire emblem (red) and the Death Star (black), otherwise they will be white. Allow paint to dry fully.
- Cut out a thin, maybe ¼-inch wide strip of black felt, long enough to wrap from one end of the ears to the other.
- Hot glue the bow in place in front of and between the ears and slide the light saber through the middle.


Notes
For more awesome Star Wars Mickey ears for Disney, visit RufflesandRainBoots.com
Creativity, Delivered
Would you like inspiration delivered right to you each week? Sign up for the once-weekly Ruffles and Rain Boots newsletter and you’ll get that and more! Get access to the exclusive libraries full of free SVGs, hand lettering practice, and so much more.
More DIY Star Wars Ears for Disney You Might Like
- Yoda Mickey Ears – Love these ears, you will, when you look at how floral and awesome they are.
- Princess Leia Buns – I like big buns, and I cannot lie. Those other princesses can’t deny that when Mickey ears walk by with big buns up top, I get squee! LOL!
- Han and Chewie Mickey Ears – It’s a mix of “I love you…” and “Raaawrrr” that any Star Wars fan would love.
- Ewok Minnie Ears – The cutest Star Wars characters in the cannon (sorry Porgs), you’ve GOT to have these cute ears, if you love the Galaxy.
Please Save This to Pinterest
Your shares are how this site grows and I am sincerely grateful. Know a friend who’d like this? Please share it on Facebook or save it to your favorite Star Wars or Disney board on Pinterest.

These are so adorable, I love them! Question! What is the 1/4 inch strip of black felt for? Thank you!!
Heather, the strips of felt are always to cover the foam core. They are 100% optional, I just don’t like to squish the felt and would rather line the foam core “channel.”
And you can use anything – we’ve used pompom trim, rick rack, bias tape – anything that matches. ;)