
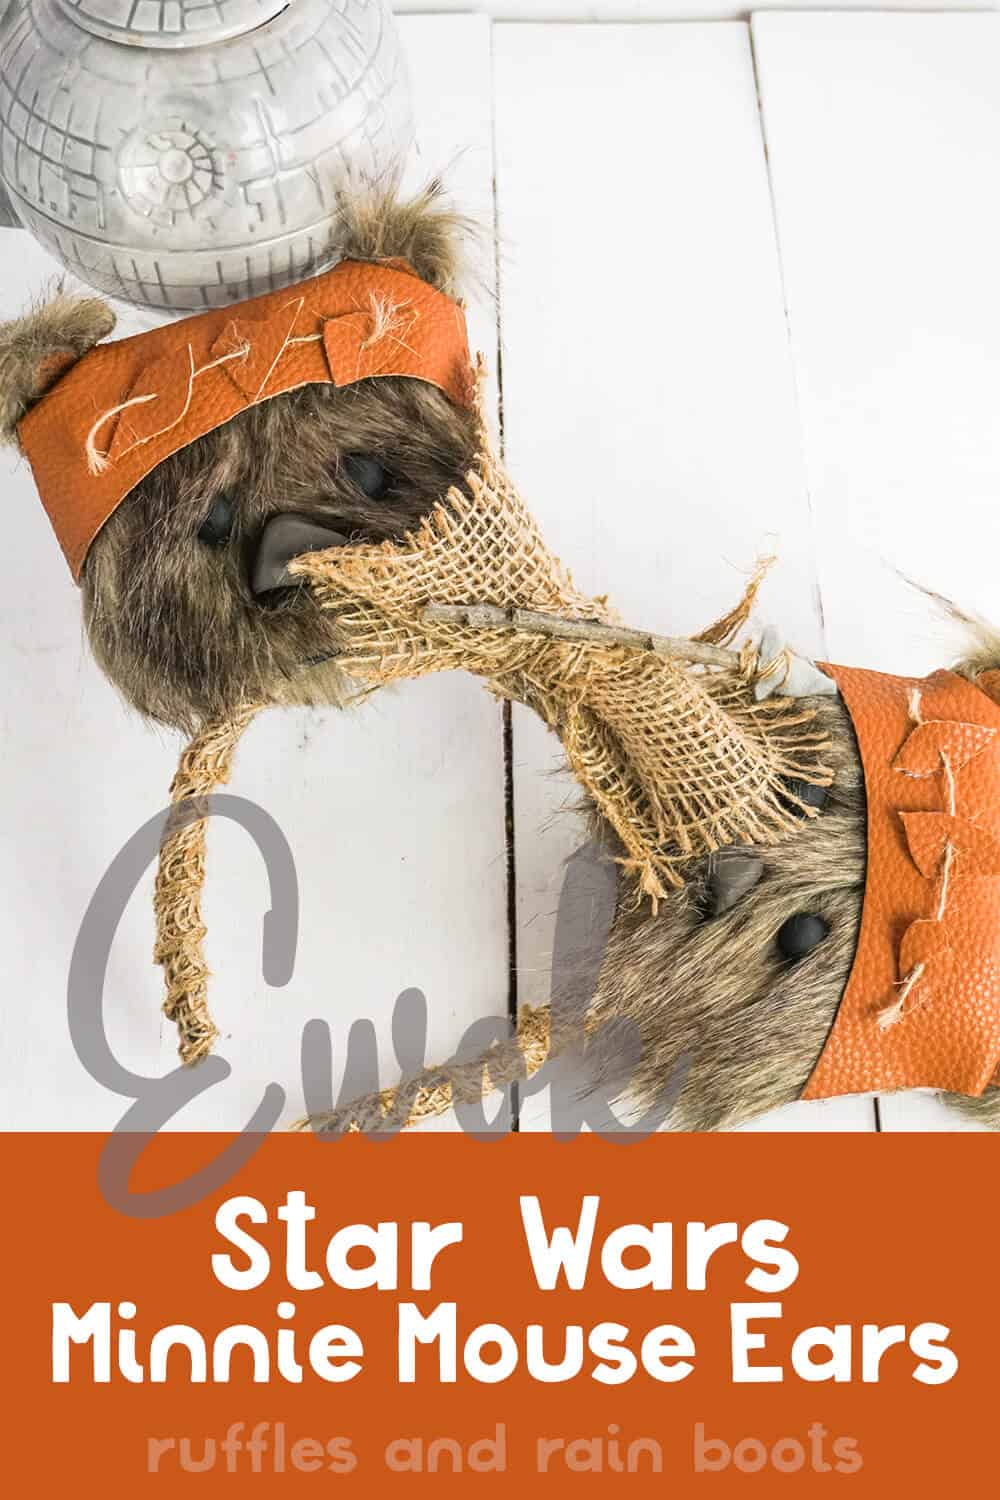
Ridiculously Cute No-Sew Ewok Minnie Ears for Star Wars Fans
Wow all nostalgic Star Wars fans when you show them these cute Ewok Minnie ears for Disney. This is one of the most fun I’ve had making DIY Mickey ears and I really hope you enjoy them, too.
What You'll Find On This Page
Ewok Minnie Ears
If you’re new to Ruffles and Rain Boots, I’m going to warn you – I really like to make Mickey and Minnie ears. Because I’m on an insane quest to make the most amazing Star Wars Mickey ears for Disney, I thought I’d reach back to my childhood.
Who was your favorite Star Wars character when you were a child? For me, HANDS DOWN, it was the Ewoks. No competition, they were in first place until Gizmo came along…
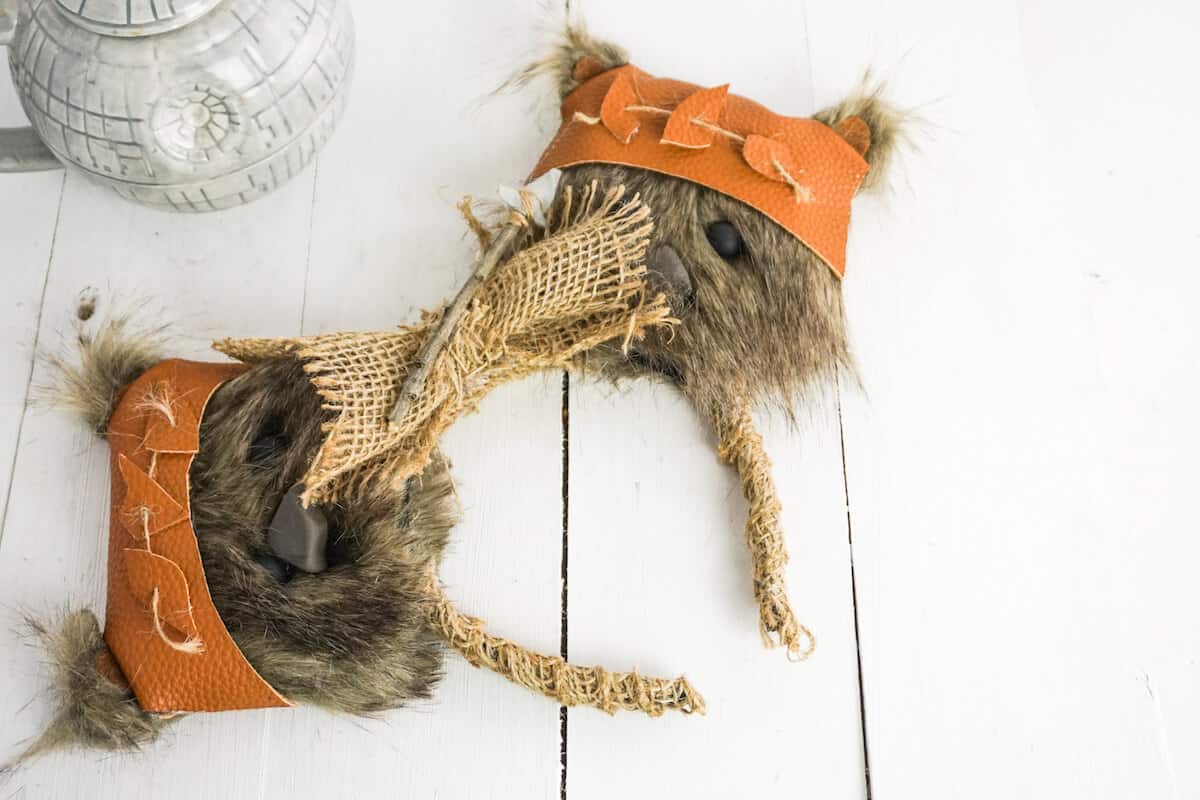
When these Ewok Minnie ears were coming together, I couldn’t help but be excited. They were turning out so much better than I could have imagined! The faux fur and leather made these ears perfect. If you’re making these for a little fella who loves Ewoks, just leave off the bow and bam – Ewok Mickey Mouse ears. :)
If you’re headed to Star Wars: Galaxy’s Edge, or looking for a fun way to surprise your kiddo with the news that you’re going, these Ewok Minnie ears are THE way to go. Let’s get started.
No Time to Make This Now? Save or Share it for Later
Do you have to grab some supplies? Save this to your favorite Disney pin board or share it to a crafty group on Facebook so you can find it when you’re ready.
As an Amazon Associate, I could earn from qualifying purchases. There could be affiliate links within this article.
Tips to Make these DIY Star Wars Mickey Ears for Disney
- Watch which way the fur lays when you cut it. You don’t want your fur to be going up when, in real life, Ewok fur, clearly, goes down. Yes, I just said, “in real life…”
- Speaking of cutting fur, if you’ve never cut craft fur before, I have an easy trick: flip it over and use an Exacto knife to only cut the fabric. By not cutting the fur, you won’t change how it falls.
- No polymer clay? No sweat. You can make eyes from wooden beads and you can cut out a nose from cardboard and paint it grey/brown. Improvise if you have to – these are too much fun not to make!
- You can use foam core board (not the squishy foam stuff) or flat, green dish scrubbies from the Dollar Tree like I did with these preppy Disney cruise ears. Cardboard works and is easy for everyone to obtain but you need to be mindful if you get caught in a rain storm (common in Florida). When you use something a bit heartier, the Mickey ears stay perfect even in one of the famous Disney downpours.
- Click here to get your free printable template for the Ewok ears. You can wing it, but it will be easier if you let the template guide you on the sizes.
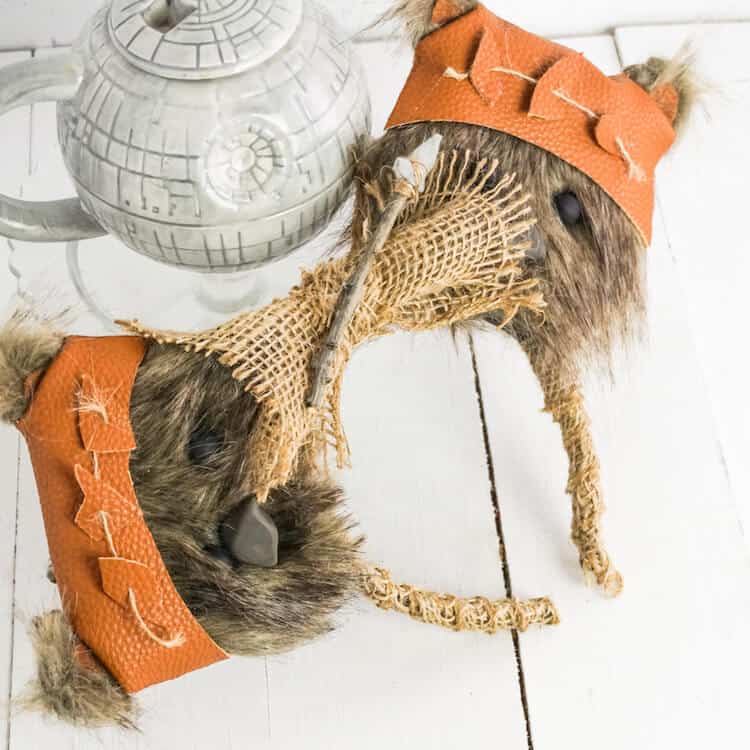
- And because I’m asked about it so much, if you want that mug in my photos (the cool Death Star one) I found one that is almost as cool. Just click here to see the awesome Death Star Mug.
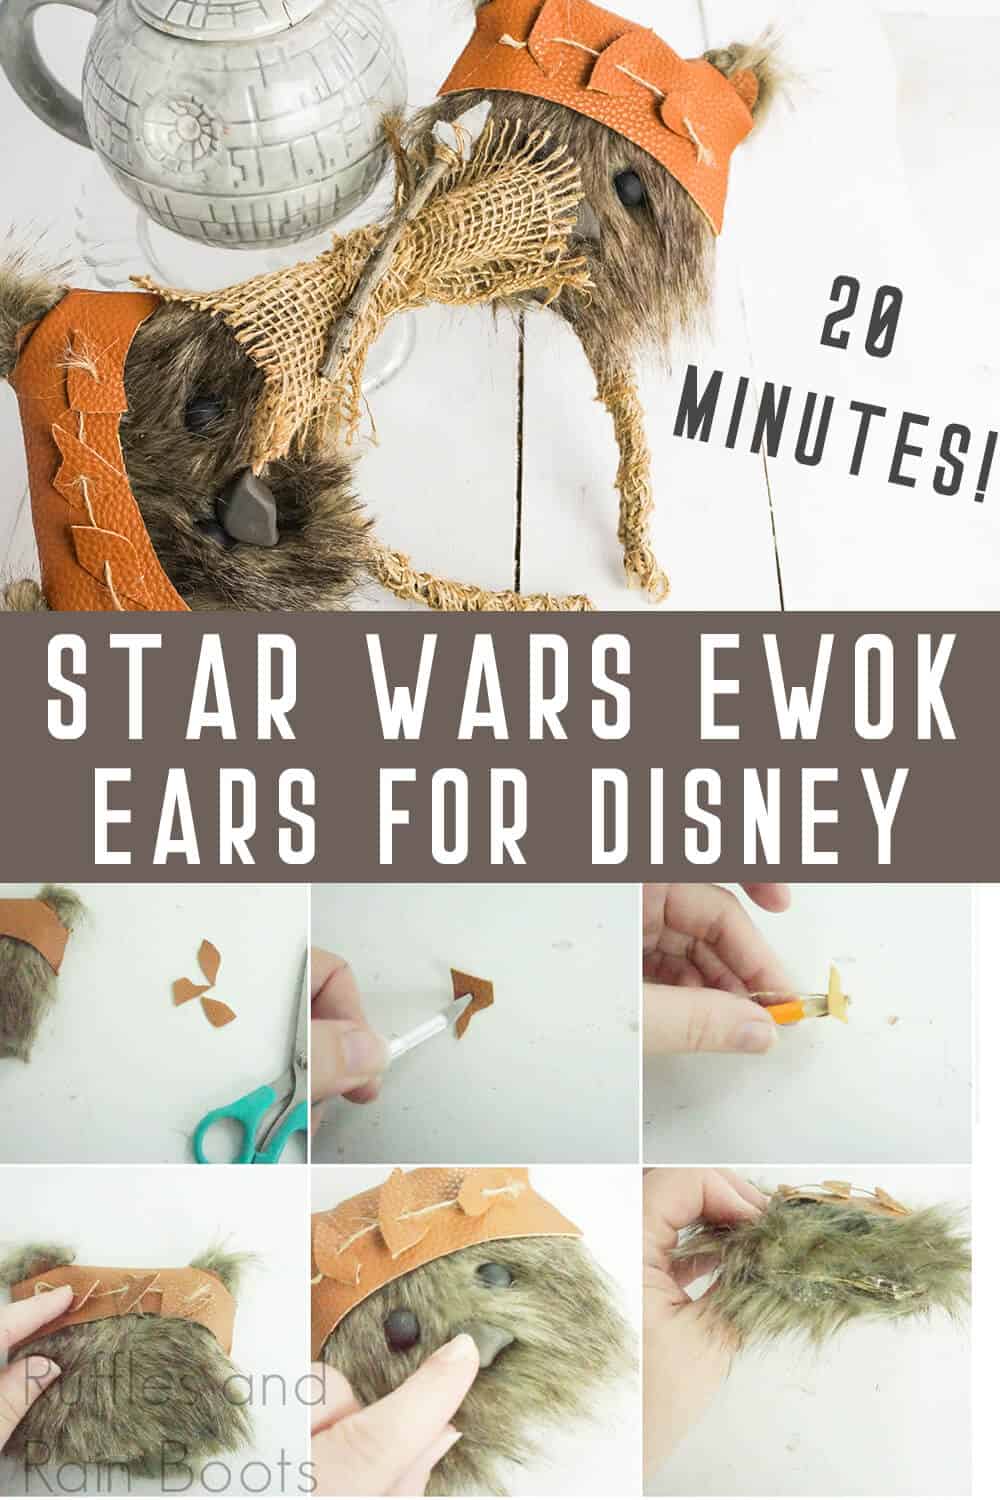
How Do I Make These Ewok Mouse Ears?
I’m so glad you asked. Below is our written tutorial. If you’re making a DIY Star Wars Mickey ears for Disney playlist on YouTube, here is our Ewok Minnie ears video tutorial.
Ewok Minnie Ears

You can wow any nostalgic Star Wars fans when you present these ridiculously cute Ewok Minnie ears for Disney.
Materials
- 2 Cardboard or Foam Core Board Circles 4-inches in Diameter
- Additional Cardboard
- 1 Black Headband
- Black, Brown Polymer Clay
- Brown Craft Fur
- Burlap Ribbon (4-inch)
- Faux Leather Canvas
- 5-inch long Stick
- 1-inch by 1-inch Grey Craft Felt
- Scraps Brown Craft Felt
- Polymer Clay Sealant, optional
- Printable Pattern (for sizing)
Tools
- Hot Glue Gun & Glue
- Scissors
- Paintbrush
- Exacto Knife
Instructions
- Roll four equal-sized portions of black clay (about ½ dime-sized) into neat balls to form eyes and set aside.
- Mix 2 quarter-sized portion of brown clay with 1 dime-sized portion of black clay until the color is consistently brown-grey.
- Split the now brown-grey clay in half.
- Roll each half portion of brown-grey clay into a ball with two gently pointed ends.
- Turn each of the pointed ends downward and pinch a little in the middle to form the nose. Flatten the back and front of the nose a little, perhaps even pinching the top of the nose a bit to give it a little more shape. Bake noses and eyes per the instructions on your clay’s packaging. Allow them to cool before touching.
- Seal eyes and noses with polymer clay sealant and set aside to dry.
- Lay headband over cardboard circles and sketch where you want the ears to sit on the headband. Cut out any area of ears that is unnecessary.
- Cut out four Ewok ear shapes from additional cardboard using the larger ear shape on the printable pattern.
- Hot glue each of the four Ewok ear shapes to their approximate location, two Ewok ears on each of the Mickey ears.
- Trace the new shape of the Mickey ears onto the back of the brown craft fur four times, taking care that the fur will lay the way you want it to when mounted to the ear.
- With an exacto knife, cut out Mickey ear shapes from the brown craft fur. Hot glue ear shapes of brown craft fur to the front and back of the cardboard cut out. Take care to glue around the edges, keeping the edge of the fur fabric from showing.
- Cut two smaller inside-of-the-Ewok-ear shapes from the printable pattern in brown craft felt.
- Brush the fur on each Ewok ear away from the center. Hot glue the inside-of-the-Ewok-ear shapes inside the center of the Ewok ears, taking care to only put hot glue in the center of the felt so that it will curve and add shape when placed on the fur. Allow the hot glue to dry completely.
- Cut two lengths of faux leather canvas sufficiently wide enough and long enough to fully cover the top half of one of the Mickey ears.
- Lay one of the Mickey ears on the backside of the faux leather cutout and mark where the Ewok ears are located. Cut a hole in the faux leather by folding it in half at the mark you just made. I widened my hole further by making additional cuts.
- Tuck the Ewok ears into the holes cut in the faux leather and mark where the edge of the Mickey ear sits on the faux leather. Mark the approximate location of the brim of the hat across the Ewok’s face. Flip the Mickey ears and mark the edge of the Mickey ears on the faux leather’s back panel and the approximate location of the back brim of the hat across the back of the Ewok’s head.
- Remove the faux leather from the Ewok head and trim along the marked lines, taking care to leave a space between the hole for the Ewok ears and the edge of the faux leather.
- Hot glue the bottom 1-inch of the edge of the front of the Ewok hat to the edge of the back of the Ewok hat on both sides. Do not go all the way up, as you will want to tuck that down into the hat to keep the hat from being a funky square.
- Tuck the hat back onto the Ewok head, pulling the Ewok ears through the slots provided. Tuck extra faux leather down inside, hot gluing in place, if desired.
- Hot glue eyes and noses onto each Ewok’s face.
- Cut six random shapes about the size of a dime from scraps of faux leather. Poke a hole in the center of each random shape and thread a piece of string (from the burlap ribbon) through 3 of the shapes. Hot glue this loosely onto the hat of each Ewok.
- Hot glue the two ears in place on the headband, taking care to hold them firmly until the hot glue is completely cooled.
- Cut two 8-inch long strips of burlap ribbon and one 4-inch strip. Hot glue one end of one of the 8-inch long strips of burlap ribbon to the inside of one side of the tip of the headband. Wrap the burlap ribbon around the headband, and hot glue periodically, up to where the Ewok ear is in the way. Hot glue this end down and trim. Repeat with the other side of the headband with the other 8-inch long strip of burlap ribbon and on the center of the headband between the two Mickey ears, with the 4-inch strip.
- Cut a piece of burlap ribbon about 6-inches long. Cut a strip of burlap ribbon about ½-inch wide and about 4-inches long.
- Gather the 6-inch long burlap ribbon in the center, then wrap the 4-inch long strip around that center location, creating a rough bow. Hot glue the strip in place in the center of the bow. Hot glue the bow onto the headband, between the two Ewoks.
- Hot glue the tiny grey felt square to one end of the stick and fold it over. Fold the back end of the felt square up, creating a kind of spear-like shape Hot glue in place. Wrap a string from the burlap ribbon around the spear-like-shape, hot gluing that in place with a tiny drop of hot glue. Hot glue this spear in place on top of the bow.
Notes
For more awesome DIY Star Wars Mickey ears for Disney, visit RufflesandRainBoots.com
Creativity, Delivered
Would you like inspiration delivered right to you each week? Sign up for the once-weekly Ruffles and Rain Boots newsletter and you’ll get that and more! Get access to the exclusive libraries full of free SVGs, hand lettering practice, and so much more.
More DIY Star Wars Minnie Ears You Might Like
- Yoda Mickey Ears – Love these ears, you will, when you look at how floral and awesome they are.
- Princess Leia Buns – I like big buns, and I cannot lie. Those other princesses can’t deny that when Mickey ears walk by with big buns up top, I get squee! LOL!
- Han and Chewie Mickey Ears – It’s a mix of “I love you…” and “Raaawrrr” that any Star Wars fan would love.
Please Save or Share This
Your shares are how this site grows and I am sincerely grateful. Know a friend who’d like this? Please save it to your favorite DIY Star Wars pin board or share it to a fun Facebook group.

The template is a 8.5 x 11 and I printed it to scale. It seems really small for ears. Am I printing it the right size? I’m confused.
Thanks for asking, Michelle. The 8.5 x 11 will produce a 4-inch round. Some printer programs will scale, so please choose fit to page or 100% for proper sizing. Again, you will know it is correct if the round base is 4 inches at the widest part.