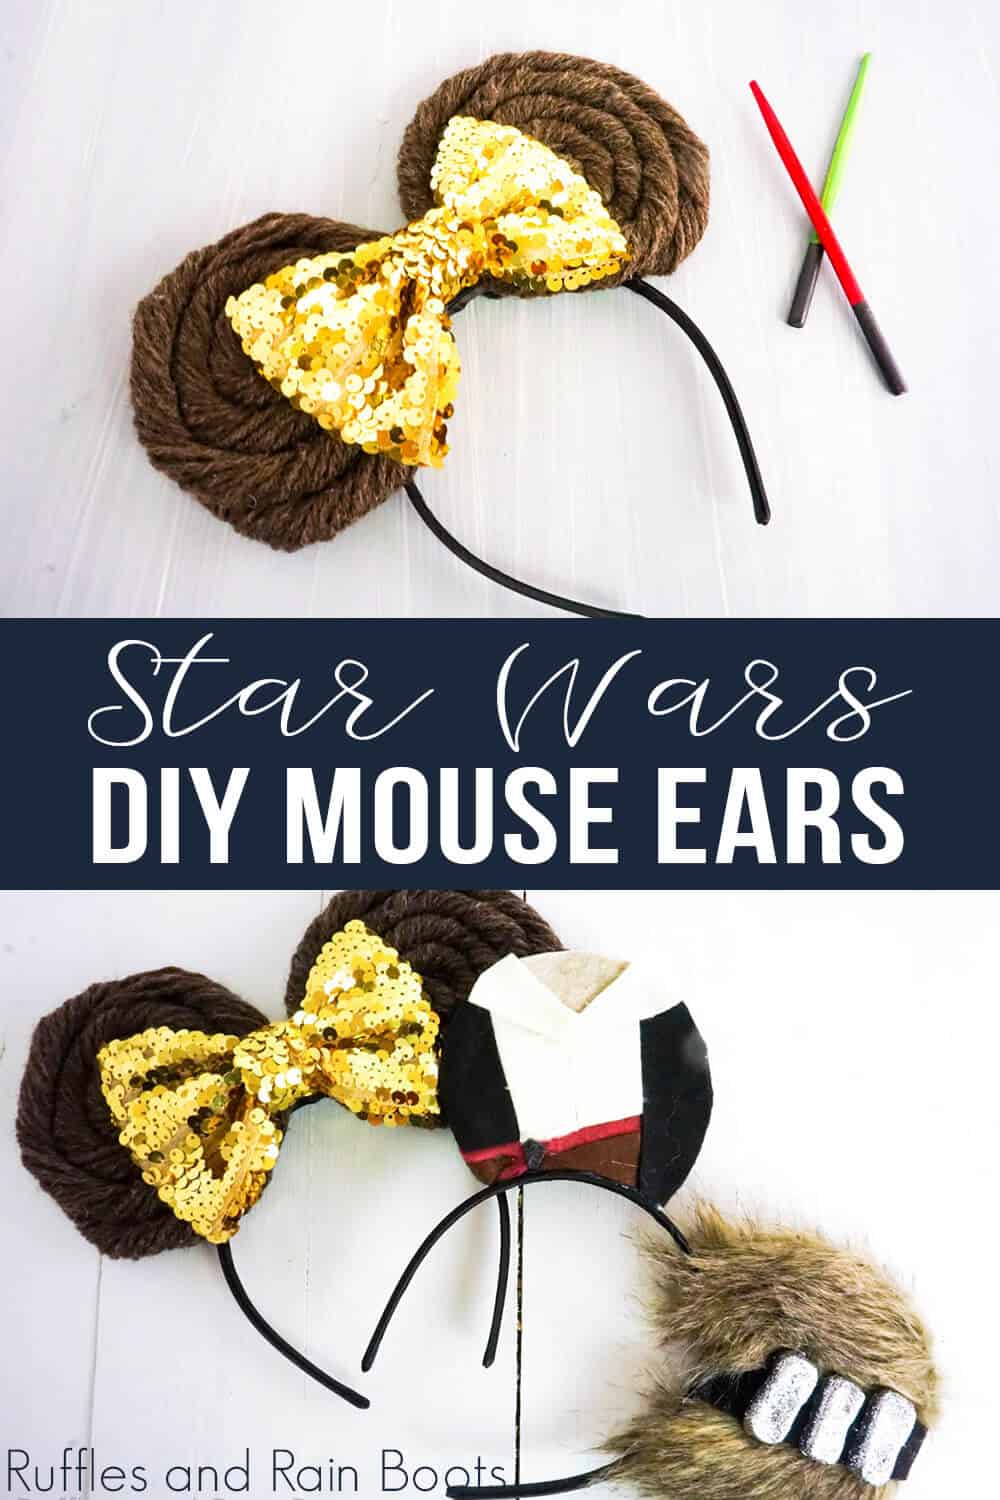
Princess Leia Minnie Ears for Disney
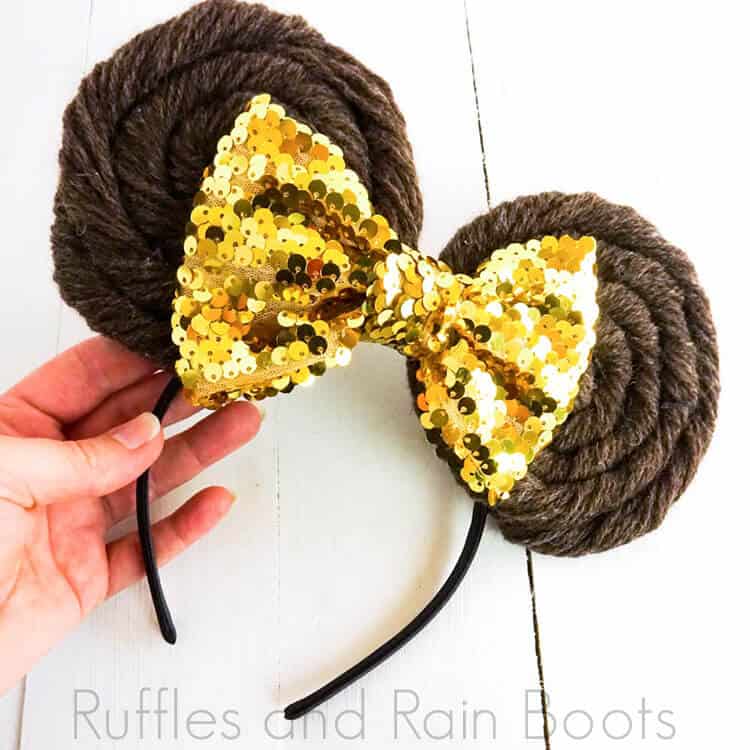
I made these Princess Leia Minnie ears in our quest to get everything perfect before we go to the parks again. I can’t tell you how excited my family is about our upcoming trip to Disney – we love Star Wars: Galaxy’s Edge.

What You'll Find On This Page
Princess Leia Minnie Ears
Here at Ruffles and Rain Boots, we love the Star Wars saga. From the live-action movies to the cartoon expansions, everyone in the house gets excited to watch. We are heading to the Walt Disney World resort again and will be spending quite a bit of time in Star Wars: Galaxy’s Edge.
For this visit, I whipped up a pair of these DIY ears for the park. I mean, she’s one of the coolest “Disney Princesses,” right? She deserved her own pair of ears in the suitcase. Let’s get started.
Save or Share for Later
Not heading to Disney yet? Pin this to your favorite Star Wars crafts pin board or share it to Facebook. It will be easy to find and here for when you’re ready.

As an Amazon Associate, I can earn from qualifying purchases. There could be affiliate links within this article.
Tips to Make Leia Mickey Mouse Ears
- If you are making this for a small child, reduce the ear size for their headband size (at least 25% smaller than normal). It will be more comfortable for little ones.
- UPDATE: after wearing these, I will be sticking to the thicker (1 inch to 1.5 inch) headbands. This was too thin for me to wear for more than a couple of hours.
- More hot glue means that your buns will be more secure but you don’t need too much that it seeps through. Start small with thorough coverage.
- Don’t worry if you see some glue at the bottom of the headband where the ears attach. It will be covered with the bow. If you have some remnants, use a razor blade to slice them away.
- No gold sequin fabric bow at your local craft store? I liked this one because it was the perfect size and fit so nicely with the Princess Leia Minnie ears.
- I usually take a couple of pairs of ears to Hollywood Studio days and these packed well because they are pretty thin.
How Do I Make This Set of Princess Leia Minnie Ears?
I’m so glad you asked. Below is our written tutorial for the Minnie ears headband. If you’re making a Star Wars crafts playlist on YouTube, here is our Princess Leia Minnie ears video tutorial.
Princess Leia Minnie Ears

I made these Princess Leia Minnie ears in our quest to get everything perfect before we go to Star Wars: Galaxy's Edge again this year.
Materials
- 2 Cardboard, Foam Core Board Circles 4-inches in Diameter
- 1 Black Headband
- Craft Felt in Charcoal or Black Color
- Brown Wool Yarn
- Large Sequin Gold Bow here on Amazon
Tools
- Hot Glue Gun & Glue
- Scissors
Instructions
- Lay headband over cardboard circles and sketch where you want the ears to sit on the headband.
- Cut out area of ears that is unnecessary. Set aside.
- Cut 15 approximately 20-foot long sections of brown wool yarn. I did this by counting out 10 lengths of the distance between my left hand and my throat (where I held the end of the yarn in my right hand). This does not have to be exact, but you need a lot of yarn, both long and many pieces of it.
- Fold the 15 20-foot long sections of brown wool yarn in half.
- Using a small length of yarn, tie a knot in the center of the folded yarn, creating an “end”.
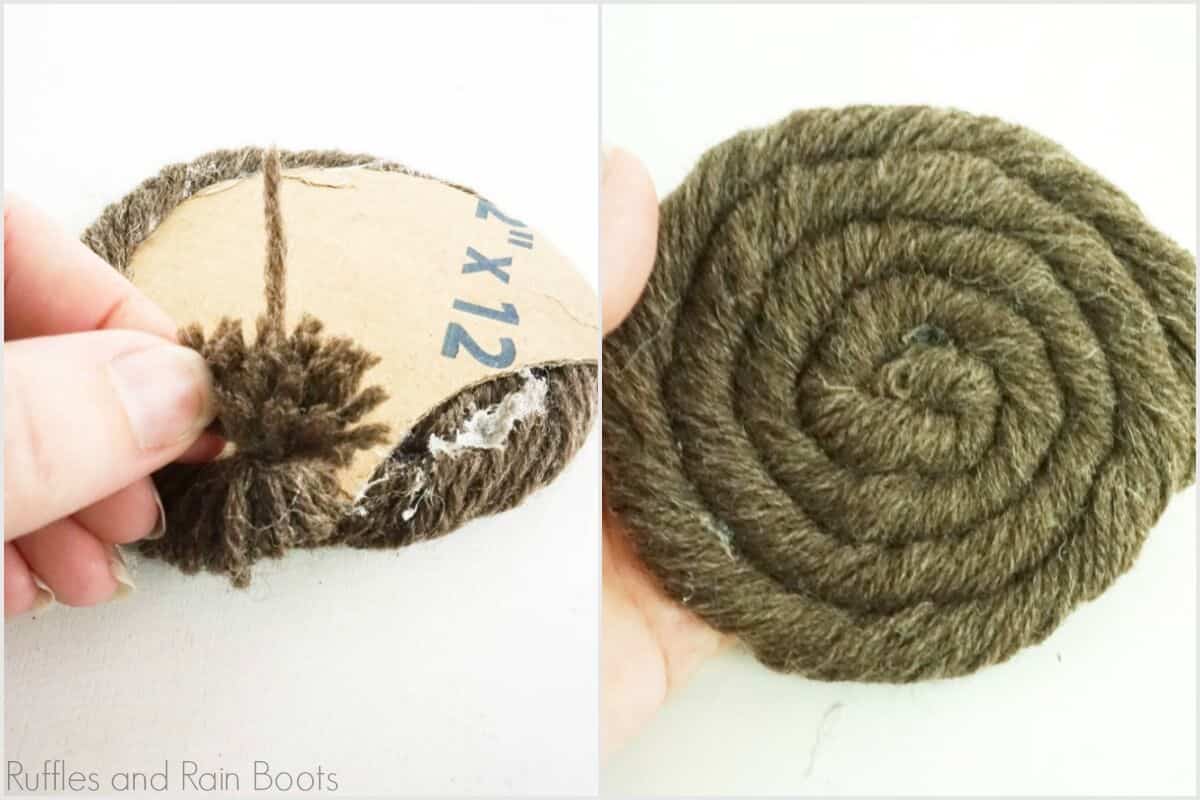
- Hot glue this “end” of the yarn to the center of a cardboard circle. Allow the hot glue to cool completely before moving on.
- Twist the yarn tightly, but loose enough that it’s still “fluffy” like hair. It should begin to curl in on itself naturally.
- As you twist, spin the cardboard, wrapping the yarn around itself, creating a bun. Also, while wrapping the yarn, hot glue it in place onto the cardboard. Hot glue as much and as often as you can manage. The more hot glue you can put down, the more secure the yarn will be.
- Wrap the yarn around and around, until the entire cardboard cutout is covered.
- End the wrapping at the bottom of the ear by tying the ends with a small piece of yarn, like you did previously, and then hot glueing this end in place on the back of the ear.
- Repeat steps 5-10 for the second ear, using the remaining yarn.
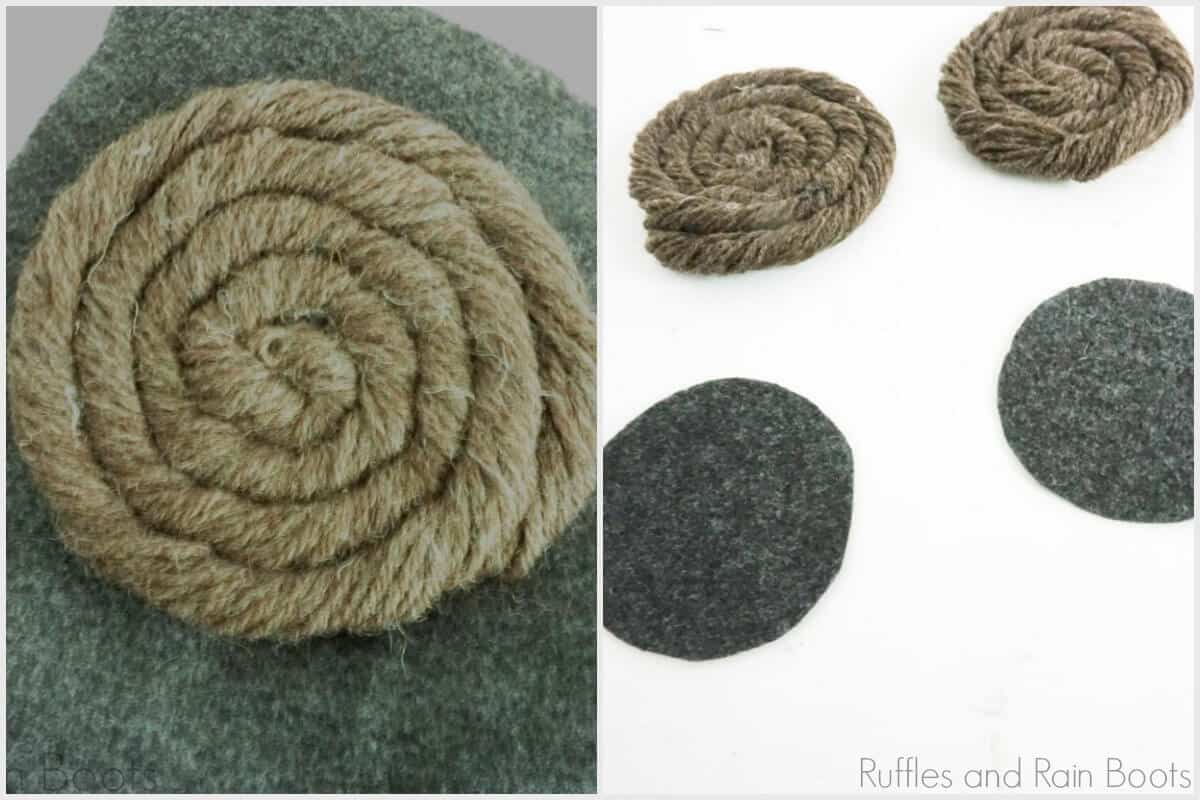
- Lay both ears on the black or charcoal craft felt.
- Trace the shape of the ears onto the craft felt, not following the edge of the cardboard, but rather the yarn, about ¼-inch inside the edge of the yarn.
- Cut out the tracing on the craft felt.
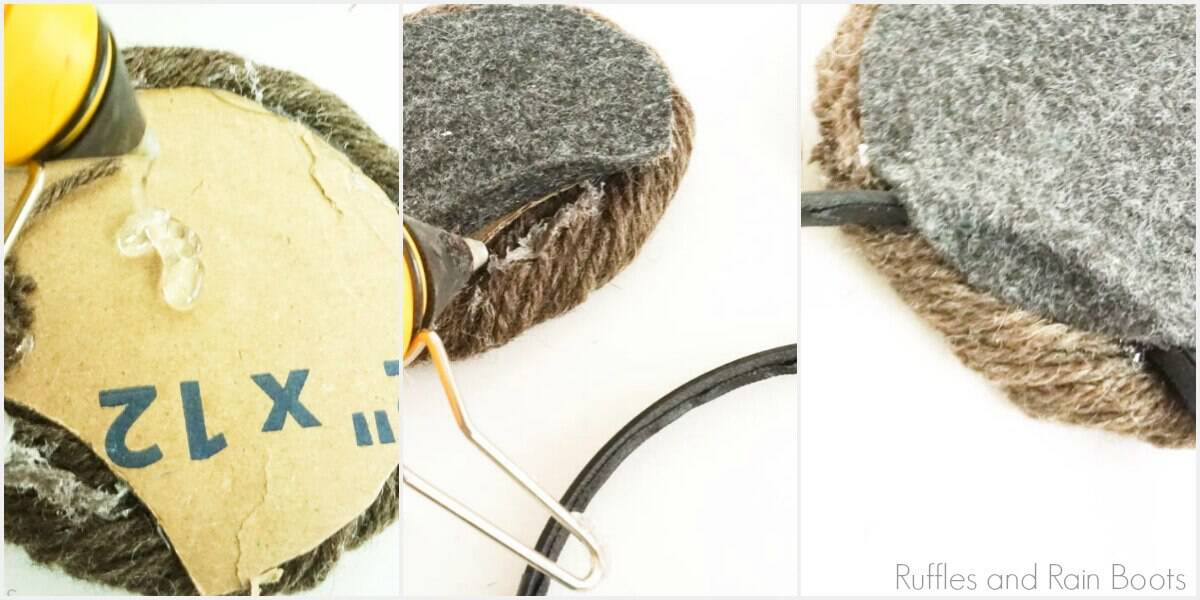
- Hot glue the cut out craft felt onto the back of each ear, taking care to hot glue the edges down, completely covering the cardboard.
- Hot glue the two ears in place on the headband, taking care to hold them firmly until the hot glue is completely cooled.
- Hot glue the large sequin gold bow in place between the two ears and pop them on your heard.
Notes
For more awesome DIY Mickey Ears, visit RufflesandRainBoots.com
Creativity, Delivered
Would you like inspiration delivered right to you each week? Sign up for the once-weekly Ruffles and Rain Boots newsletter and you’ll get that and more! Get access to the exclusive libraries full of free SVGs, hand lettering practice, and so much more.
More DIY Mickey Ears You Might Like
- Han & Chewbacca Mickey Ears – If you love this iconic pair – or someone you does – put together these manly, rugged DIY ears.
- No-Sew Snow White Minnie Ears – Try your hand at making Mickey ears with this classic style in a fun new design.
- DIY Dumbo Mickey Mouse Ears – He’s cute, he’s ready to party, and he’s got floppy ears. He’s everyone’s favorite flying elephant!
Save or Share
Your shares are how this site grows and I am sincerely grateful. Know a friend who’d like this? Please save it to a pin board or share it to your favorite Facebook group.
