
Bee Clay Pot Craft for Adorable Fun
This Dollar Tree clay pot bee craft is the “bee’s knees!” When it comes to cute and creative summer fun, it’s time to put clay pot crafts on your list, even for young children.
Clay pot craft ideas are quick to make (or do in stages), they are adorable, and everyone just loves them. You will need a few more supplies from the dollar store to make this cute craft idea.
RELATED READING: Easy Bee Book Stack Craft for Spring and Summer
What You'll Find On This Page
Clay Pot Bee Craft Idea
Here at Ruffles and Rain Boots, we’re crafting all year long. While we love spending time backyard in the pool, I find that crafting during the hot, Texas summer days are at the top of our list.
Bee crafts have been trending for years, so it’s safe to say they’ll be popular and buzzing about all summer… (oh wait, there’s more). What better way to show off your un-bee-lievable crafting skills than with this cute bee clay pot craft. Okay, I’m done with the bee puns (I think).
RELATED READING: Easy Recycled Mini Bee Gnome
Need to Get Some Clay Pots? Save or Share This Bee Craft Idea
If you are heading to the dollar store to grab a set of clay pots, save this to your favorite craft pin board or share it on a Facebook craft page. Use the sharing buttons and help make it easy to find when you’re ready to begin.

As an Amazon Associate, I can earn from qualifying purchases. There could be affiliate links within this article.
RELATED READING: Like Clay Pot Crafts? Try This Easy DIY Clay Pot Frog DIY
What paint works best to use on clay pots?
Acrylic paint is one of the best for this clay pot craft and it’s usually the one everyone has on hand. It adheres to the clay pots without a primer.
Because terra cotta soaks up paint, you may have to add a couple of coats depending on the paint. Another option is to prep the pots by using a sealant like this one from Americana (you’ve probably seen the larger bottle in videos on my YouTube channel).
Supplies You Will Need
I’ll give suggestions to some of the items below, but honestly, this can all be found at the dollar stores or craft stores. Check your stash (even buttons will work) before you head to the store.
- terra cotta / clay pots (I used 1.5 an 2.5 inch pots)
- black craft foam
- black pom poms
- craft paint (yellow, black, pink)
- googly eyes (can use black buttons)
- a black pipe cleaner / chenille stem
- small white paper doilies (can use white craft foam)

How to Make a Clay Pot Bee
Below is a step by step picture tutorial to put together this adorable summer craft idea. Keep this page open while you work and refer to the pictures as a guide. If you would rather have a simple printed supply list and steps, scroll down.
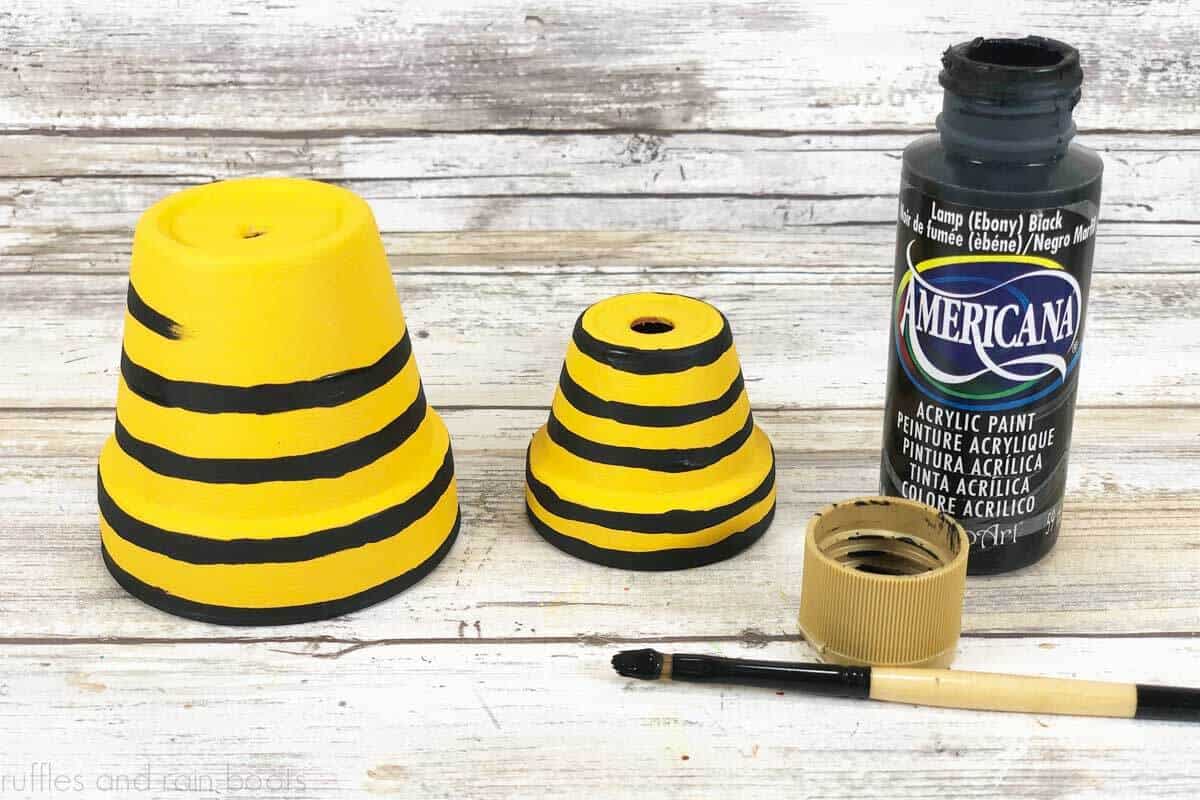
First, paint both pots with yellow acrylic paint. Let dry or hurry it along with a heat gun or blow dryer.

Next, paint stripes from the top to bottom of both clay pots with black paint. Paint the bottom of the pot, as well. Let dry and add another coat if needed.
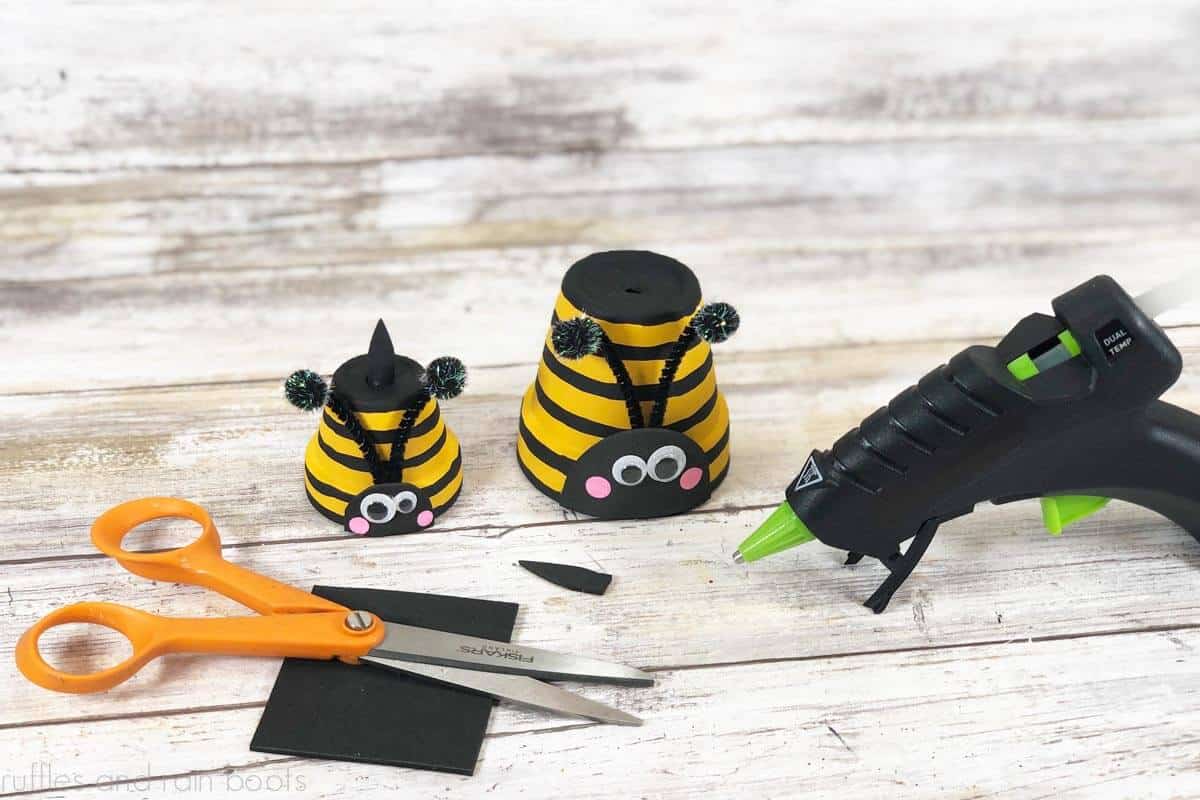
Cut a larger and smaller half circle from the black foam. Attach two eyes to each of the heads and apply with glue. Glue the faces to the bottom of the pots (line up the flat part with the table). Optional: use the pencil eraser to add cheeks in pink paint.

Next, cut a pipe cleaner in half and fold each piece in half again. Glue to the pot, tucking each antennae behind the curved portion of the face. Glue on a pompom to each end. Finally, cut a stinger from craft foam scraps and glue to the top of the pot.
More Clay Pot Crafts
- Clay Pot Mushrooms for the Garden – This is an adorable idea for your garden space!
- Clay Pot Bunny with a Glove Easter Craft – Remember this for Easter!
- Adorable No Sew Spring Clay Pot Gnome with Wide Brim Hat – The perfect no sew craft!
- Easy Terra Cotta Pot Apple Gift – This is perfect for a teacher or aide to show a bit of appreciation.
Please Save or Share This Cute Bee DIY
Your shares are how this site grows and I am sincerely grateful. Please save this to an easy DIY crafts pin board or share it with a crafty group on Facebook.

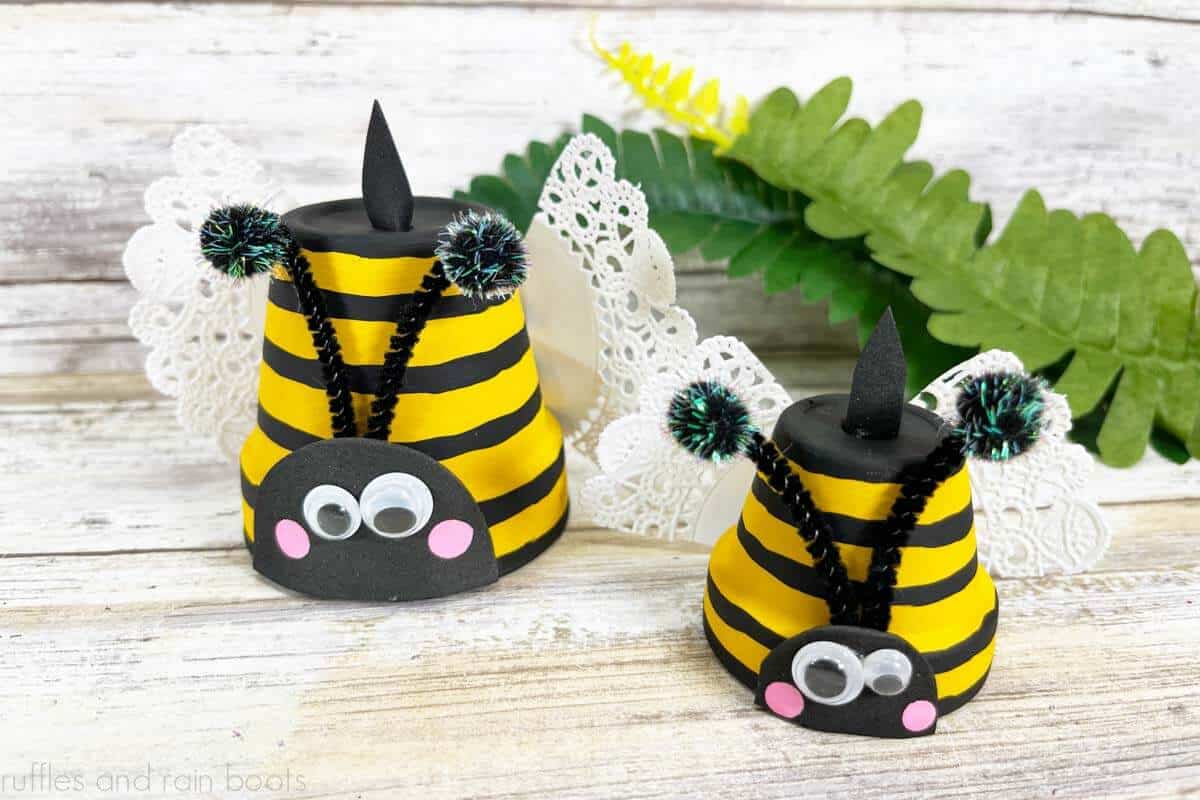
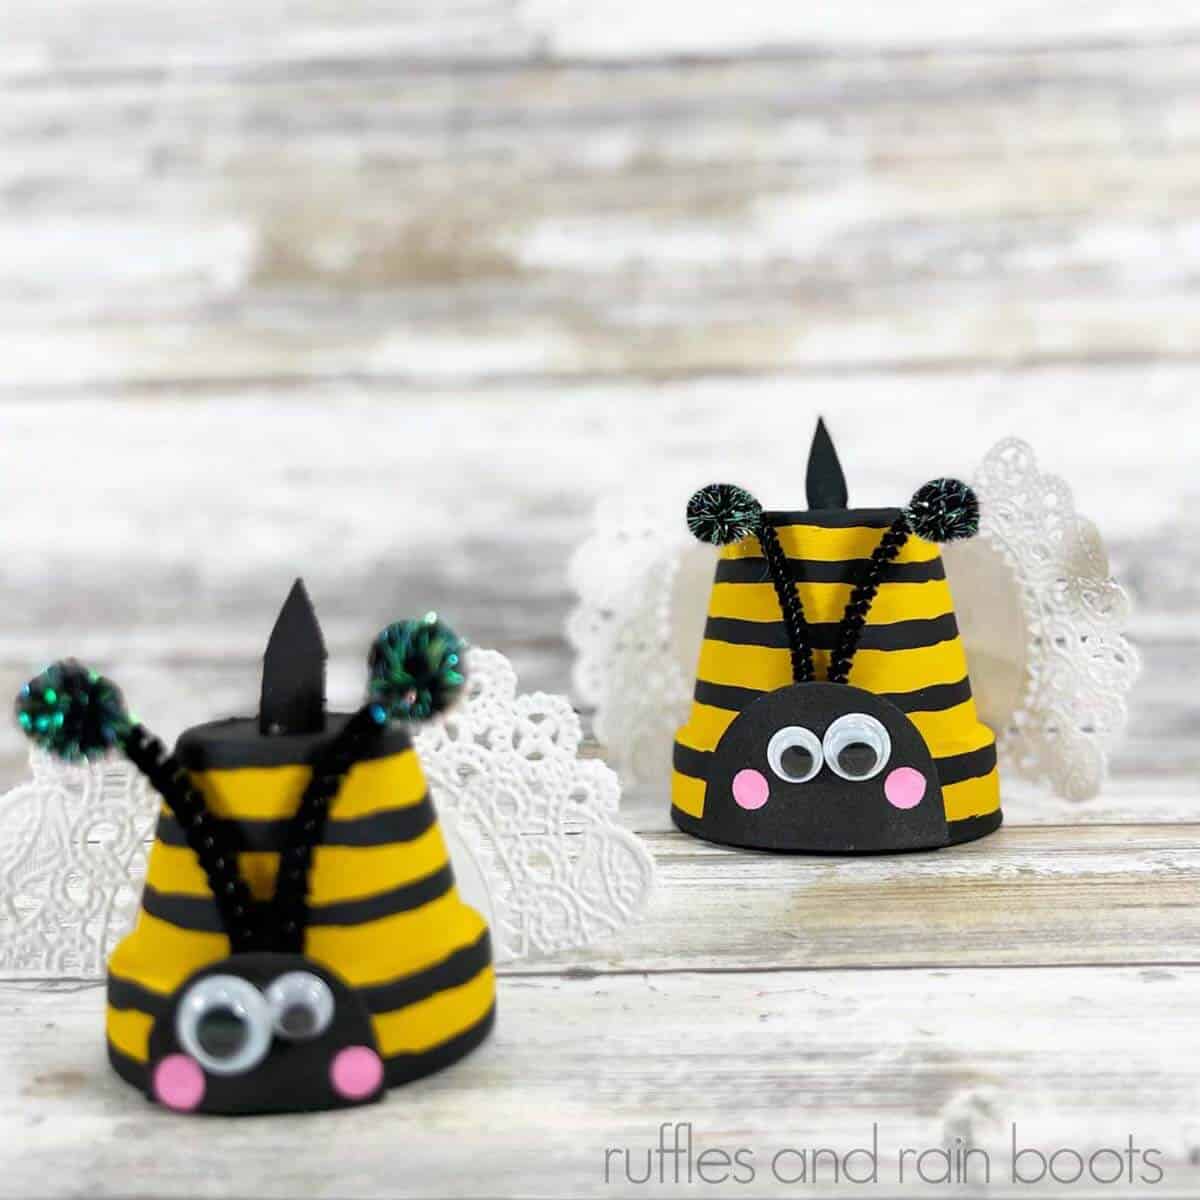
Bee Clay Pot Craft

Head to the Dollar Tree to grab a clay pot, foam, and doilies for this fun clay pot bee craft idea. Both kids and adults will have a great time putting this easy Dollar Tree DIY craft idea together using a bit of paint. We made the bee wings using paper doilies but also suggest foam (for little hands). Learn how to paint a bee, how to make a cute face, and how to craft the cute bee wing DIY.
Materials
- Clay Pots, 2.5” and 1.5” in diameter
- Yellow, Black, Pink acrylic paint
- Black Craft Foam
- Four Wiggle Eyes
- Pom Poms, Black Tinsel
- Black Chenille Stem
- Two Small White Paper Doilies
Tools
- Hot Glue Gun and Glue Sticks
- Scissors
- Paintbrush
- Pencil with New Eraser
Instructions
- Paint both pots yellow. Let it dry and apply another coat if needed.
- With the black acrylic paint, paint stripes from the top to bottom of both clay pots. Let dry and add another coat if needed.
- Cut a larger and smaller half circle from the black foam and glue on two eyes to each of the heads. Glue each face aligned to the bottom of the pot (flat edge at the bottom). Add cheeks using pink paint and an eraser end of a pencil dipped in pink paint.
- Cut a 12" chenille stem into two pieces and fold the sections in half. Put a black tinsel pom pom onto the ends that are cut and attach with glue.
- Glue the folded end to the back of the heads on both.
- Cut two skinny triangles from the black foam and put them into the hole in the bottom of the pot. Attach with glue.
- Cut the doilies into quarters and put two on the back of both bees using glue.
Meet the Creator
Hi there, I’m Sarah Nenni-Daher. I’m a crafty gal and always have at least 14 projects going at once. I am a crafter, designer, DIYer, and pattern maker. I share my creations here and in the Ruffles and Rain Boots® Shop.
Here at Ruffles and Rain Boots®, you’ll find DIY gnomes, crafts, gifts, cupcakes, laser crafts, and so much more. I love sharing video tutorials over on YouTube and chatting with other crafters in my Facebook groups. We’d love to have you!