
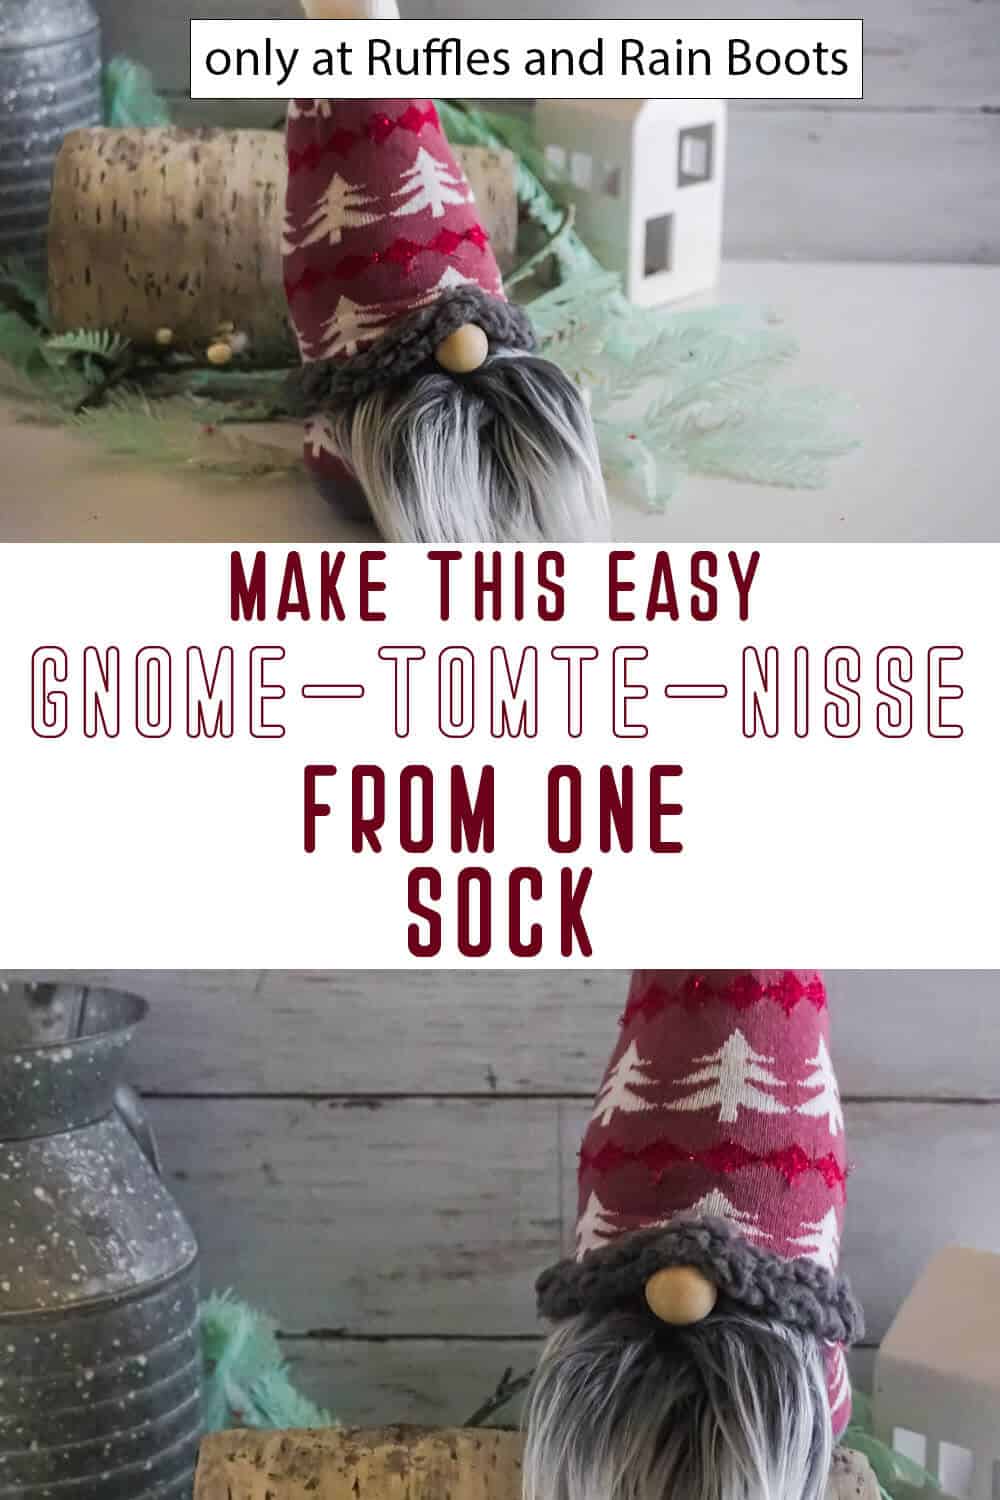
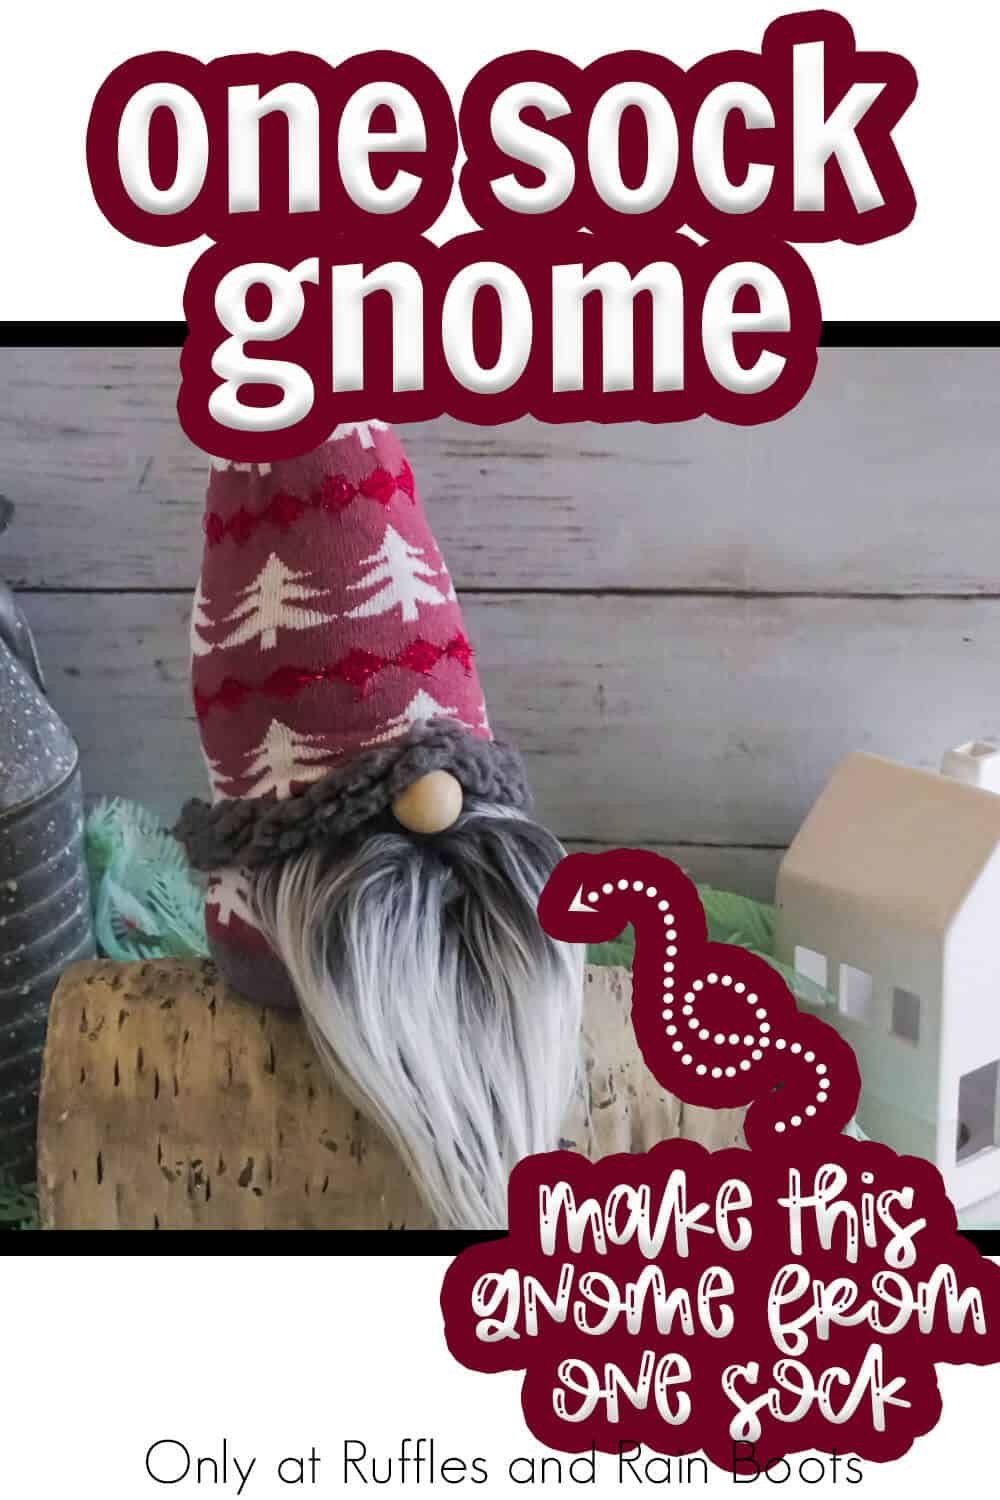
How to Make a Gnome from One Sock – One Sock Gnome
I figured out how to make a gnome from one sock and just had to share it with you. If you’re a crafter (or a mom), you end up with a solitary sock from time to time – now, let’s craft with it.
Create a Christmas gnome with a sock or a gnome for any season or occasion. Let’s get started with this easy gnome idea.

RELATED READING: How to Make a Sock Gnome in 3 Minutes (Really)!
How to Make a One Sock Gnome DIY
Here at Ruffles and Rain Boots, I sometimes get distracted. Take this instance: I set out to make a gnome with a patterned hat so that the pattern was right-side up on the hat. I whipped-up a video and tutorial, then went back to edit it and realized I had just figured out how to make a sock gnome from ONE sock!
It wasn’t the goal, it was BETTER!
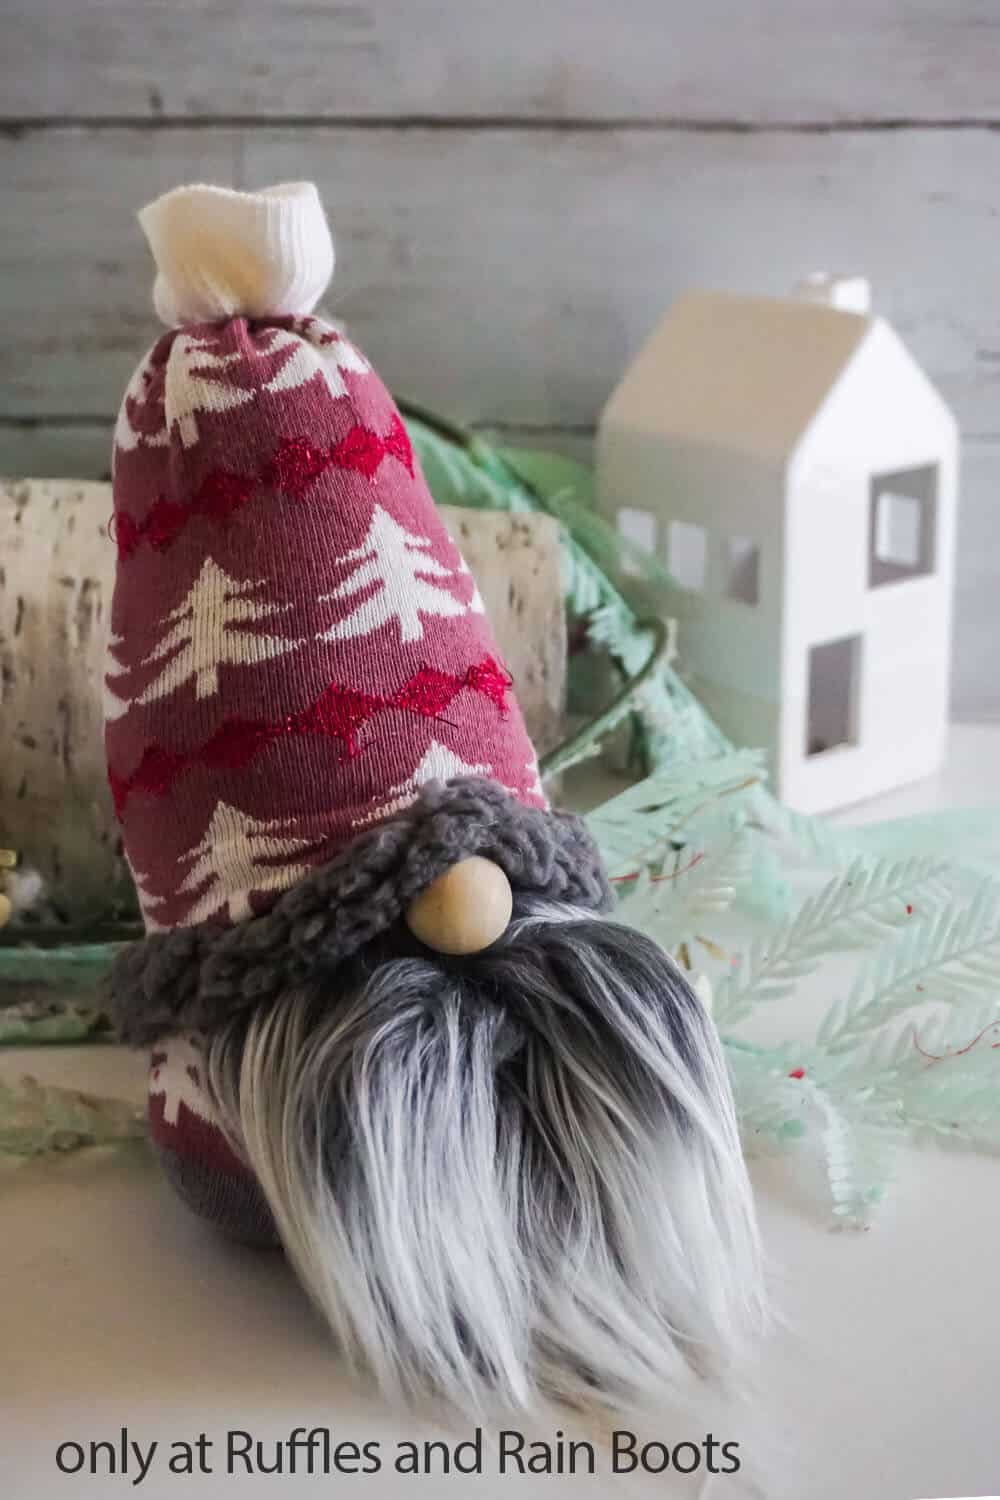
I wasn’t in love with the gnome himself, that wasn’t the point. It was just a sock I had laying around that happened to have a pattern (and no match). But the result? He’s too cute not to share, and now I have a whole new way of making gnomes. If you’re ready to figure out how to make a sock gnome from one sock, let’s get started.
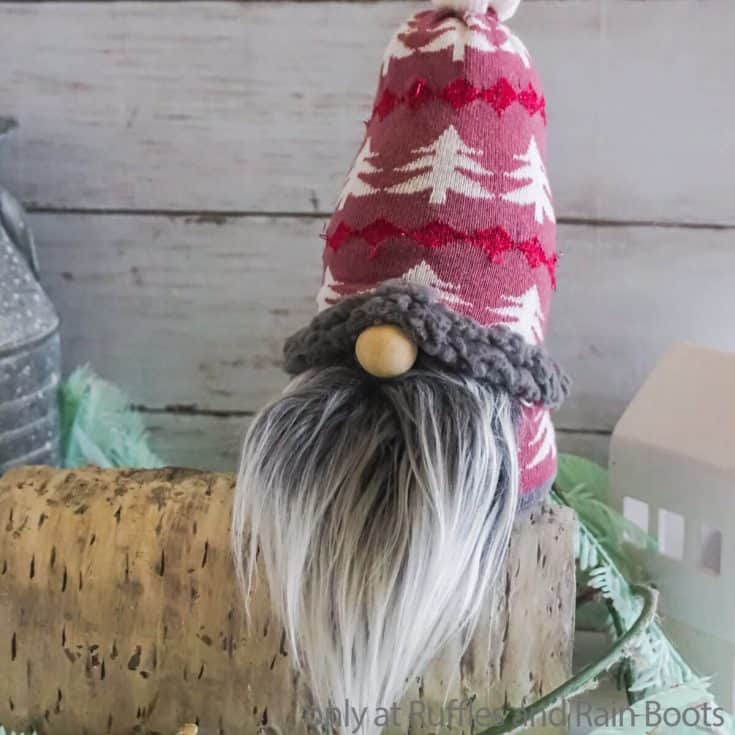
First, fill the toe of the sock with poly beads and follow by stuffing the sock up to the heel with polyfill. Tie the sock closed with the embroidery thread and cut off the top of the sock in a straight line above the heel. Hot glue the cut top of the sock to keep it closed.
Cut a 1/4-inch wide strip of sherpa fabric long enough to wrap around the cut end of the sock top (the hat). Hot glue the strip of sherpa fabric to the cut edge of the hat, covering the cut edge and securing it so that it won’t fray.
Flip the Mongolian fur over fur-side-down and, using a razor blade or craft knife, cut out a small “u” shape of fur, wide enough to cover the front of your gnome and long enough to cover from the middle of the gnome to the bottom.
Cut a 1-inch wide strip, equally wide as the beard, to make a mustache. Part the mustache fur in the center and finger-brush it to either side, allowing the fur’s backing to curl in on itself, hot gluing it in place, if desired.
Hot glue the beard to the front of the gnome, about 2 inches from the top knot. Part the beard fur about 1/2 inch from the top of the beard, add hot glue and place the nose in this location.
Tuck the mustache under the nose and hot glue in place.
Pull the hat over the top of the gnome, tucking it low over the nose and hot gluing it in place onto the top of the nose to make a little wrinkle. Pull the hat low in the back, almost down to the bottom, and hot glue it in place, opening up the face.
Stuff a bit of polyfill into the top of the hat, working it down and into a smooth cone shape. Tie the hat closed with a bit of embroidery thread.
Brush out the beard, if desired, and enjoy!

RELATED READING: The Best Gnome Making Supplies to Have On Hand
Need to find a single sock? Save this fun DIY one sock gnome idea to a DIY tutorials pin board or share it to Facebook. Either way will make this easy to find when you’re ready to begin.
As an Amazon Associate, I can earn from qualifying purchases. There could be affiliate links within this article.
RELATED READING: Sock Gnome Tips – Make a Sock Gnome Look High End
Tips to Make an Easy One Sock Gnome
- You don’t need a gnome pattern to make this little one. In fact, you can make this gnome using a hat with a pattern or a plain sock with a patch, an added saying, or even a logo on it!
- What’s up with those gnome noses, right?! They’re all so different and unique – just as widely varied as gnomes themselves. While I generally like to use wood beads like these, I have used all sorts of different methods in the past (clay, felt balls, buttons, etc.). Don’t feel restricted, just grab something which appeals to you.
- If you’re still on the fence about how to make a sock gnome because you’re hesitant about the beard’s material, don’t worry. For all first-time gnome-makers and many seasoned professionals, I know that faux fur can be intimidating. It’s not the easiest to work with, but I have a method that lets anyone cut a beautiful, long beard with accuracy and speed (quick video tutorial here on how to cut faux fur). Place the fur fluffy-side-down on your cutting surface and, with either a razor blade or a craft knife, cut only the fabric backing for the fur into the shape you want. Then. it’s as simple as pulling the cut portion away, separating the fur gently. From there, you can comb it, style it, or just glue it on your beard when you’re ready!

More Easy Gnome Tutorials You Might Like
- Easy DIY Sewn Gnome Pattern – If you have a sewing machine and want to make professional-level gnomes, this pattern is the perfect way to get you started!
- Sock Gnome Tips and Tricks – Learn how to make a lowly sock into something high end and fabulous with these tips and sock gnome patterns.
- No-Sew Valentine Gnome – A gnome met a gnomette and fell in love, with pink fleece, teal accents and the cutest sneaker sets you can make in no time!
Please Save or Share This Christmas DIY Sock Gnome Tutorial
Your shares are how this site grows and I am sincerely grateful. Know a friend who’d like this? Please share it on Facebook or save it to your an holiday decor crafts pin board.
How to Make A Gnome from One Sock
Below is the written tutorial for this easy Christmas gnome craft. Keep this page open and follow along, using the comments for any questions.
If you’re a visual learner, watch the how to make a gnome from one sock video tutorial. While you’re there, be sure to subscribe – we have a lot of fun!
How to Make a Gnome from One Sock
When I figured out how to make a gnome from one sock, I was so excited to share it. It's quick fun!
Materials
- 1 Patterned Sock, woman's ankle sock size
- 1-2 cups Poly Pellets (I use these)
- 2 cups Poly-Fill (my preferred choice)
- Embroidery Thread
- 1 to 2 inch Wood Bead (or other nose)
- Scrap, Sherpa Fabric
- Small Portion, Mongolian Fur
Tools
- Scissors
- Hot Glue Gun & Glue
- Funnel, optional
- Razor Blade or Craft Knife
Instructions
- Fill the toe of the sock with poly beads and follow by stuffing the sock up to the heel with polyfill. Tie the sock closed with the embroidery thread and cut off the top of the sock in a straight line above the heel. Hot glue the cut top of the sock to keep it closed.
- Cut a 1/4-inch wide strip of sherpa fabric long enough to wrap around the cut end of the sock top (the hat). Hot glue the strip of sherpa fabric to the cut edge of the hat, covering the cut edge and securing it so that it won't fray.
- Flip the Mongolian fur over fur-side-down and, using a razor blade or craft knife, cut out a small "u" shape of fur, wide enough to cover the front of your gnome and long enough to cover from the middle of the gnome to the bottom. Cut a 1-inch wide strip, equally wide as the beard, to make a mustache. Part the mustache fur in the center and finger-brush it to either side, allowing the fur's backing to curl in on itself, hot gluing it in place, if desired.
- Hot glue the beard to the front of the gnome, about 2 inches from the top knot. Part the beard fur about 1/2 inch from the top of the beard, add hot glue and place the nose in this location. Tuck the mustache under the nose and hot glue in place.
- Pull the hat over the top of the gnome, tucking it low over the nose and hot gluing it in place onto the top of the nose to make a little wrinkle. Pull the hat low in the back, almost down to the bottom, and hot glue it in place, opening up the face.
- Stuff a bit of polyfill into the top of the hat, working it down and into a smooth cone shape. Tie the hat closed with a bit of embroidery thread. Brush-out the beard, if desired, and enjoy!
Notes
For more fun gnome tutorials, visit Ruffles and Rain Boots!
Recommended Products
As an Amazon Associate and member of other affiliate programs, I earn from qualifying purchases.


Meet the Creator
Hi there, I’m Sarah Nenni-Daher. I’m a crafty gal and always have at least 14 projects going at once. I am a crafter, designer, DIYer, and pattern maker. I share my creations here and in the Ruffles and Rain Boots® Shop.
Here at Ruffles and Rain Boots®, you’ll find DIY gnomes, crafts, gifts, cupcakes, laser crafts, and so much more. I love sharing video tutorials over on YouTube and chatting with other crafters in my Facebook groups. We’d love to have you!