xTool O1 Football Bow Sign
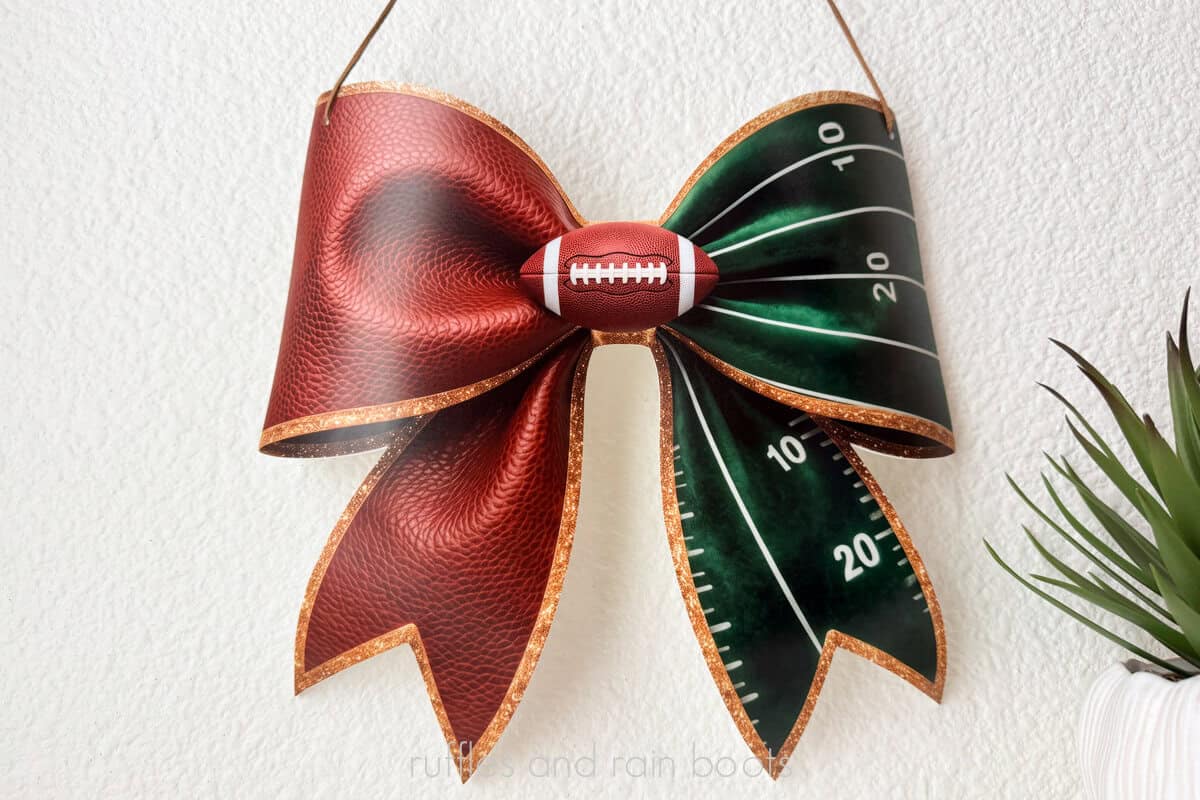
In this xTool O1 football bow sign tutorial, I’m going to show you how you can turn a boring piece of white acrylic into an amazing DIY! This project is a really fun one for UV printing beginners, too.
RELATED READING: How to Print on Leather
As an Amazon Associate, I could earn from qualifying purchases. There could be affiliate links within this article.
What You'll Find On This Page
UV Printed Football Bow Sign and Acrylic Bending Tutorial
Here at Ruffles and Rain Boots, I’ve been playing with the xTool O1 OMNI UV printer for about a month. I’ve gone well beyond the “print and be wowed” portion of the machine and wanted to share a truly next-level project.
We’re going to cut a piece of acrylic, use the xTool O1 (and the amazing Smart Mask feature) to print it, and then use the xTool WonderPress heat press to turn it into a 3D sign. I know it sounds complicated, but all of the work is done for you!
Material Settings for All Machines
Listen, I know you might just be here for the settings, so here you go.
I used the xTool P series laser (CO2) to cut white matte / glossy acrylic from Houston Acrylics into a bow shape. I used 100 power, 18 speed, 1 pass, and 100% air for this but test your settings for your machine.
For the xTool O1 UV Printer’s settings, I used standard quality, 150% feather, 0.05 choke, on a flat print with only a single layer of color.
Finally, for the xTool WonderPress, I used 320 degrees F, on 100kg of pressure, and 420 seconds. This allowed the 3mm white acrylic to get pliable enough to drape.
Tutorial Notes
While I have a video detailing every step of this process and a few tips and lessons learned, here is a brief summary of some pertinent information.
- Get the file on my Atomm profile (follow me there, too, friend). 🥰
- Cut the piece OR print the piece first – both work in the xTool O1 OMNI because the Smart Mask is a very cool piece of tech.
- Use a promoter for the acrylic before printing. I use these acrylic promoter wipes.
- Wait 24 hours after printing before pressing. I only tested a small sample, but my print dulled when I printed and immediately pressed.
- Work quickly with the WonderPress. Once the acrylic gets drapey, you only have seconds. Use gravity, molds out of household items, and heat resistant gloves to get the look you want.
- Turn on the air purifier (or wear a mask) for the press portion. I smelled the acrylic melting. I didn’t smell the xTool O1 when it was printing, but I did have it connected to the purifier (xTool AP2).
More Projects You Might Like
The written tutorial is below. Before you go, check out these fun projects with xTool machines.
- Batch Processing – Learn batch processing in xTool Studio (for free; no credits).
- How to Engrave Colors on Metal xTool F2 – Oh, when you crack the code you are unstoppable!
- Adorable Bag Tags Turn Into Cold, Hard Cash – Make design, print money. Here’s how.
Please Save or Share This xTool O1 Tutorial
Your shares are how this site grows and I am sincerely grateful. Please save this to a DIY pin board or share it with a group on Facebook or Reddit. Thank you. :)
xTool O1 Football Sign with Acrylic Bending Tutorial
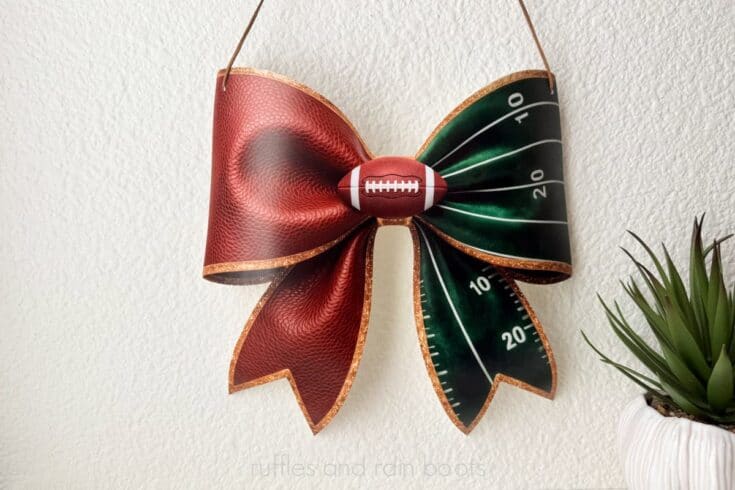
This UV printed football bow sign is one of my favorite xTool O1 projects yet! It's a great way to learn how to cut a piece, align and print the project, and then bend the acrylic.
Materials
- 3mm 1/8th inch white matte / white glossy acrylic from Houston Acrylics
- xTool Acrylic Adhesion Promoter
- Big Bed
- Mold items (I used flour sack towels and shop towels to drape my acrylic on)
- Heat Protective Mat
- Suede Cord for Hanging
Tools
Instructions
Step1: File Set Up
Open the file for your O1. You can either do a multi-machine (beta) build OR, like I did, the standard single machine. I was testing how well I could manually align a print to a cut I'd already done in the xTool P2.
Enter settings. For the 11.4 inch print on the xTool O1 (took 12 minutes, 56 seconds), I used:
- standard quality
- feather 150%
- choke 0.2
- flat
- color only, 1 layer
Settings for the P2 (3mm white acrylic) but you can enter your own after testing. My settings were 100 power, 18 speed, 1 pass, 100% air on the honeycomb. Masking left on back.
Step2: Print
If you're using the multiple-machine beta set up, size the print AND the vector together if you're changing it. In the next screen, set the processing for the laser (mode is cut and enter settings). Follow the prompts in the process (it's done for you).
If you're doing the same test as I am (cut and line up in the O1), cut only the vector (turn the output off for the image) and move the cut acrylic to the printer.
Place the piece into the O1 on the large bed and coat the acrylic with the xTool Adhesion Promoter for Acrylic.
Scan the piece in the O1, open Smart Mask, and position. I used micro angle adjustments because I can never put anything in straight. :)
Print the image.
Step3: WonderPress
This took a lot of failed settings but here's the final time, temp, and pressure I used.
You'll need to set up a draping area with a protective mat and whatever items you want to mold the bow.
Place a piece of butcher paper on the foam mat of the WonderPress. Add a piece of plywood or something else hard.
Place a piece of butcher paper on the wood, remove the back masking from the acrylic, and place the print INK SIDE DOWN on the butcher paper.
Cover the back of the acrylic with a teflon sheet.
Override one of the settings (I use fuse beads) to the following:
- 320 temp
- 100 kg pressure
- 420 seconds
When the WonderPress is done, with heat resistant gloved hands, move the piece to the mold. Use gravity to help the bow sides drape and press the ribbon tails gently downward until the acrylic no longer moves.
Seal with a UV matte protectant spray per the can's instructions to protect the print if placing outside or just to protect it for storage.
Add a suede cord or ribbon for hanging or place in the center of a large wreath as a wreath ornament.
Notes
You need to work quickly when it comes to the acrylic bending portion. You have about 10 seconds to drape the bow's edges before you have to press down the ribbon tails to bend them. They're a little too light to let gravity do all the work.
Meet the Creator
Hi there, I’m Sarah Nenni-Daher. I’m a crafty gal and always have at least 14 projects going at once. I am a crafter, designer, DIYer, and pattern maker. I share my creations here and in the Ruffles and Rain Boots® Shop.
Here at Ruffles and Rain Boots®, you’ll find DIY gnomes, crafts, gifts, cupcakes, laser crafts, and so much more. I love sharing video tutorials over on YouTube and chatting with other crafters in my Facebook groups. We’d love to have you!