
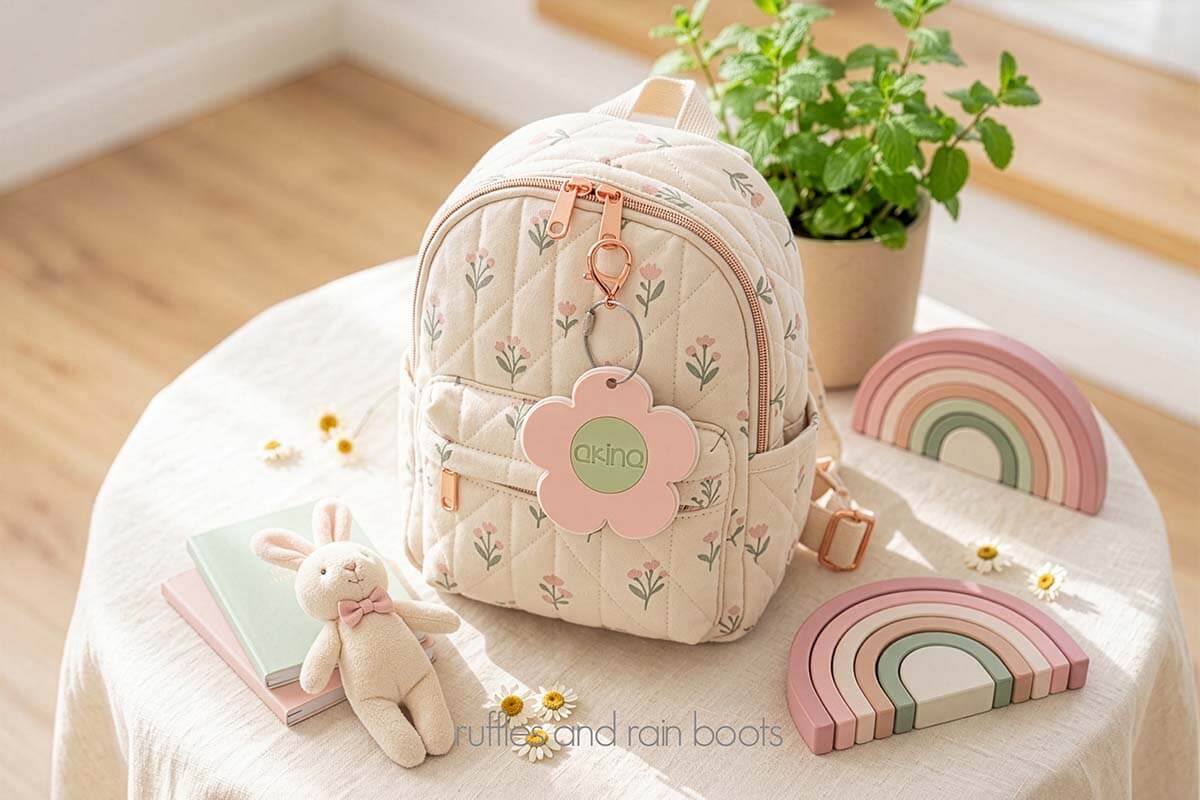
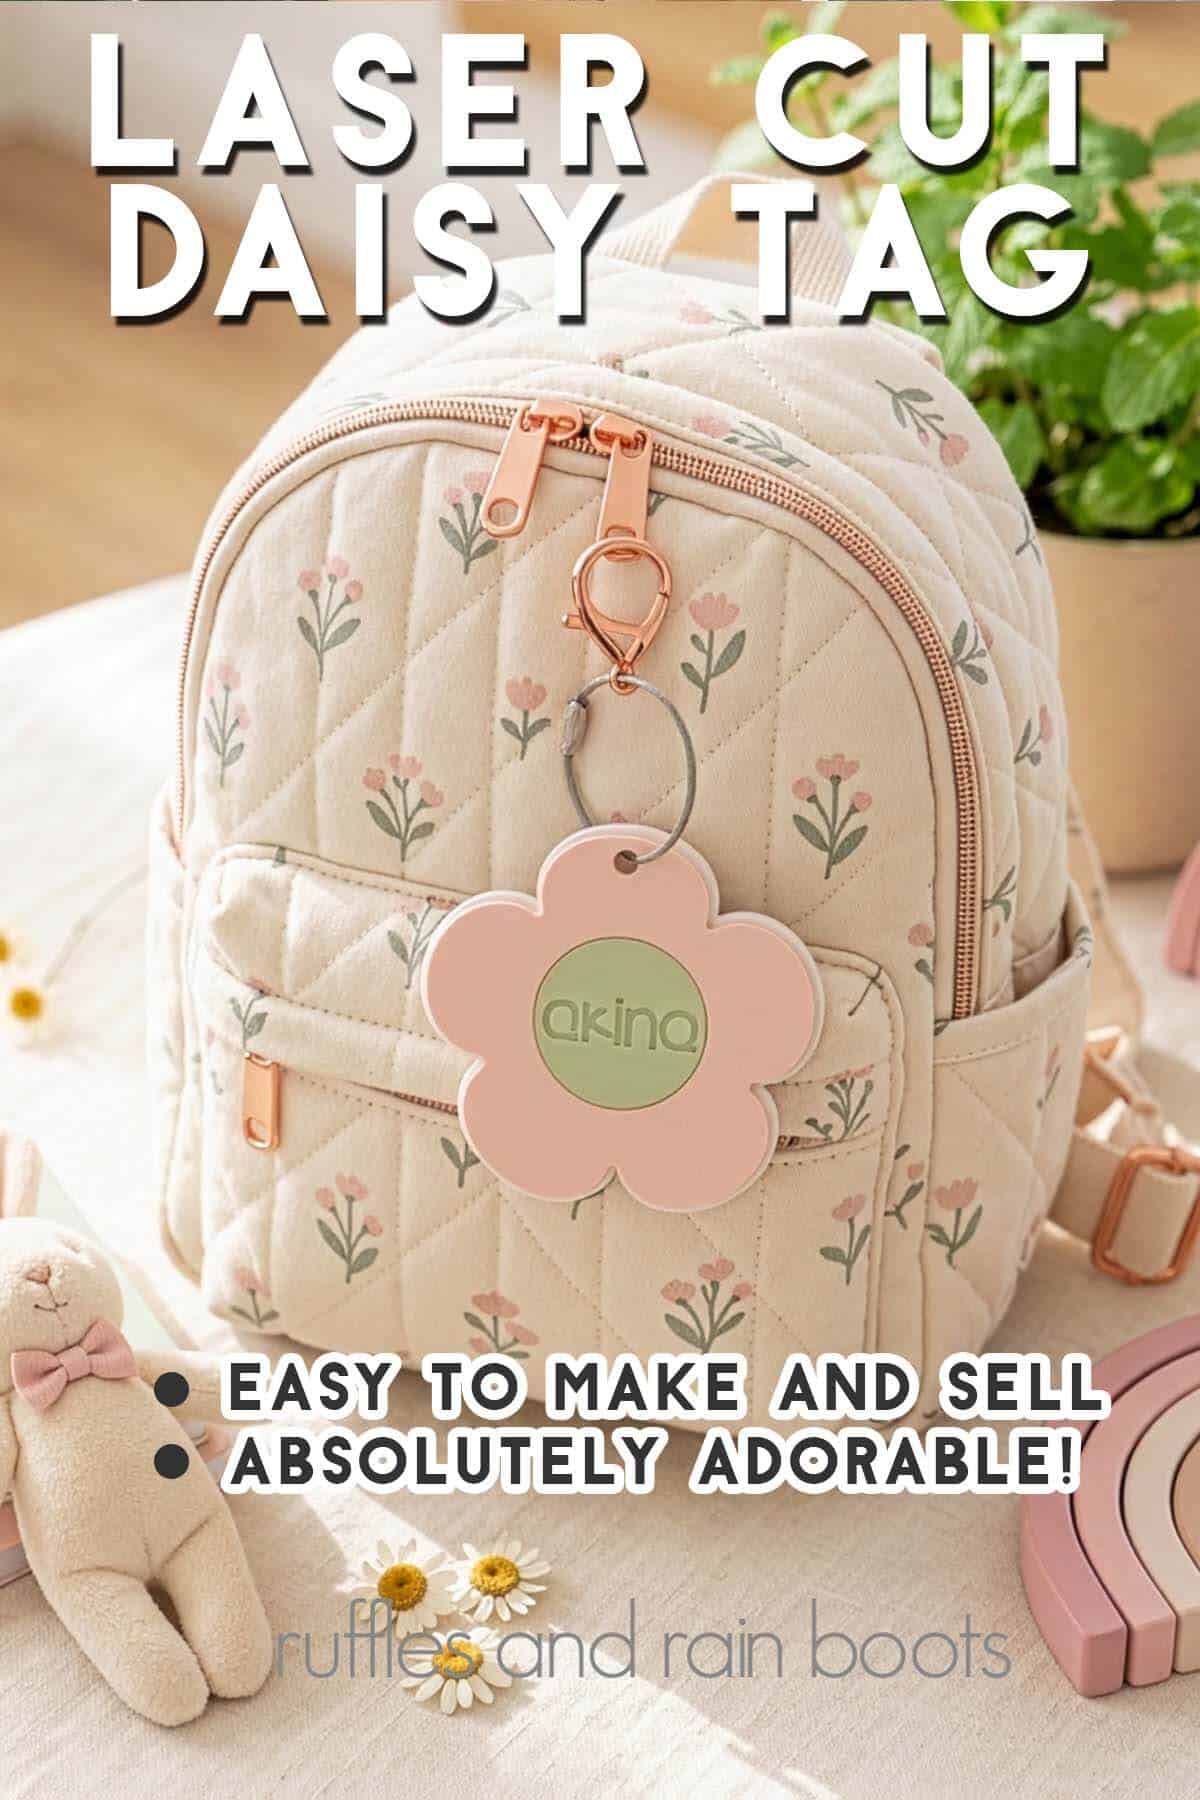
Laser Cut Daisy Bag Tag SVG Bundle
This absolutely adorable daisy bag tag laser bundle is just what you need for the sweetest little back pack or lunch bag. Included in this bundle are two designs and a quick instructional video.
RELATED READING: Can You Engrave in COLOR with the xTool F2?
What You'll Find On This Page
Daisy Bag Tag Laser File Bundle
Here at Ruffles and Rain Boots, school is almost out, so of course it’s time to talk about what to make for back to school! When you’re a seller, working a few months ahead of time will help new products really get off the ground running.
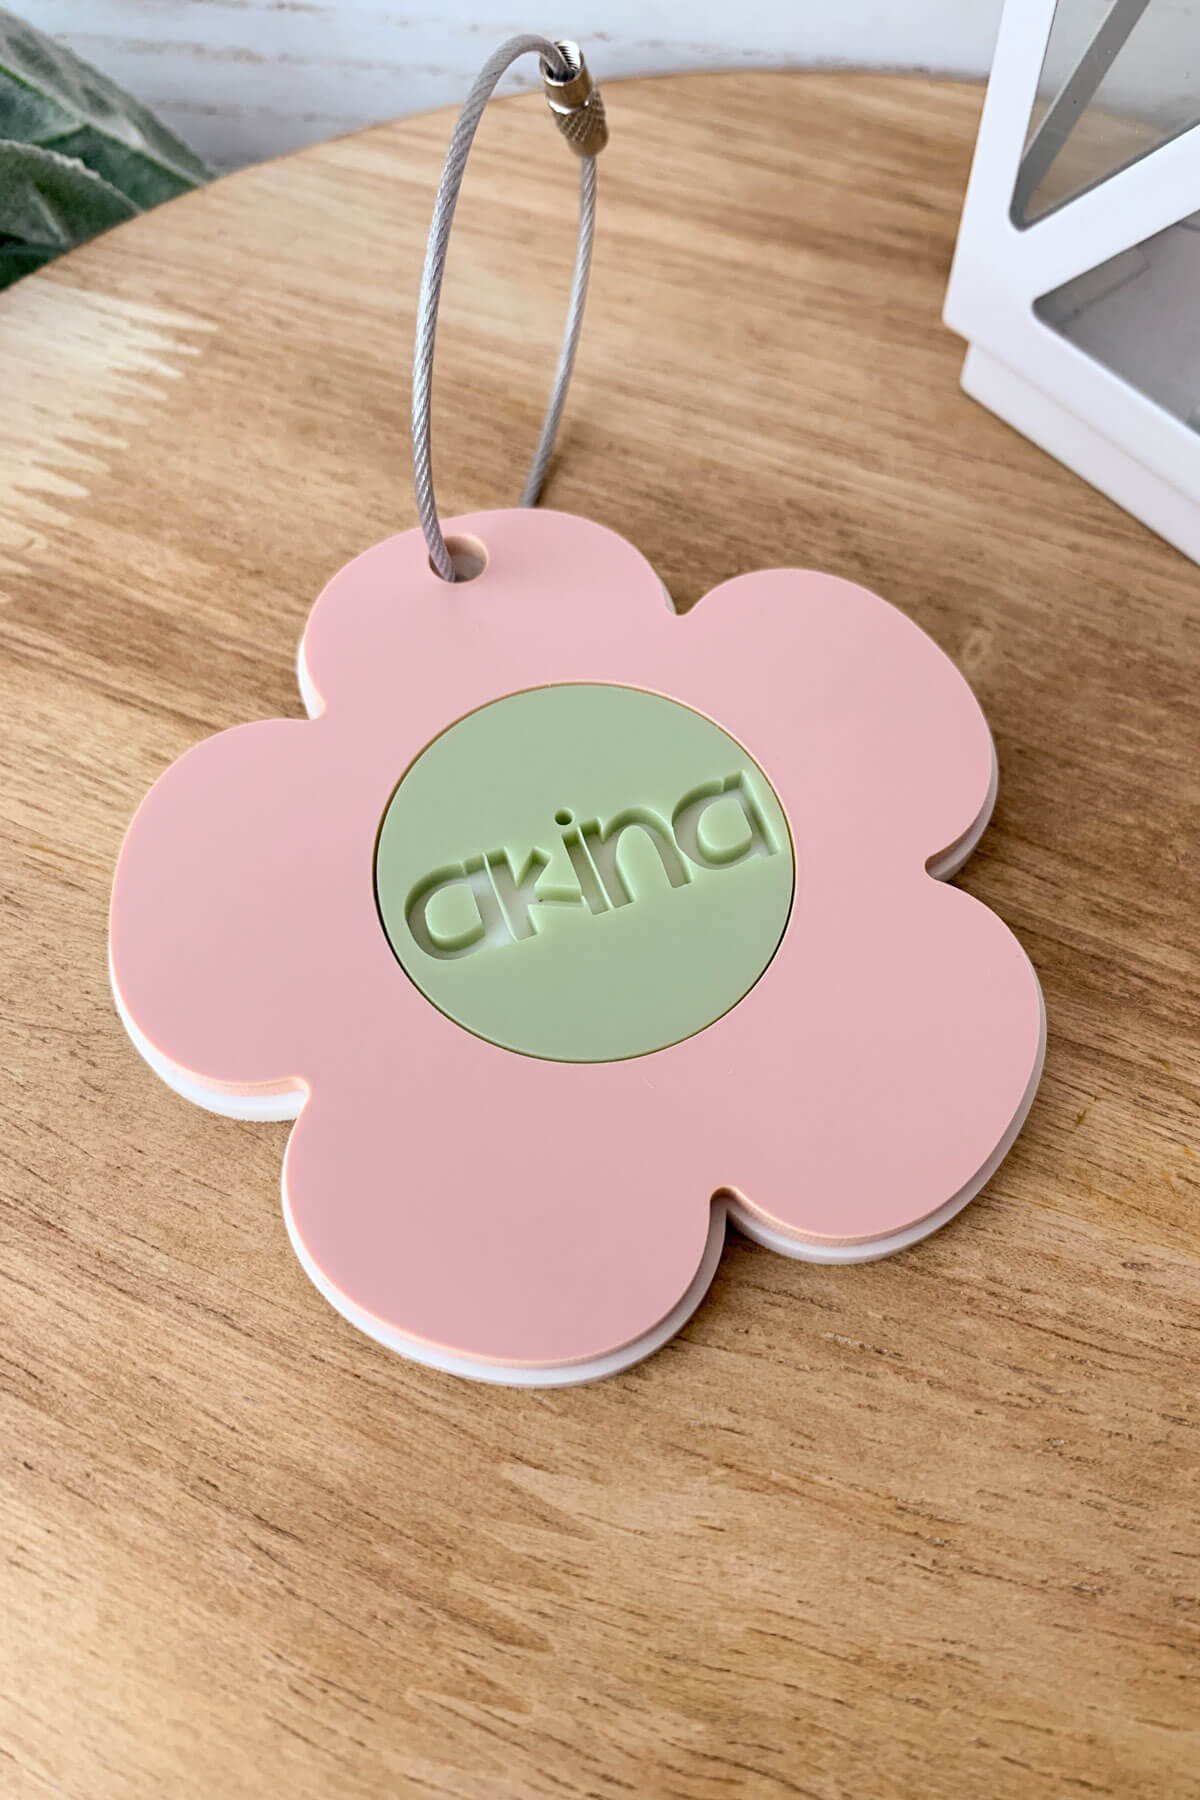
Today, I created a two design set using a little hand drawn daisy I sketched. It’s a sweet, quick file to work up and can be personalized with any font style.
Materials You Will Need
- daisy bag tag file set
- 3mm acrylic (you can use two or three colors)
- a wire luggage tag (tested and proven to be the best)
- 3M 467MP (or WeldOn 3)
- acrylic cleaner
Watch This Daisy Bag Tag Video Tutorial
If you’re a visual learner, you can see how easy this is to make. Here’s a video (less than 1 minute) to show you how it comes together.
Daisy Bag Tag Instructions
Daisy Bag Tag Laser Project
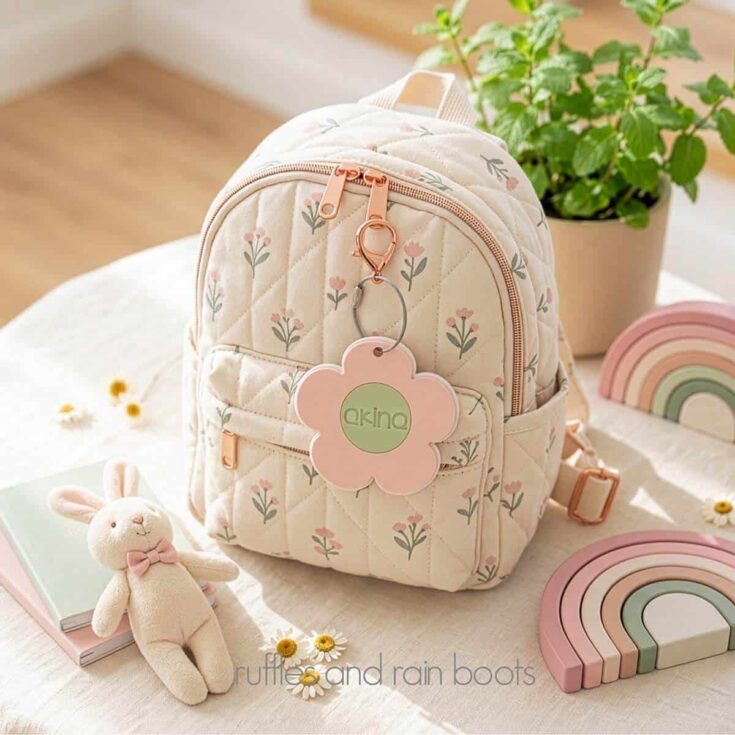
Make this adorable daisy bag tag one of two ways using a couple of pieces of scrap acrylic and a luggage hanger.
Materials
Tools
- xTool P series (CO2 laser)
- clamps (to secure)
Instructions
- Remove masking from the acrylic. Add the 3M 467MP to the back of the acrylic you're using for all layers EXCEPT the bottom (my white was left without tape).
- Open the XCS file (xTool lasers) or import the SVG to your laser software. Choose which style you would like (2 designs are included).
- If using a name, type it and SUBTRACT it out from the center circle.
- Cut all the layers of acrylic.
- Clean all pieces, pop out the name (you are only using the negative in the design), and hang onto any letters or pieces to be attached.
- Remove the backing and press the flower or center onto the white flower backing piece.
- Clamp and set before adding a wired luggage tag.
More Laser Crafts You Might Like
- Bow Bag Tag File and Tutorial – Y’all, this is too cute and it’s SO popular!
- TooCaa NOVA Laser Review – This is a compact diode with a flippable laser.
- What is Laser Masking? – I get asked this a lot so I put together a little guide for you (from beginner to advanced laser crafters).
Please Save or Share This Beginner Laser Project Idea
Your shares are how this site grows and I am sincerely grateful. Please save this to a laser crafts pin board or share it in a laser Facebook group.
Meet the Creator
Hi there, I’m Sarah Nenni-Daher. I’m a crafty gal and always have at least 14 projects going at once. I am a crafter, designer, DIYer, and pattern maker. I share my creations here and in the Ruffles and Rain Boots® Shop.
Here at Ruffles and Rain Boots®, you’ll find DIY gnomes, crafts, gifts, cupcakes, laser crafts, and so much more. I love sharing video tutorials over on YouTube and chatting with other crafters in my Facebook groups. We’d love to have you!