
Metal Color Engraving on the xTool F2
Getting vibrant, consistent color engraving colors on metal doesn’t have to be a guessing game. While many images online are highly edited, you can achieve stunning real-world results using the color separation features in xTool Studio with built-in, free tools.
RELATED READING: Use the xTool F2 for Wine & Bottle Stoppers (free Jig)
As an Amazon Associate, I could earn from qualifying purchases. There could be affiliate links within this article.
What You'll Find On This Page
Master Color Engraving on Metal with the xTool F2
Here at Ruffles and Rain Boots, I’ve been color engraving with the xTool F2 since day 3 of setting it up. And if you know – it can be a frustrating process when you don’t know the basic tenets.
This article and step-by-step video will show you exactly how to set up, enter settings, and process for the most vibrant color engraving. I’ll also show you a tool that does a lot of the work for you – the color separation tool!
Materials You Will Need for Color Engraving
- a solid, simple color engraving material test (see step 1)
- a stainless steel pendant, dog tag, etc. (not a stamping blank, see note below)
- a cleaning cloth (and rubbing alcohol, if needed)
- a glove
- an xTool F2, dual-laser (diode and infrared)
Note that stamping blanks, often sold at big online retailers, could be stainless steel but they could be a metal mix. Ideally, the blank should be 304 stainless steel, so please be careful when ordering or order directly from xTool here or Monarch Pine for true stainless blanks for laser work.
Watch the Process for the xTool F2 to Engrave Color
More and more of my content is shared exclusively on video-forward platforms because I can protect the work under copyright law and platform controls. Be sure to subscribe to the channel to see all new content.
The Basic Tenets of Color Laser Engraving
1. Start with the Right Material Test
You cannot rely on standard engraving settings for color. Color is achieved by specific temperature and frequency interactions with the metal.
- Don’t DIY your test: Use a verified material test (like Yve’s SIMPLE color engraving test) to find the specific power, speed, and Lines Per Centimeter (LPC) required for each hue.
- Material Matters: The quality of your metal blanks (pendants, business cards, etc.) directly impacts the vibrancy. High-quality 304 stainless steel typically yields the best results.
2. Essential Pre-Engraving Tips
Before you hit “Start,” keep these three rules in mind:
- Manually Measure: Do not use auto-measure for shiny metal. Manually focusing the laser ensures the most accurate beam height.
- Preheat the IR: In your device settings, toggle on the Preheat IR option. This adds about 10 seconds to the start of your job but ensures a much cleaner, more consistent color from the very first line to the very last.
- Avoid Auto-Select: While the Studio material library is top notch, do not select a “preset material” from it when color engraving. It can override your custom settings, so keep the material field blank and enter your test results manually.
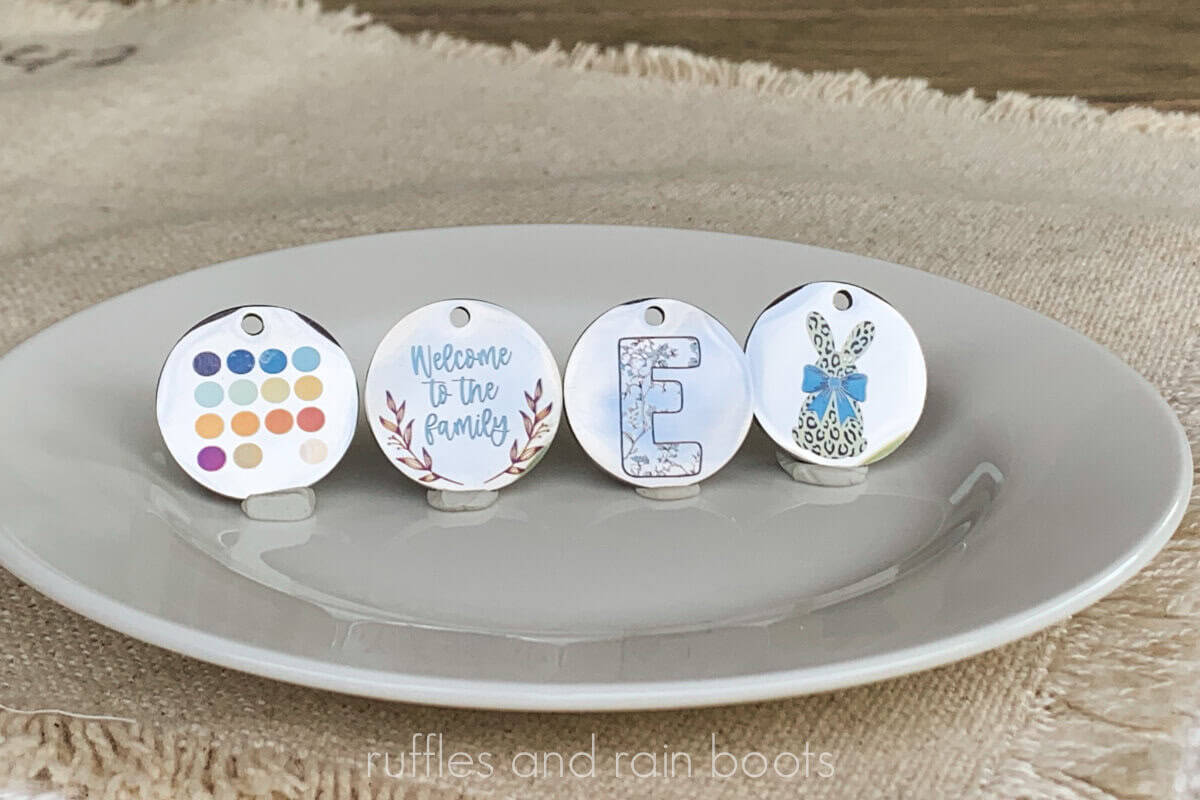
3. xTool Studio Exclusive Tool (Free): Automatic Color Separation
Studio makes it easy to break down complex images into layers. The steps are:
- Import & Adjust: Bring in your image (a high-quality PNG is best) and use the crop tool to remove any unnecessary background, eraser tool to remove any unwanted areas, etc.
- Color Engrave: Select the edited image and click “Color Engrave” in the Image Section (right menu bar). The software will automatically separate the image into color layers when you select the prompt at the top, center of the screen.
- Clean Up: Turn off individual layers to check for “junk” pixels or overlaps. Delete any layers you don’t need to keep the process efficient. I believe 3 to 5 colors are usually the “sweet spot” for beginners, however, you can do many, many more.
- Set Your Values: For each layer, ensure the IR (Infrared) laser is selected. Enter the Power, Speed, and LPC found during your material test.
- Set Up Two Passes: Just like in the material test, two passes with the simple adjustments made to the angle is ideal for a consistent, saturated color engrave.
4. The Two-Pass Technique
For the most consistent results across different materials, run your engraving in two separate passes:
- First Pass: Group all your color layers and run them at a 0° angle.
- Second Pass: Duplicate the group. For the second pass, change the engraving angle to 90°.
- Pro Tip: Run these passes manually (one after the other with a little time for the material to cool down) rather than as one giant job. This prevents the metal from overheating, which can shift the colors.
Additional Tips for Color Engraving on Metal
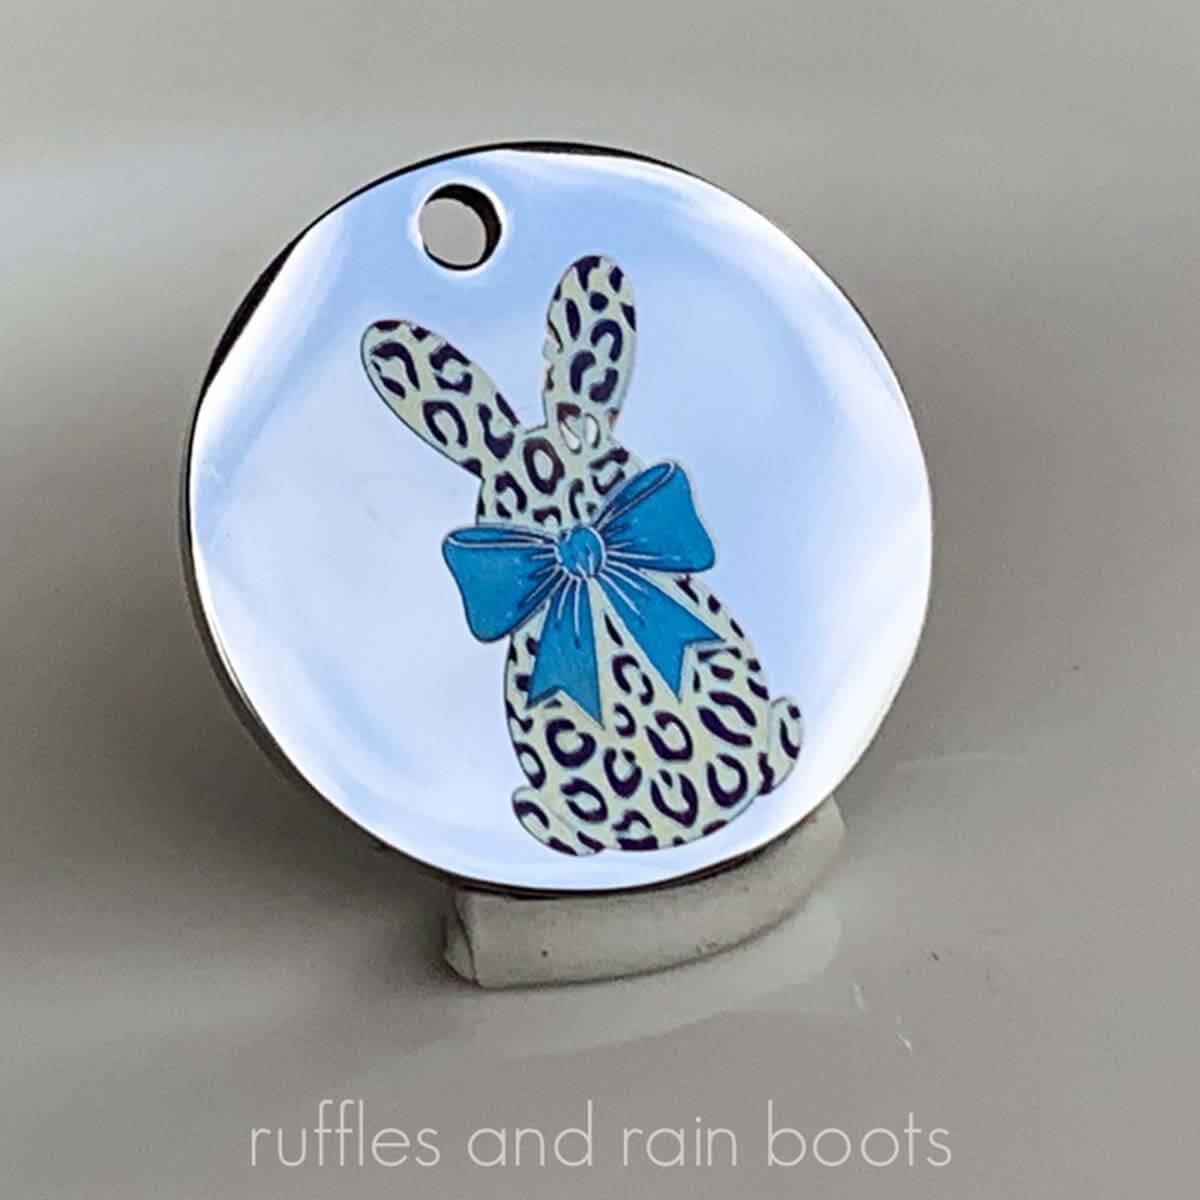
- Patterns In Masked Items: If you want to put a pattern inside a shape (like a letter), follow the steps in the video. In it, I share how to create a true outline, so as to not over-engrave everything.
- Silver-White: When creating multiple colors, be sure to try the silver-white option. It doesn’t come across on video well, but it really pops in person. This is one color you want to get nailed down.
- Altered Tests: The color engraving test and instructions linked above and in the video is just the starting point. Add 15-20% power to all of them and adjust the LPC down to 846 – you’ll get some different results that will help some colors really pop!
Color engraving requires a bit of patience and a solid material test, but once you have your settings dialed in, the results are incredibly rewarding.
More Laser Crafts You Might Like
- Laser Masking: Tips, Tricks, and Hacks – You definitely need to learn all about masking because it can save you time, frustration, and money!
- Free DIY Laser Cut Earrings Template – A beginner needs to start somewhere and free files are best. ;)
- How to Engrave a Gradient Leather Patch – This is a) a ton of fun and b) a good money-maker.
Please Save or Share This Color Laser Engraving Tutorial
Your shares are how this site grows and I am sincerely grateful. Please save this to a DIY laser crafts pin board or share it with a laser group on Facebook.
Meet the Creator
Hi there, I’m Sarah Nenni-Daher. I’m a crafty gal and always have at least 14 projects going at once. I am a crafter, designer, DIYer, and pattern maker. I share my creations here and in the Ruffles and Rain Boots® Shop.
Here at Ruffles and Rain Boots®, you’ll find DIY gnomes, crafts, gifts, cupcakes, laser crafts, and so much more. I love sharing video tutorials over on YouTube and chatting with other crafters in my Facebook groups. We’d love to have you!