
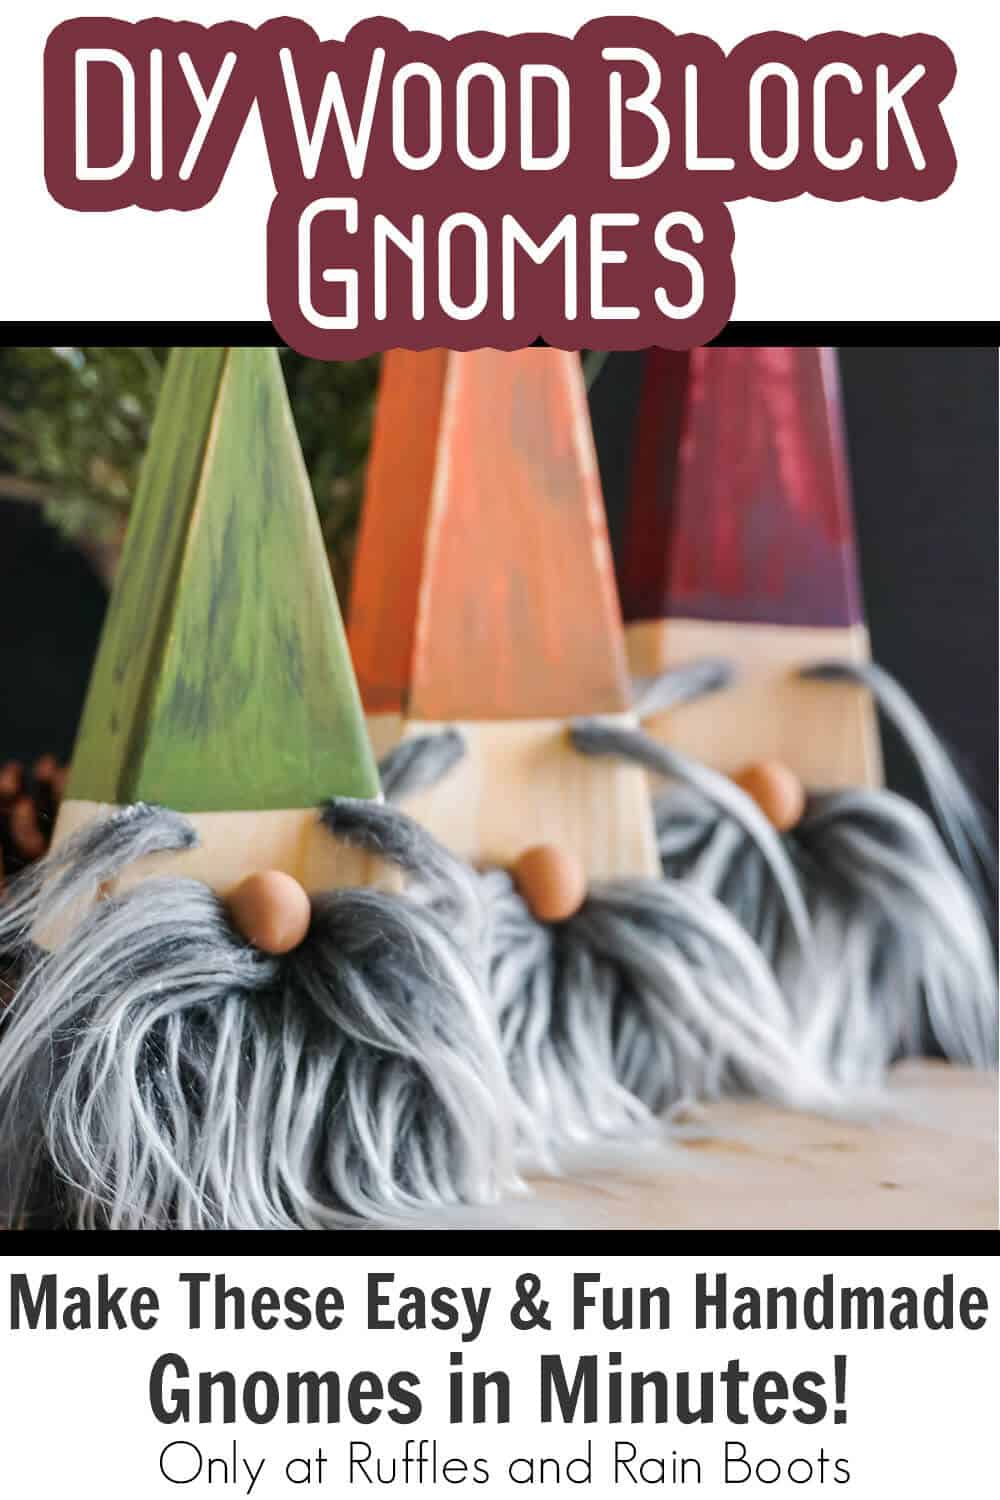
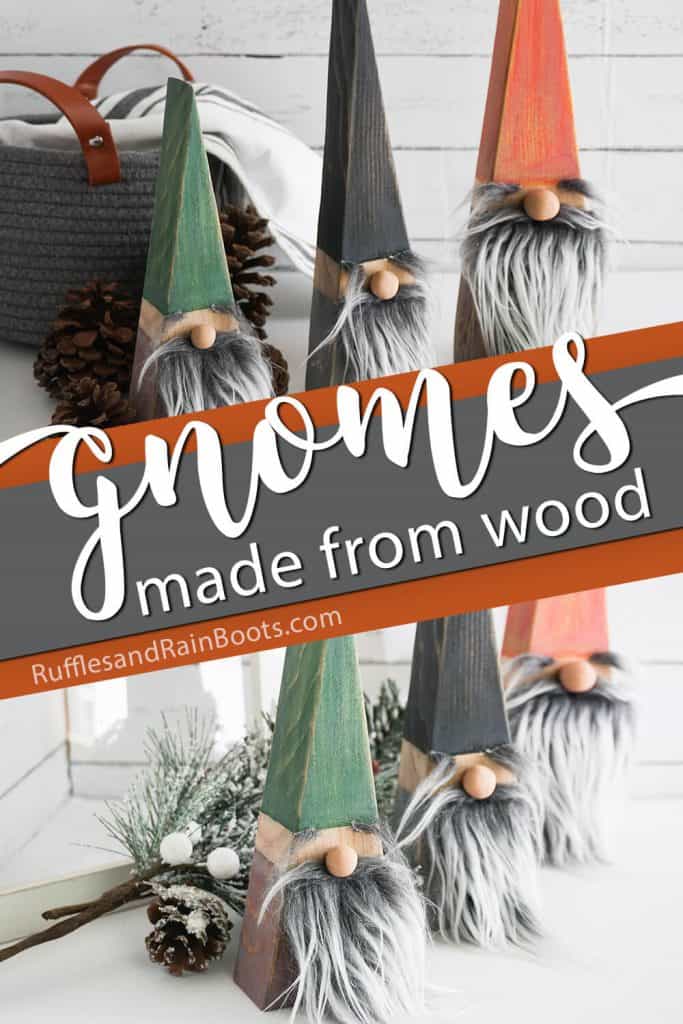
DIY Wood Block Gnomes You Can Make In Minutes!
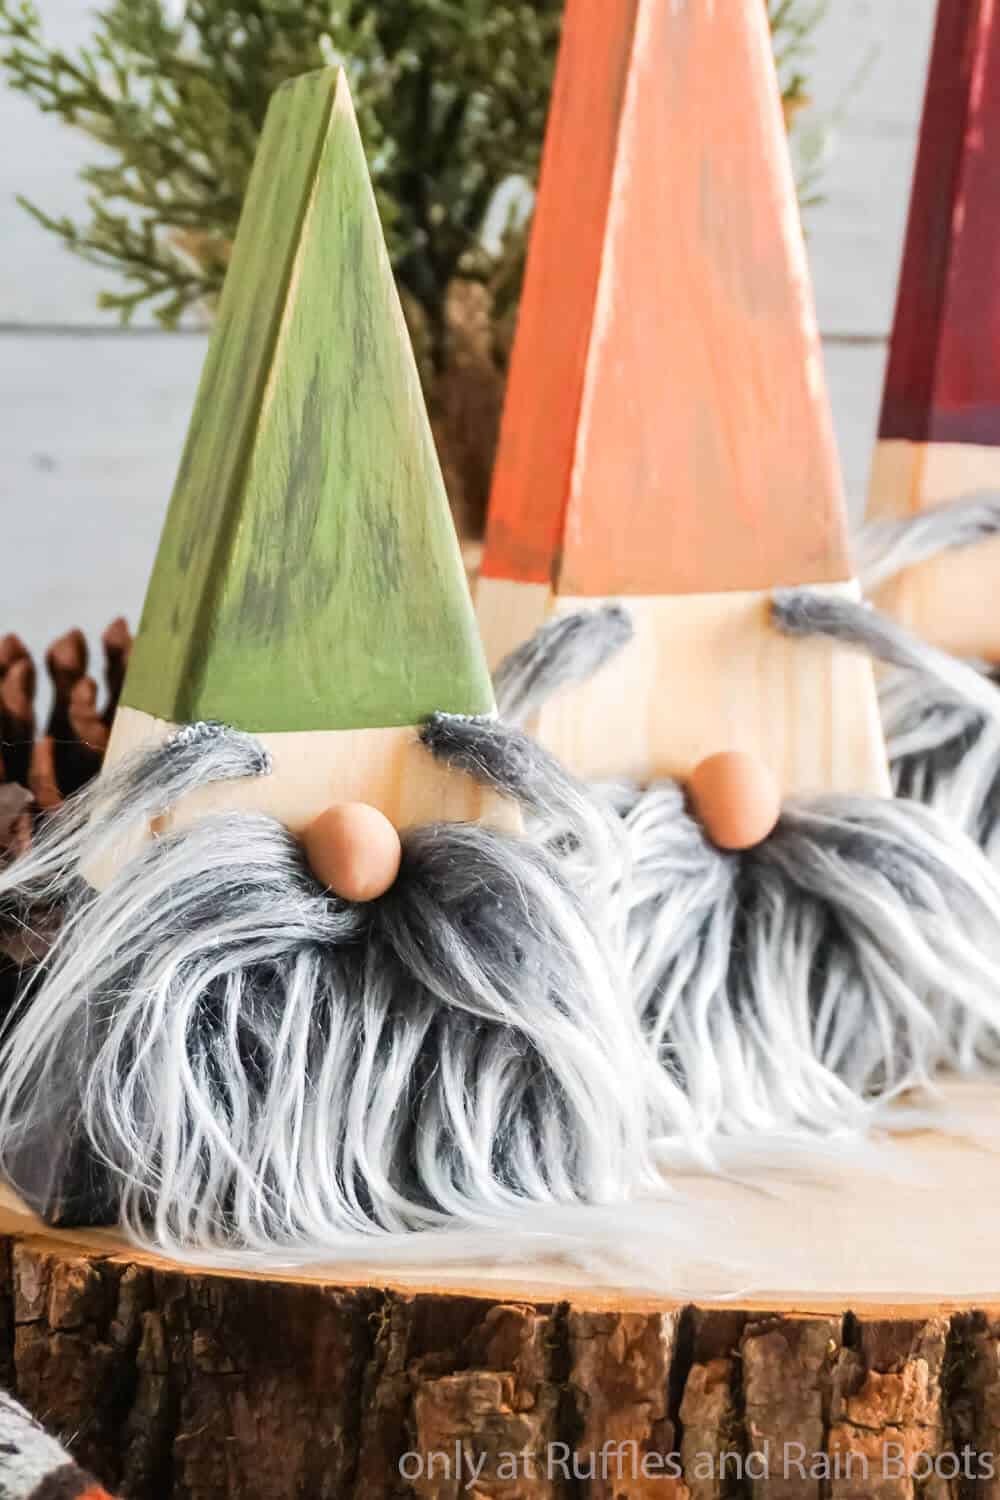
If you’re looking for the world’s easiest gnome project, you have to check out these wood block gnomes. They’re ridiculously simple, but so cute, they’re the perfect decor for the holidays!

What You'll Find On This Page
Wood Block Gnomes
Here at Ruffles and Rain Boots, we love gnomes. If every surface in the house was covered in gnomes, there would be no shame. None. And making these latest nisse is no exception. I could have a million of them and I would not flinch. I’m sure it’s some form of crazy-cat-lady-syndrome, but it’s gnomes and they’re cute, so whatever. LOL!
These wood gnomes are really perfect, though. They’re easy and fun, and really unique. They’re heavy enough to sit on the mantle, and definitely bring some whimsy to my holiday decor.
RELATED READING: WOOD GNOME ORNAMENTS
Plus, they’re just so darn easy! Did I say that? Oh, well, they are. About 10 minutes and you’ve got 3 adorable gnomes–and you just have to wait for the paint to dry. If you’re ready to make some wooden gnomes for your mantle, let’s get started.
No Time to Make This Now? Pin it for Later
You’re busy, I get it. Pin this to your favorite DIY Christmas decorations board on Pinterest and it’ll be here for when you’re ready.
As an Amazon associate, I could earn from qualifying purchases.
RELATED READING: Love Farmhouse? Make DIY Highland Cows with Faux Fur
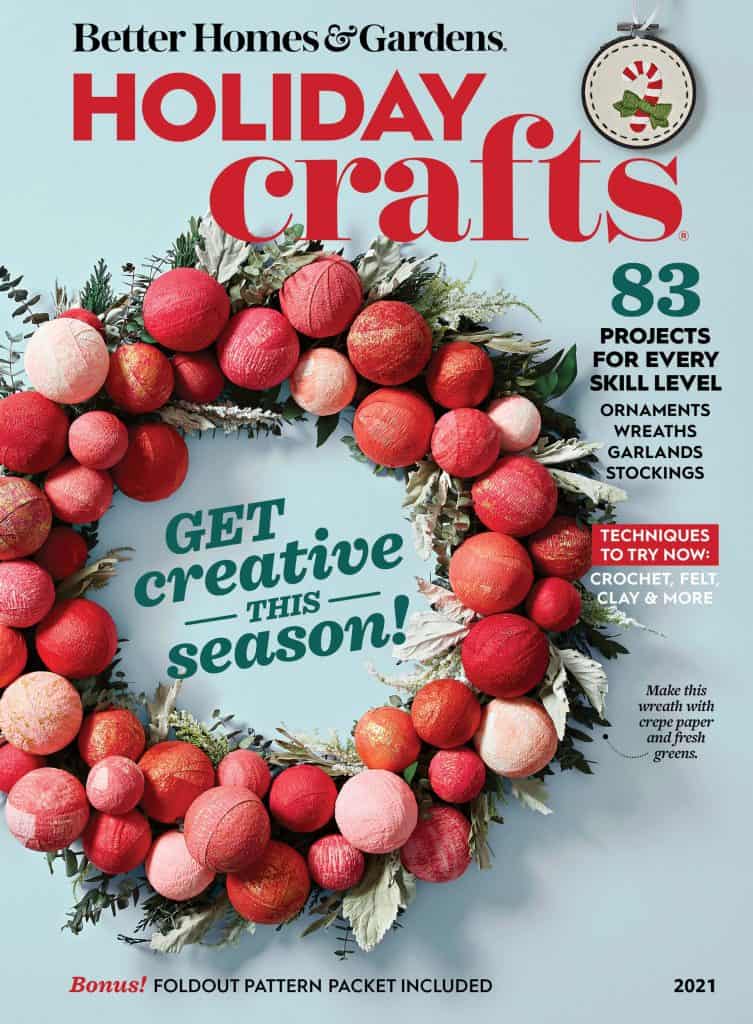
Now Featured in Holiday Crafts 2021!
Friends, I’m over the moon excited to tell you that this wood gnome DIY is now a feature in the 2021 Holiday Crafts Magazine from Better Homes and Gardens!
You all know how popular this holiday magazine is and I am so honored to have been included. Be sure to get your Holiday Crafts 2021 Magazine here (available 9/17/2021), on news stands, and wherever quality publications are sold.
Tips to Make Gnomes from Wood
- This tomte tutorial is so simple, it’s almost too easy. The only thing which is critical is the placement of the beard and nose… That’s it.
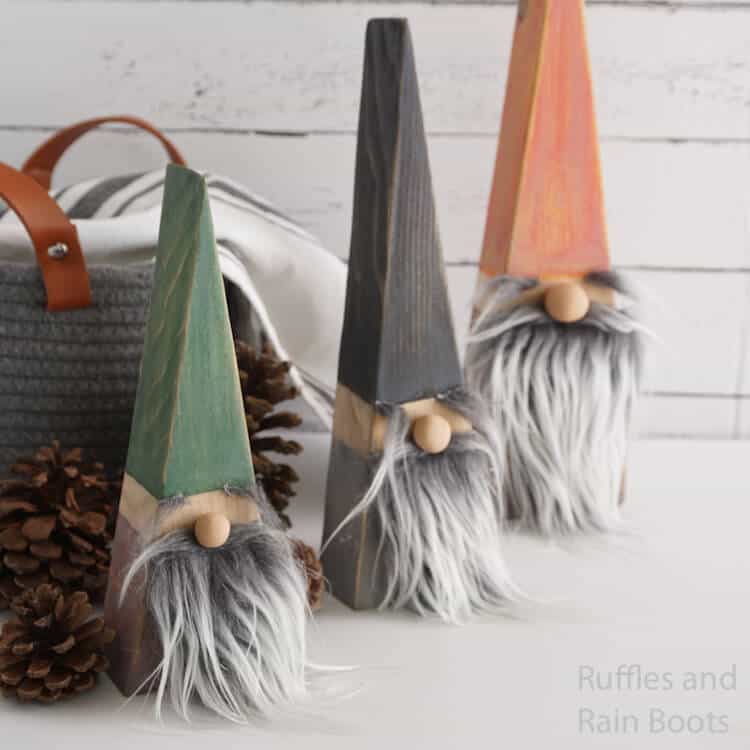
- Rather than hitting my craft store this time, I popped over to the home improvement store and grabbed a single 2×4. You could make this with a thinner wood, but the 2×4 really gives it a nice base to stand on.
- To make the noses, you could use wood beads. I didn’t have the right size, so I used polymer clay to hot glue to the wood. But wood beads like these would look great.
- When you’re cutting the wood for these DIY Christmas gnomes, you should measure from the middle of the wood. Otherwise, your hat will be off-center and the whole gnome will be off-kilter.
- Decorating with Scandinavian gnomes is really easy. Just place your Scandinavian Christmas gnomes on your mantle or on a bookshelf with your other Christmas decorations. They add a touch of whimsy.
- You can paint your gnome hats whatever color you want. I was going for a more farmhouse style with a distressed look and muted colors. But if you want a red cap on each one, do it. They’re your gnomes – make them how you want.
How Do I Make Wood Block Gnomes?
I’m so glad you asked. Below is our written tutorial. Because you all loved this one so much, I made a painted wood block gnomes video tutorial here. Keep this page open and follow along. If you have any questions, leave them in the comments.
First, start by making the gnome noses. To do this, take a small portion of light brown clay (one-half section of a clay pack) and a little larger portion of white clay (one full section of a clay pack) and work them together until combined completely.
Break this ball into three varying-sized neat balls rolled smooth. The sizes are what you want the noses of the gnomes to be based on the measurements of wood. My largest nose was one inch and went down slightly from there.
Bake the noses per the directions on your clay’s package and allow to cool completely.
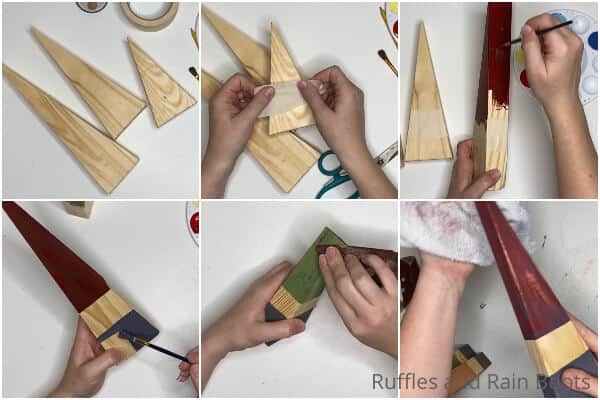
Cut the 2×4 into one 8-inch long section, one 12-inch long section, and finally a 16 inch section. Save the remainder to use on another project.
Mark the center of each of your blocks of wood. Cut a 15-degree angle from the center of the wood all the way to the edge, flip and repeat. I found this easiest to do with my chop-saw, but this can be done with a hand saw, skill saw, or jig saw, as well.
Sand all faces and edges of each of the three triangle blocks.
Paint the bottom 1/3 one color on each block (taping edge is optional but recommended). Allow to dry.
Paint the top 1/3 a contrasting color on each block (taping edge is optional). Allow to dry.
Lightly sand all painted surfaces if a distressed look is desired.
Add a very light dry-brush coat of light grey wood stain to both painted surfaces of each block, staying clear of the center 1/3 section that is unpainted. Using the paper towel, remove as much excess stain as you can. Allow stain to dry completely.
Lightly sand all surfaces again.
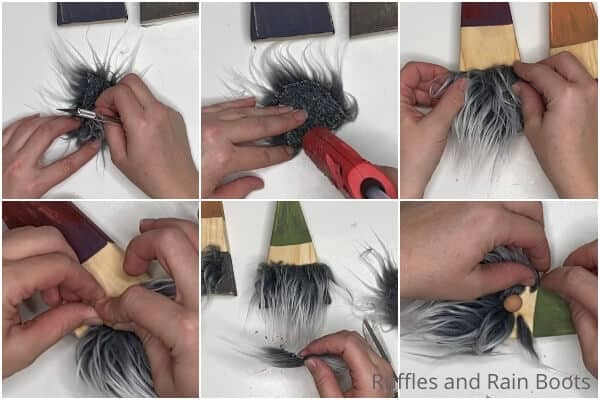
Using the craft knife, cut a triangle of Mongolian fur wide enough to cover the front of each block. Only cut on the back side of the fur (the fabric backing).
Cut 9 small rectangles of Mongolian fur (1/2 inch wide by 1/4 inch high). Brush the fur on 6 of them to one side to make eyebrows (3 in one direction, 3 in the other). For the remaining 3 pieces, split the fur and brush to each side from the center to form a mustache.
Hot glue the beards onto the front side of each gnome. Affix the mustaches to the top center of the beard and the eyebrows to each gnome’s face.
Hot glue a nose to the top of each gnome’s mustache.
More Christmas Gnome Tutorials You Might Like
- The BEST Christmas Gnome Tutorials – If you’re looking for a gnome, you’re going to find so many nisser and tomten here that you can make in minutes.
- DIY Chef Gnome – The perfect gift for a baker! This gnome is all you need to make a gift for someone that loves to bake.
- Nordic Viking Gnomes – Check out this cute and definitely perfect-for-all-your-gnome-needs Viking. He’s coming with his dragons.
- How to Paint a Christmas Gnome – This adorable guy all tangled up in Christmas lights is a fun craft to brighten up a rainy afternoon.
Please Save This to Pinterest
Your shares are how this site grows and I am sincerely grateful. Know a friend who’d like this? Please share it on Facebook or save it to your favorite gnome tutorials board on Pinterest.
Wood Block Gnomes
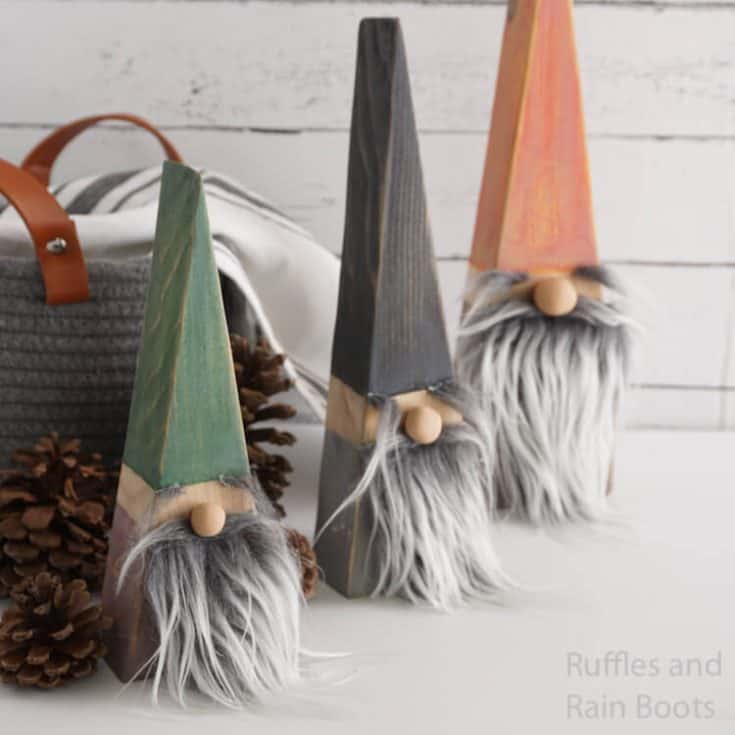
These easy wood block gnomes are a popular project because they are easy to cut, come together in minutes, and makes for a gorgeous gnome display.
Materials
- Polymer Clay in Light Brown and White
- Paint (wood stain, acrylic paint, or chalk paint)
- Light Grey Wood Stain, optional
- 3" Pile Mongolian Fur (scraps or 1/8th of a yard)
- 1 2x4 wood plank (or precut wood triangles from Etsy)
Tools
- Hand Saw or Chop Saw (if cutting the wood yourself)
- Oven
- Paint Brushes
- Paper Towel
- Sand Paper
- Pencil
- Hot Glue Gun and Glue Sticks
- Craft Knife or Razor Blade
- Optional, tape for painting
Instructions
- Start by making the gnome noses. To do this, take a small portion of light brown clay (one half section of a clay pack) and a a little larger portion of white clay (one full section of a clay pack) and work them together until combined completely.
- Break this ball into three varying sized neat balls rolled smooth. The sizes are what you want the noes of the gnomes to be based on the measurements of wood. My largest nose was one inch and went down slightly from there.
- Bake the noses per the directions on your clay's package and allow to cool completely.
- Cut the 2x4 into one 8-inch long section, one 12-inch long section, and finally a 16 inch section. Save the remainder to use on another project.
- Mark the center of each of your blocks of wood. Cut a 15-degree angle from the center of the wood all the way to the edge, flip and repeat. I found this easiest to do with my chop-saw, but this can be done with a hand saw, skill saw, or jig saw, as well.
- Sand all faces and edges of each of the three triangle blocks.
- Paint the bottom 1/3 one color on each block (taping edge is optional but recommended). Allow to dry.
- Paint the top 1/3 a contrasting color on each block (taping edge is optional). Allow to dry.
- Lightly sand all painted surfaces if a distressed look is desired.
- Add a very light dry-brush coat of light grey wood stain to both painted surfaces of each block, staying clear of the center 1/3 section that is unpainted. Using the paper towel, remove as much excess stain as you can. Allow stain to dry completely.
- Lightly sand all surfaces again.
- Using the craft knife, cut a triangle of the Mongolian fur wide-enough to cover the front of each block. Only cut on the back side of the fur (the fabric backing).
- Cut 9 small rectangles of Mongolian fur (1/2 inch wide by 1/4 inch high). Brush the fur on 6 of them to one side to make eyebrows (3 one direction, 3 the other). For the remaining 3 pieces, split the fur and brush to each side from the center to form a mustache.
- Hot glue the beards onto the front side of each gnome.
- Affix the mustaches to the top center of the beard and the eyebrows to each gnome's face.
- Hot glue a nose to the top of each gnome's mustache.
Notes
For more fun gnome tutorials, visit Ruffles and Rain Boots.

We could not figure how to cut 15 degrees on the 2×4 wood. Please show how want to use my chop saw. Thank you
Your chop saw should have a degree marker and you should be able to cut a 15-degree angle by going to a 45-degree angle. But to be honest, I have to stand in front of the chop saw every time and think about exactly what to do. So, to make it easier, I am going to send you to the tutorial that I found that is so much more simpler than the method I used initially: https://www.queenbeeofhoneydos.com/cut-angle-miter-saw/
I hope this helps! Be sure to send me a picture of how they turn out!