
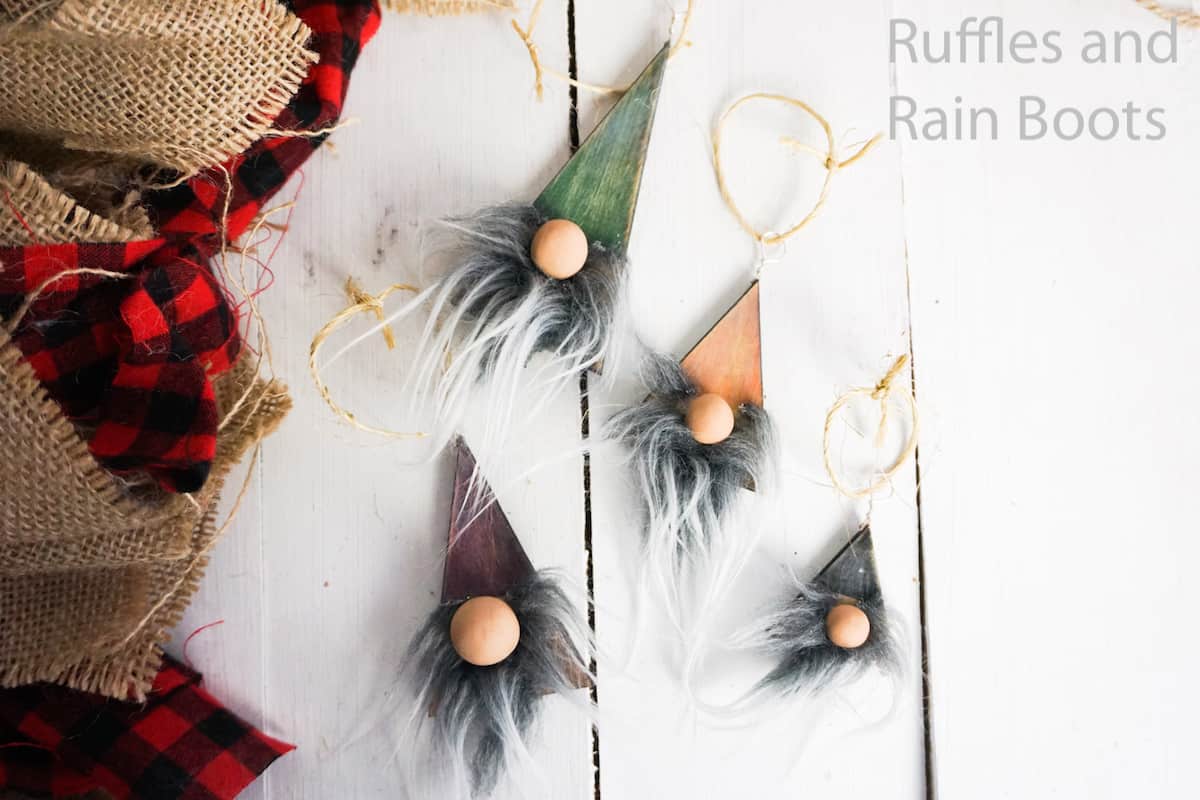
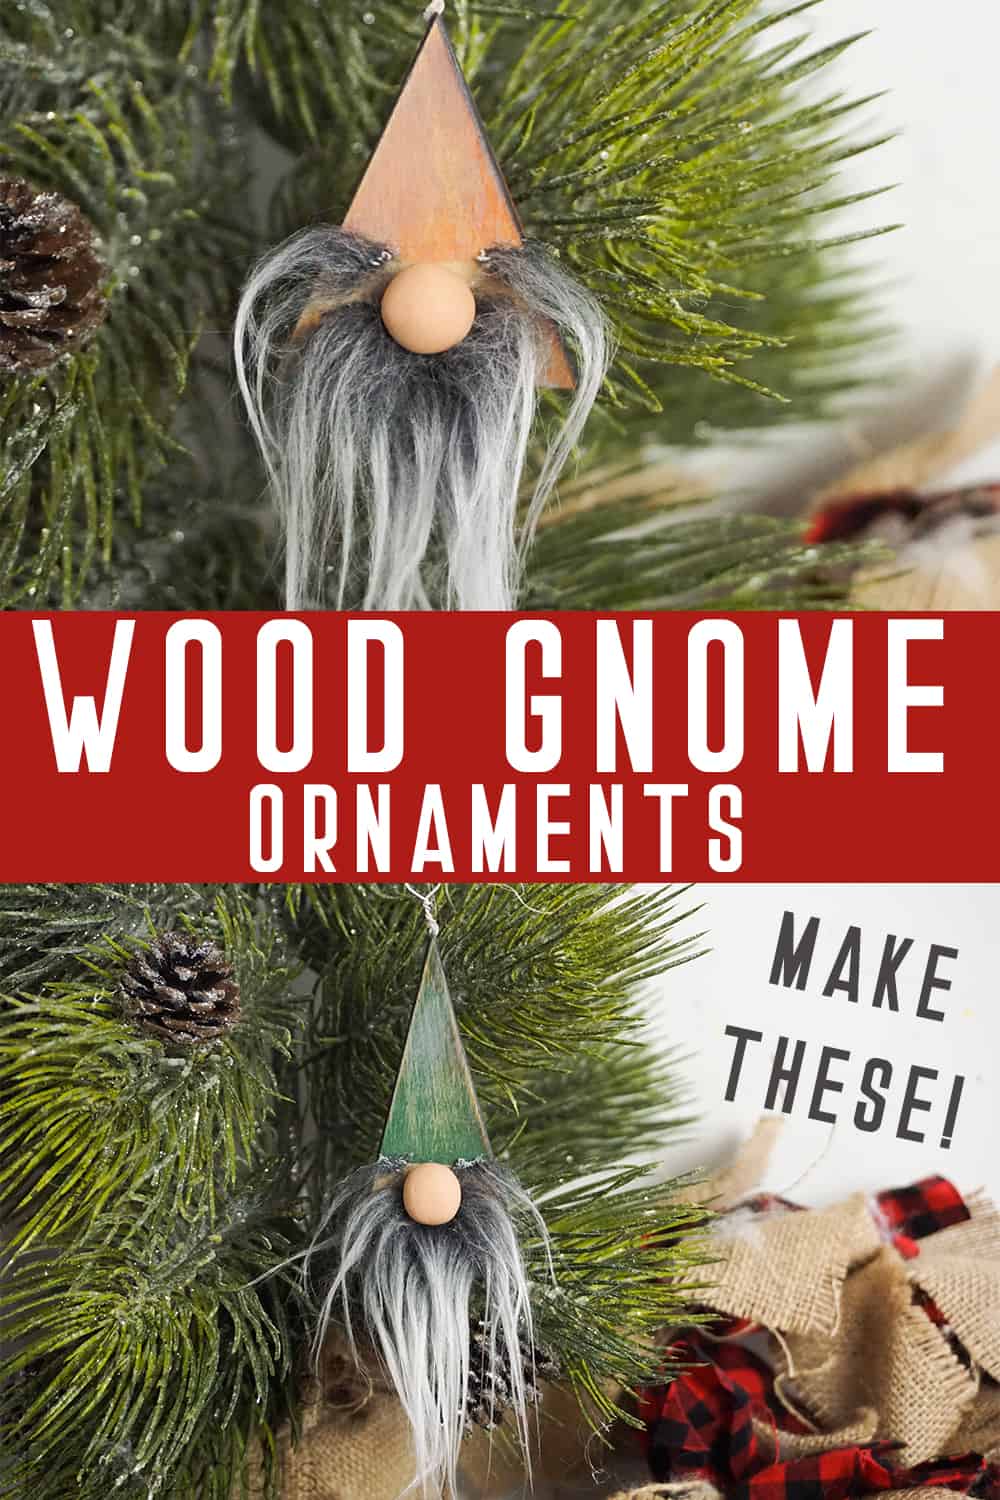
These Wooden Gnome Ornaments are so Easy and Cute!
If you want a super quick custom Christmas ornament, you have to make these easy wooden gnome ornaments. They’re so simple, but they look so cute on a farmhouse Christmas tree!
What You'll Find On This Page
Wooden Gnome Ornaments
Here at Ruffles and Rain Boots, we are on a mission to make every kind of gnome ever though of. Seriously, I have made so many, I can’t even list them. But, for a farmhouse Christmas, I made these adorable wooden gnome ornaments.
RELATED READING: SCANDINAVIAN GNOME ORNAMENTS
They are so simple and fast to make. I made these easy wooden gnome ornaments in about 20 minutes. Basically, the paint dries and they’re done. Let’s get started.
DIY Christmas Gnome Tutorials
If you’re looking for the best DIY Christmas gnome tutorials, you have come to the right place. Check out all of my favorite tomte tutorials for the holidays!
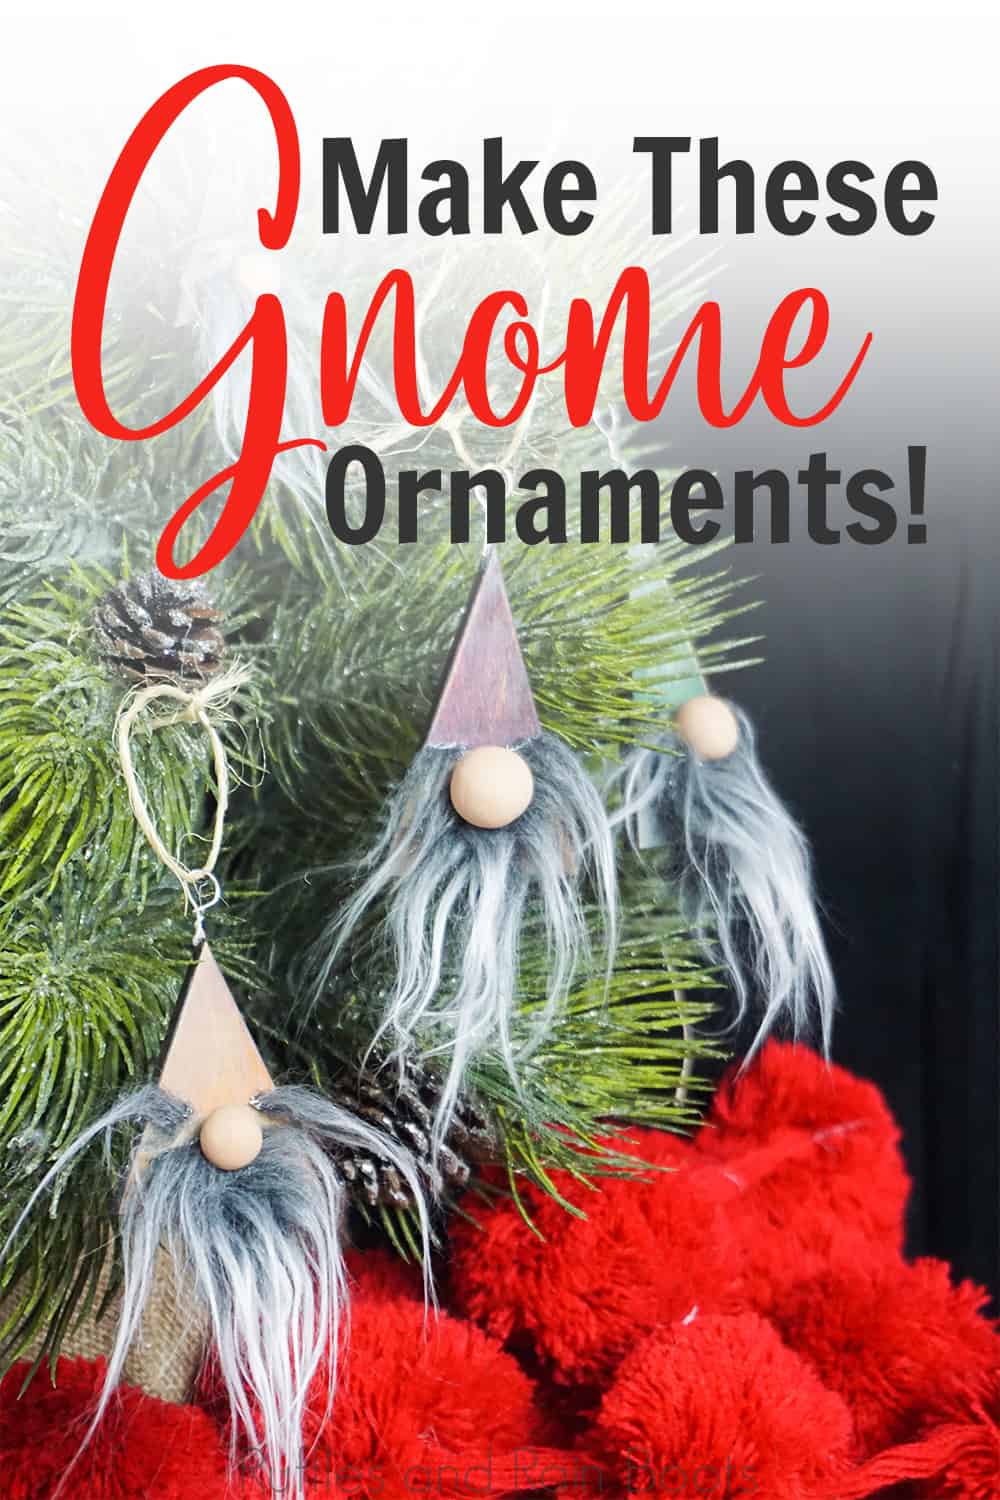
No Time to Make This Now? Pin it for Later
You’re busy, I get it. Pin this to your favorite Christmas crafts board on Pinterest and it’ll be here for when you’re ready.
Tips to Make DIY gnome Ornaments
- Click here to get the free cut file. This is free for personal use, but I would love it if you would share to Pinterest on your favorite farmhouse Christmas board. But, if you don’t have a cutting machine, you can still make these adorable DIY gnome ornaments. Just get your saw action going!
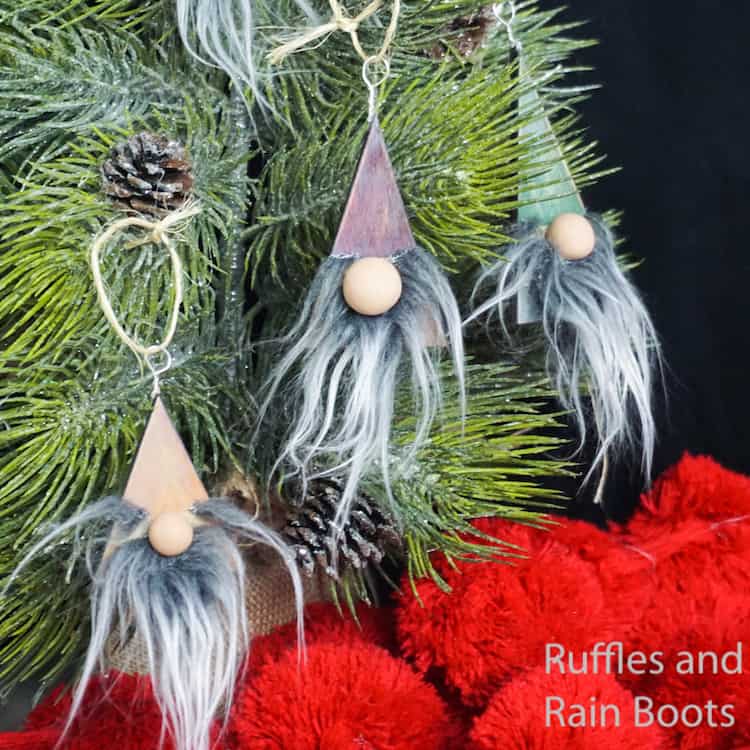
- You can hang these on your Christmas tree or put them on a wreath. They’re very easy to make, so you could even do both! LOL!
- To make the most fun farmhouse colors, mix a little black or grey with your primary colors. So, don’t just go with straight green. Add a little brown or black to it. That will tone down the brights and make it a little more farmhouse-ey (is that a word?). And the same with reds, yellows and oranges.
- Get a quality faux fur – check out my recommendations here. It really does make a HUGE difference in a quality gnome.
How Do I Make Wooden Gnome Ornaments?
I’m so glad you asked. Below is our written tutorial.
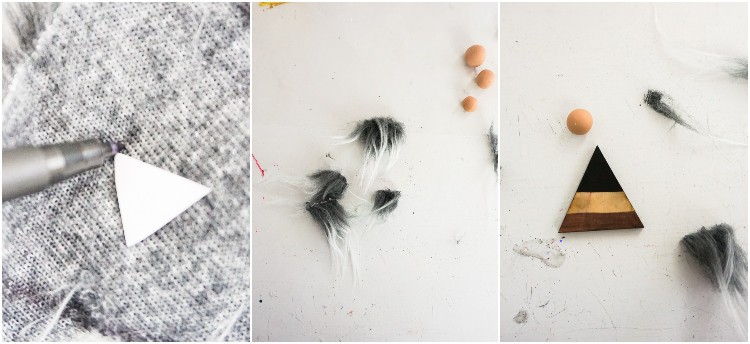
Start making your gnome noses by combining the brown and white polymer clay until a flesh-color is consistent throughout.
Roll clay into 4 neat balls, making sure they are smooth all the way around.
Bake in the oven per the polymer clay package directions. Allow to cool before touching. Set aside.
Cut out triangles from printable pattern.
Sand each piece of wood smooth.
With a sheet of paper, sketch out where you want the hat and clothes to be on your gnomes. Be sure to leave a 1-inch space between the hat and clothes.
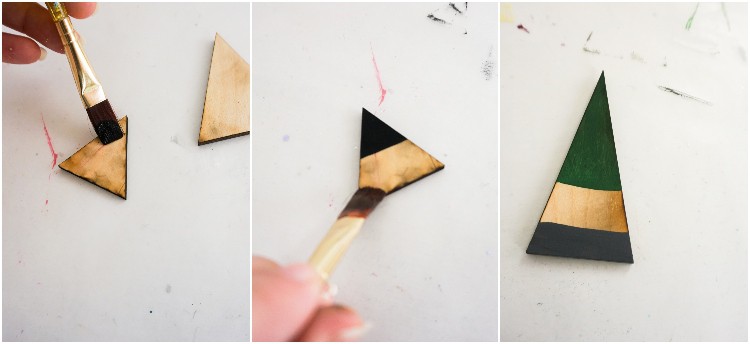
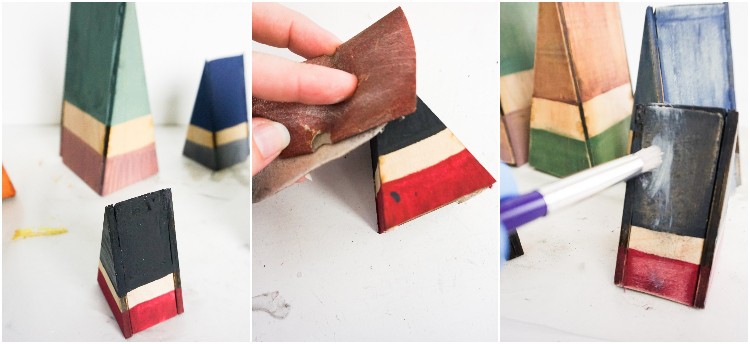
Transfer locations of hat and clothes onto wood.Paint hats and bodies of each gnome as desired.
Allow paint to dry completely.
Sand paint a little, making the wood look aged.
Add a coat of grey wood stain and immediately wipe off, making the wood look more aged. Allow stain to dry completely.
Sand again to further age the wood.
Cut out the fur or the felt for beards, mustaches and eyebrows.
Hot glue beards, mustaches, and eyebrows in place.
Hot glue noses in place above beard.
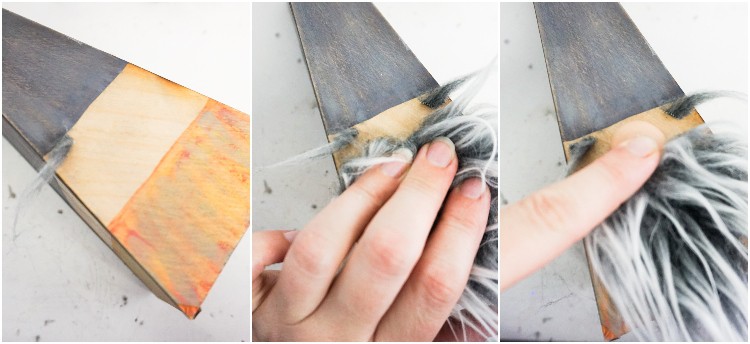
Enjoy!
If you’re making a Christmas crafts playlist on YouTube, here is our wooden gnome ornaments video tutorial.
More DIY Gnome Ornaments You Might Like
- The Best Gnome Ornaments – If you’re looking to make a few ornaments for your Christmas tree this year, there’s awesomeness just waiting for you to get started.
- Adorable Gnome Pillow – Need more gnome in your life? You can make a quick gnome pillow in minutes!
- Simple Scandinavian Gnome with Braids – Basically, this is a gnome any gnome-lover needs to make. Braids? Yes, please!
Please Save This to Pinterest
Your shares are how this site grows and I am sincerely grateful. Know a friend who’d like this? Please share it on Facebook or save it to your favorite holiday crafts board on Pinterest.
Wooden Gnome Ornaments

If you want a super quick custom Christmas ornament, you have to make these easy wooden gnome ornaments. They're so simple, but they look so cute on a farmhouse Christmas tree!
Materials
- 1 Sheet 12x12 Wood (3/32 thickness maximum for cutting machines)
- Craft Paint:
- Red
- Yellow
- Black
- Green
- White
- Grey Wood Stain
- Wipe-on Polyurethane to Seal (optional)
- Craft Fur, Mongolian Fur or any fur OR Ivory Craft Felt
- Polymer Clay (for EACH gnome nose--you can alternatively use a ½-inch wooden bead per gnome):
- 1 small, dime-sized portion of brown
- 1 quarter-sized portion of white
- Floral Wire
- Ribbon or String
- Printable Pattern
Tools
- Sand Paper
- Pencil
- Cutting Machine (or Miter Saw or Table Saw)
- Paintbrush
- Exacto Knife or Scissors
- Wire Cutter Pliers
Instructions
- Start making your gnome noses by combining the brown and white polymer clay until a flesh-color is consistent throughout.
- Roll clay into 4 neat balls, making sure they are smooth all the way around.
- Bake in the oven per the polymer clay package directions. Allow to cool before touching. Set aside.
- Cut out triangles from printable pattern.
- Sand each piece of wood smooth.
- With a sheet of paper, sketch out where you want the hat and clothes to be on your gnomes. Be sure to leave a 1-inch space between the hat and clothes.
- Transfer locations of hat and clothes onto wood.
- Paint hats and bodies of each gnome as desired.
- Allow paint to dry completely.
- Sand paint a little, making the wood look aged.
- Add a coat of grey wood stain and immediately wipe off, making the wood look more aged.
- Allow stain to dry completely.
- Sand again to further age the wood.
- Cut out the fur or the felt for beards, mustaches and eyebrows.
- Hot glue beards, mustaches and eyebrows in place.
- Hot glue noses in place above beard.
- Enjoy!
Notes
For more great Christmas gnome ornaments, visit RufflesandRainBoots.com
Meet the Creator
Hi there, I’m Sarah Nenni-Daher. I’m a crafty gal and always have at least 14 projects going at once. I am a crafter, designer, DIYer, and pattern maker. I share my creations here and in the Ruffles and Rain Boots® Shop.
Here at Ruffles and Rain Boots®, you’ll find DIY gnomes, crafts, gifts, cupcakes, laser crafts, and so much more. I love sharing video tutorials over on YouTube and chatting with other crafters in my Facebook groups. We’d love to have you!