
Nordic Viking Gnome Tutorial
This Nordic Viking gnome is the perfect addition to any gnome lover’s collection. Grab your supplies and let’s make a fun DIY Scandinavian gnome.
What You'll Find On This Page
Viking Gnome Tutorial
Here at Ruffles and Rain Boots, I love making gnomes. If you do, too, you’re in the right place! This Viking gnome came as a request from my daughter. For years, she’s loved all things “How to Train Your Dragon” and asked for a gnome to keep her dragon stuffed animals company.
To make this fun Viking gnome in a helmet, we will:
- make a sock gnome body
- braid the gnome’s faux fur beard
- use felt to make a helmet
- mold clay to make the horns and helmet accents.
Let’s get started.
No Time to Make This Nordic Gnome Now? Pin it for Later
If you just need to gather supplies (or a few crafting partners), pin this to your favorite crafts board on Pinterest and come back later.

Tips to Make a Viking Gnome
I love sharing this tips section on my gnome tutorials because, well, I don’t want you to have to make the same mistakes I did! Below are a few things to keep in mind when making this adorable Scandinavian gnome.
- Any gnome body type will work, but learn how to create a sock gnome – it’s the easiest style. To me, it’s also the most appropriate for this tomte, as it’s the stockiest.
- You might also want to peruse this list of the most frequently asked questions people have when making sock gnomes. It helps you to decide the details and gives you tips on making them.
- Form the horns for the helmet just a tad larger than you think they should be. I wish I would have made mine about a half inch longer on each side.
- Braiding the fur takes a couple of tries to get right, but it really brings this Viking gnome together. Work it up in a French braid style (pulling fur from below instead of from the side) and it will help make them longer.
How Do I Make a Nordic Viking Gnome?
I’m so glad you asked! For our written tutorial, see below but be sure to watch the video because it does show more detail on how each step is done. Here is the FULL Viking gnome video tutorial.
Viking Gnome Tutorial

This Viking gnome is the perfect addition to any decor. It's fun and quick to make, so let's get started.
Materials
- sock gnome (click here to learn how to make one)
- felt
- black suede or felt
- white polymer clay
- polyfill
Tools
- hot glue sticks and glue gun
- sewing machine (can be hand sewn)
- scissors
- chalk or chalk pencil for making marks on felt
Instructions
- Create a gnome body. I chose to use a sock gnome (click here for a sock gnome tutorial).
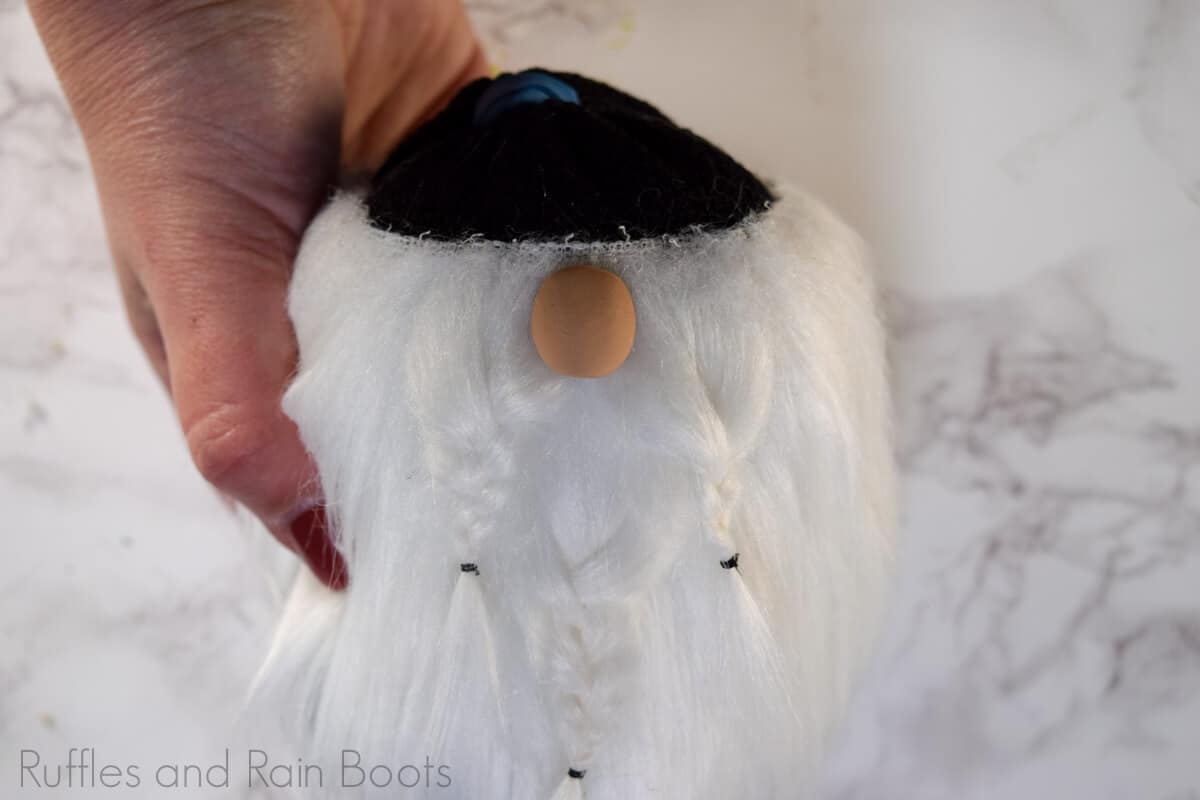
- Braid the fur on either side of the nose and underneath it to resemble the multiple beard braids of Vikings.

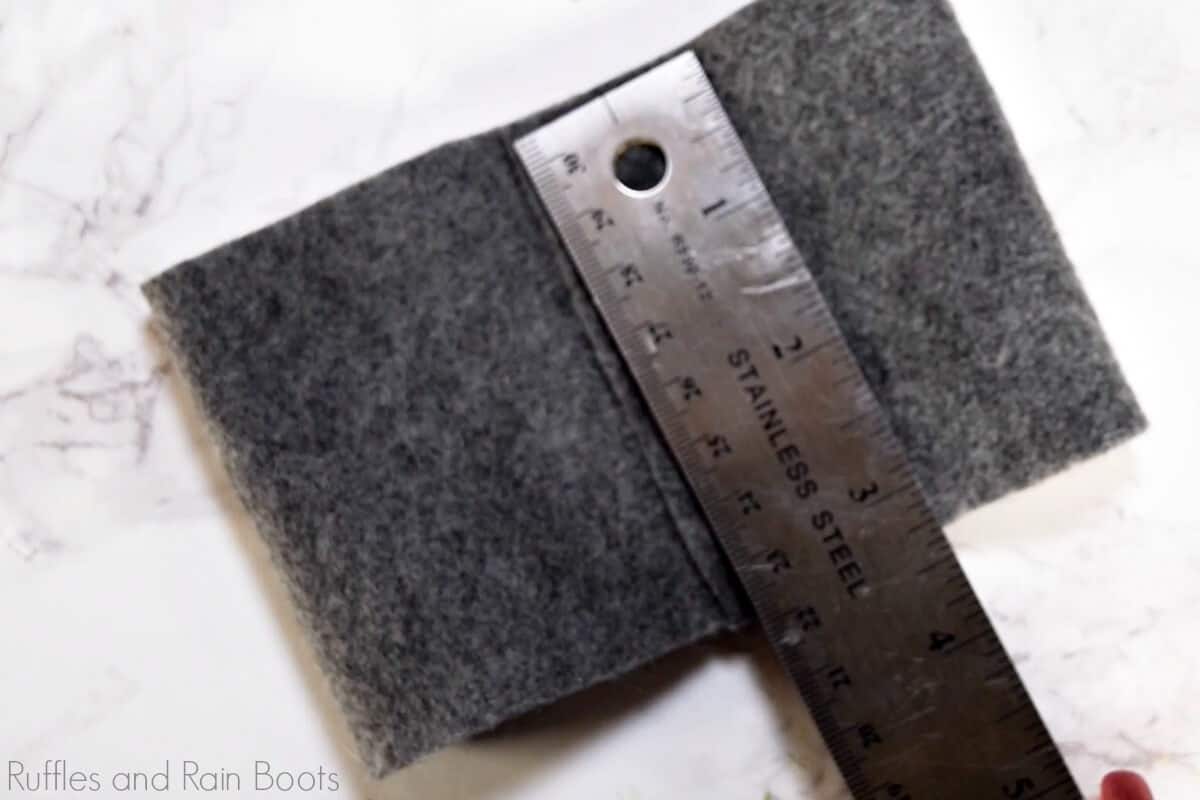
- Cut a piece of felt about 3.5 inches tall and long enough to go around the width of your sock gnome. Hot glue the short edges together in order to form a cylinder. Squish it flat.
- Measure the height of your gnome helmet and use a chalk pencil (or chalk) to add a line to adjust the height of the felt (top seam). Measure 1.5 inches from the edges, make a mark along the top seam. Measure 1 inch down from the top seam, make a mark. Join the two marks together with a chalk line.
- Sew along all the mark lines (top seam and two diagonal edges). Trim them leaving about a 1/8th seam allowance.
- Fit the hat to the gnome and tack down a few points - do not hot glue the hat down all the way around as we are not finished. Fold in the corner points and secure with hot glue.
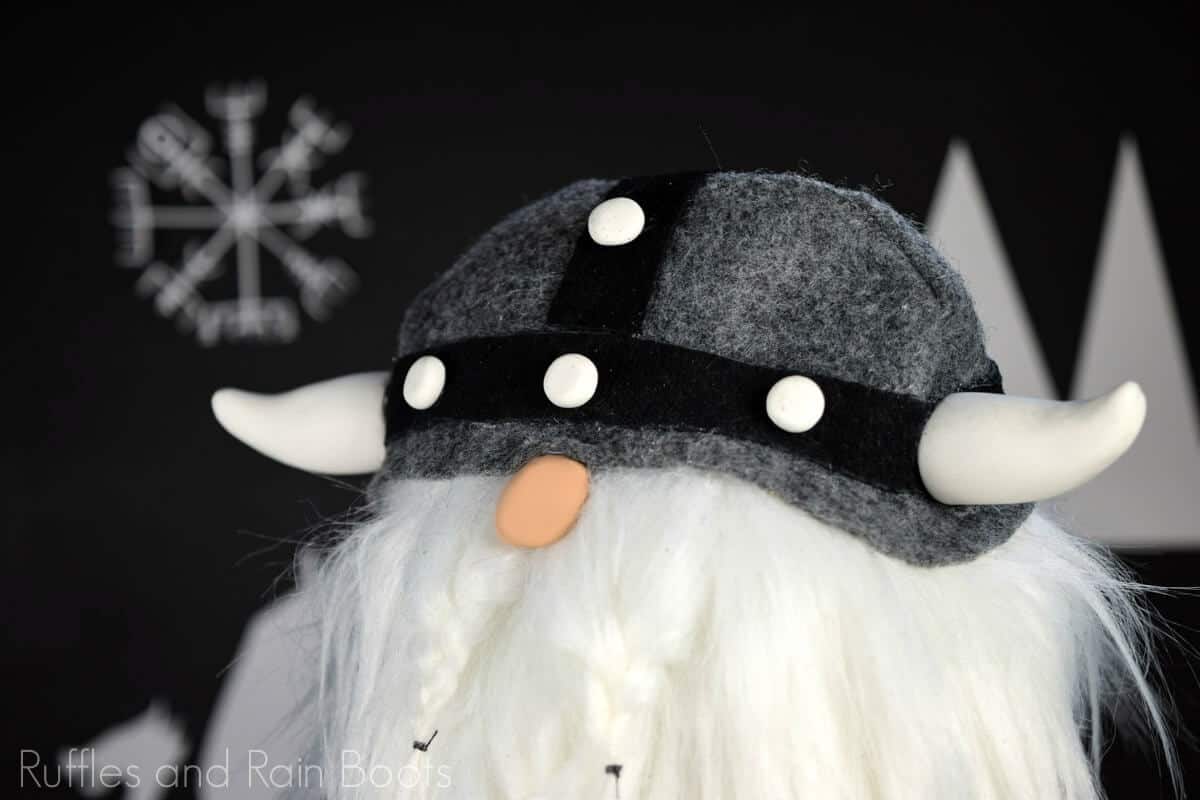
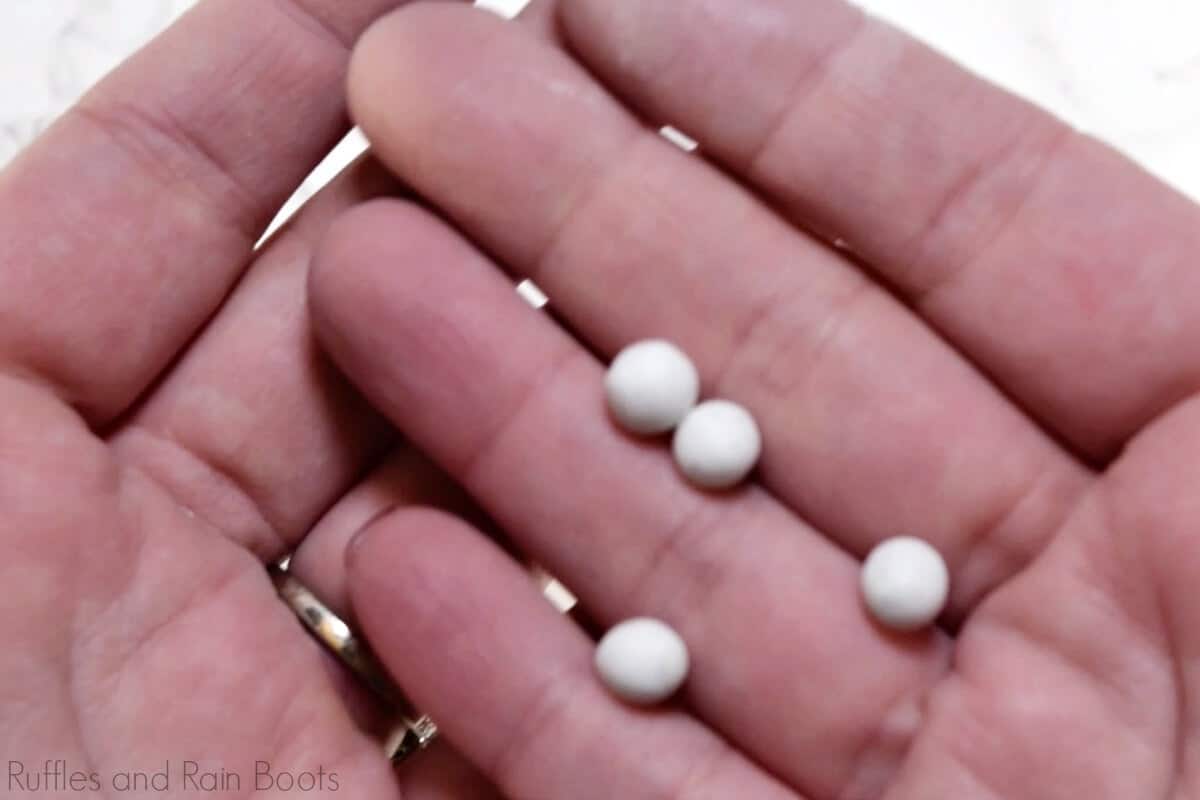
- Using white polymer clay, form two horns and 4 nail heads. See the video for more details.
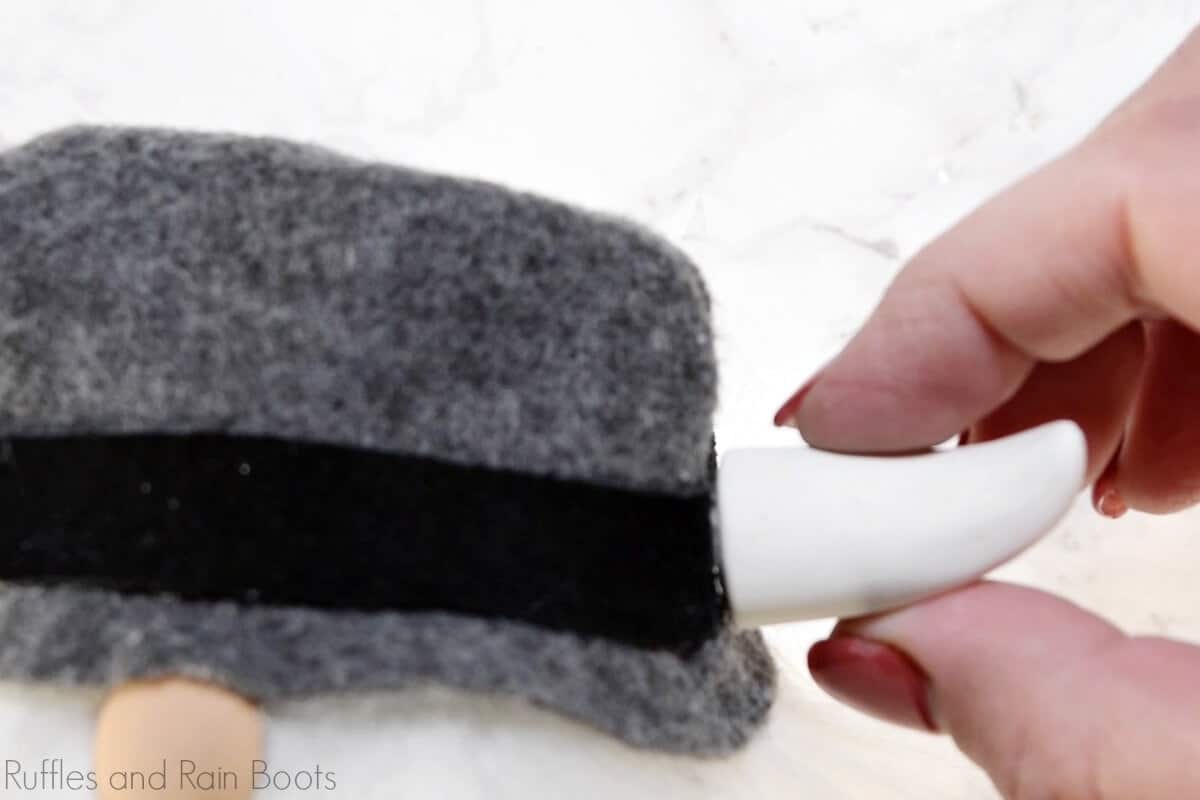
- Cut a piece of faux suede which wraps your helmet and is about 1/2 an inch wide. Glue it along the bottom edge of the helmet, leaving just a small bit of the felt showing through at the bottom.
- Glue the clay horns to the gnome helmet.
- Stuff the helmet with polyfill and secure with hot glue.


Notes
For an insane amount of gnome tutorials, visit Ruffles and Rain Boots.com.
Other DIY Gnomes
If you’re new here, you’ll soon discover I love to make gnomes and share the tutorials with you. Before you go, check out some of our favorites.
- Rainbow Sock Gnome – This adorable cutie has a twisty hat and is so easy to make!
- Bunny Gnome – Bring Spring indoors with this fun gnome tutorial.
- Christmas Gnomes – From sock gnomes to conical, here are ALL of our Christmas gnomes. You’ve been warned… :)
Please Save This to Pinterest
Your shares are how this site grows. If you liked this tutorial, please share it with friends on Facebook or save it to a board on Pinterest.

Meet the Creator
Hi there, I’m Sarah Nenni-Daher. I’m a crafty gal and always have at least 14 projects going at once. I am a crafter, designer, DIYer, and pattern maker. I share my creations here and in the Ruffles and Rain Boots® Shop.
Here at Ruffles and Rain Boots®, you’ll find DIY gnomes, crafts, gifts, cupcakes, laser crafts, and so much more. I love sharing video tutorials over on YouTube and chatting with other crafters in my Facebook groups. We’d love to have you!