
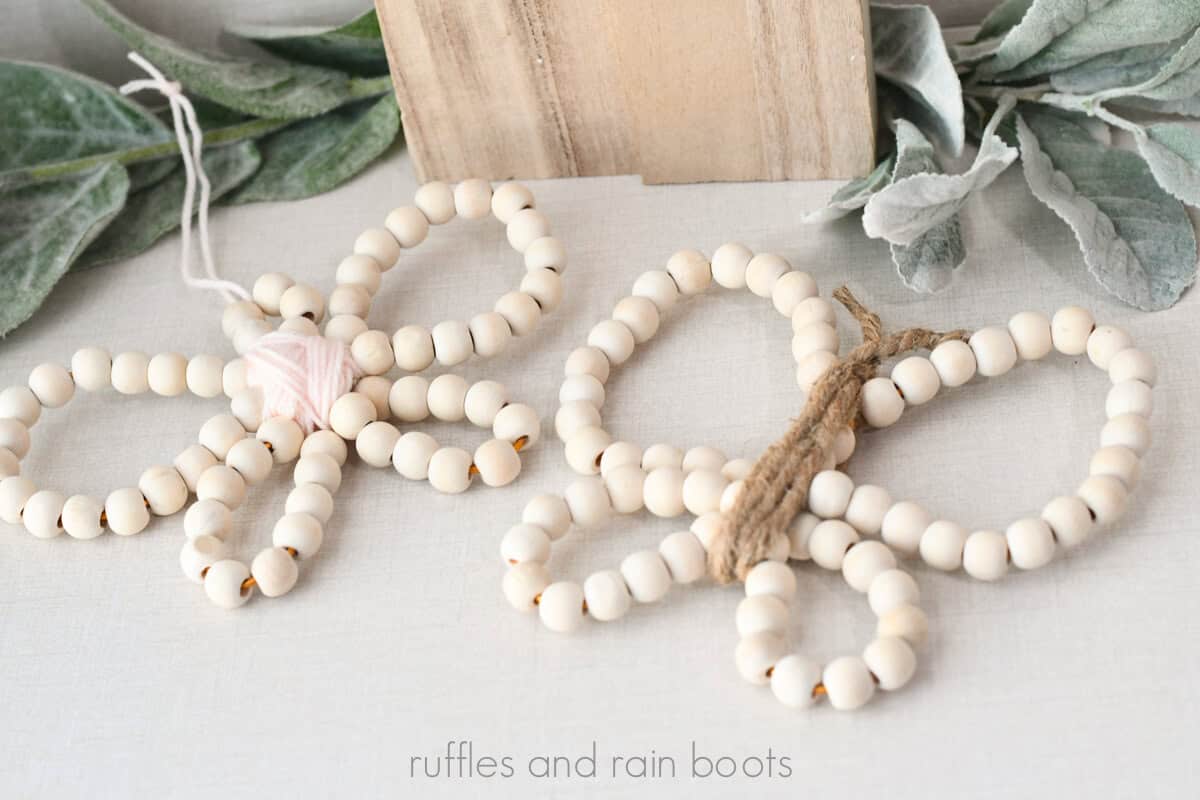
Wood Bead Butterfly
This wood bead butterfly craft is perfect for a warm summer afternoon. It only uses basic craft supplies and the possibilities for customization are endless.
RELATED READING: DIY Craft Stick Fairies (Using Craft Butterflies)
What You'll Find On This Page
Butterfly Wood Bead DIY
Here at Ruffles and Rain Boots, I’ve been – gasp – cleaning up my craft space and actually trying to use my stash. Over the years, I’ve purchased (and misplaced) so many bags of wood beads. I’ve just uncovered a stash that is particularly embarrassing.
While you should expect to see quite a few wood bead crafts throughout the year, I’m starting with a simple set of butterflies. These can be placed on a tiered tray, display, or even hung up in front of a window or off a rod.
Materials Needed for This Butterfly Craft
Below are the materials I used for this project. If you have little ones, pipe cleaners (the long ones) might be better suited than the wire.
- Wood Beads (I used Dollar Tree wood bead strings)
- Wire (again, a Dollar Tree find)
- Scissors
- Wired Twine, Yarn, or Pipe Cleaners
- Hot Glue (optional, to secure wired twine after cutting)
RELATED READING: Wood Bead Wreath Ornament (for Any Season)
Watch These Wood Butterflies Come Together (Video Tutorial)
If you’re a visual learner, watch my quick DIY wood bead butterfly video tutorial. It’s short and shows two ways to make different butterflies. While you’re there, please subscribe – we have a lot of fun on the channel.
How to Make a Wood Bead Butterfly
First, cut a 32 inch piece of wire and turn over one end by a half inch. I used scissors for this but you might need wire cutters if you’re using a thicker wire.
String nearly the entire length with beads. I ended up taking a few off in order to twist the wire, but if you start only about an inch left on either end (ends turned up), you should be good.

Once the wire is beaded, find the center and form the top wing on each side. With the remainder, form the lower wing sections.
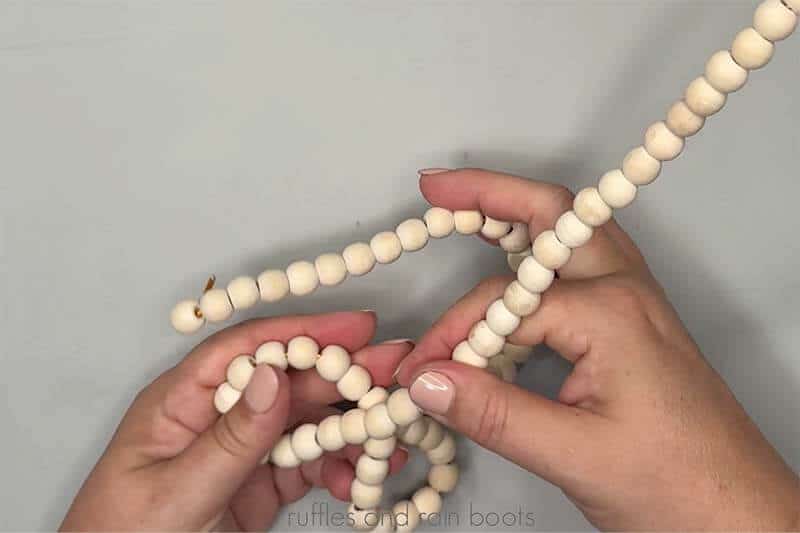
Secure the wire to itself when joining sections. I used the end of my scissors to press the wire down so it wouldn’t be sticking out.
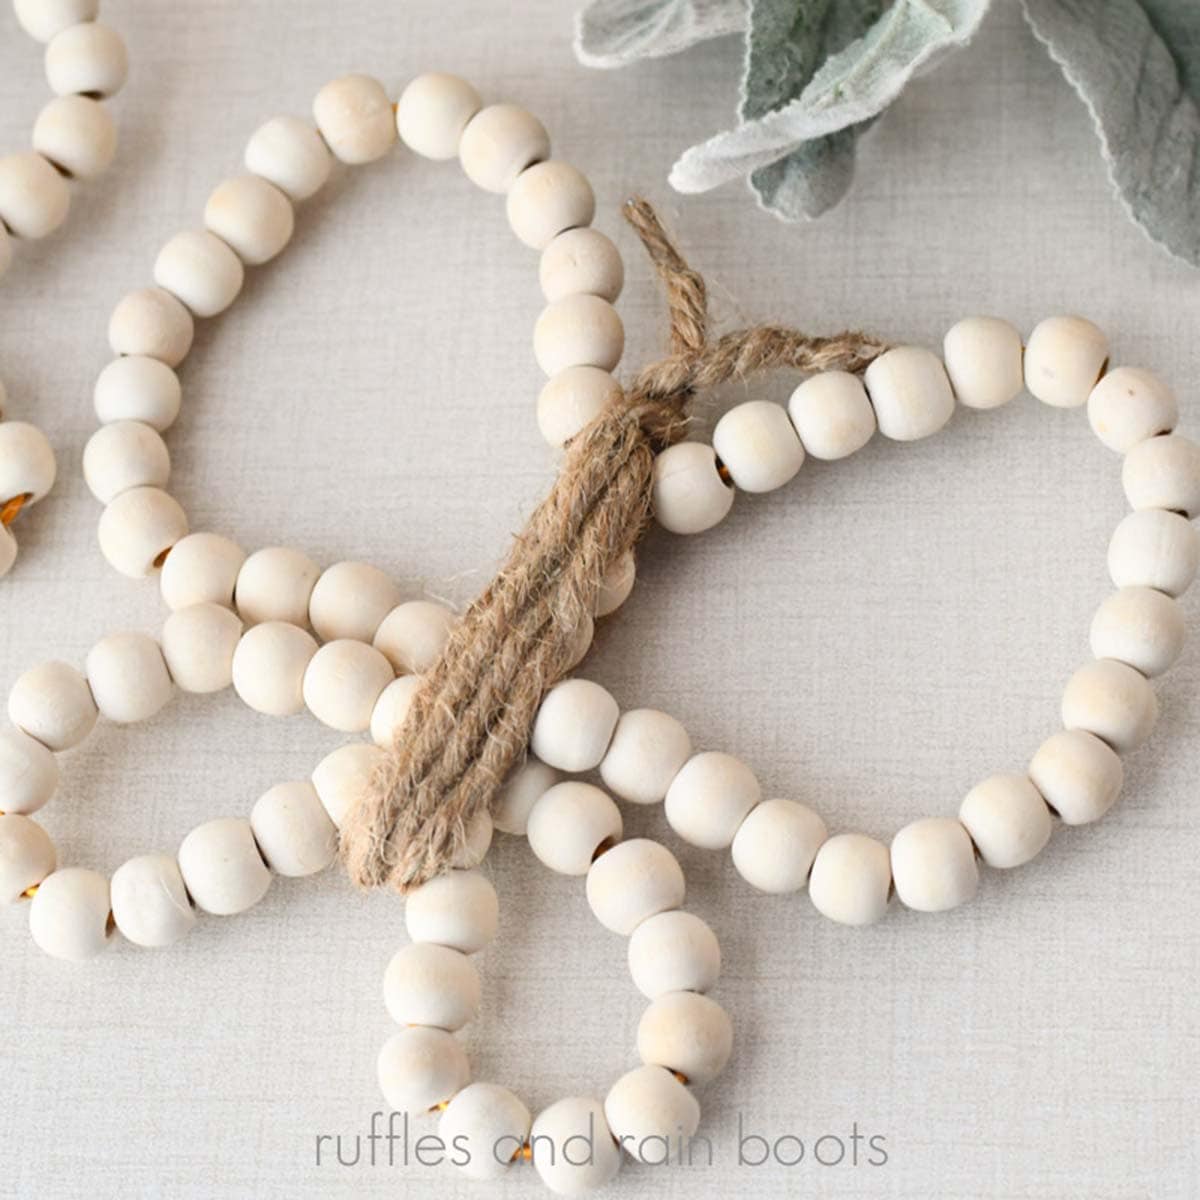
Wrap the area where a body would be and add antennae (if using wired twine) and/or a hanger.

More Crafts Like This
- How to Make Farmhouse Beads – Any color, any occasion, any decor, these wood bead strings make great accents on tiered trays, in dough bowls, or tucked into displays.
- DIY Wood Bead Pumpkin – This fun crafternoon idea is absolutely stunning left natural.
- Beaded Corn Craft for Fall – When the temperature starts cooling, grab some beads and make this colorful fall staple.
Please Save or Share This Fun Summer Butterfly Craft Idea
Your shares are how this site grows and I am sincerely grateful. Please save this to an easy crafts pin board or share it with a crafty group.

Meet the Creator
Hi there, I’m Sarah Nenni-Daher. I’m a crafty gal and always have at least 14 projects going at once. I am a crafter, designer, DIYer, and pattern maker. I share my creations here and in the Ruffles and Rain Boots® Shop.
Here at Ruffles and Rain Boots®, you’ll find DIY gnomes, crafts, gifts, cupcakes, laser crafts, and so much more. I love sharing video tutorials over on YouTube and chatting with other crafters in my Facebook groups. We’d love to have you!