
Dollar Tree DIY Wood Bead Pumpkin
This wood bead pumpkin craft is made with Dollar Tree finds and comes together pretty quickly. It is easy to keep the structure (unlike twine pumpkins) using a little hack I came up with.
Gather up the simple supplies and you will be done with this easy fall craft in under 30 minutes. If you can find some, snag some of the green twine to add a few curly vines and elevate it even more!
RELATED READING: Easy Raffia Pumpkin Placeholders (They Look SO High-End)
DIY Wooden Beaded Pumpkin with Wire
Here at Ruffles and Rain Boots, the season of pumpkin EVERYTHING is almost upon us. I’m not one to get in the coffee line for a pumpkin spice, but that doesn’t mean I don’t love decorating with the gourd.
This year, I am replacing a craft that… didn’t make it. I followed a different tutorial and well, it didn’t pan out for a lasting decor piece after it was packed away. Sure, that means I should do a better job in packing but I knew I could improve on the twine pumpkin.
No Time to Make This Now? Save or Share for Later
If you need to head to the store or your craft room to gather some supplies, save this to a DIY Dollar Tree crafts pin board or share it on Facebook. Either will make it easy to find when you’re ready to begin.

As an Amazon Associate, I could earn from qualifying purchases. There could be affiliate links within this article.
Tips for Making a Wired Wood Beaded Pumpkin
- Years ago, I made the twine-only version of this pumpkin and it was disappointing because after one season, it was very bent out of shape. Changing the base to floral wire allows me to quickly adjust it after pulling it from storage.
- If you can find some, use green twine to add a few curly vines coming from the stem. You can get the look with the jute, as well.
- In this easy DIY, I used two sizes of beads to make the piece more organic and less rigid. If you have only one size of bead, it will look fabulous, too!
- For a less neutral look, paint the beads before stringing them. I do recommend sealing them, as well.
- If your dollar store doesn’t have fall florals in yet, use felt to cut a pumpkin shape. Here is a free pumpkin leaf template.
RELATED READING: Rustic Cork Pumpkin DIY for Fall
How to Make Wired Beaded Pumpkins from the Dollar Tree
Below is the written and printable tutorial for this fun Dollar Tree fall craft idea. If you have questions, please use the comments section below.
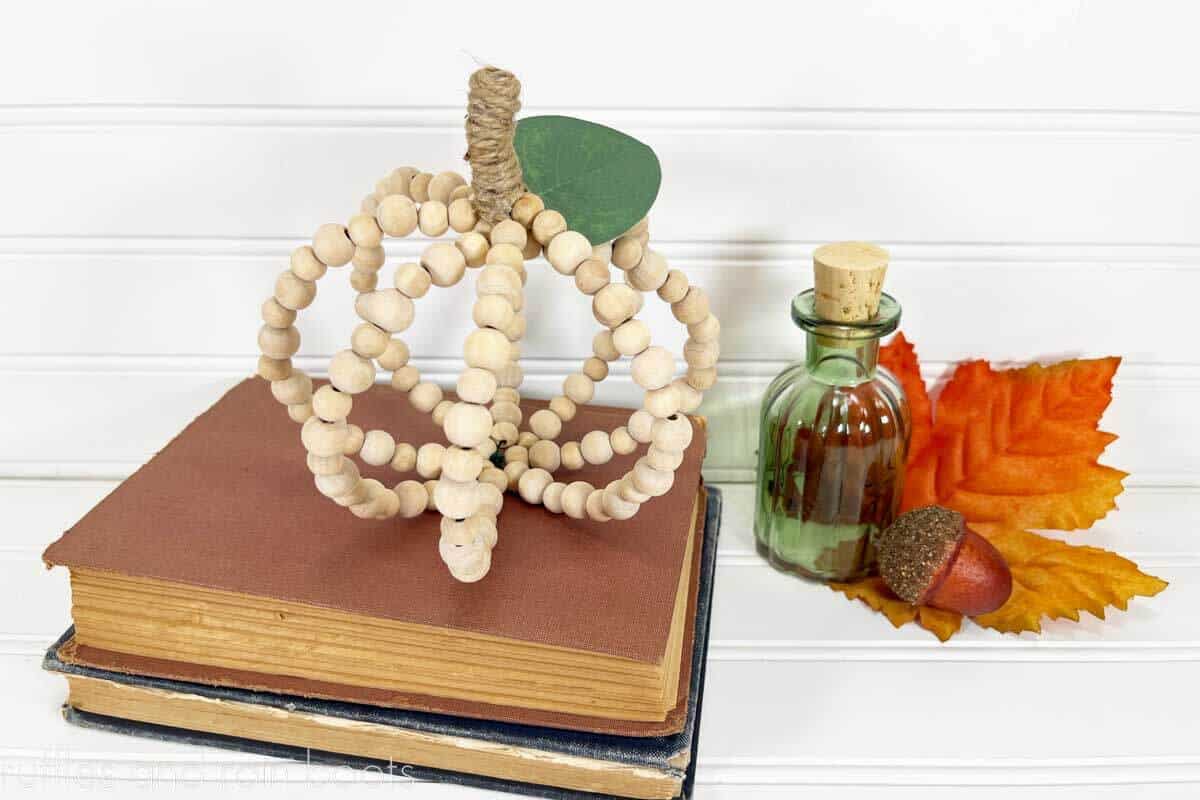
DIY Wood Bead Pumpkin

Create a solid DIY wood bead pumpkin using Dollar Tree supplies. In about 30 minutes, you can create a rustic, farmhouse-inspired fall craft and it's so easy, you can listen to your favorite audio book or watch a show while making it.
Materials
- Wood Beads (2 sizes from the Dollar Tree)
- 4 x Floral Wire Stems, 20 gauge, 18-inch (Dollar Tree)
- Jute Twine (Dollar Tree)
- Silk Leaf Stem (Dollar Tree)
Tools
- Hot Glue Gun and Glue Sticks
- Needle Nose Pliers
- Scissors
- Ruler
Instructions
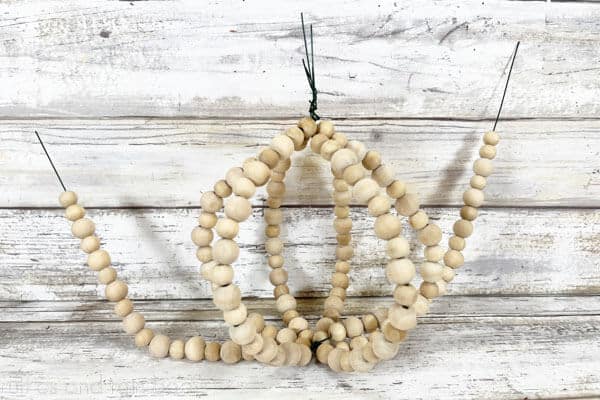
- Twist together four (4) floral wire stems to create a star-like shape with 8 spokes. Use the pliers to pinch where the wires join as closely together as you can.

- Thread 8 of the smaller beads onto each spoke, pushing them to the center join.
- String on 8 of the larger beads onto each spoke, pushing them right up next to the previous bead.
- Repeat adding beads in alternating sizes until there are 16 beads on each spoke.
- Bring two opposite wires together in the center, twisting to join them tightly.
- Continue joining opposite wires, wrapping them around the center wire bundle. Use the pliers to make them secure.
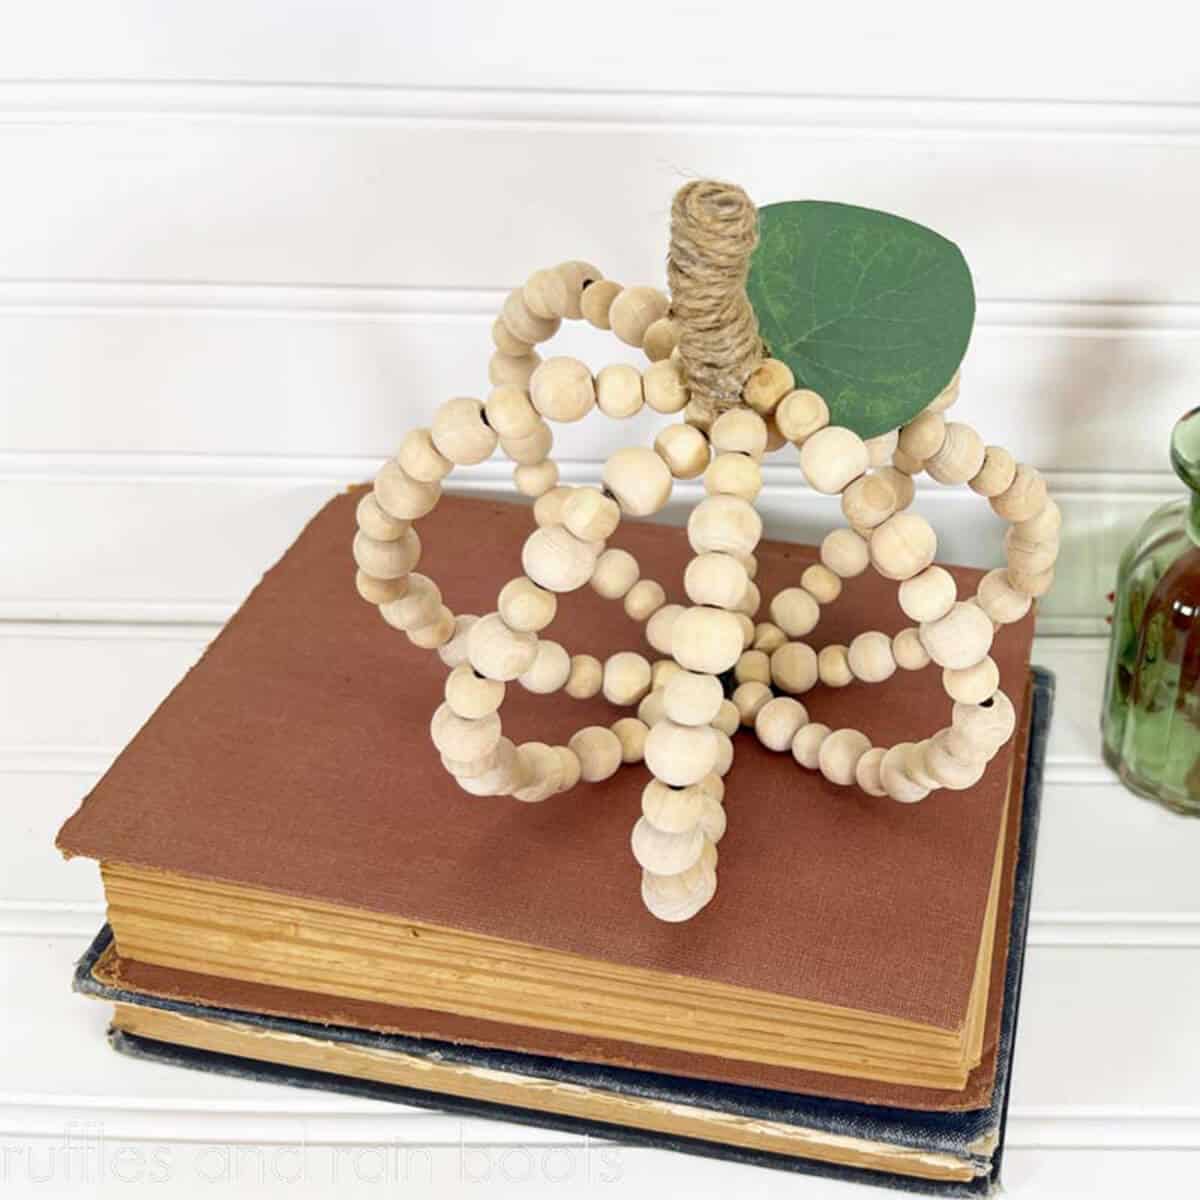
- Use hot glue and the twine to cover the wire by wrapping it securely in one or two layers. Add a faux leaf with hot glue and display.


Notes
Paint or stain the wood beads before stringing (I recommend sealing them).
Use green twine to create curly vines by wetting the twine, wrapping it around a pencil, and letting it dry. You can speed up the process with a heat gun.
More Fall Dollar Tree Craft Ideas You Might Like
- Quick and Easy Dollar Tree Fabric Pumpkins – Scraps of fabric find a home in this very quick fall DIY.
- Jenga Block Pumpkin Craft (Rustic Paint) – Add a pop of color in a farmhouse way using the wood game blocks.
- Dollar Tree Pumpkin Gnomes – These adorable, on-trend gnomes are made in just minutes (and check out those feet)!
Please Save or Share This Wood Bead Craft Idea
Your shares are how this site grows and I am sincerely grateful. Please save this to a fall home decor pin board or share it with a Dollar Tree DIY group on Facebook.

Meet the Creator
Hi there, I’m Sarah Nenni-Daher. I’m a crafty gal and always have at least 14 projects going at once. I am a crafter, designer, DIYer, and pattern maker. I share my creations here and in the Ruffles and Rain Boots® Shop.
Here at Ruffles and Rain Boots®, you’ll find DIY gnomes, crafts, gifts, cupcakes, laser crafts, and so much more. I love sharing video tutorials over on YouTube and chatting with other crafters in my Facebook groups. We’d love to have you!