
Make this Welcome Sign with Shelf to Display Gnomes and More!
I adore this easy welcome sign with shelf to display gnomes in my entryway. The floating shelf sign was so easy to make and the little shelf is perfect!
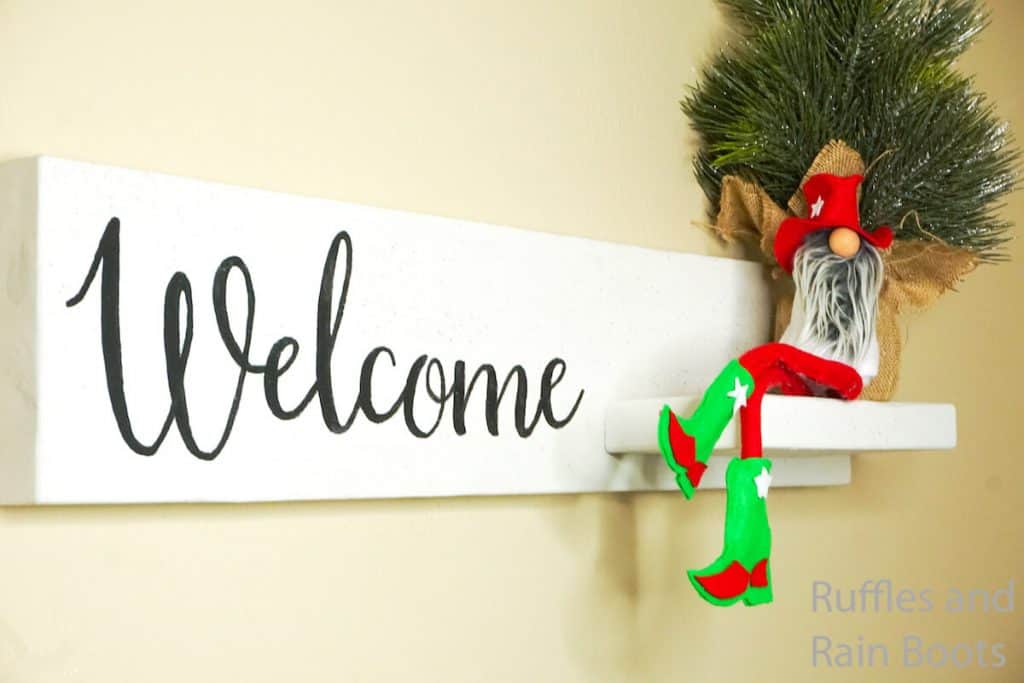
Welcome Sign with Shelf to Display Gnomes
Here at Ruffles and Rain Boots, I am loving the gnome trend. I needed a way to show off some of my gnomes, because, well, I was running out of space on my tiered tray and I just needed a new “home” for a gnome. So, I whipped up this awesome welcome sign with shelf to display gnomes!
RELATED READING: HOME GNOME CHANGEABLE SEASON SIGN
It’s super sturdy and really pretty. I am particularly in love with the little bit of sparkle from the glitter. Super cute. Now if I could just figure out a permanent home for the sign and shelf to display a gnome, that would be nice. LOL!
If you’re ready to make a display shelf and sign for your gnome (or Christmas crafts, or anything), let’s get started.
No Time to Make This Now? Pin it for Later
You’re busy, I get it. Pin this to your favorite DIY farmhouse ideas board on Pinterest and it’ll be here for when you’re ready.

Tips to Make this Display Shelf and Sign
- I used hot glue to hold the shelf in place on the sign long enough to get the screws into the back. I picked hot glue because it dries fast and I could keep moving. If you use wood glue, be sure to let it dry completely before flipping the sign over to drive in your screws.
- When I made this fun floating shelf sign, I was seeing if there was a way to make a sign without using my Cricut. I have included a cut file you can download here, to put vinyl on your sign, but I wanted to see what I could do. You know, experimentation.

How Do I Make this Welcome Sign with Shelf to Display Gnomes?
I’m so glad you asked. Below is our written tutorial.
Welcome Sign with Shelf

I adore this easy welcome sign with shelf to display gnomes in my entryway. The floating shelf sign was so easy to make and the little shelf is perfect!
Materials
- 1 8x3 piece of wood, 3-foot long
- 1 6x3 piece of wood, 1-foot long
- Black Craft Paint
- Glitter (I used silver, but white would be beautiful, too)
- White Chalkboard Paint
- Wipe-on Polyurethane to Seal (optional)
- Pattern for “Welcome”
- 2 Small “L” Brackets and 4 screws
- 2 4-inch long screws
Tools
- Sand Paper
- Pencil
- Hot Glue Gun and Glue
- Screw Driver
- Paintbrush
- Exacto Knife
- Screwdriver
- Wall Anchors
Instructions
- Start by lightly sanding the wood.
- Using ample hot glue, glue the 1-foot long piece of wood to the 3-foot long piece of wood, horizontally, about 2-inches from the bottom of the 3-foot long piece and about 2-inches from the right side of the 3-foot long piece.
- Paint the wooden sign, including the shelf you just made, on the facing side and all edges, with the white chalkboard paint.
- Before the paint dries, sprinkle with the glitter.
- Allow paint to dry fully.

- If you have a Circut machine, download the “Welcome” file, upload to Circut Design Space, weld the word, and cut it. If using vinyl, apply to the wood as desired.
- If you do not have a Circut machine, download the two welcome file pages and, using painter’s tape, tape these pages to the wood, aligned correctly. Using the exacto knife, cut out the letters, then trace with a pencil. Paint the letters as traced.
- Allow paint to dry fully.
- Seal with wipe-on polyurethane, if desired (I didn’t desire).
- Drive the two 4-inch long screws through the back of the 3-foot long piece into the side of the 1-foot long piece to add stability. The hot glue is only to hold the shelf in place while you put the screws into the back.
- Place wall anchors into the wall, level to each other, where you’d like the top edge of the sign to be, about 10-20 -inches apart. I like to pre-drill holes for wall anchors, but that’s just me--the directions on the box say that you don’t need to, but I like do it anyway.
- Screw the “L” brackets into the wall anchors.
- Hold the sign up and screw the top side of the “L” bracket into the top edge of the sign.
- Place gnomes on the shelf immediately!


Notes
For more awesome gnome tutorials, visit rufflesandrainboots.com
More Gnome Tutorials You Might Like
- Home Gnome Interchangeable Season Sign – You will absolutely adore making and displaying easy interchangeable gnomes on this seasonal sign.
- Lumberjack Christmas Gnome – Loving that slouchy buffalo check hat gnome on the shelf in my photos above? You definitely have to check him out here.
- Mermaid Hat Gnome – Oh, is the mermaid gnome more your style? Cool! She’s so easy to make and that tail is just GORGEOUS!
- Christmas Cowboy Gnome – Ok, so, a confession: this little Christmas cowboy gnome has been out on my shelf for about a month already. LOL!
Please Save This to Pinterest
Your shares are how this site grows and I am sincerely grateful. Know a friend who’d like this? Please share it on Facebook or save it to your favorite DIY farmhouse ideas board on Pinterest.

Meet the Creator
Hi there, I’m Sarah Nenni-Daher. I’m a crafty gal and always have at least 14 projects going at once. I am a crafter, designer, DIYer, and pattern maker. I share my creations here and in the Ruffles and Rain Boots® Shop.
Here at Ruffles and Rain Boots®, you’ll find DIY gnomes, crafts, gifts, cupcakes, laser crafts, and so much more. I love sharing video tutorials over on YouTube and chatting with other crafters in my Facebook groups. We’d love to have you!