
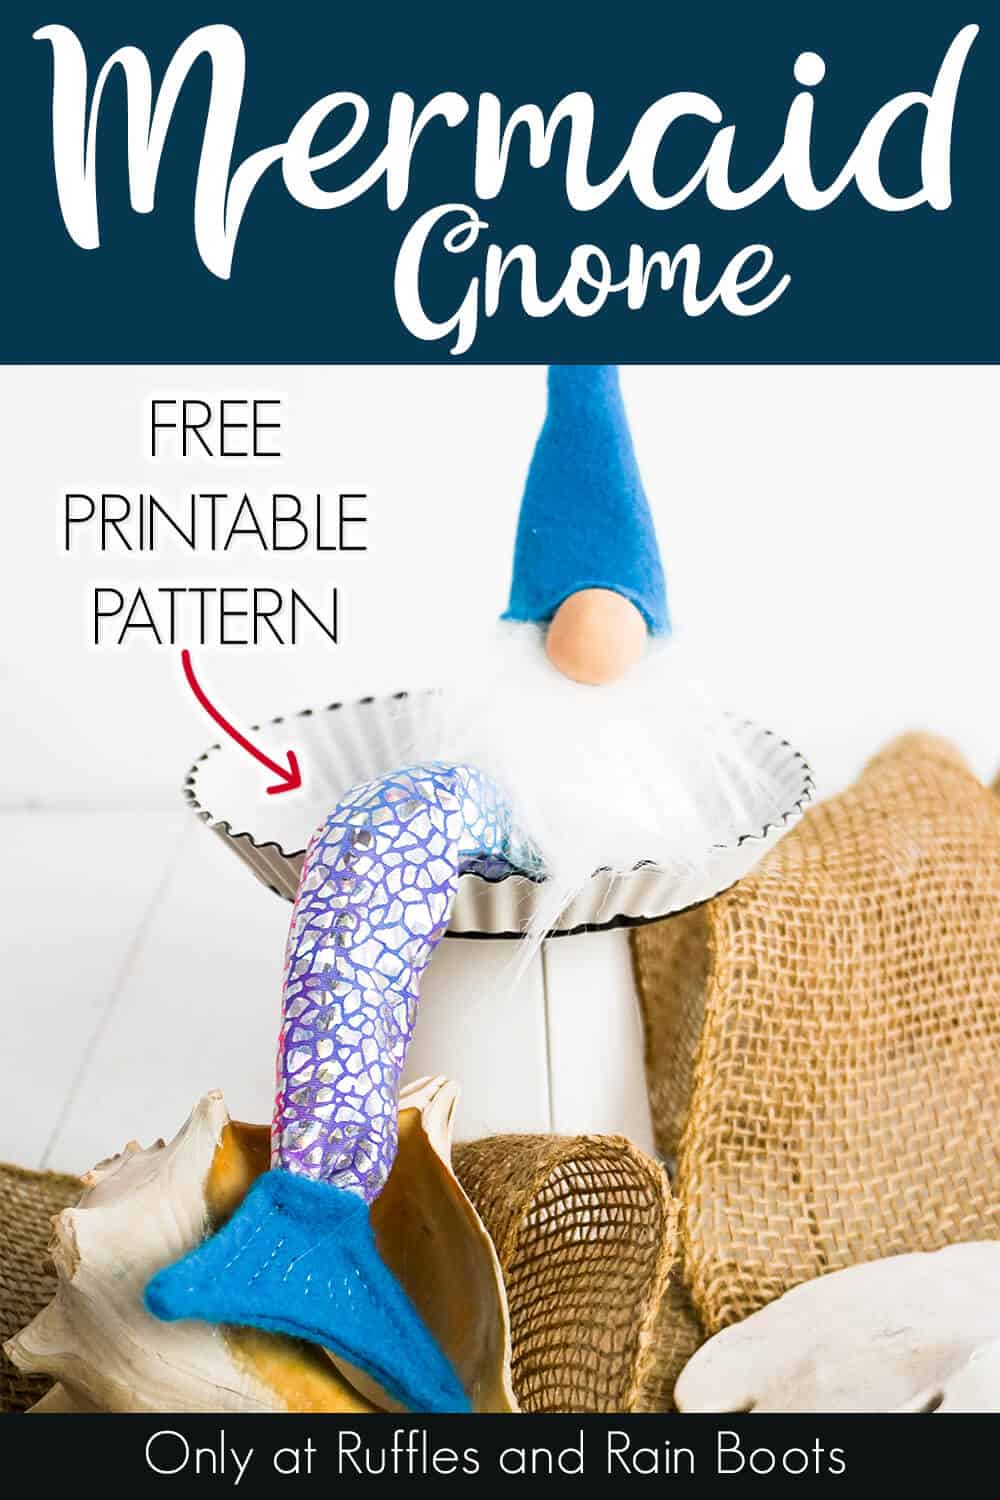
This Adorable Mermaid Gnome is so Cute and Comes Together Fast!
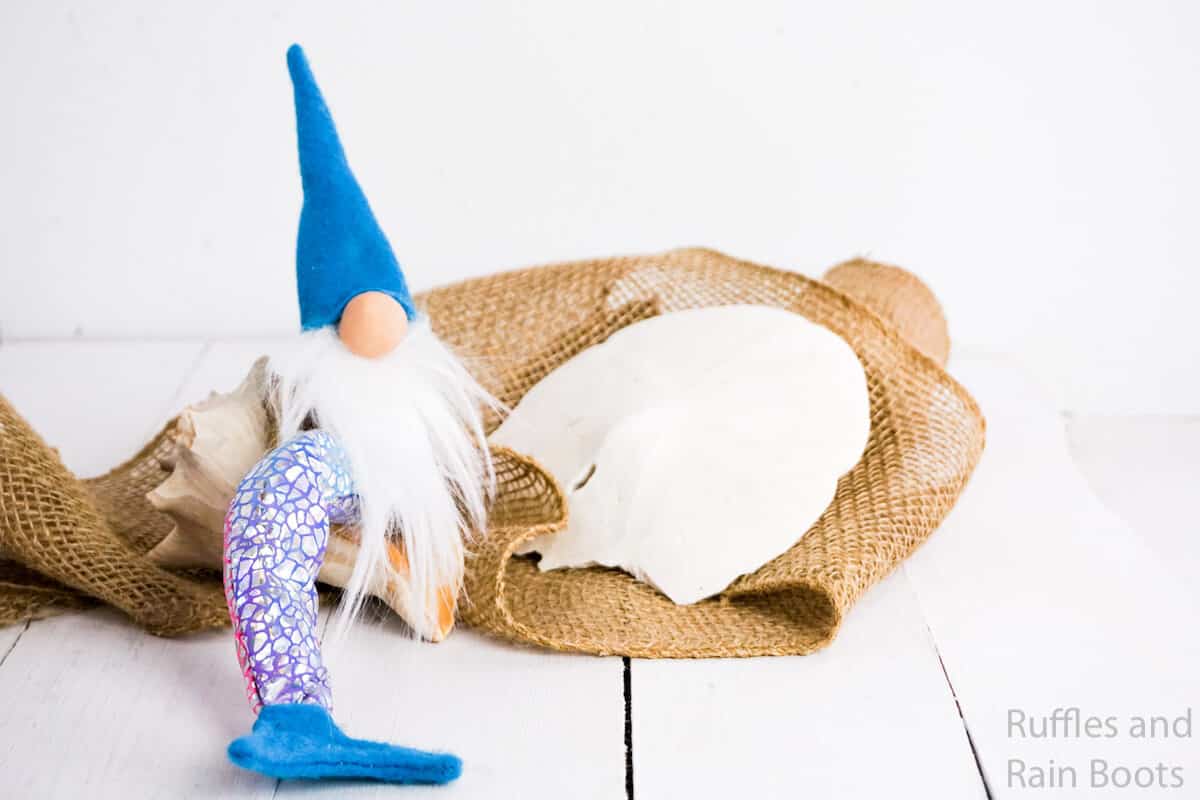
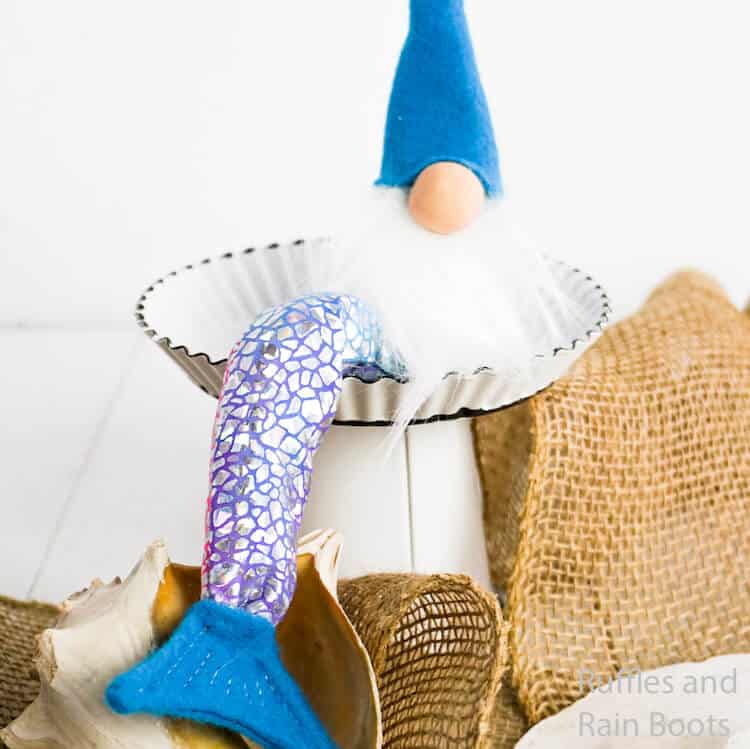
I love figuring out how to make a gnome, but this mermaid gnome was an especially fun tomte to figure out. He’s so cute and I could have this gnome mermaid done in 20-minutes!
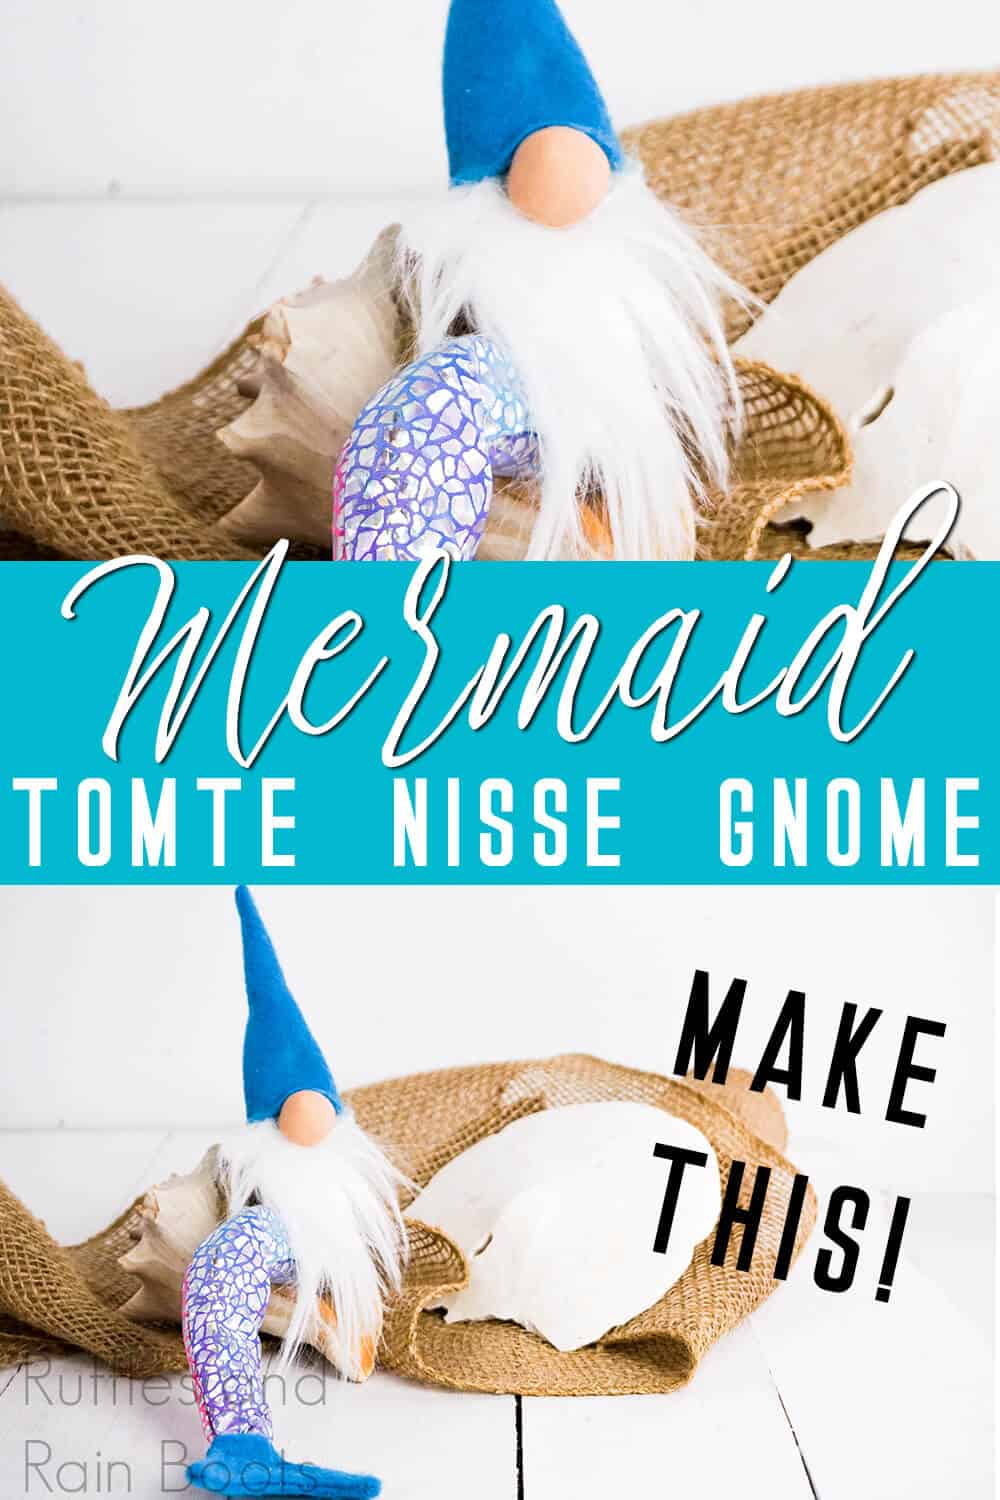
Mermaid Gnome
Here at Ruffles and Rain Boots, we adore learning how to make a gnome every day. Each one is unique and has a fun twist. Every tomte has it’s own challenges and then, well, they’re each so cute in their own little ways. Take this nisse, for example. He was kind of difficult to figure out the right combination of fabric and it took 2 attempts to get that tiny fin right.
RELATED READING: GIRL MERMAID GNOME
But the result of having this adorable mermaid nisse is just fantastic. And, because he’s such an adorable gnome mermaid, well, I think he’s just going to sit on my desk all the time…I mean, he’s just so cute!
If you’re ready to make your own mermaid tomte, let’s get started.
No Time to Make This Now? Pin it for Later
You’re busy, I get it. Pin this to your favorite gnome tutorials board on Pinterest and it’ll be here for when you’re ready.
Tips to Make A Gnome Mermaid
- If you don’t have floral wire, don’t despair! You can use a piece of wire hanger or pull a wire from an old faux flower stem. But, don’t make this tomte without some sort of wire in his tail. The little guy can’t stand up with that floppy tail, so the wire is necessary for keeping him upright.
- Don’t feel like you have to make this gnome mermaid with blue fin and hat, or even white craft fur. You can use your own combinations and create a ton of fun variations on this adorable gnome with a mermaid tail!
- Click here to download the free printable for this easy gnome pattern. You could probably figure it out for yourself without the pattern, but why bother when I did sketch it out for you…LOL!
How Do I Make this Mermaid Gnome?
I’m so glad you asked. Below is our written tutorial.
Mermaid Gnome

I love figuring out how to make a gnome, but this mermaid gnome was an especially fun tomte to figure out. He's so cute and I could have this gnome mermaid done in 20-minutes!
Materials
- 1/8 Cups Dry Rice
- Small Amount of Polyfill
- Polymer Clay (for gnome nose):
- 1 small, 1/8 dime-sized portion of brown
- 1 dime-sized portion of white
- ¼ yd Teal Blue Craft Felt
- ¼ yd Mermaid Scale Fabric
- 6-8-inch long floral wire
- Printable Template/Pattern
- Scrap White Craft Fur
- Mermaid (Merman) Gnome Pattern
Tools
- Hot Glue Gun & Glue
- Scissors
- Exacto Knife (to cut the fur)
- Wax Paper
- Oven
- Sewing Machine
- Aqua or Teal Thread
Instructions
- Start making your gnome nose by combining the brown and white polymer clay until a flesh-color is consistent throughout.
- Roll the clay into a neat ball, making sure it’s smooth all the way around.
- Bake in the oven per the polymer clay package directions. Allow to cool before touching. Set aside.
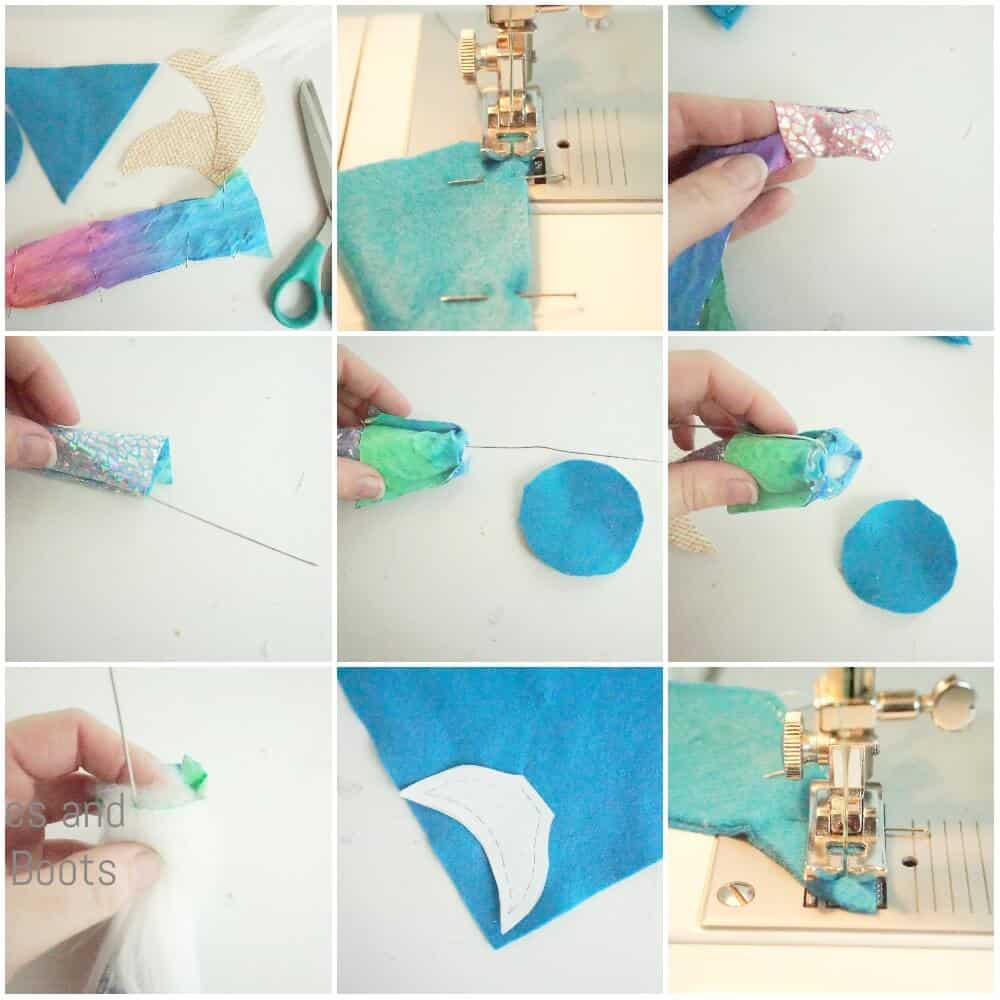
- Cut out the following:
- 2 fins from printable pattern in Teal Blue Craft Felt
- 1 circle base from printable pattern in Teal Blue Craft Felt
- 1 triangle hat shape from printable pattern in Teal Blue Craft Felt
- 1 beard triangle shape from craft fur (using the exacto knife on the back side of the fur, being careful not to cut the fur itself)
- To assemble the gnome merman body:
- Fold the body cutout in half vertically with the two scaled/shiny sides facing.
- Pin in place and sew that hem, leaving both ends open.
- Turn the tail right side out.
- Slide the floral wire into the body.
- Tuck the circle base in blue craft felt inside the body, about 3-inches below the top opening, and hot glue or whip-stitch in place, taking care to hot glue or whip stitch the floral wire in place at the same time.
- Fill the space between the bottom of the body and the circle base with polyfill.
- Fill the space between the top of the body and the circle base with rice, topping off with a small bit of polyfill to keep the rice in place when the body inevitably gets knocked over while you’re making the gnome.
- Set aside.
- To assemble the fin:
- Place the two fin cutouts back-to-back and pin them in place.
- Sew the fin cutouts together along the edges, leaving the top edge, where the fin meets with the fish scales.
- Trim the felt back at the fin tips as close as you can without breaking the thread you just sewed so that you can get a sharp tip when the fin is turned right side out.
- Turn the fin right side out, using a pencil or some other thin implement like needle nose pliers to get the tips pointed sharply outward.
- Sew 4-5 lines fanned-out across tail from top to end, leaving ⅛-inch from the edge of the fin at a minimum.
- Trim all strings.
- Tuck end of body into the top of the fin and hot glue or whip-stitch in place.
- To assemble the gnome mermaid:
- Place the beard on the front of the body, just below the edge of the top, where you would like the beard to permanently lay and hot glue or whip-stitch in place.
- Hot glue nose in place on the beard.
- Set hat on top, tucking the top of the body into the hat and wrinkling hat down on nose and hot glue hat in place in that wrinkle.
- Enjoy!

Notes
For more fun DIY gnome crafts, visit RufflesandRainBoots.com
More Gnome tutorials You Might Like
- Christmas Gnome Ornaments – Seriously one of the easiest DIY gnome tutorials that you will find. And the results are a stunning ornament you’ll be proud is on your tree!
- The Best Gnome Tutorials You Can Find – You won’t find a more comprehensive set of fun gnome tutorials for all sorts of holidays, seasons, and just for fun!
- Viking Gnome – Yes, yes, you too can make a viking gnome. So cool. And way more fun than just a plain ‘ole gnome,
Please Save This to Pinterest
Your shares are how this site grows and I am sincerely grateful. Know a friend who’d like this? Please share it on Facebook or save it to your favorite gnome tutorials board on Pinterest.

Hi, Is there a way to get the mermaid gnome template without signing up for Google drive?
You definitely should not have to sign up. Can you see this? https://drive.google.com/drive/folders/1thduxOlRROqwmmrO_FGgDLlDECl960Ke?usp=sharing
Is there a video on this one?
No, I’m sorry – no video on this one. I can see if I can add it to the summer queue, though.