
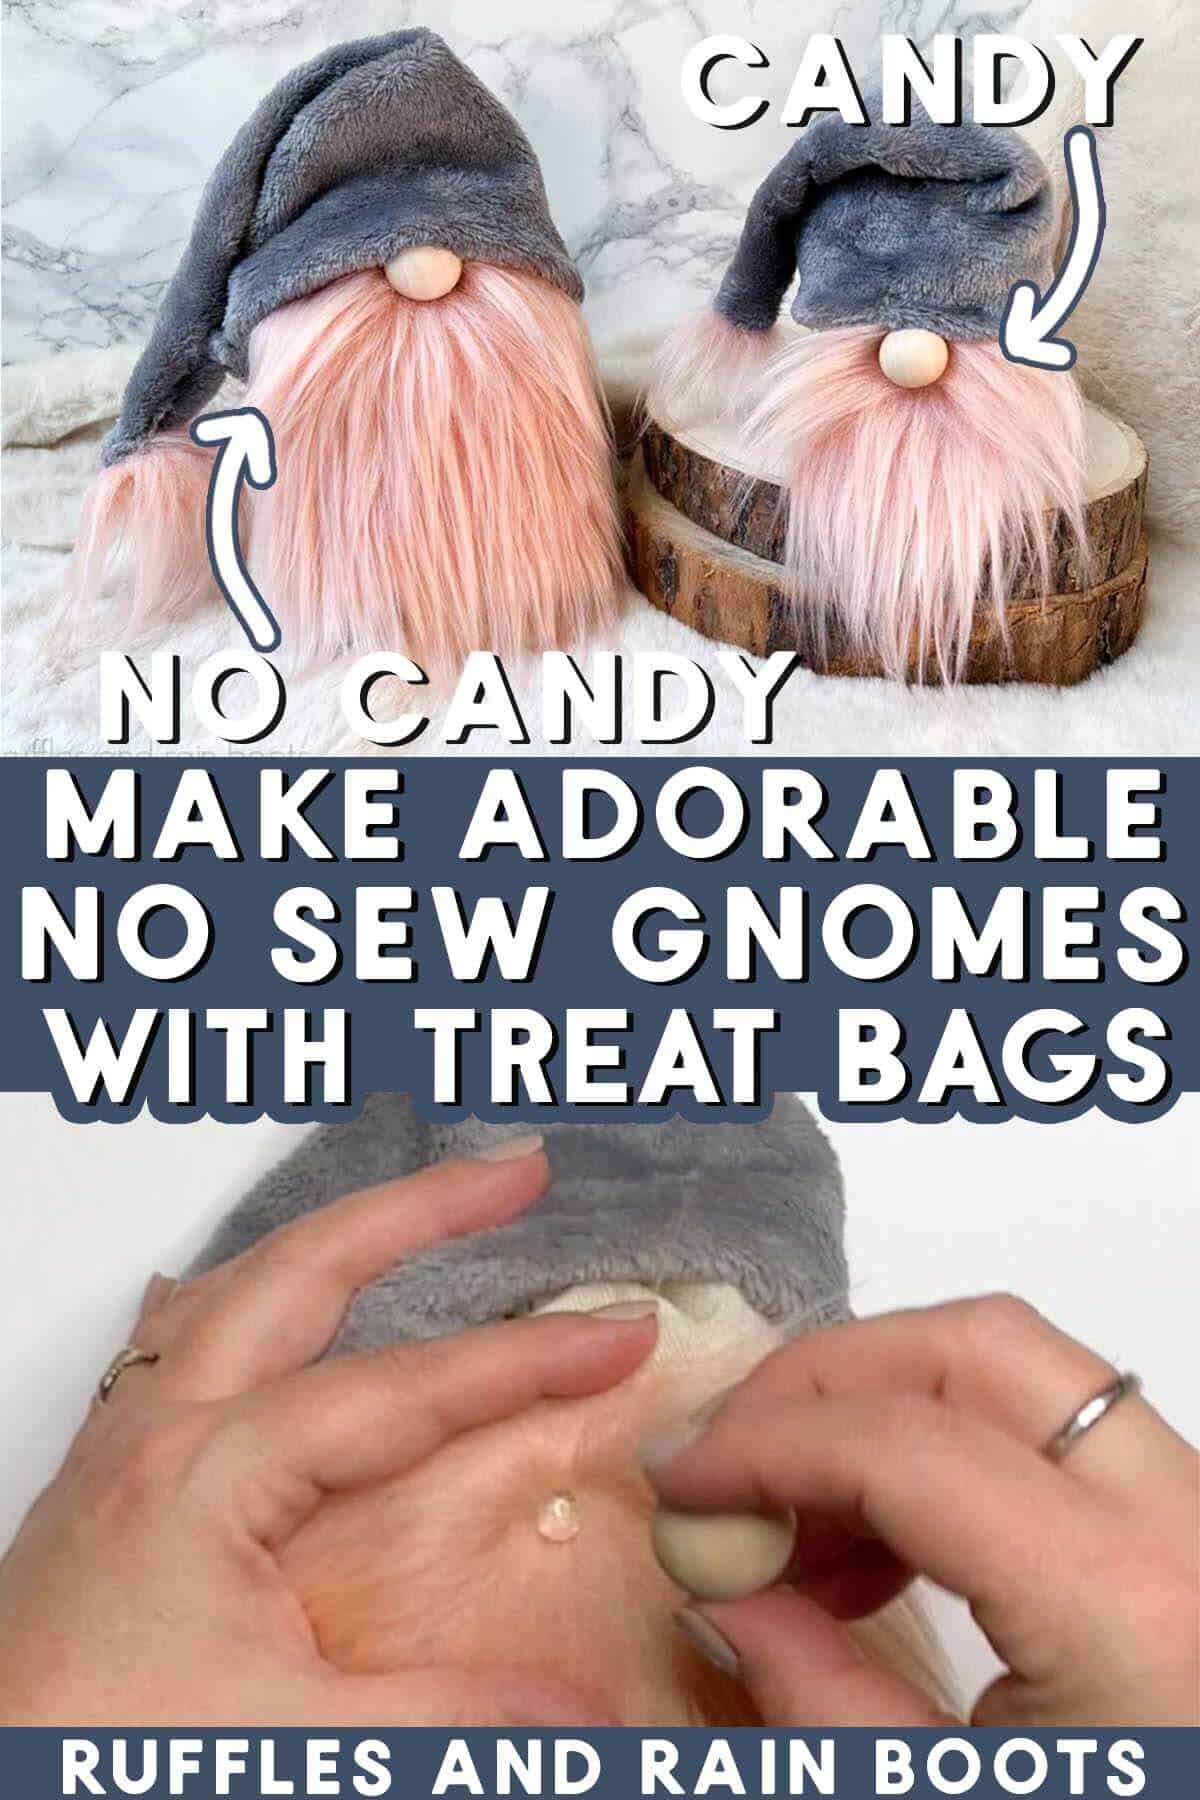
DIY Treat Bag Gnome for Any Occasion
Let’s make a pair of treat bag gnomes two ways using the same easy techniques and a hot glue gun. One is actually a gnome treat bag filled with candy, the other is a stuffed gnome made with a treat bag and no sewing!

RELATED READING: Christmas Gift Bag Gnomes – So Cute and Easy
Gnomes Made with Dollar Tree Treat Bags
Here at Ruffles and Rain Boots, when I was packing for a big move, I found a TON of craft supplies I forgot I had – tell me I’m not the only one! These Dollar Tree treat bags were in that stash and I started playing around with a couple of ideas immediately.
These easy no sew gnomes come together in about 7 minutes, so they are a good afternoon craft. I am creating these for Valentine’s Day, but you can use the same method to create Christmas gnomes, birthday favors, or gnomes for any occasion.
RELATED READING: DIY Dried Fern Heart Frame (So Easy)
Please Save or Share This Fun DIY Gnome Idea
Your shares are how this site grows and I am sincerely grateful. Please use the sharing buttons to save this easy gnome tutorial to a fun DIY pin board or share it with a crafty group on Facebook.
As an Amazon Associate, I could earn from qualifying purchases. There could be affiliate links within this article.
RELATED READING: Easy Valentine’s Day Sock Gnomes with Twisted Heart Hats
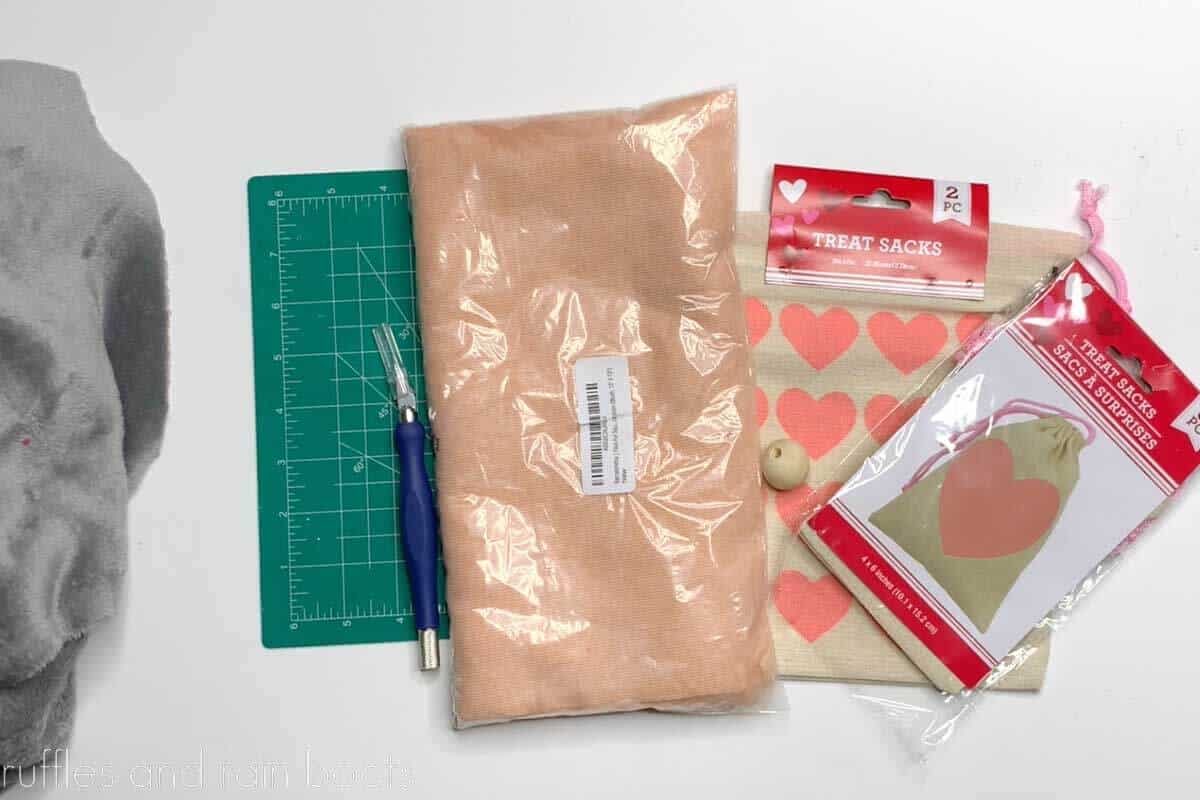
Materials Needed for a Valentine’s Day Gnome Treat Bag
Below are the materials I used for these treat bag gnomes. A quality faux fur isn’t really necessary on this craft but it can sure change the look.
- Treat Bags or Canvas Gift Bags – I used two sizes from the Dollar Tree, 4×6 and 7×9.
- Faux Fur – This is a very beautiful faux fur and I highly recommend it. I used pink because I was creating a Valentine gnome, but the sky is the limit!
- Wood Ball or Wood Bead – You can use anything, even a pom pom for a gnome nose.
- Poly Pellets – These are the preferred method for weighting stuffed animals and plushes.
- Poly Fill – Use more than you think you need, as it will compress.
- Optional: candy or decorations
RELATED READING: No Sew Mini Felt Gnomes for Valentine’s Day
How to Make Treat Bag Gnomes
Below are the step by step instructions for making both the large, stuffed gnome and the small treat bag gnome topper. Keep this page open, follow along, and use the comments section for any questions.
If you are a visual learner, watch the full treat bag gnome video tutorial which shows how to put both together. We have a lot of fun over there, so be sure to subscribe.
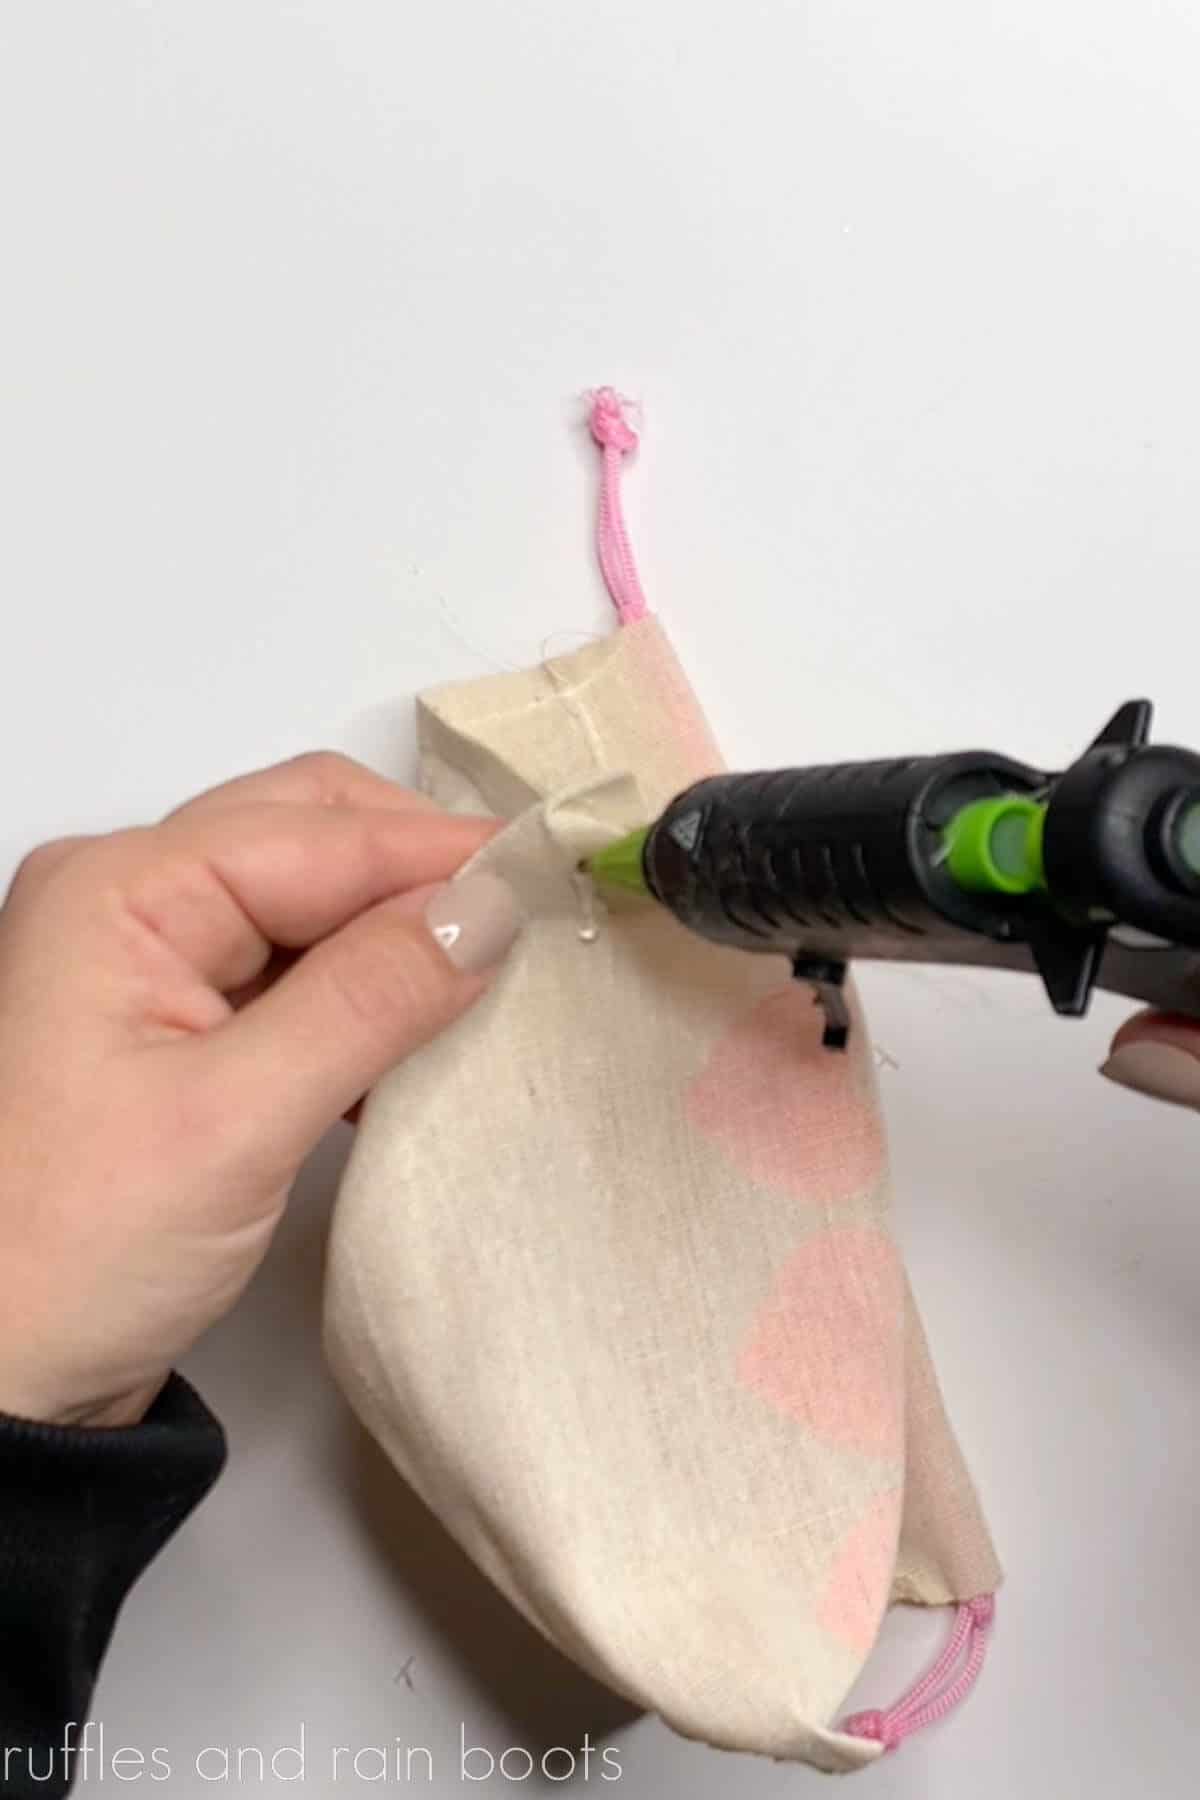
First, turn the treat bag inside out. Glue each point to the bottom to create a box pleat. Once dry, turn the bags right-sides out.
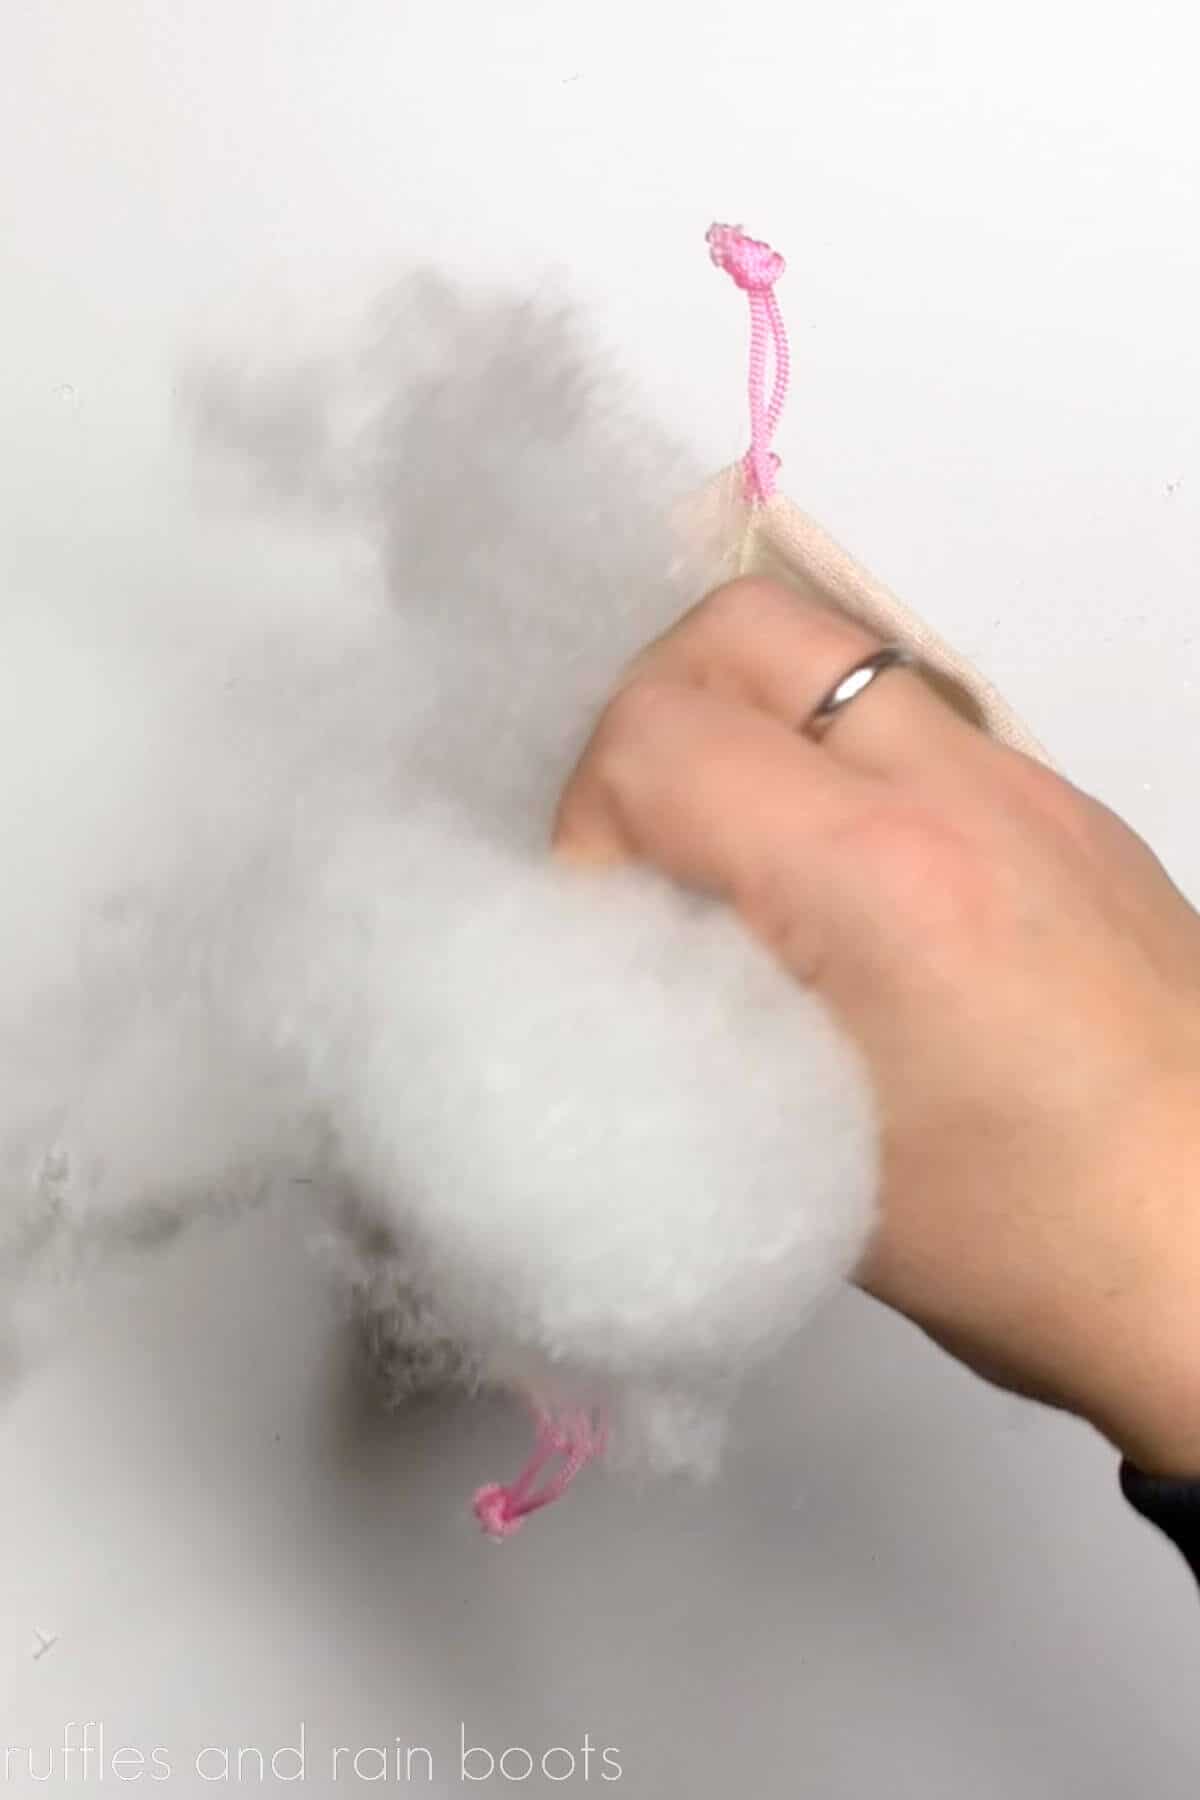
Turn the treat bag right-sides out and fill. If making a treat bag, add candy, pull the strings, and tie them in a bow. If making a stuffed gnome, add weight and fill the remainder of the bag with stuffing. Pull the strings, double-knot them, and cut off the excess.
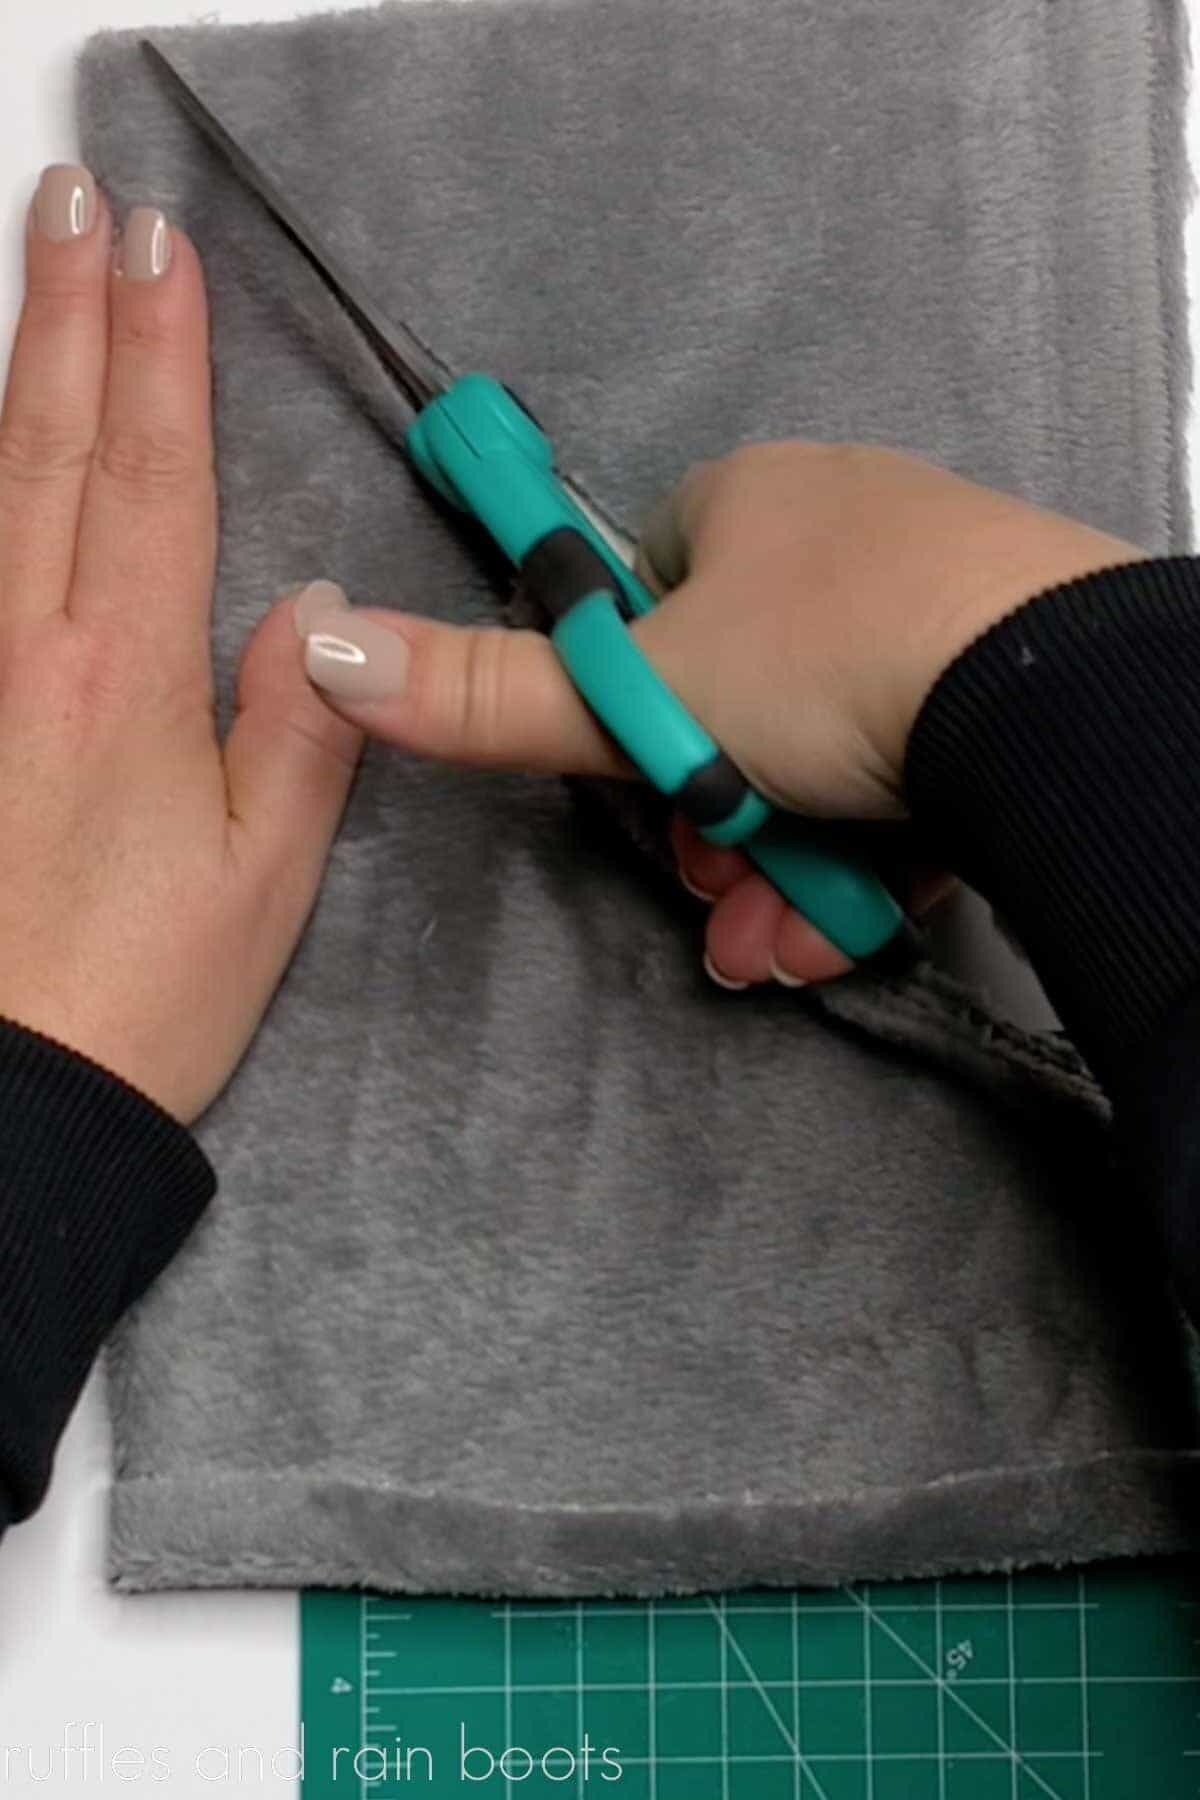
Create a gnome hat with the fleece fabric. Measure the fabric around the widest part of the gnome and add one inch. Measure 9 inches high for the small gnome and 11 inches for the large one.
Fold up the bottom on the wrong side to make a brim. Fold the right sides of the fabric together and cut a triangle to the folded edge. The rise for the small gnome is 2 inches, the large gnome is 3 inches.
Glue the right sides together, up along the rise through to the tip of the hat. Let dry and turn right-sides out.
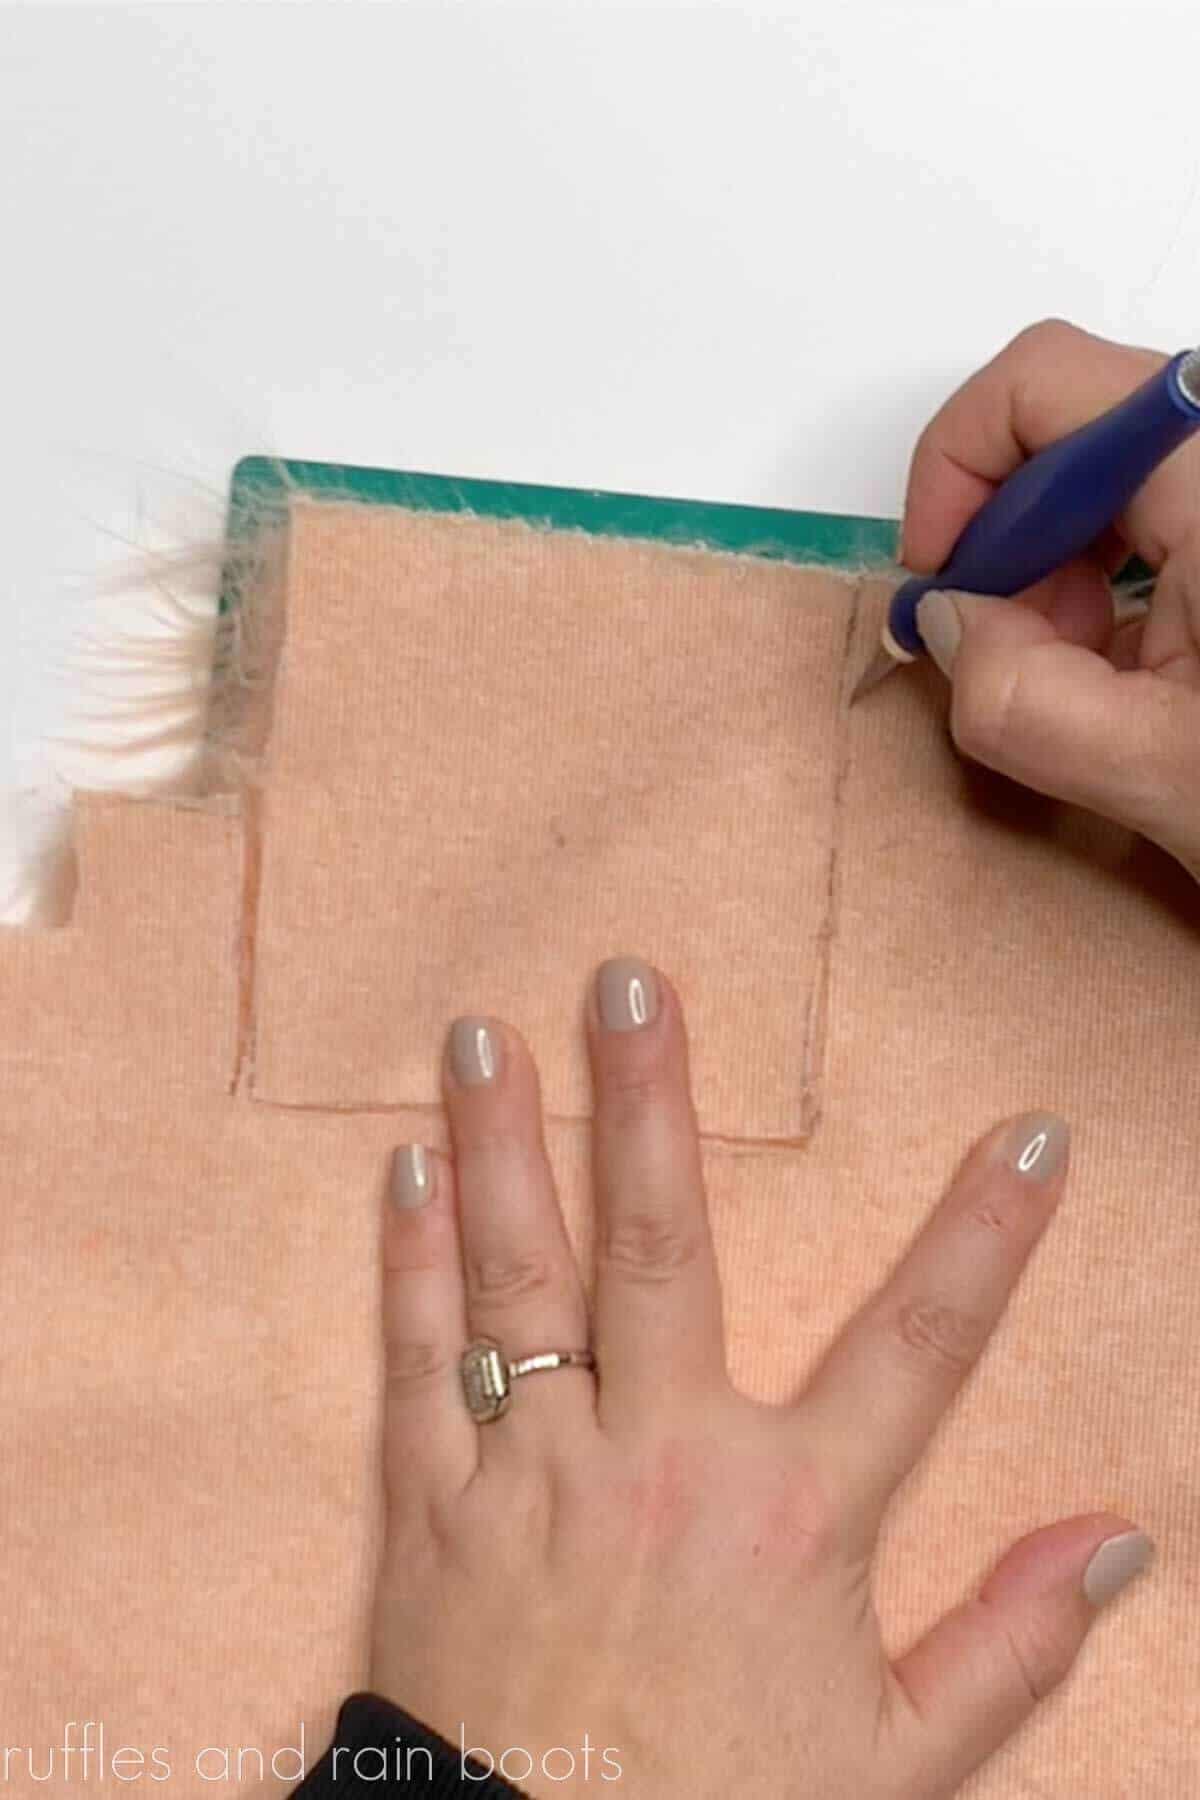
Cut a gnome beard from faux fur with an X-Acto knife. The small gnome beard measures a 2×2 inches and the large gnome 4×4 inches. Glue the beard to the inside brim of the hat (for the treat bag gnome) or onto the body for the stuffed gnome.
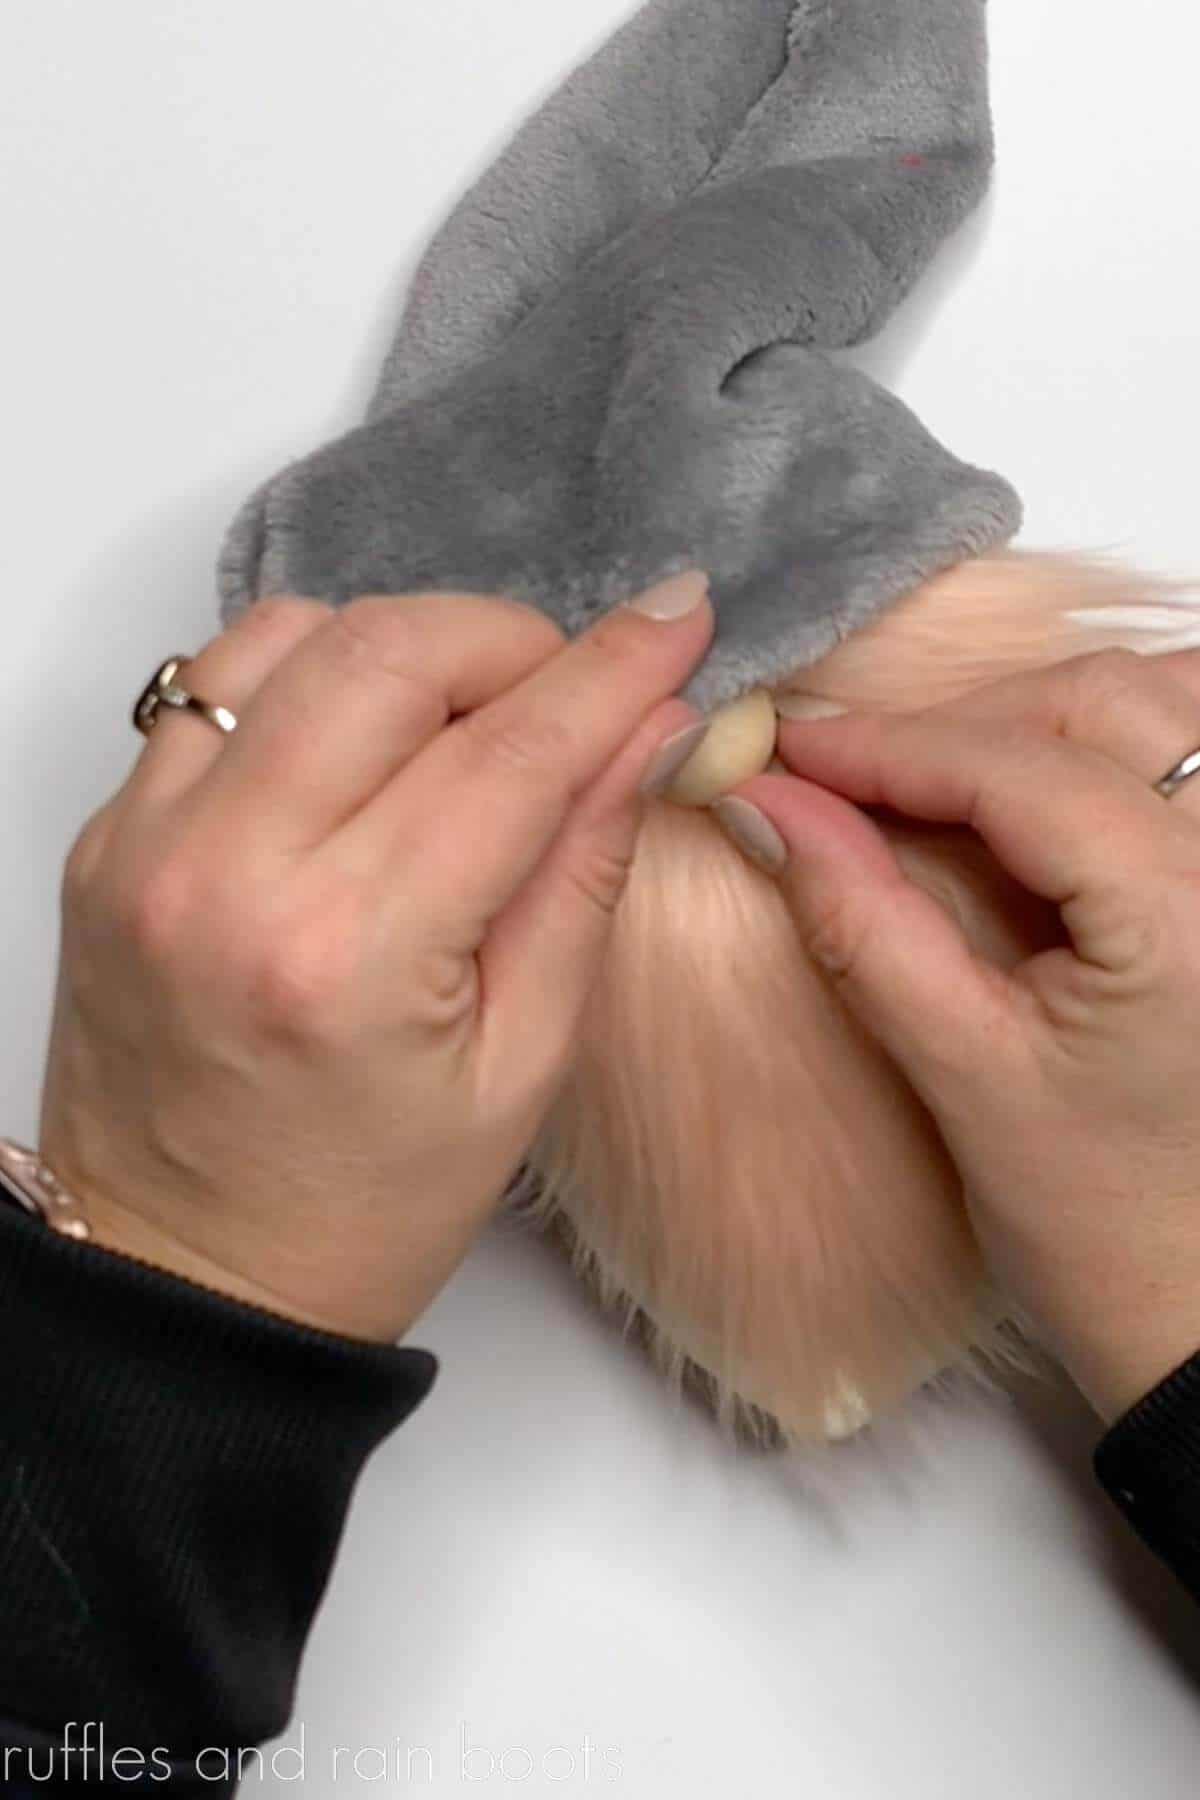
Split the fur to the fabric backing, add glue, and press on the wood ball or bead for the gnome nose.

Secure the brim of the hat to the top of the nos. For the stuffed gnome, glue down the hat.
Create a pompom from the faux fur used for the beard and glue onto the tip of the hat. Glue down the flop over portion of the hat to the side of the hat and display!

More Gnome Crafts You Might Like
- Wood Block Gnomes – Use a little fleece to make this adorable pair of gnomes for some Valentine’s Day decor.
- Standing Gnomes for Valentine’s Day – This cute gnome couple is made with hot glue or a sewing machine.
- Scandinavian Sweeties Gnome Couple DIY – The adorable set of gnomes is made with the most popular gnome pattern on the Internet (and just look at their accessories)!
Easy Treat Bag Gnomes

Use dollar store bags to create these adorable treat bag gnomes. Whether you want to fill it with candy or create a piece for your decor, each gnome only takes 7 minutes to create with a hot glue gun, some fur, and a wood bead for a nose. The smaller design can even be used as a gnome bottle topper for the perfect hostess gift.
Materials
- 4x6 Inch Treat Bag (Dollar Tree)
- 7x9 Inch Treat Bag (Dollar Tree)
- Fabric for the Hat (I used luxe fleece)
- Pink Faux Fur (I used this faux fur)
- Wood Beads or Rounds (Noses)
- Optional, Candy
- Optional, Wood or Cardboard Circle
- Optional, Poly Pellets (1 cup)
- Optional, Poly-Fil
Tools
- Hot Glue Gun and Glue Sticks
- Scissors
- X-Acto Knife
- Cutting Mat
Instructions
- Turn the treat bag inside out. Flatten the bottom. Take each pointed corner and glue it to the bottom of the treat bag. Let dry.
- Turn the treat bag right-sides out and fill. If making a treat bag, pull the strings, and tie them in a bow.
If making a stuffed gnome, add 1 cup of poly pellets and fill the remainder of the bag with stuffing. Pull the strings, double-knot them, and cut off the excess. - Create a gnome hat with the fleece fabric. Measure the fabric around the widest part of the gnome and add one inch. Measure 9 inches high for the small gnome and 11 inches for the large one.
Fold up the bottom 1/2 inch on the wrong side of the fabric and secure with glue to make a brim.
Fold the right sides of the fabric together, measure the rise, and cut a triangle to the folded edge, leaving about 1/2 inch flat. The rise for the small gnome is 2 inches, the large gnome is 3 inches.
Glue the right sides of the fabric together along the outside edge of the folded pieces. Take care to glue the tip of the hat well. Let dry and turn right sides out. - Measure a gnome beard and cut it out with an X-Acto knife. For the small gnome, measure a 2x2 inch faux fur beard. For the large gnome, measure a 4x4 inch faux fur beard.
Glue the beard to the inside brim of the hat (for the treat bag gnome) or onto the body for the stuffed gnome. - Split the faux fur to the fabric backing, add glue, and press on the wood ball or bead for the gnome nose.
- Secure the brim of the hat to the top of the nose for both sizes. For the stuffed gnome, glue down the hat all around the back of the body (do not glue to the faux fur).
- To create a pompom, cut a square of faux fur (1 inch for the small, 2 inches for the large). Glue each point into the center of the fur's fabric backing, let dry, and fluff.
- Put the hat onto the gnome body with the seam on the side. Glue the top of the hat to the body of the hat along the side, glue the pompom to the tip, and the gnome is ready!
Notes
For the stuffed gnome, you can use clean aquarium gravel for weight.
The treat bag gnome can also be used as a wine or other bottle topper or as a mason jar topper.
Recommended Products
As an Amazon Associate and member of other affiliate programs, I earn from qualifying purchases.


Meet the Creator
Hi there, I’m Sarah Nenni-Daher. I’m a crafty gal and always have at least 14 projects going at once. I am a crafter, designer, DIYer, and pattern maker. I share my creations here and in the Ruffles and Rain Boots® Shop.
Here at Ruffles and Rain Boots®, you’ll find DIY gnomes, crafts, gifts, cupcakes, laser crafts, and so much more. I love sharing video tutorials over on YouTube and chatting with other crafters in my Facebook groups. We’d love to have you!