
Standing Pompom Gnome with Hat
Use a pre-made fur pompom to create the most adorable standing gnome with a hat. In this tutorial, you can make a gnome with legs and decorate it for your decor or for any holiday, season, or event.
You will need some basic craft supplies, some fabric (scraps), and a hot glue gun for this easy gnome idea. I’ll even show you the fastest way to make a fun hat for your gnome!
RELATED READING: Standing Cone Santa Gnome
DIY No Sew Pompom Gnome with Pants and Hat
Here at Ruffles and Rain Boots, I challenge myself with coming up with new ways to make gnomes (and so many other fun crafts). Although I can recreate others’ ideas, I choose to spend time bringing something fresh where I can.
Years ago, I created the pompom pets sensation that spawned so many adorable gnome dogs, cats, bunnies, and more. Over the years, many have asked me about using pre-made pompoms for the animals AND for gnomes, and they work brilliantly! The pompoms also work great for gnome beards, however, it isn’t the most cost-effective method.
But because I like to challenge myself, I have been working on a series of standing and sitting gnomes using pom poms and basic materials you have on hand or can easily get. Today’s rough and traveling gnome DIY craft is part of that pompom gnome series.
Need to Grab Pompoms? Save or Share This for Later
If you need to gather supplies, save this to a fun gnome pin board or share it on Facebook. Either will make it easy to find when you’re ready to begin.

As an Amazon Associate, I could earn from qualifying purchases. There could be affiliate links within this article.
Tips for Making a Pompom Body Gnome
- These are the pompoms I have been using. They’re available on Amazon and have great reviews and are priced very well. I chose a variety pack with the more traditional colors, however, they do have a couple with pale and bright pinks available.
- If you prefer to make the gnome boots without clay, use any style in my 17 gnome boots and shoes pattern set. Note: pay attention to the sizing so you can adjust to a 1.5 – 2 inch shoe.
- Though I used flannel for the pants, you can use most fabric types and weight. Jean, fleece, velvet (a cute mini standing Santa gnome would be fun in red velvet), or other mid-weight fabric works well to cover the dowel legs. If you’re using cotton, a backing or bonding might be necessary if it’s very thin.
- I chose to recycle a k-cup (coffee pod) for the hat, however, you can easily make a card stock hat form in this style, as well, and cover it with fabric or felt. I’ve shared MANY free and premium gnome hat patterns if you would like a more traditional look.
- Gnome noses can be most anything: fabric stuffed with Poly-Fil, a wood ball, a wooden bead, shaped air dry or baked clay, or even a smaller pompom.
- The faux leather gnome boots tutorial is best watched here on YouTube, rather than read. It’s hard to describe how to shape the air dry clay around the Dollar Tree booties to make the gnome’s boots, but it’s easily shown.
How to Make a Standing Pompom Gnome
Below are the written and printable step-by-step instructions for making this fun gnome craft idea. If you’re a visual learner, I recommend watching the pompom gnome with legs video tutorial on YouTube.
Note: the faux leather boots tutorial is separate and is linked above and below. I recommend making the gnome boots in advance because the clay can take a couple of days to dry.
Standing Pompom Gnome with Hat
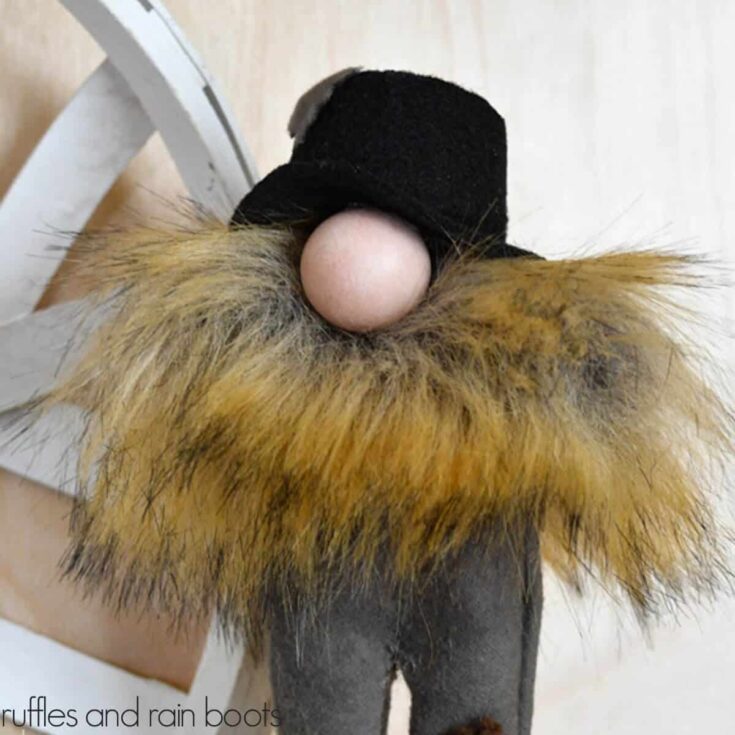
The standing pompom gnome is an easy to assemble cutie. You can use pre-made doll boots or use the Dollar Tree booties (from the party favor section) and a bit of air dry clay to create leather-look, weighted gnome boots.
Materials
For the Boots
- Air Dry Clay
- Dollar Tree Booties (Party Favor)
- Paint and Sealant
- Embroidery Thread (for Shoestrings)
- Small Rocks, Gravel, Poly Pellets for Weight
For the Gnome
- Pompom (I Use These)
- Flannel (for Pants and Socks)
- 12 inch Wood Dowel
- Dollar Tree Wood Block Game Piece (or 2 inch wood piece)
- 1 Inch Wood Round (Painted or Natural)
- K-Cup and Black Felt (for Hat)
Tools
- Toothpick or Skewer
- Sandpaper
- Drill
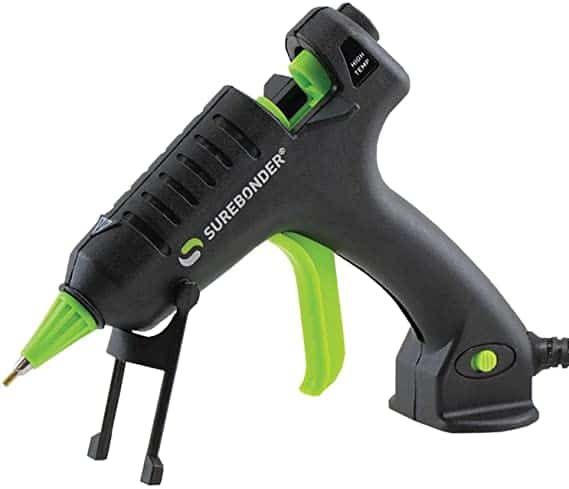
- Hot Glue Gun and Glue Sticks
- Scissors and/or X-Acto Knife
- Brown Marker, Optional
- Needle
Instructions
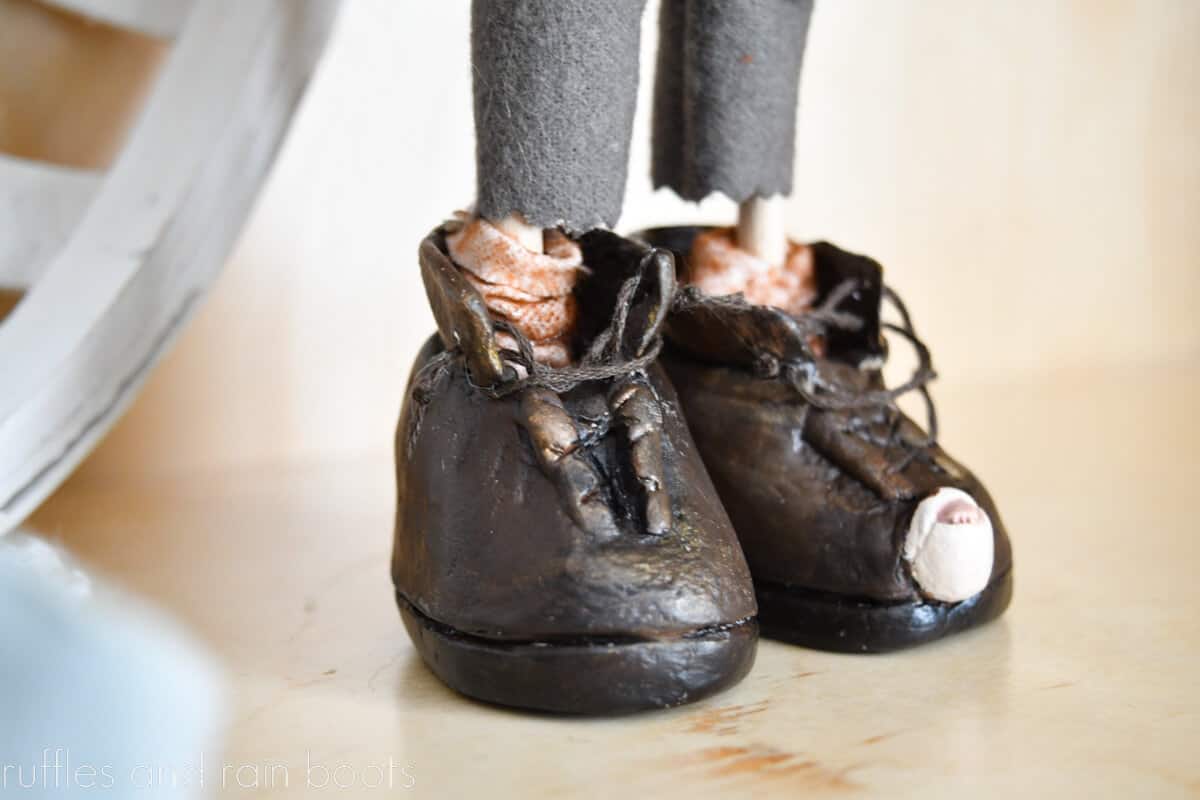
Make the Gnome Shoes
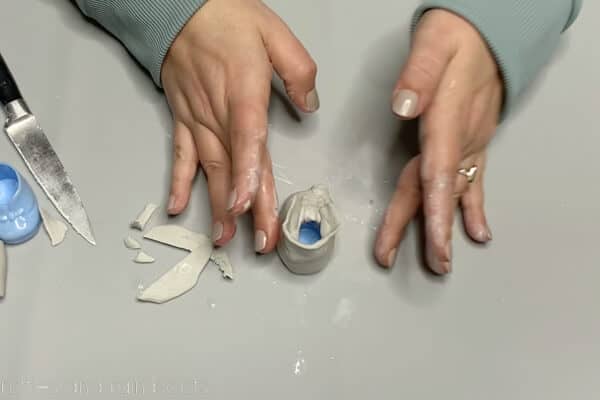
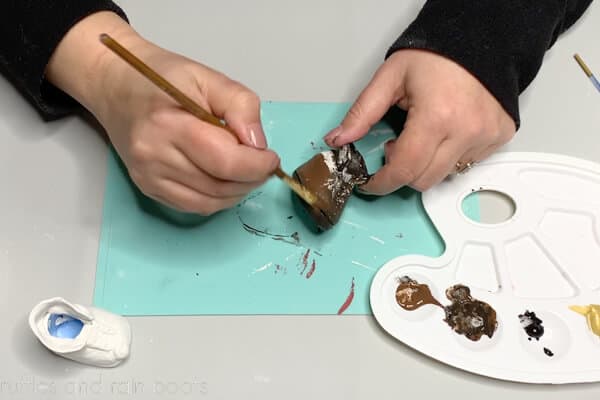
- Sand the plastic booties before covering them completely in air dry clay, leaving the open portion available for fill and dowels. Create raised portions, slouchy portions, eyelets, and add a toe poking out, if desired. Let dry (can take a couple of days). See the full video for detailed instruction.

- Sand the clay smooth, paint, and seal. Let dry between painting and sealing.
Make the Gnome Body
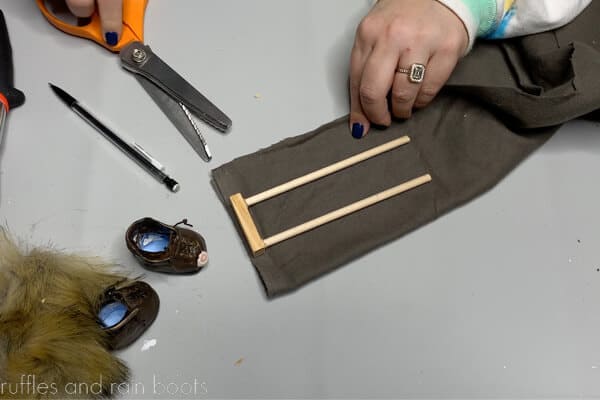
- Cut the dowel in half for two 6-inch portions. Trace the dowels onto the wood game piece and drill a hole halfway through. Use hot glue to secure the legs into the drilled recesses and set the leg assembly aside.
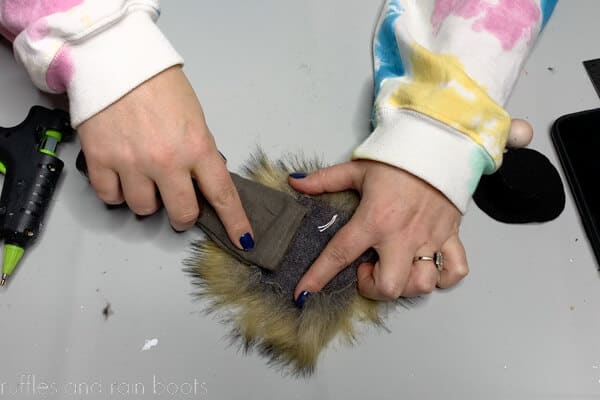
- Use an X-Acto knife to open the pompom and remove the stuffing.

How to Make Gnome Pants and Socks
- Wrap the flannel around the leg assembly to overlap 1/2 inch for a seam. Trim the bottom to the length of pants desired. Note: the legs will be set into the boots so cut shorter to see the legs or socks.
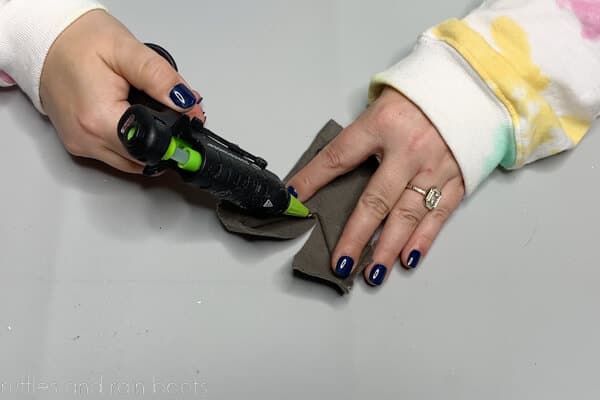
- Put the pant fabric right-sides together and secure the long, open edge with hot glue. Fold the pants in half (with the edge reaching to the inside of the glued seam - SEE THE VIDEO) and cut a slit in the center to create two pant legs. Secure each with glue to close. Turn the pants right side out and glue them to the leg assembly, lining up the top fabric with the game piece.
- Cut two small rectangles for socks and use the marker to paint the fabric in a rough way. Glue the long edge of the sock, let dry, and turn down the top edge. Slide onto the legs below the pants.

Assemble the Hobo Standing Gnome
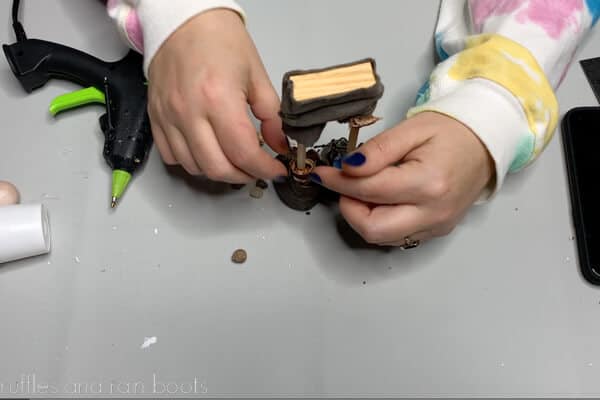
- Glue the bottom of each leg into the boots and add small rocks around the dowel to just below the inside edge of the boot.
- Add a generous amount of glue to the top of the rocks and pull down the socks into place.
- Open the pompom and secure the pants and leg assembly to align at the bottom of the game piece (the entire wood game piece will be IN the pompom). Glue down the sides and front of the pompom to the leg assembly.
Finish the Pompom Gnome
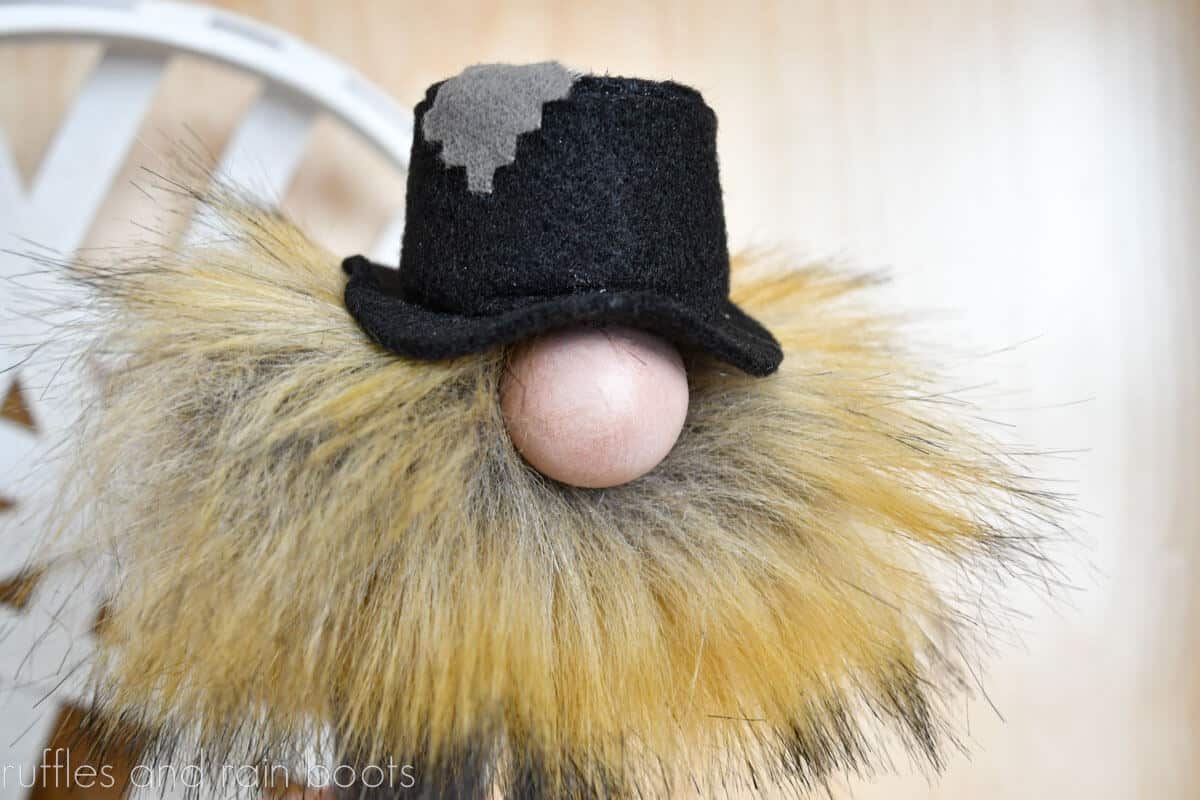
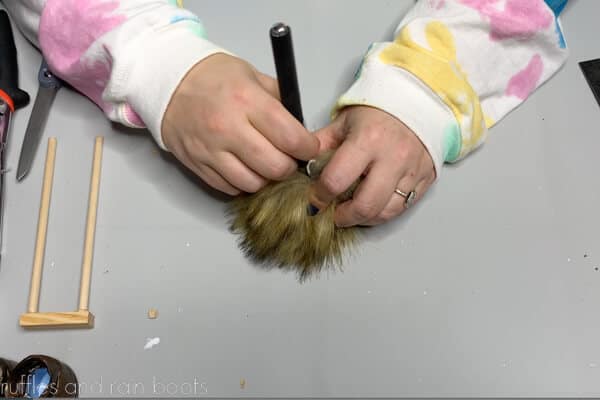
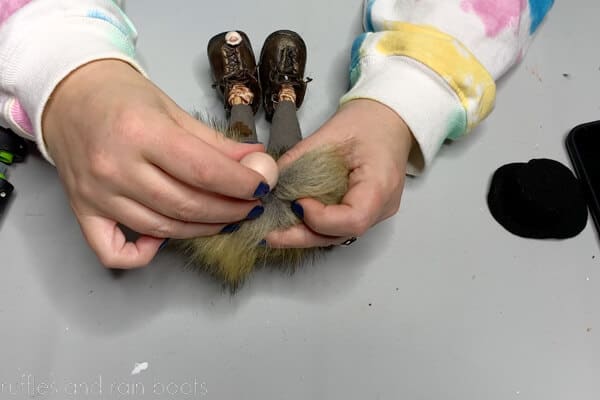
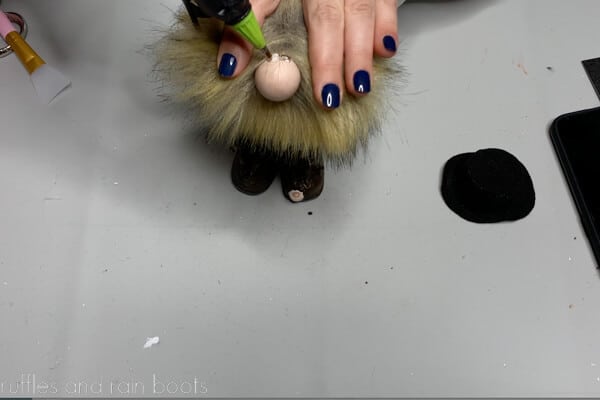
- Brush the fur of the pompom downward toward the feet. Measure down about 1 inch from the top of the pompom, split the fur to the fabric backing, add a generous amount of hot glue, and press in the wood bead for the nose.
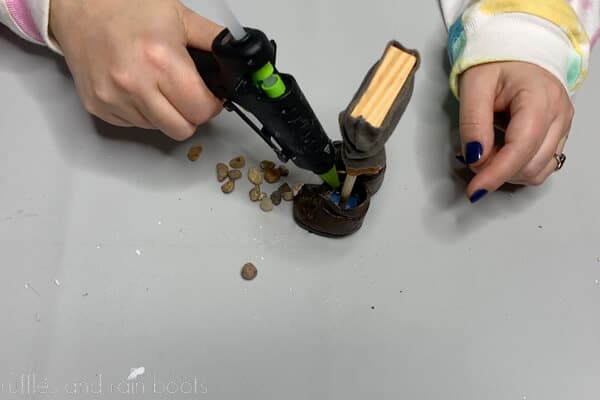
- Make a hat from the recycled K-cup (or use a pre-made hat) by tracing half a K-cup's top, bottom, and vertical sides onto back felt. Glue the top of the hat assembly to a brim. Please see the video for detailed instructions. Glue on the hat to the top of the nose and pompom.
Notes
I recommend watching the video tutorials for the boots and the gnome assembly. They are two separate videos and walk through each step thoroughly.
To add additional character, add patches to the pants and hat using fabric scraps and hot glue. Pockets would be downright adorable, too.
Recommended Products
As an Amazon Associate and member of other affiliate programs, I earn from qualifying purchases.

More Pompom Gnome Crafts You Might Like
- Pompom Gnome with Feet – I have to say, this is one of my favorite projects from the entire year. This big foot pompom gnome is easy and absolutely adorable.
- Flower Pot Gnome – Using a simple pompom and a Dollar Tree terra cotta pot, you can create an adorable peek-a-boo gnome in minutes.
- Summer Pompom Gnome – An easy way to create a gnome with feet is to buy them and these cute little sandals do not disappoint.
- Christmas Gnome Ornaments – One of my favorite crafts of all time, this easy Christmas ornament idea uses scraps.
Please Save or Share This
Your shares are how this site grows and I am sincerely grateful. Please save this to a gnome DIY pin board or share it to a crafty group on Facebook.

Meet the Creator
Hi there, I’m Sarah Nenni-Daher. I’m a crafty gal and always have at least 14 projects going at once. I am a crafter, designer, DIYer, and pattern maker. I share my creations here and in the Ruffles and Rain Boots® Shop.
Here at Ruffles and Rain Boots®, you’ll find DIY gnomes, crafts, gifts, cupcakes, laser crafts, and so much more. I love sharing video tutorials over on YouTube and chatting with other crafters in my Facebook groups. We’d love to have you!