
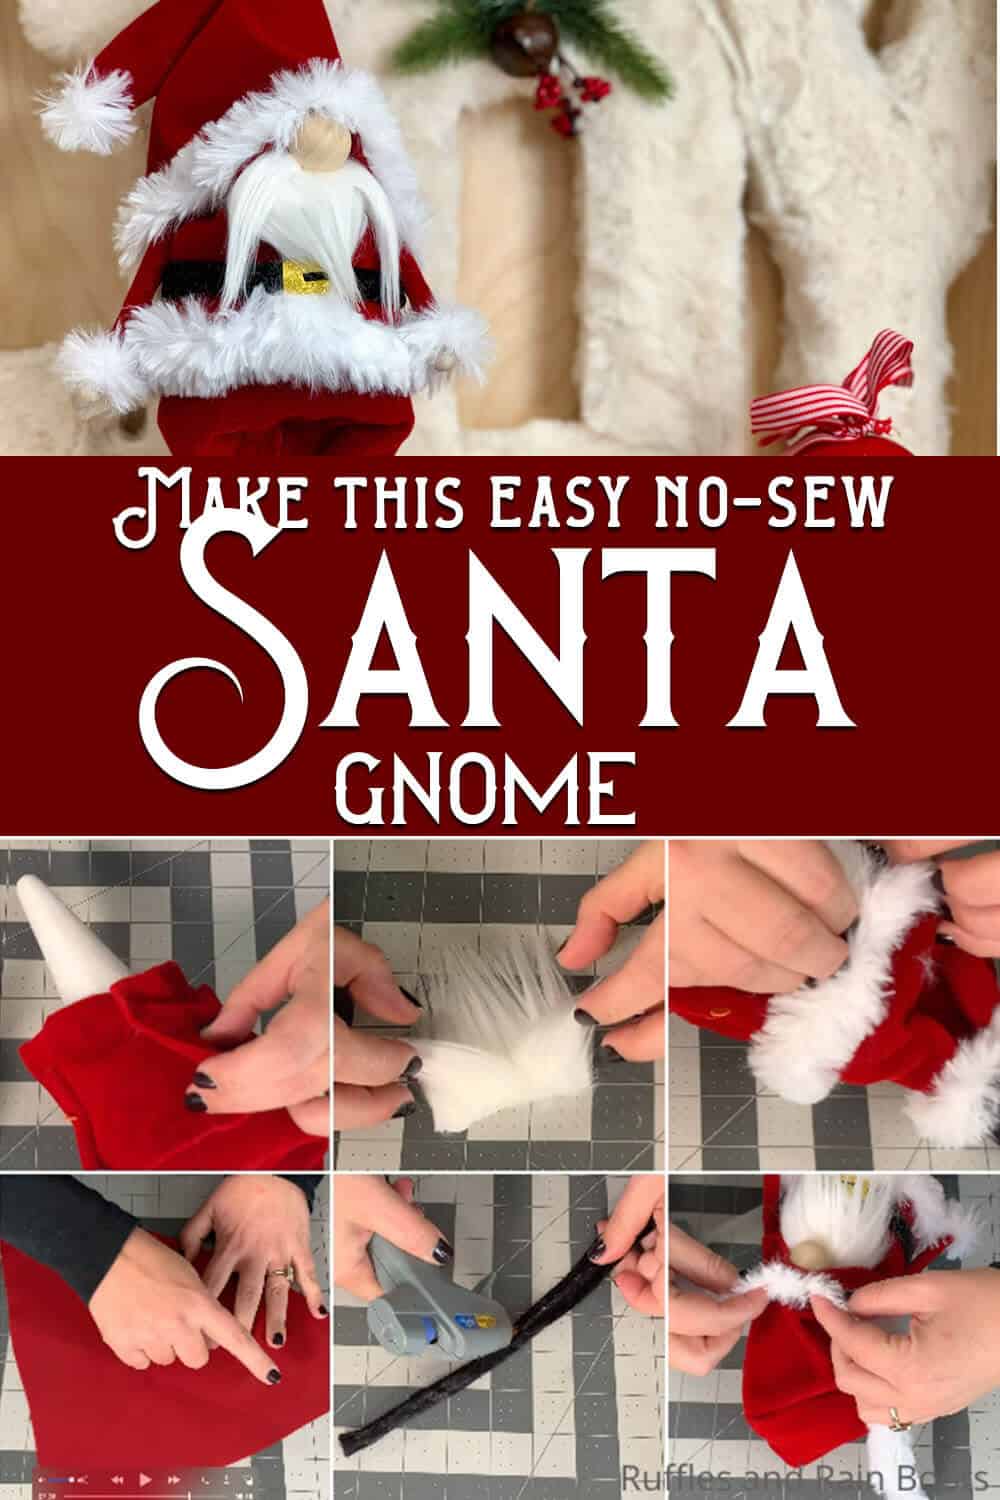
This Santa Gnome from a Cone is the Best DIY Christmas Gnome!
Do you enjoy gnome projects? If you love making easy gnome patterns, then this fun Santa gnome is for you!
This gnomes DIY project is made from a cone that makes the best gnome Santa and it’s so simple. You don’t need epic crafting skills for this gnome tutorial.

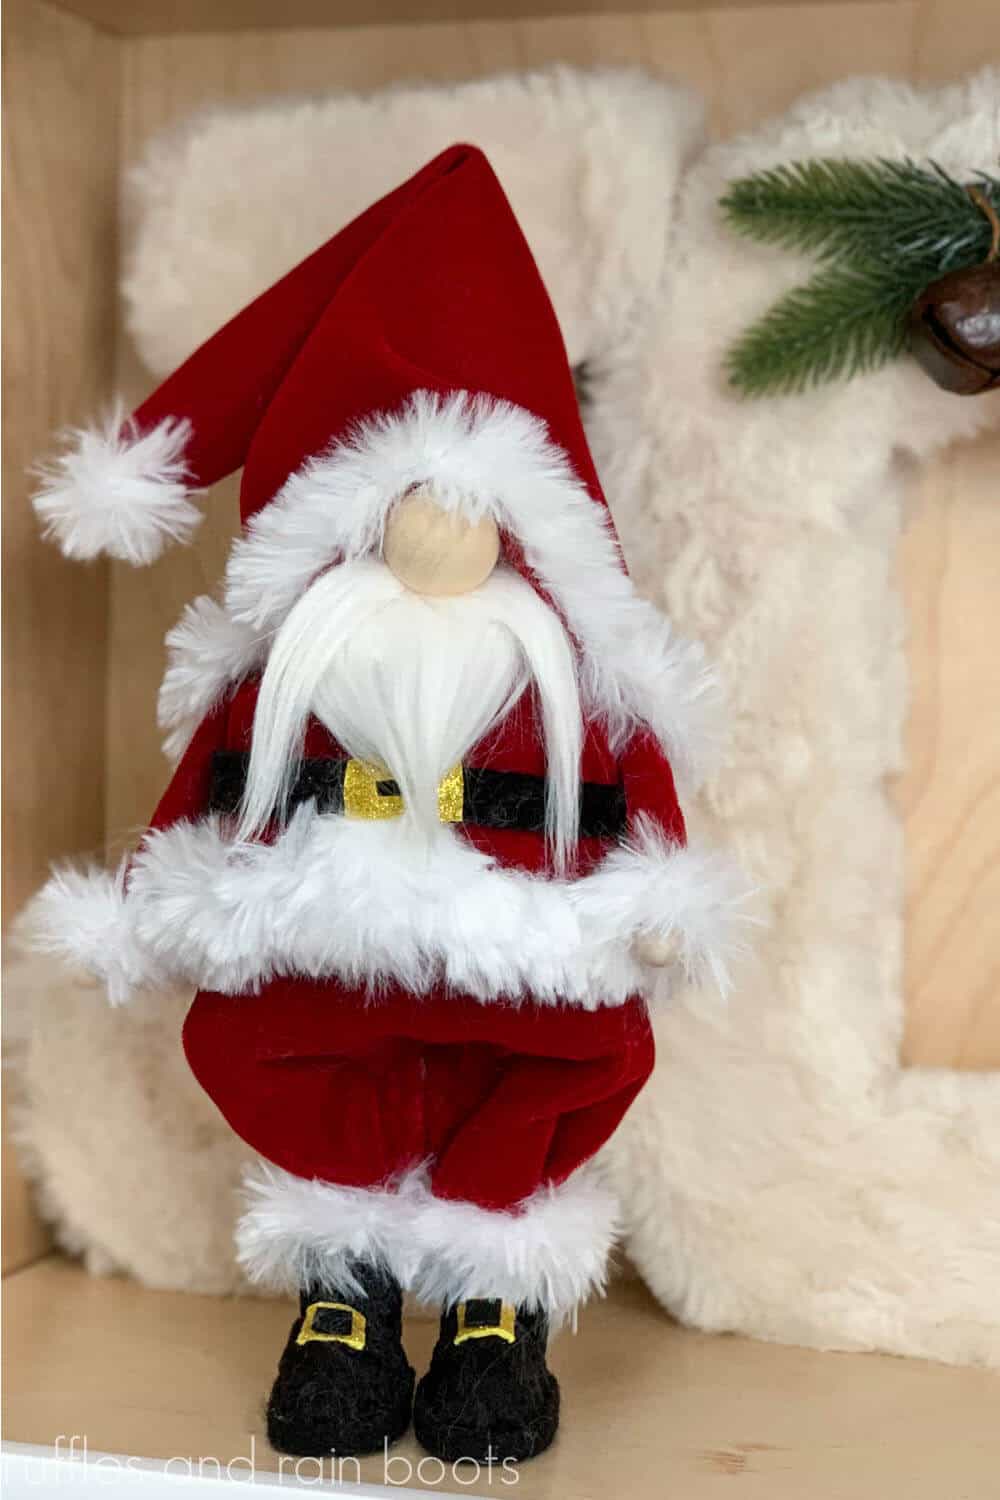
Santa Gnome from a Cone
Here at Ruffles and Rain Boots, we spend a lot of time working on some of the best holiday gnome patterns. Whether they’re no-sew gnomes or some of the more crazy variations on traditional Scandinavian gnomes, it’s all about having fun. And this Santa gnome is so fun, you can’t help but love him! This is just one of the adorable gnomes on our website.
RELATED READING: SCANDINAVIAN GNOME WINE BAG
Basically, he’s a chubby little elf gnome with a gnome body and a cheery disposition that is going to brighten any farmhouse mantle decor. If you’re ready to make a fun DIY Christmas gnome, let’s get started.
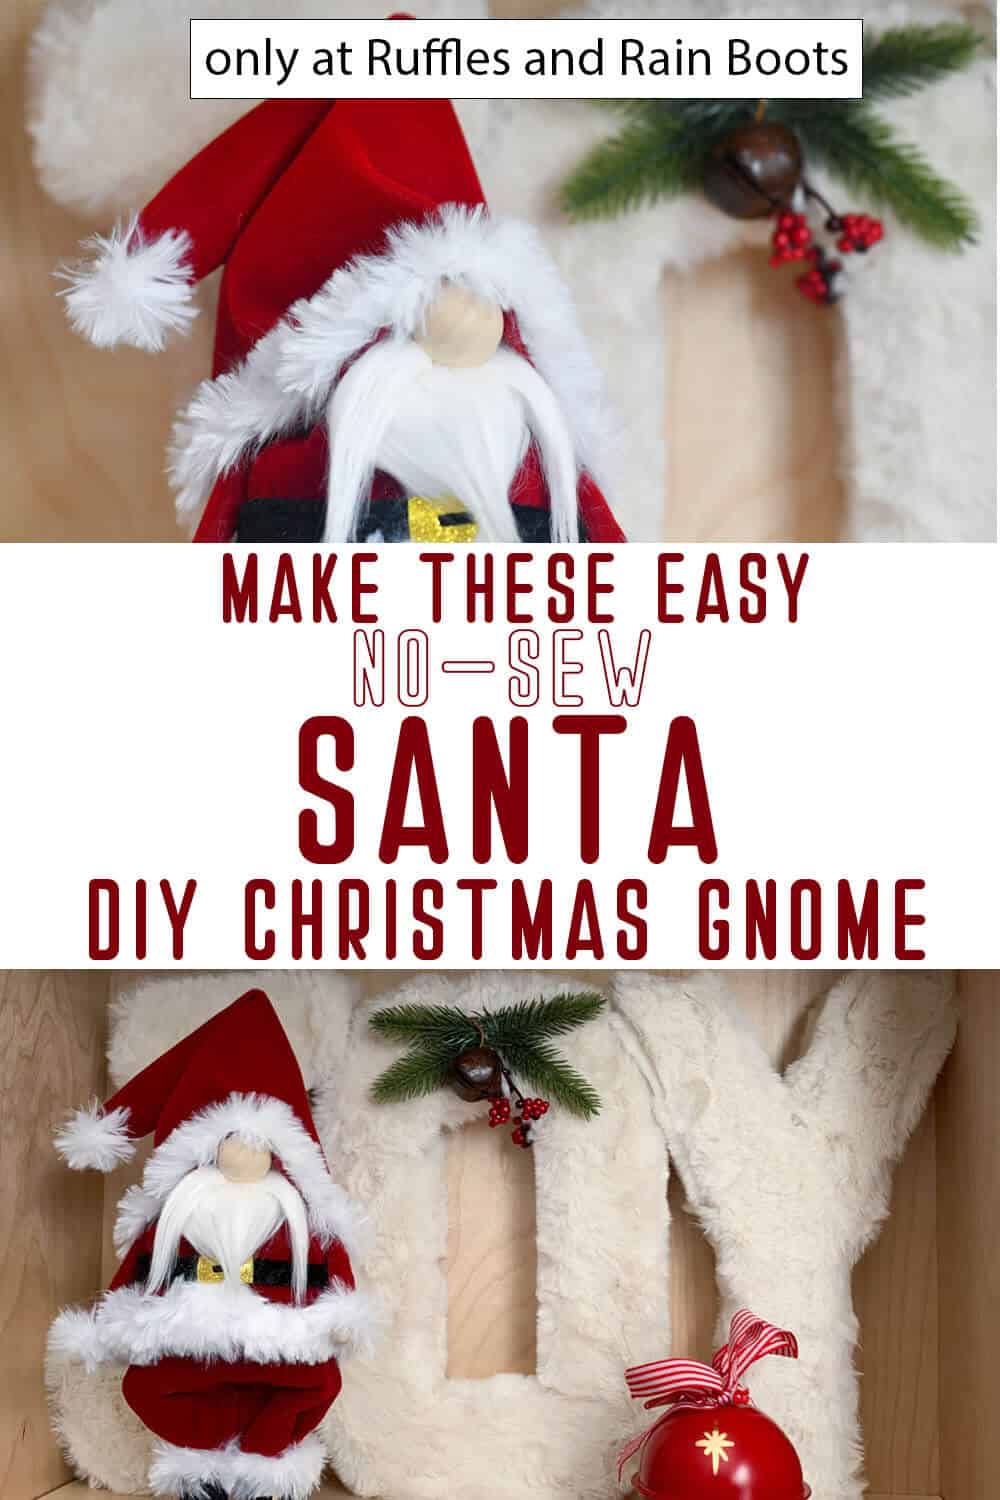
No Time to Make This Now? Pin it for Later
You’re busy, I get it. Pin this to your favorite Scandinavian gnomes board on Pinterest and it’ll be here for when you’re ready.
As an Amazon Associate, I can earn from qualifying purchases. There could be affiliate links within this article.
Tips to Make The Best DIY Christmas Gnome
- Start by grabbing the Swanky Jacket & Fancy Pants Pattern for gnomes. You can use this pattern for so many different variations on your tomten, from hip pirates to creepy zombies and all the best squishy Santa gnomes in between!
- I love cone gnomes. They’re so easy and fast to make, with very little room for “messing up” if that makes sense. It’s fantastic for a beginner gnome, but cones have the potential for being very versatile, allowing you to make a lot of fun variations. So, grab several cones to make ALL of the Christmas decor your heart desires.
- You’re going to want to Santa gnome some boots. Because the boots make the suit. So, just use the boot pattern included in the Swanky Jacket & Fancy Pants Pattern. That way you don’t have to worry about finding another pattern to mess with.
Get the Santa Gnome Pattern
Click below to add this fun pattern to your cart. So many gnomes can be made with this!

How Do I Make this Santa Gnome from a Cone?
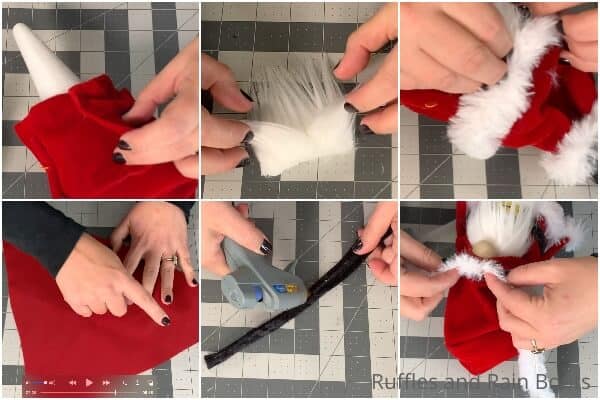
I’m so glad you asked. Below is our written tutorial. If you’re more of a visual learner, like me, then you’re going to love this awesome step-by-step video tutorial that I put together to make this easy DIY Santa gnome!
Start by cutting the jacket and pants from the red felt. I added 1 1/2 inches to the width of the jacket and pants to accommodate the chubby belly I wanted for my Santa gnome – but I did not add any length to either. Hem all of the edges, as necessary if your fabric is prone to fraying.
Make the gnome legs and shoes according to the pattern, cutting the craft stick in half, then make it into a short, 1 1/2 long rounded oval by cutting down either end and rounding it. Repeat with the other half of the craft stick, then stack the two craft sticks on top of each other and hot glue them together.
Hot glue a piece of dowel (about 5 inches long) to the center toward the back of this craft stick.
Cut the shoe elements from the pattern out of the stiff black felt, cutting the boot shaft from the white short-fur.
With the larger rectangle shoe piece, roll this into a cylinder and hot glue it in place.
When the glue has set, slide this over the dowel and hot glue it in place on top of the craft stick, forming the cylinder into the shoe shape of the craft stick.
Wrap the toe piece around the end of the craft stick with the slits allowing the toe piece to fit nicely around the cylinder of the boot. Hot glue this in place.
Wrap the top of the boot shaft around the top of the boot and hot glue it in place.
Cut two tiny rectangles from the gold glitter craft foam with even tinier squares cut out of the center to create buckles and glue these in place onto the front of the boots.
Wrap the thin sole cover felt piece around the sole of the shoe and hot glue it in place. Fill the shaft of the boot with the small rocks.
Poke a hole in the cone where the legs will sit on the bottom of the cone, then hot glue the legs into the holes.
Roll the cone in the batting, about halfway the height of the cone, folded over. Cut the batting to fit and hot glue it in place, shaping it into a round belly.
Wrap the pants shape around the belly and assemble them per the pattern directions. Take care to fold the legs over to shorten the pants, as necessary. Wrap the jacket piece around the gnome body, hot gluing it in place snugly around the belly.
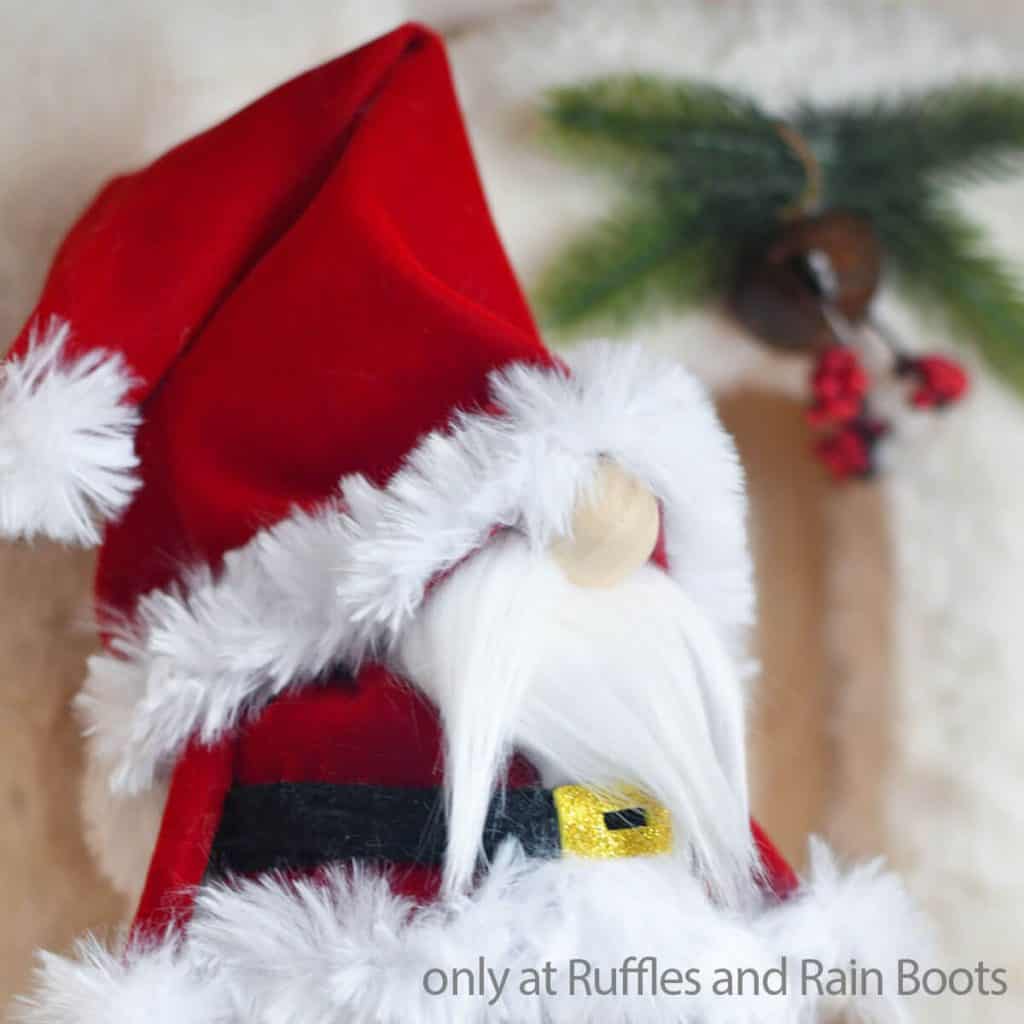
Cut two small 3-inch x 2-inch rectangles of faux fur for the beard. Hot glue one on top of the other. Then cut two small 1/2-inch squares, for the mustache and hot glue them on either side of the top of the beard. Place the nose onto the gnome in the center top of the beard, affixing it with hot glue.
Hot glue the beard in place on the front of the gnome, just below where the top of the jacket starts.

Make the arms by cutting two of the arm shapes from the red velvet then hemming each of the sides with the hot glue. Fold the arm in half wrong side to wrong side and hot glue in place, hot gluing the hand in place just inside the cuff. Hot glue a small section of the short white faux fur to the cuff of each arm.
Line up the top of each arm with the edge of the jacket, and pin each arm in place onto the jacket.
Cut pieces of the short white fur the width of the color pieces and wrap the collar around the jacket and hot glue it in place. Repeat with a length of the short white fur around the bottom of the jacket edge and a line of the same down the front of the jacket.
Cut the sash shape (the belt) from black velvet, making sure to cut it to length to be long enough to wrap around the belly of the gnome, and hot glue in place about an inch from the bottom of the jacket.
Cut a tiny little rectangle (1/2 inch by 1/2 inch at most, with the center cut out) for a buckle from the gold glitter foam. Hot glue the buckle into the center of the sash.
Cut a large triangle of red velvet, the base of which should be wide enough to wrap around the cone, plus 2 inches at least, to allow for a nice slouch and hemming.
Hem the brim of the hat and glue together the two edges, making a cone-shaped hat. Tuck this hat onto the top of the gnome’s head. Use a little polyfill to help fill-out the hat if desired.
Make a small pom pom with the short white faux fur and hot glue it to the tip of the hat.
Hot glue the back of the hat to the gnome, then position the arms as desired and hot glue them in place, both to the hat and the body of the gnome. Then hot glue the wrinkle over the gnome’s nose.
Add a trim of short white faux fur around the brim of the hat and enjoy!
More DIY SCandinavian Gnomes You Might Like
- Nordic Wood Gnomes – Easy and fast, these Nordic style wood gnomes are so cute, having a dozen of them on my mantle wouldn’t be enough!
- No-Sew Gnome Mug Cozy – If you’re like me, crafting with a cup of coffee next to you on the desk is a pretty common occurrence. Do it with a little buddy. That makes it more fun.
- Easy Gnome Pattern for Cozy Gnomes – You can make so many awesome gnomes from this one pattern. It’s an easy sewing pattern perfect for beginners or those who have a bit of experience.
- DIY No Sew Gnome Cover (Free Pattern) – This is fun, easy, and you’re done in about 10 minutes. Get the free pattern.
Please Save This to Pinterest
Your shares are how this site grows and I am sincerely grateful. Know a friend who’d like this? Please share it on Facebook or save it to your favorite Christmas crafts board on Pinterest.
Santa Gnome

Making this easy Santa gnome from a cone was so quick and fun. You'd never know that this DIY Christmas gnome is a anything less than a professionally made farmhouse Christmas decor piece!
Materials
- Swanky Jacket & Fancy Pants Gnome Pattern
- 7-inch Styrofoam Cone
- 1/4 yd Red Velvet
- 1/8 yd Black Velvet (or Black Craft Foam)
- Craft Foam in Gold Glitter
- Premium (Stiff) Felt in Black for the Shoes
- 2 1/8-inch Dowels (4-5 inch pieces)
- 1 Craft Stick
- 3 Wood Beads (one large for a nose and two small for hands)
- Small Rocks
- Small Amount of White Mongolian Faux Fur
- Small Amount of Short-Length White Faux Fur
- Foam Batting
Tools
- Hot Glue Gun & Glue
- Scissors
- Hole Punch
- Straight Pins
- Pencil
- Black Marker, optional
Instructions
- Start by cutting the jacket and pants from the red felt. I added 1 1/2-inches to the width of the jacked and pants to accommodate the chubby belly I wanted to my Santa gnome - but I did not add any length to either. Hem all of the edges, as necessary if your fabric is prone to fraying.
- Make the gnome legs and shoes according to the pattern, cutting the craft stick in half, then make it in to a short, 1 1/2 long rounded oval by cutting down either end and rounding it. Repeat with the other half of the craft stick, then stack the two craft sticks on top of each other and hot glue them together.
- Hot glue a piece of dowel (about 5 inches long) to the center toward the back of this craft stick.
- Cut the shoe elements from the pattern out of the stiff black felt, cutting the boot shaft from the white short-fur.
- With the larger rectangle shoe piece, roll this into a cylinder and hot glue it in place.
- When the glue has set, slide this over the dowel and hot glue it in place on top of the craft stick, forming the cylinder into the shoe shape of the craft stick.
- Wrap the toe piece around the end of the craft stick with the slits allowing the toe piece to fit nicely around the cylinder of the boot. Hot glue this in place.
- Wrap the top of the boot shaft around the top of the boot and hot glue it in place.
- Cut two tiny rectangles from the gold glitter craft foam with even tinier squares cut out of the center to create buckles and glue these in place onto the front of the boots.
- Wrap the thin sole cover felt piece around the sole of the shoe and hot glue it in place. Fill the shaft of the boot with the small rocks.
- Poke a hole in the cone where the legs will sit on the bottom of the cone, then hot glue the legs into the holes.
- Roll the cone in the batting, about halfway the height of the cone, folded over. Cut the batting to fit and hot glue it in place, shaping it into a round belly.
- Wrap the pants shape around the belly and assemble them per the pattern directions. Take care to fold the legs over to shorten the pants, as necessary.
- Wrap the jacket piece around the gnome body, hot gluing it in place snugly around the belly.
- Cut two small 3-inch x 2-inch rectangles of faux fur for the beard. Hot glue one on top of the other. Then cut two small 1/2-inch squares, for the mustache and hot glue them on either side of the top of the beard. Place the nose onto the gnome in the center top of the beard, affixing it with hot glue.
- Hot glue the beard in place on the front of the gnome, just below where the top of the jacket starts.
- Make the arms by cutting two of the arm shapes from the red velvet then hemming each of the sides with the hot glue. Fold the arm in half wrong side to wrong side and hot glue in place, hot gluing the hand in place just inside the cuff. Hot glue a small section of the short white faux fur to the cuff of each arm.
- Line up the top of each arm with the edge of the jacket, and pin each arm in place onto the jacket.
- Cut pieces of the short white fur the width of the color pieces and wrap the collar around the jacket and hot glue it in place. Repeat with a length of the short white fur around the bottom of the jacket edge and a line of the same down the front of the jacket.
- Cut the sash shape (the belt) from black velvet, making sure to cut it to length to be long enough to wrap around the belly of the gnome, and hot glue in place about an inch from the bottom of the jacket.
- Cut a tiny little rectangle (1/2-inch by 1/2 inch at most, with the center cut out) for a buckle from the gold glitter foam. Hot glue the buckle into the center of the sash.
- Cut a large triangle of red velvet, the base of which should be wide enough to wrap around the cone, plus 2 inches at least, to allow for a nice slouch and hemming.
- Hem the brim of the hat and glue together the two edges, making a cone shaped hat. Tuck this hat onto the top of the gnome's head. Use a little polyfill to help fill-out the hat if desired.
- Make a small pom pom with the short white faux fur and hot glue it to the tip of the hat.
- Hot glue the back of the hat to the gnome, then position the arms as desired and hot glue them in place, both to the hat and the body of the gnome. Then hot glue the wrinkle over the gnome's nose.
- Add a trim of short white faux fur around the brim of the hat and enjoy!
Notes
For more fun DIY Christmas gnomes (ALL THE GNOMES) tutorials, visit Ruffles and Rain Boots!
Recommended Products
As an Amazon Associate and member of other affiliate programs, I earn from qualifying purchases.


Meet the Creator
Hi there, I’m Sarah Nenni-Daher. I’m a crafty gal and always have at least 14 projects going at once. I am a crafter, designer, DIYer, and pattern maker. I share my creations here and in the Ruffles and Rain Boots® Shop.
Here at Ruffles and Rain Boots®, you’ll find DIY gnomes, crafts, gifts, cupcakes, laser crafts, and so much more. I love sharing video tutorials over on YouTube and chatting with other crafters in my Facebook groups. We’d love to have you!