
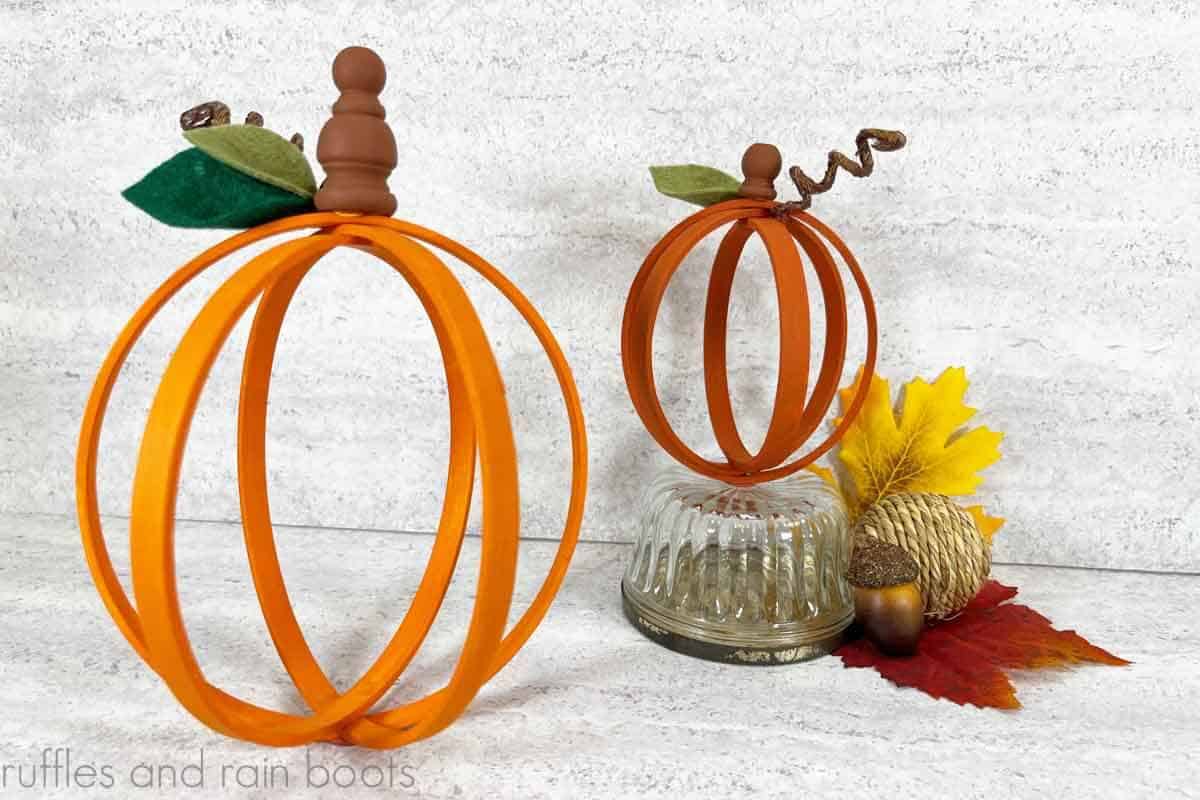
DIY Embroidery Hoop Pumpkins
It’s officially fall online and in the stores, so it’s time to share these embroidery hoop pumpkins. Create these in a natural, painted, or stained look for a versatile piece of fall decor.
For this creative fall craft idea, you will need a couple of embroidery hoops, paint, felt for leaves, and a stem of some kind. Let’s get started because this is a FUN afternoon craft.
RELATED READING: Easy Raffia Pumpkin Photo or Seating Card Holders
Embroidery Hoop Pumpkins for an Easy Crafting Win
Here at Ruffles and Rain Boots, creativity comes in spurts. I’m always crafting but with the move from Seattle to Austin, TX, I’ve been creative in packing boxes, donating to charities, and well – doing everything other than crafting!
If you, too, have a lot on your plate, a quick “crafting win” like these DIY pumpkins can be a real pick me up. And if you love to hoard craft supplies, you likely have everything you need on hand right now. Psst: check the Dollar Tree for embroidery hoop sets but also the thrift store – I tend to find quite a few there.
Need to Gather Supplies? Save or Share for Later
If you need to find some embroidery hoops in your stash or pick up some wired twine, save this to a DIY pin board or share it to Facebook. Either will make it easy to find when you’re ready to begin.

As an Amazon Associate, I could earn from qualifying purchases. There could be affiliate links within this article.
Tips for Making This Creative Pumpkin Idea for Your Decor
- The Dollar Tree and thrift stores are great places to check for embroidery hoops to save some pennies, but sometimes Amazon has really great deals on embroidery hoop sets like this. If you want to sell these, that’s 4 sets from one pack!
- I don’t recommend using the plastic embroidery hoops because they tend to slide around when assembling. If that’s what you have on hand, use a strong glue (like E6000) alongside the hot glue.
- You can paint, stain, or leave these natural depending on your decor and where you’re placing these. For a modern farmhouse pumpkin style, make one natural and paint one black (with or without distressing).
- If you have faux leaves from other crafts, use those instead of the felt. I had packed everything up but might change them out next year to use the fall leaves I’ve saved.
- Other ideas for the pumpkin stems are corks, twigs from the yard, thimbles, and even a dowel wrapped in twine with more layers at the bottom to thicken it up.

RELATED READING: Dollar Tree Wood Bead Pumpkin Craft for Fall
How to Make Embroidery Hoop Pumpkins
Below is the written and printable tutorial for this easy farmhouse fall craft. If you have any questions, use the comments. Please read the tips above before starting.
Embroidery Hoop Pumpkin DIY
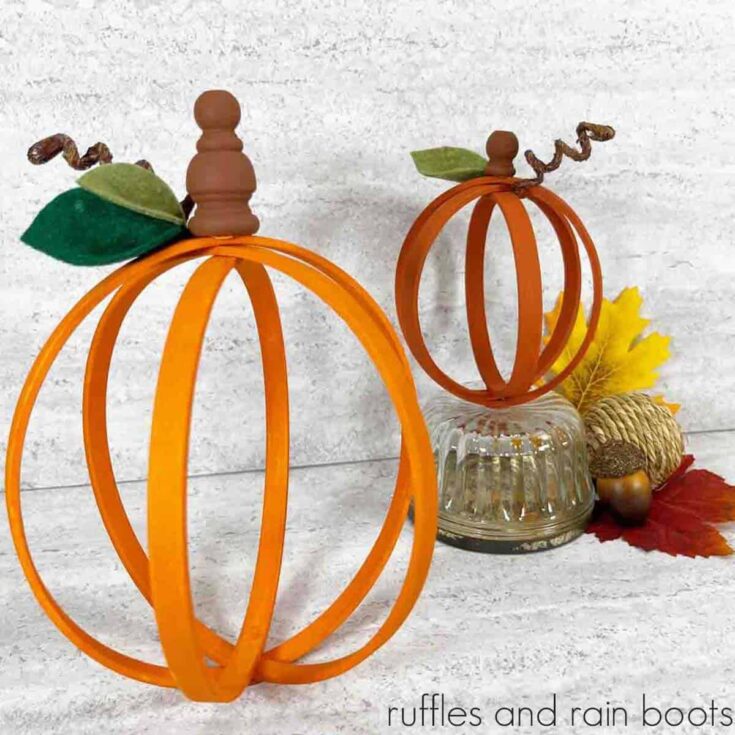
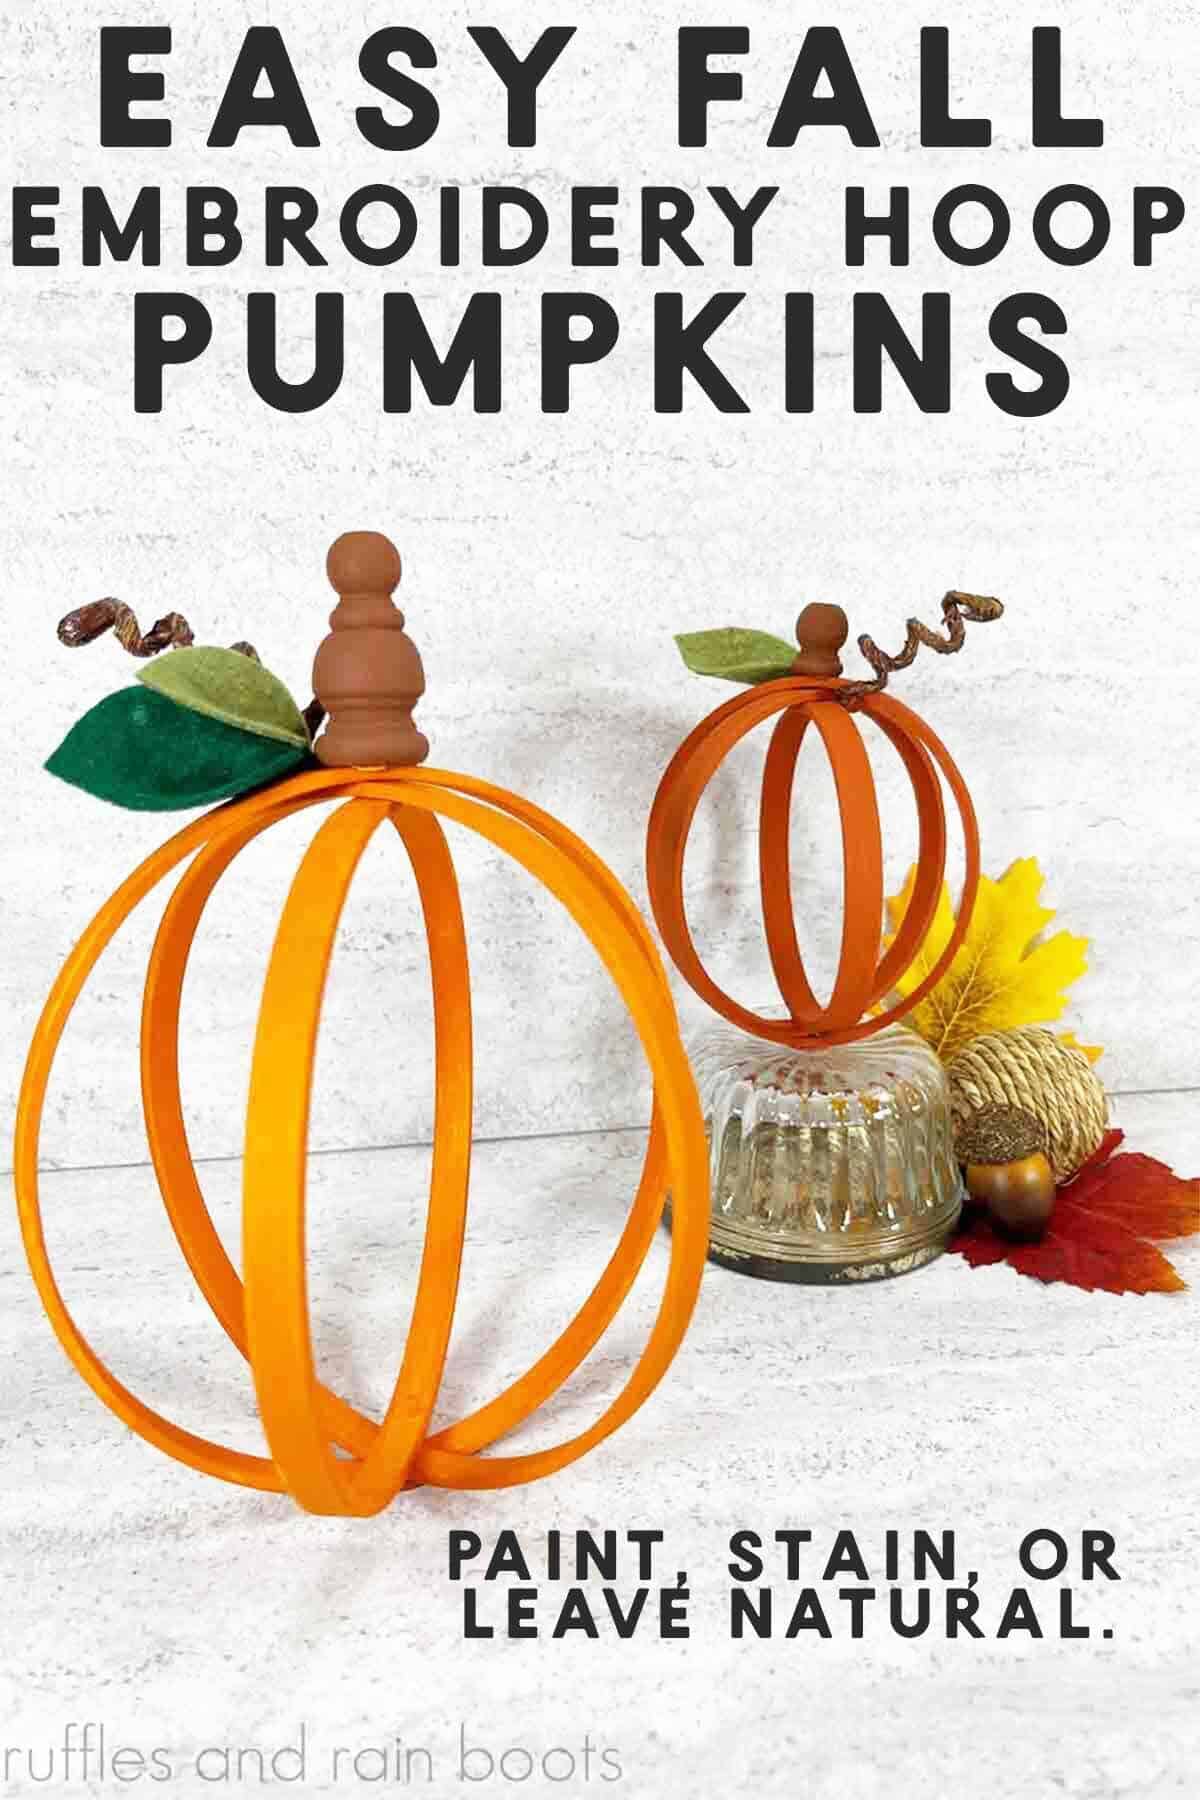
Use simple embroidery hoops to create a set of pumpkin decor that will really draw the eye. Painted or left natural, this hoop pumpkin is quite a bit of fun and is perfect for an easy craft night project.
Materials
- 2 each, Embroidery Hoops 4" and 6" (check the dollar store)
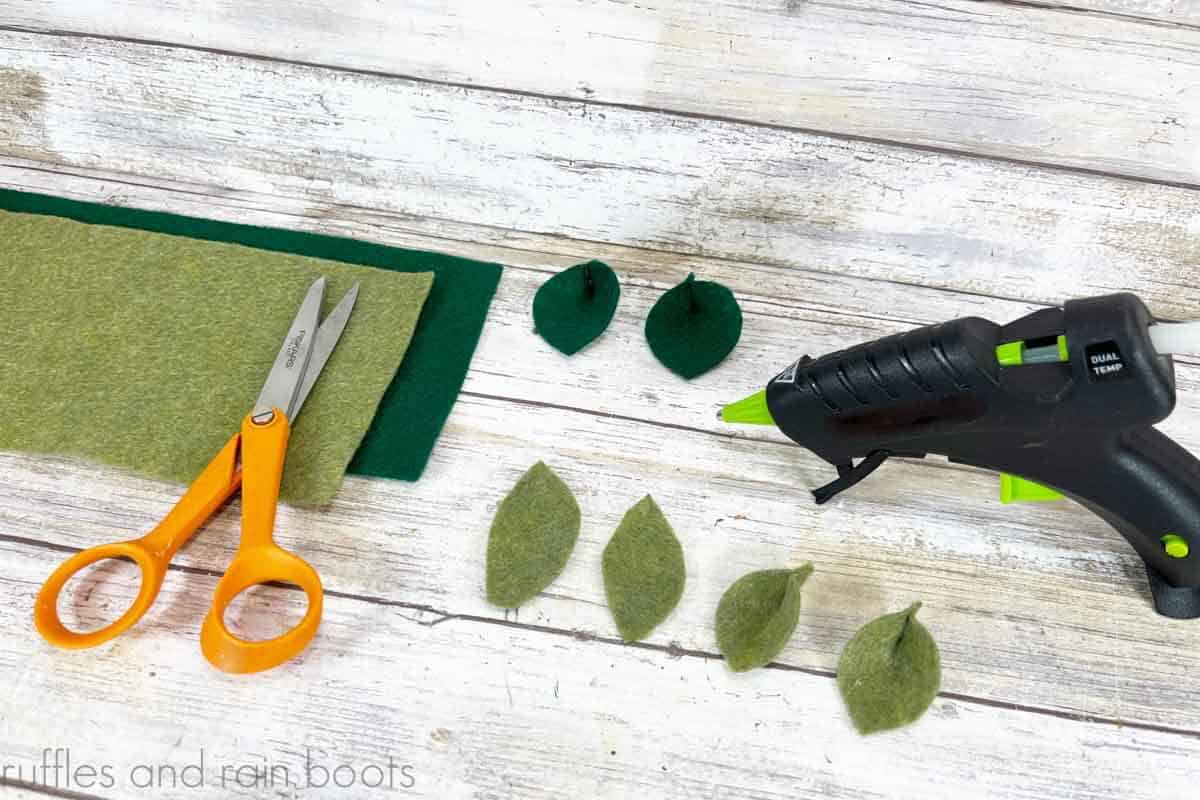
- Felt in Dark and Olive Greens
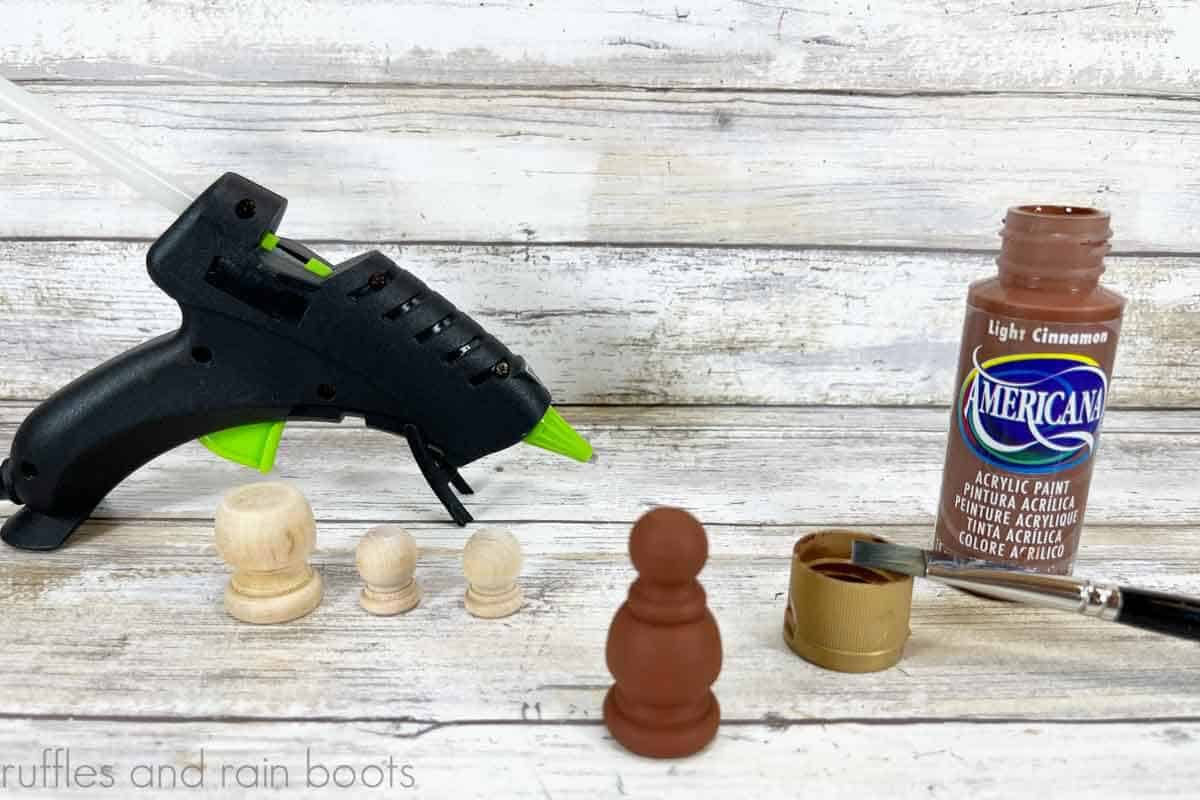
- Wooden Finials, 2 small, 1 medium (or Corks or Sticks)
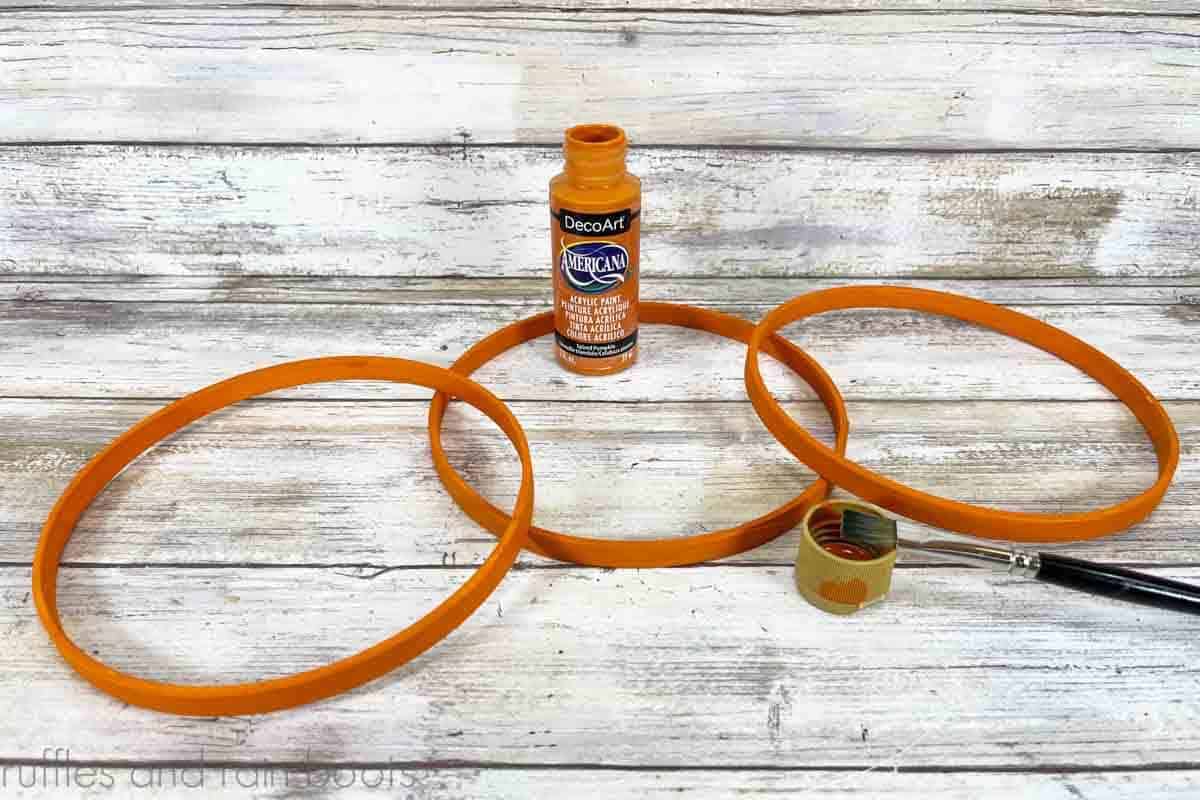
- Paint in Oranges and Brown Tones
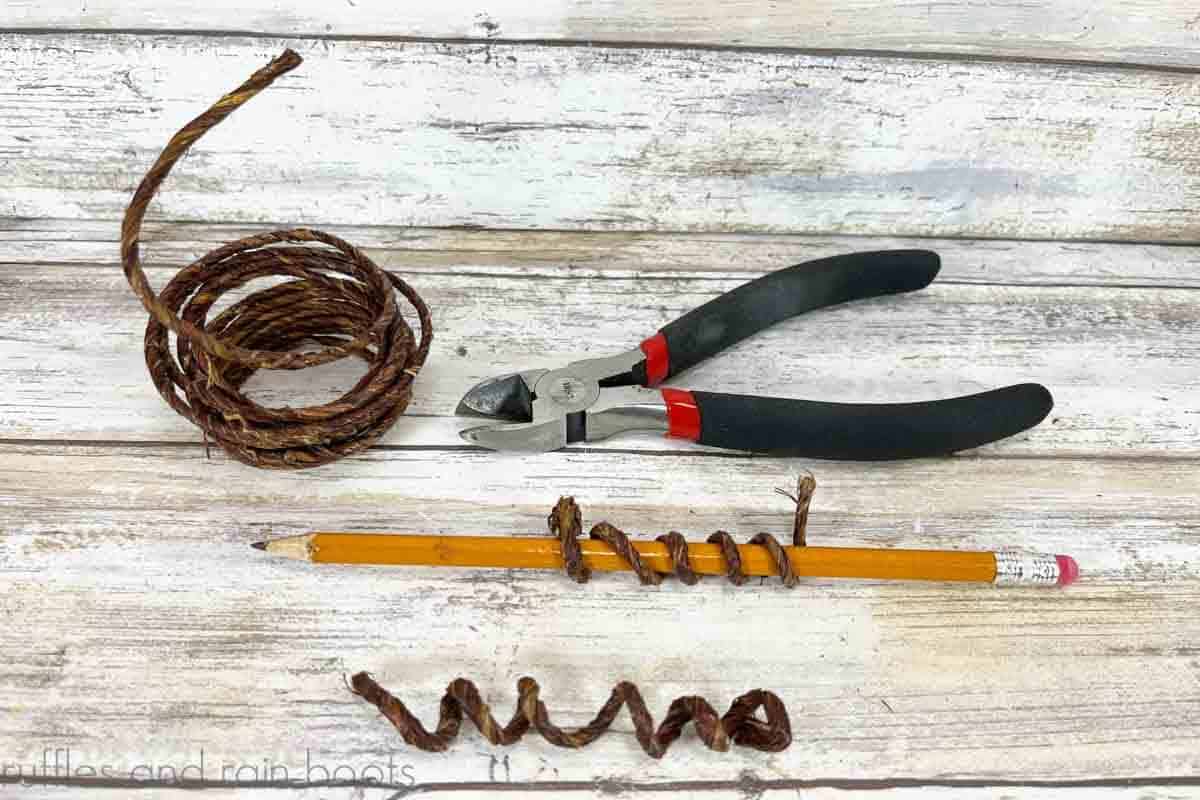
- Wired Twine
Tools
- Hot Glue Gun and Glue Sticks
- Scissors
- Paintbrush
- Wire Cutters, Optional
- Pencil
Instructions
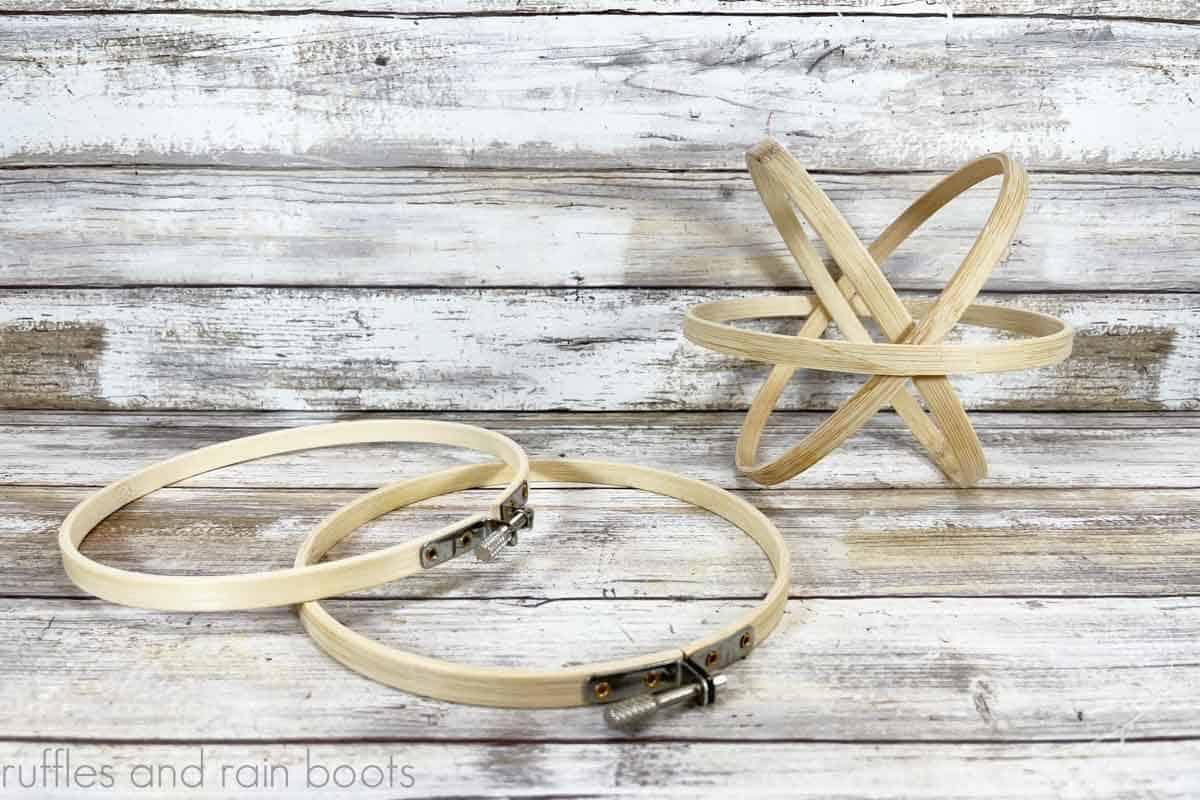
- Loosen the hoop hardware and separate the inner and outer hoops. You will use 3 of the 6" and 3 of the 4" for this project.

- Paint three 6" hoops orange and three 4" hoops orang (I used two colors of orange for each pumpkin) and let dry. Apply a second coat and let dry, if needed.
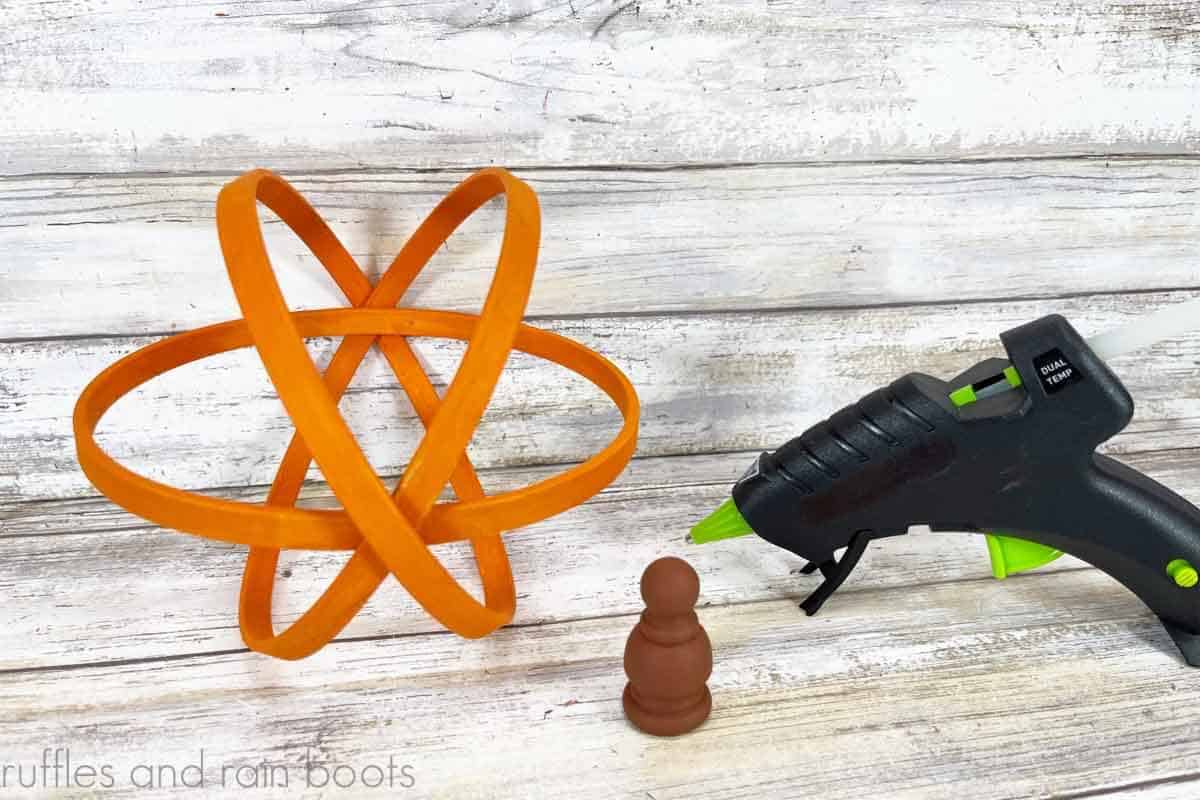
- Create the larger stem by gluing one small finial to the top of the medium finial. Paint all finials brown.
- Assemble the pumpkins. Insert one 6" hoop inside another to form an X-shape. Slide the third 6" hoop over the two, forming a line through the X-shape you just made. Repeat with the 4" hoops to assemble the smaller pumpkin.
- Glue the large finial to the 6" hoop pumpkin and the small to the 4" inch pumpkin. Wrap a 12" and an 8" length of wired twine around a pencil to make them curly. Slide off the pencil and the coil becomes a pumpkin vine you can glue to the stem.
- Cut leaf shapes from the dark and olive green felt and hot glue to the pumpkin stem. To create a fun look, glue the bottom of each leaf together to create dimension. Note: if you have a faux leaf, glue that on instead of the felt.
Notes
For a muted more neutral look, do not paint the embroidery hoops.
If you want an additional hoop to be added to the pumpkin, you might have to soak it first so it can be pliable when inserted into the other three.
More Fall and Pumpkin Crafts You Might Like
- Wooden Bead Pumpkin – A few beads and a little time result in this adorable farmhouse pumpkin.
- Free Pumpkin SVG Set – If you have a cutting machine, use these free cut files to make tiered tray signs and so much more.
- Raffia Pumpkin Place Holders – These are easy to make and really elevate a fall or Thanksgiving table (and they are so cute as photo holders, too).
- Dollar Tree Pumpkin Gnome – Hop on the gnome trend and whip up this easy, no sew fall gnome in just minutes (with or without the feet).
Please Save or Share for Later
Your shares are how this site grows and I am sincerely grateful. Please save this to a fall DIY pin board or share it with a crafty group on Facebook.
Meet the Creator
Hi there, I’m Sarah Nenni-Daher. I’m a crafty gal and always have at least 14 projects going at once. I am a crafter, designer, DIYer, and pattern maker. I share my creations here and in the Ruffles and Rain Boots® Shop.
Here at Ruffles and Rain Boots®, you’ll find DIY gnomes, crafts, gifts, cupcakes, laser crafts, and so much more. I love sharing video tutorials over on YouTube and chatting with other crafters in my Facebook groups. We’d love to have you!